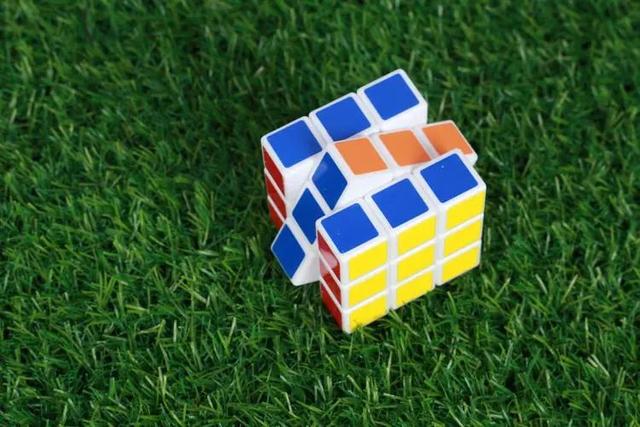
基于Python+kociemba+opencv的3阶魔方自动还原
使用kociemba模块可以快速地得到3阶魔方的还原步骤,例如:
U = '红绿黄白红白白蓝白'
R = '红蓝绿绿绿蓝黄红红'
F = '绿橙绿黄白红蓝橙红'
D = '橙黄绿红橙蓝橙黄黄'
L = '白橙橙绿蓝红白白黄'
B = '橙白蓝黄黄橙蓝绿蓝'

cubdict = {U[4]: 'U', R[4]: 'R', F[4]: 'F', D[4]: 'D', L[4]: 'L', B[4]: 'B'}
UC = ''

for s in [U, R, F, D, L, B]:
    for i in range(9):
        UC = UC + cubdict[s[i]]
print(UC)
print(kc.solve(UC))
指定面向自己的一面为Front(F),相对的一面即为Back(B),左边的一面为Left(L),右边的一面为Right(R),上面为Up(U),下面为Down(D),将魔方的6个面的颜色分别写到U R F D L B中,最后就会打印出还原魔方所有的步骤,按照步骤操作即可还原。
但是,每次都要自己输颜色会显得自己比较low,所以可以借用opencv的图像处理功能来进行魔方颜色的自动识别,例如:
import kociemba as kc

import os
import cv2
import numpy as np
from copy import deepcopy
import math


def imgcheck(frame_raw):
    hsv_table = [[[0, 10], [43, 255], [46, 255], '红'],
                 [[156, 180], [43, 255], [46, 255], '红'],
                 [[11, 20], [43, 255], [46, 255], '橙'],
                 [[20, 34], [43, 255], [46, 255], '黄'],
                 [[35, 80], [43, 255], [46, 255], '绿'],
                 [[80, 99], [43, 255], [46, 255], '青'],
                 [[100, 124], [43, 255], [46, 255], '蓝'],
                 [[125, 155], [43, 255], [46, 255], '紫'],
                 [[0, 180], [0, 30], [166, 255], '白'],
                 [[0, 180], [0, 43], [46, 166], '灰'],
                 [[0, 180], [0, 255], [0, 46], '黑']]

    cube_list = []
    frame = frame_raw.copy()
    index = 0
    center = []
    candidates = []
    hsv = cv2.cvtColor(frame, cv2.COLOR_BGR2HSV)
    for process_ind in range(2):
        hsv = cv2.cvtColor(frame, cv2.COLOR_BGR2HSV)
        #cv2.imshow("image", hsv)
        #cv2.waitKey(0)
        gray = cv2.cvtColor(frame, cv2.COLOR_BGR2GRAY)
        blurred = cv2.GaussianBlur(gray, (3, 3), 0)
        canny = cv2.Canny(blurred, 20, 40)
        #cv2.imshow("image", canny)
        #cv2.waitKey(0)
        if process_ind == 0:
            kernel = np.ones((3, 3), np.uint8)
            dilated = cv2.dilate(canny, kernel, iterations=12)
        else:
            kernel = np.ones((6, 6), np.uint8)
            dilated = cv2.dilate(canny, kernel, iterations=3)
        if process_ind == 1 or process_ind == 0:
            cv2.imshow("image", dilated)
            cv2.waitKey(0)
        (contours, hierarchy) = cv2.findContours(dilated.copy(), cv2.RETR_TREE, cv2.CHAIN_APPROX_SIMPLE)
        hierarchy = hierarchy[0]
        pre_cX = 0
        pre_cY = 0
        area_arr = []
        for component in zip(contours, hierarchy):
            contour = component[0]
            peri = cv2.arcLength(contour, True)
            approx = cv2.approxPolyDP(contour, 0.1 * peri, True)
            area = cv2.contourArea(contour)
            corners = len(approx)
            # compute the center of the contour
            M = cv2.moments(contour)
            if M["m00"]:
                cX = int(M["m10"] / M["m00"])
                cY = int(M["m01"] / M["m00"])
            else:
                cX = None
                cY = None
            if cX is not None:
                if process_ind == 0:
                    tmp = {'area': area, 'contour': contour}
                    area_arr.append(tmp)
                elif 60000 > area > 1000:
                    tmp = {'index': index, 'cx': cX, 'cy': cY, 'contour': contour}
                    center.append(tmp)
                    index += 1
        if process_ind == 0:
            area_arr.sort(key=lambda k: (k.get('area', 0)), reverse=True)
            mx,my,mw,mh = cv2.boundingRect(area_arr[0].get('contour'))
            cv2.rectangle(frame, (mx,my), (mx+mw, my+mh), (0, 255, 0), 2)
            #cv2.imshow("image", frame)
            #cv2.waitKey(0)
            frame = frame[my-5:my+mh+5, mx-5:mx+mw+5]
            #cv2.imshow("image", frame)
            #cv2.waitKey(0)
            frame = cv2.resize(frame, (320, 320))
    #if index < 9:
    #    return

    print(str(index))
    '''
    center.sort(key=lambda k: (k.get('cx', 0)))
    center.sort(key=lambda k: (k.get('cy', 0)))
    '''
    center.sort(key=lambda k: (k.get('cy', 0)))
    row1 = center[0:3]
    row1.sort(key=lambda k: (k.get('cx', 0)))
    row2 = center[3:6]
    row2.sort(key=lambda k: (k.get('cx', 0)))
    row3 = center[6:9]
    row3.sort(key=lambda k: (k.get('cx', 0)))
    center.clear()
    center = row1 + row2 + row3
    for component in center:
        candidates.append(component.get('contour'))
        x,y,w,h = cv2.boundingRect(component.get('contour'))
        if abs(w - h) < 10:
            cv2.rectangle(frame, (x, y), (x+w, y+h), (0, 255, 0), 2)
            #cv2.imshow("image", frame)
            #cv2.waitKey(0)
            h_ = 0
            s_ = 0
            v_ = 0
            ss = w * h
            for i in range(w):
                for j in range(h):
                    h_ = h_ + hsv[y+j][x+i][0]
                    s_ = s_ + hsv[y+j][x+i][1]
                    v_ = v_ + hsv[y+j][x+i][2]
            h_ = h_ / ss
            s_ = s_ / ss
            v_ = v_ / ss
            print(str(h_) + ',' + str(s_) + ',' + str(v_))
            for k in hsv_table:
                if k[0][0] < h_ < k[0][1] and k[1][0] < s_ < k[1][1] and k[2][0] < v_ < k[2][1]:
                    # print(k[3])
                    cube_list.append(k[3])
                    break
    print(str(len(cube_list)))
    #if len(cube_list) == 9:
    print(cube_list)
    #cv2.drawContours(frame, candidates, -1, (0, 0, 255), 3)
    cv2.imshow("image", frame)
    cv2.waitKey(0)


if __name__ == "__main__":
    webcam = cv2.VideoCapture(0)

    if not webcam.isOpened():
        print("can't open the camera!!!")
    while True:
        ret, frame = webcam.read()
        rec_w = 200
        rec_h = 200
        rec_y = int((frame.shape[0] - rec_h)/2)
        rec_x = int((frame.shape[1] - rec_w) / 2)
        cv2.rectangle(frame, (rec_x, rec_y), (rec_x + rec_w, rec_y + rec_h), (0, 255, 0), 2)
        imgcheck(frame)
        cv2.imshow("video", frame)
        if cv2.waitKey(1) & 0xFF == ord('q'):
            break

    webcam.release()
    cv2.destroyAllWindows()
hsv_table的各个颜色的范围可能需要根据实际情况进行调试。