使用 Kubeadm 部署 K8S安装
- 安装要求
在开始之前,部署Kubernetes集群机器需要满足以下几个条件:
一台或多台机器,操作系统 CentOS7.x-86_x64
硬件配置:2GB或更多RAM,2个CPU或更多CPU,硬盘30GB或更多
可以访问外网,需要拉取镜像,如果服务器不能上网,需要提前下载镜像并导入节点
禁止swap分区
2. 准备环境
角色 IP HostName
master 172.16.3.181 k8smaster
node1 172.16.3.182 k8snode1
node2 172.16.3.183 k8snode2
2.1. 基础配置
关闭防火墙
[root@localhost ~]# firewall-cmd --state #查看防火墙状态
[root@localhost ~]# systemctl stop firewalld # 停止防火墙的服务
[root@localhost ~]# systemctl disable firewalld # 禁止开机启动
关闭selinux
[root@localhost ~]# setenforce 0 # 临时(当前不用重启)
[root@localhost ~]# sed -i ‘s/enforcing/disabled/’ /etc/selinux/config # 永久(重启后生效)
[root@localhost ~]# sestatus -v # 查看状态(需要重启生效)
关闭swap
[root@localhost ~]# swapoff -a # 临时
[root@localhost ~]# sed -ri ‘s/.swap./#&/’ /etc/fstab # 永久
根据规划设置主机名
[root@localhost ~]# hostnamectl set-hostname k8smaster #其它的服务器为 k8snode1,k8snode2
在master添加hosts
[root@localhost ~]# cat >> /etc/hosts << EOF
172.16.3.181 k8smaster
172.16.3.182 k8snode1
172.16.3.183 k8snode2
EOF
将桥接的IPv4流量传递到iptables的链(三台都执行)
[root@localhost ~]# cat > /etc/sysctl.d/k8s.conf << EOF
net.bridge.bridge-nf-call-ip6tables = 1
net.bridge.bridge-nf-call-iptables = 1
EOF
[root@localhost ~]# sysctl --system # 生效
时间同步
[root@localhost ~]# yum install ntpdate -y
[root@localhost ~]# ntpdate time.windows.com
- 所有节点安装Docker/kubeadm/kubelet
Kubernetes默认CRI(容器运行时)为Docker,因此先安装Docker。
3.1 安装Docker
[root@localhost ~]# wget https://mirrors.aliyun.com/docker-ce/linux/centos/docker-ce.repo -O /etc/yum.repos.d/docker-ce.repo
[root@localhost ~]# yum -y install docker-ce-19.03.11
[root@localhost ~]# systemctl enable docker && systemctl start docker
[root@localhost ~]# docker --version
[root@localhost ~]# cat > /etc/docker/daemon.json << EOF
{
“registry-mirrors”: [“https://b9pmyelo.mirror.aliyuncs.com”]
}
EOF
3.2 添加阿里云YUM软件源
[root@localhost ~]# cat > /etc/yum.repos.d/kubernetes.repo << EOF
[kubernetes]
name=Kubernetes
baseurl=https://mirrors.aliyun.com/kubernetes/yum/repos/kubernetes-el7-x86_64
enabled=1
gpgcheck=0
repo_gpgcheck=0
gpgkey=https://mirrors.aliyun.com/kubernetes/yum/doc/yum-key.gpg https://mirrors.aliyun.com/kubernetes/yum/doc/rpm-package-key.gpg
EOF
3.3 安装kubeadm,kubelet和kubectl
由于版本更新频繁,这里指定版本号部署:
[root@localhost ~]# yum install -y kubelet-1.18.19 kubeadm-1.18.19 kubectl-1.18.19
[root@localhost ~]# systemctl enable kubelet
4. 部署Kubernetes Master
在172.16.3.181(Master)执行。
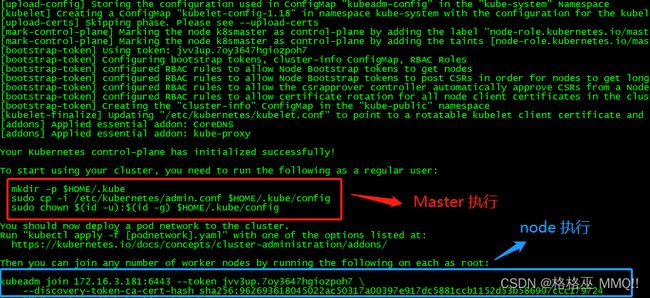
[root@localhost ~]# kubeadm init
–apiserver-advertise-address=172.16.3.181
–image-repository registry.aliyuncs.com/google_containers
–kubernetes-version v1.18.19
–service-cidr=10.96.0.0/12
–pod-network-cidr=10.244.0.0/16
说明:
–apiserver-advertise-address=172.16.3.181 #master的ip地址
–image-repository registry.aliyuncs.com/google_containers #指定从什么位置拉取镜像
–kubernetes-version=v1.18.19 #指定k8s版本,根据具体版本进行修改
–service-cidr=10.96.0.0/16 #指定service网络的范围
–pod-network-cidr=10.244.0.0/16 #指定pod网络的范围
由于默认拉取镜像地址k8s.gcr.io国内无法访问,这里指定阿里云镜像仓库地址。
使用kubectl工具:
[root@k8smaster ~]# mkdir -p $HOME/.kube
[root@k8smaster ~]# sudo cp -i /etc/kubernetes/admin.conf $HOME/.kube/config
[root@k8smaster ~]# sudo chown ( i d − u ) : (id -u): (id−u):(id -g) $HOME/.kube/config
[root@k8smaster ~]# kubectl get nodes
NAME STATUS ROLES AGE VERSION
k8smaster NotReady master 5m40s v1.18.19
[root@k8smaster ~]#
5. 加入 K8S Node
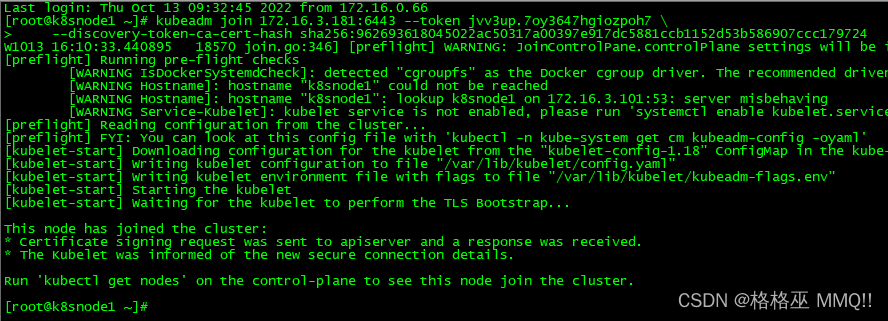
向集群添加新节点,执行在kubeadm init输出的kubeadm join命令:
[root@k8snode2 ~]# kubeadm join 172.16.3.181:6443 --token jvv3up.7oy3647hgiozpoh7
–discovery-token-ca-cert-hash sha256:962693618045022ac50317a00397e917dc5881ccb1152d53b586907ccc179724
默认token有效期为24小时,当过期之后,该token就不可用了。这时就需要重新创建token,操作如下:
[root@k8snode2 ~]# kubeadm token create --print-join-command

状态为 NotReady 需要安装 CNI 插件
-
部署CNI网络插件
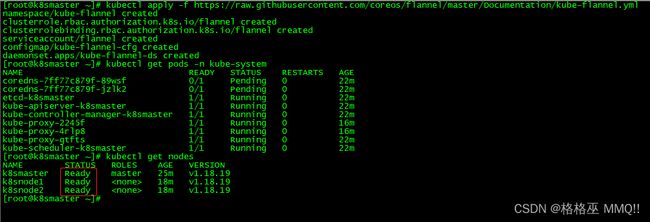
[root@k8smaster ~]# kubectl apply -f https://raw.githubusercontent.com/coreos/flannel/master/Documentation/kube-flannel.yml
#查看 pods 情况
[root@k8smaster ~]# kubectl get pods -n kube-system
#查看 nodes 情况
[root@k8smaster ~]# kubectl get nodes
如果 kubectl apply -f 后面的地址下不下来。可以单独下载下来。然后 apply 上去

-
测试kubernetes集群
在Kubernetes集群中创建一个pod,验证是否正常运行:
拉一个 Nginx 下来,便于测试用
[root@k8smaster ~]# kubectl create deployment nginx --image=nginx
查看状态
[root@k8smaster ~]# kubectl get pod
对外暴露 80 端口
[root@k8smaster ~]# kubectl expose deployment nginx --port=80 --type=NodePort
$ kubectl get pod,svc
访问地址:http://NodeIP:Port


