Spring框架入门
文章目录
-
- Spring
- 第1章 简介
- ==1.1 Spring概述==
- Spring的下载地址
- 1.3 Spring模块
- ==Spring框架分为五大模块:==
- 1.4 HelloWorld
- ==applicationContext.xml文件中的内容==
- ==1.5 获取bean的方式==
- 第2章 基于XML的方式管理Bean
- 2.1 IOC和DI
- 2.1.1 IOC(Inversion of Control):反转控制
- 2.1.2 DI(Dependency Injection):依赖注入
- ==2.1.3 IOC容器在Spring中的实现==
- 2.1.4 ApplicationContext的主要实现类
- 2.2 创建Bean
- 2.3 给Bean的属性赋值
- 2.3.1 setter注入
- 2.3.2 构造器注入
- 2.3.3 特殊值处理
- 2.3.4 使用p名称空间
- 2.3.5 引用外部已声明的bean
- 2.3.6 内部bean
- 2.3.7 级联属性赋值
- 2.3.8 集合属性
- 2.3.9 集合类型的bean
- ==2.3.10 自动装配==
- 2.3.11 引入外部属性文件
- ==classpath:只会到你的class路径中查找找文件;==
- ==2.3.12 FactoryBean==
- ==2.4 Bean的作用域==
- ==2.5 Bean的生命周期==
- 第3章 基于注解的方式管理Bean
- 3.1 创建Bean
- 3.1.1 使用注解标识组件
- ==3.1.2 组件扫描==
- ==3.2 给Bean的属性注入值——自动装配==
- 3.3 完全注解开发
- 3.4 Spring集成Junit
- 第4章 AOP
- 4.1 引入案例
- 4.1.1 需求:实现计算器加减乘除功能
- 4.1.2 功能扩展:在计算结果的前后打印日志
- 4) 问题:
- ==4.1.3 动态代理==
- 4.1.4 使用JDK动态代理实现日志的打印
- ==4.2 AOP概述==
- ==4.3 AOP术语==
- 4.4 AspectJ
- 4.5 在Spring中使用AOP的步骤:
- 4.6 AOP细节
- 4.6.2 连接点细节
- 4.6.3 通知细节
- 3) 后置通知
- 4) 返回通知
- 5) 异常通知
- 6) 环绕通知
- 4.6.4 重用切入点表达式
- 4.6.5 设置切面的优先级
- 4.6.6 通过AOP方式实现日志打印的切面类的完整内容
- 4.7 基于XML的方式实现AOP
- 第5章 JdbcTemplate
- 5.2 环境搭建
- 5.2.1 导入jar包
- 5.2.2 创建数据库和表
- 5.2.3 创建druid.properties文件
- 5.2.4 创建Spring的配置文件
- 5.3 操作数据库
- 5.4 通过注入JdbcTemplate实现Dao
- 第6章 声明式事务
- 6.1 事务概述
- 6.2 Spring的事务管理
- 6.2.1 编程式事务管理
- 6.2.2 声明式事务管理
- 6.2.3 Spring提供的事务管理器
- 6.3 引入案例
- 6.3.1 创建数据库和表
- 6.3.2 需求:购买图书
- 6.4 基于注解方式的声明式事务
- 6.4.1 购买图书案例中添加Spring的声明式事务
- 3) 在需要添加事务的方法上添加@Transactional注解
- 6.4.2 事务的传播行为
- ==常用传播行为说明==
- 6.4.3 事务的隔离级别
- 1) 数据库事务并发问题
- 2) 隔离级别
- 6.4.4 @Transactional注解中的其他属性
- 6.5 基于XML方式的声明式事务
- 6.5.1 修改实现类
- 6.5.2 重新创建一个Spring的配置文件
- 6.5.3 测试
- 第7章 Spring5的新特性
- 7.1 新特性简介
- 7.2 Spring 5.0 框架自带了通用的日志封装
- 7.3 支持@Nullable 注解
- 7.4 整合 JUnit5
Spring
第1章 简介
1.1 Spring概述
Spring是一个为简化企业级开发而生的开源框架。使用Spring开发可以将Bean对象,Dao组件对象,Service组件对象等交给Spring容器来管理,这样使得很多复杂的代码在Spring中开发却变得非常的优雅和简洁,有效的降低代码的耦合度,极大的方便项目的后期维护、升级和扩展。
== Spring是一个IOC(DI)和AOP容器框架。==
Spring的优良特性:
1) 非侵入式:基于Spring开发的应用中的对象可以不依赖于Spring的API。
2) 控制反转:IOC——Inversion of Control,指的是将对象的创建权交给Spring去创建。使用Spring之前,对象的创建都是由我们自己在代码中new创建。而使用Spring之后。对象的创建都是由给了Spring框架。
3) 依赖注入:DI——Dependency Injection,是指依赖的对象不需要手动调用setXXX方法去设置,而是通过配置赋值。
4) 面向切面编程:AOP——Aspect Oriented Programming,在不修改源代码的基础上进行功能扩展。
5) 容器:Spring是一个容器,因为它包含并且管理应用对象的生命周期。
6) 组件化:Spring实现了使用简单的组件配置组合成一个复杂的应用。在 Spring 中可以使用XML和Java注解组合这些对象。
7) 一站式:在IOC和AOP的基础上可以整合各种企业应用的开源框架和优秀的第三方类库(实际上Spring 自身也提供了表述层的SpringMVC和持久层的JDBCTemplate)。
Spring的下载地址
官网:https://spring.io/
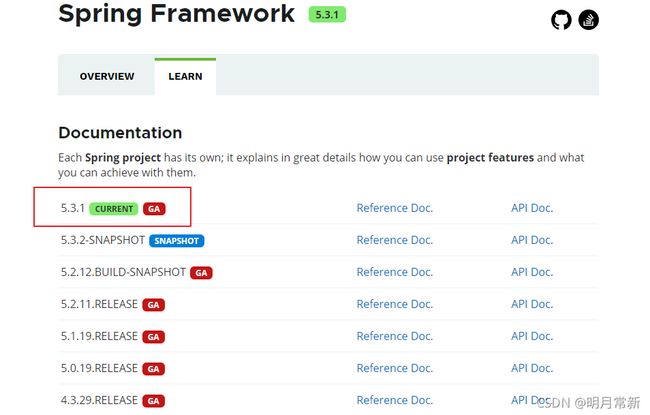
最新正式发布版下载地址:https://repo.spring.io/release/org/springframework/spring/
1.3 Spring模块
**
Spring框架分为五大模块:
**
1) Core Container:核心容器
Beans提供 BeanFactory,它是一个工厂模式的复杂实现。
Core提供了框架的基本组成部分,包括IOC和DI功能。
Context建立在由核心和 Bean 模块提供的基础上,它是访问定义和配置的任何对象的媒介。ApplicationContext 接口是上下文模块的重点。
SpEL在运行时提供了查询和操作一个对象的强大的Spring表达式语言。
2) AOP&Aspects:提供了面向切面编程的实现。
3) DataAccess/Integration:提供了对数据访问/集成的功能。
4) Web:提供了面向Web应用程序的集成功能。
5) Test:提供了对JUnit 或 TestNG 框架的测试功能。
1.4 HelloWorld
创建HelloWorld的步骤如下:
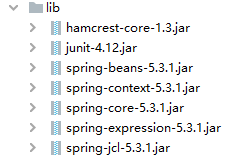
1) 创建Java工程,并导入以下jar包

2) 创建Java类HelloWorld
声明一个name属性
提供setName方法
创建sayHello方法
public class HelloWorld {

    private String name;
    //发现是通过无参构造
		public HelloWorld(){

        System.out.println("HelloWorld对象被创建了");
    }

    public void setName(String name) {

        this.name = name;
    }

    public void sayHello(){

        System.out.println("Hello :"+name);
    }
}
3) 在src目录下创建Spring Config配置文件,并命名为applicationContext.xml
applicationContext.xml文件中的内容
Bean标签是为了让spring为我们造对象 而 proprety 是为了给类属性赋值
<?xml version="1.0" encoding="UTF-8"?>
<beans xmlns="http://www.springframework.org/schema/beans"
       xmlns:xsi="http://www.w3.org/2001/XMLSchema-instance"
       xsi:schemaLocation="http://www.springframework.org/schema/beans http://www.springframework.org/schema/beans/spring-beans.xsd">

    <!--配置bean
        id属性:设置bean的唯一标识
        class属性:设置类的全类名,IOC容器通过反射创建对象
    -->
    <bean id="helloWorld" class="com.atguigu.spring.helloworld.HelloWorld">
    //setName严格来说是set方法的后边单词首字母小写 name="name"
        <property name="name" value="Spring"></property>
    </bean>
</beans>
4) 创建单元测试类HelloWorldTest
public class HelloWorldTest {

    /*
       测试HelloWorld
    */
    @Test
    public void testHelloWorld(){

        //1.创建IOC容器对象
        ApplicationContext ioc = new ClassPathXmlApplicationContext("applicationContext.xml");
        //2.获取IOC容器中的HelloWorld对象
        HelloWorld helloWorld = (HelloWorld) ioc.getBean("helloWorld");
        //3.调用sayHello方法
        helloWorld.sayHello();
    }
}
IOC原理总结:
在new了这个容器对象之后
new ClassPathXmlApplicationContext(“applicationContext.xml”);
加载配置文件,发现有一个ben标签,所以调用无参构造器new对象
,接着
setName方法,把value值传给name属性
1.5 获取bean的方式
1) 根据bean的id获取
需要强转
HelloWorld helloWorld = (HelloWorld) ioc.getBean(“helloWorld”);
2) 根据bean的类型获取
如果在IOC容器中有多个该类型的bean则会抛出异常
HelloWorld helloWorld = ioc.getBean(HelloWorld.class);
3) 根据bean的id和类型获取
HelloWorld helloWorld = ioc.getBean(“helloWorld”, HelloWorld.class);
第2章 基于XML的方式管理Bean
2.1 IOC和DI
2.1.1 IOC(Inversion of Control):反转控制
在应用程序中的组件需要获取资源时,传统的方式是组件主动的从容器中获取所需要的资源,在这样的模式下开发人员往往需要知道在具体容器中特定资源的获取方式,增加了学习成本,同时降低了开发效率。
反转控制的思想完全颠覆了应用程序组件获取资源的传统方式:反转了资源的获取方向——改由容器主动的将资源推送给需要的组件,开发人员不需要知道容器是如何创建资源对象的,只需要提供接收资源的方式即可,极大的降低了学习成本,提高了开发的效率。这种行为也称为查找的被动形式。
2.1.2 DI(Dependency Injection):依赖注入
IOC的另一种表述方式:即组件以一些预先定义好的方式(例如:setter 方法)接受来自于容器的资源注入。相对于IOC而言,这种表述更直接。
总结: IOC 就是一种反转控制的思想, 而DI是对IOC的一种具体实现。
2.1.3 IOC容器在Spring中的实现
在创建Bean之前,首先需要创建IOC容器。Spring提供了IOC容器的两种实现方式:
1) BeanFactory:IOC容器的基本实现,是Spring内部的使用接口,是面向Spring本身的,不是提供给开发人员使用的。
2) ApplicationContext:BeanFactory的子接口,提供了更多高级特性。面向Spring的使用者,几乎所有场合都使用ApplicationContext而不是底层的BeanFactory。
2.1.4 ApplicationContext的主要实现类

1) ClassPathXmlApplicationContext:对应类路径下的XML格式的配置文件
2) FileSystemXmlApplicationContext:对应文件系统中的XML格式的配置文件
3) ConfigurableApplicationContext:是ApplicationContext的子接口,包含一些扩展方法refresh()和close(),让ApplicationContext具有启动、关闭和刷新上下文的能力。
4) WebApplicationContext:专门为WEB应用而准备的,它允许从相对于WEB根目录的路径中完成初始化工作。
2.2 创建Bean
让Spring的IOC容器帮我们创建Bean,只需要在Spring的配置文件中通过bean标签配置即可。
bean标签中常用属性说明:
1) Id属性:给IOC容器中的bean设置的唯一标识。
2) class属性:配置让IOC容器管理的类的全类名,Spring会利用反射技术通过类的无参构造器创建对象。
<?xml version="1.0" encoding="UTF-8"?>
<beans xmlns="http://www.springframework.org/schema/beans"
       xmlns:xsi="http://www.w3.org/2001/XMLSchema-instance"
       xsi:schemaLocation="http://www.springframework.org/schema/beans http://www.springframework.org/schema/beans/spring-beans.xsd">

    <bean id="book" class="com.atguigu.spring.beans.Book"></bean>
</beans>
2.3 给Bean的属性赋值
2.3.1 setter注入
在bean标签中通过property标签设置bean的属性值,property标签中的属性说明:
name属性:配置bean的属性名
value属性:配置bean的属性值
还可以通过value子标签配置bean的属性值
<bean id="book1" class="com.atguigu.spring.beans.Book">
    <property name="id" value="1"></property>
    <property name="title" value="三国演义"></property>
    <property name="author" value="罗贯中"></property>
    <property name="price" value="66.66"></property>
    <property name="sales" value="100"></property>
 </bean>
2.3.2 构造器注入
在bean标签中通过constructor-arg标签设置bean的属性值,constructor-arg标签中的属性说明:
name属性:配置构造器中的参数名
value属性:配置参数值
index属性:配置参数在构造器中的索引位置,从0开始
type属性:配置构造器中参数的类型
1) 只指定value属性,自动匹配合适的构造器
<bean id="book2" class="com.atguigu.spring.beans.Book">
    <constructor-arg  value="2"></constructor-arg>
    <constructor-arg  value="水浒传"></constructor-arg>
    <constructor-arg  value="施耐庵"></constructor-arg>
    <constructor-arg  value="88.88"></constructor-arg>
    <constructor-arg  value="100"></constructor-arg>
</bean>
2) 所有属性都指定
<bean id="book3" class="com.atguigu.spring.beans.Book">
    <constructor-arg name="id" value="3"></constructor-arg>
    <constructor-arg name="title" value="红楼梦"></constructor-arg>
    <constructor-arg index="2" value="曹雪芹"></constructor-arg>
    <constructor-arg type="java.lang.Integer" value="100"></constructor-arg>
</bean>
2.3.3 特殊值处理
1) 字面量
字面量是用于表达源代码中一个固定值的表示法。基本数据类型及其包装类型、String等类型都可以采取字面值注入的方式。
2) 赋null值
通过标签给bean的属性赋null值
3) 赋值中包含特殊字符
若字面值中包含特殊字符,可以使用把字面值包裹起来
<bean id="book4" class="com.atguigu.spring.beans.Book">
    <property name="id" value="4"></property>
    <property name="title">
        <value><![CDATA[<<西游记>>]]></value>
    </property>
    <property name="author" value="吴承恩"></property>
    <property name="sales">
        <null></null>
    </property>
</bean>
2.3.4 使用p名称空间
使用p名称空间需要引入对应的约束,在Idea中根据提示引入即可。
<beans xmlns="http://www.springframework.org/schema/beans"
       xmlns:xsi="http://www.w3.org/2001/XMLSchema-instance"
       xmlns:p="http://www.springframework.org/schema/p"
       xsi:schemaLocation="http://www.springframework.org/schema/beans http://www.springframework.org/schema/beans/spring-beans.xsd">

<!--通过p名称空间配置bean-->
<bean id="book5" class="com.atguigu.spring.beans.Book"
          p:id="5" p:title="解忧杂货店"
          p:author="藤野圭吾"
          p:price="33.00"
          p:sales="100"></bean>

</beans>
2.3.5 引用外部已声明的bean
当bean的属性是一个其他类型的对象是,可以在property或标签中通过ref属性或ref子标签引用IOC容器中配置好的该类型的bean,ref的属性值指定为引用的bean的id值。
<bean id="cartItem" class="com.atguigu.spring.beans.CartItem">
<!--引用外部bean-->
    <property name="book" ref="book1"></property>
    <property name="count" value="10"></property>
    <property name="amount" value="100"></property>
</bean>
2.3.6 内部bean
当bean实例仅仅给一个特定的属性使用时,可以将其声明为内部bean。内部bean声明直接包含在或元素里,不需要设置id。
<bean id="cartItem2" class="com.atguigu.spring.beans.CartItem">
    <property name="book">
<!--配置内部bean-->

        <bean class="com.atguigu.spring.beans.Book">
            <property name="id" value="6"></property>
            <property name="title" value="三体"></property>
            <property name="author" value="刘慈欣"></property>
            <property name="price" value="22.00"></property>
            <property name="sales" value="100"></property>
        </bean>
    </property>
    <property name="count" value="10"></property>
    <property name="amount" value="100"></property>
</bean>
2.3.7 级联属性赋值
当bean的属性是一个对象,我们可以通过配置当前bean的方式给属性中对象的属性赋值,即给属性的属性赋值,这种方式我们称为给级联属性赋值。
<!--给级联属性赋值-->
<bean id="cartItem3" class="com.atguigu.spring.beans.CartItem">
    <property name="book" ref="book1"></property>
    <!--通过给级联属性赋值将book1中的title修改为新三国-->
    <property name="book.title" value="新三国"></property>
</bean>
2.3.8 集合属性
当bean的属性是集合类型时,可以通过以下标签进行配置:
:配置数组类型
:配置List类型
:配置Map类型
<!--配置集合属性-->
<bean id="bookShop" class="com.atguigu.spring.beans.BookShop">
    <property name="books">
        <list>
            <ref bean="book1"></ref>
            <ref bean="book2"></ref>
            <ref bean="book3"></ref>
        </list>
    </property>
    <property name="map">
        <map>
            <entry key="user1" value="张三"></entry>
            <entry key="user2" value="李四"></entry>
            <entry key="user3" value="王五"></entry>
        </map>
    </property>
</bean>
2.3.9 集合类型的bean
如果只能将集合对象配置在某个bean内部,则这个集合的配置将不能被重用。我们需要将集合bean的配置拿到外面,供其他bean引用。
配置集合类型的bean需要引入util名称空间。
<beans xmlns="http://www.springframework.org/schema/beans"
       xmlns:xsi="http://www.w3.org/2001/XMLSchema-instance"
       xmlns:p="http://www.springframework.org/schema/p"
       xmlns:util="http://www.springframework.org/schema/util"
       xsi:schemaLocation="http://www.springframework.org/schema/beans http://www.springframework.org/schema/beans/spring-beans.xsd http://www.springframework.org/schema/util https://www.springframework.org/schema/util/spring-util.xsd">

<!--配置集合bean-->
<util:list id="listBean">
        <bean class="com.atguigu.spring.beans.Book">
            <property name="id" value="1"></property>
            <property name="title" value="大秦帝国之裂变"></property>
            <property name="author" value="孙皓晖"></property>
        </bean>
        <bean class="com.atguigu.spring.beans.Book">
            <property name="id" value="2"></property>
            <property name="title" value="大秦帝国之纵横"></property>
            <property name="author" value="孙皓晖"></property>
        </bean>
        <bean class="com.atguigu.spring.beans.Book">
            <property name="id" value="3"></property>
            <property name="title" value="大秦帝国之崛起"></property>
            <property name="author" value="孙皓晖"></property>
        </bean>
    </util:list>
</beans>
2.3.10 自动装配
手动装配:以value或ref的方式明确指定属性值都是手动装配。
自动装配:根据bean标签的autowire属性指定的装配规则,不需要明确指定,Spring自动将匹配的属性值注入bean中。
自动装配的规则,即autowire的属性值有:
no或default:不自动装配
byName:根据bean的属性名称自动装配,以当前bean的属性名作为id从IOC容器中寻找以实现装配。找到则装配,找不到则不装配。
byType:根据bean的属性类型自动装配。找到一个则装配,找到多个则报错,找不到则不装配。
constructor:根据bean的属性的构造器自动装配,不推荐使用。
<bean id="cartItem4" class="com.atguigu.spring.beans.CartItem" autowire="byName"></bean>
2.3.11 引入外部属性文件
当bean的配置信息逐渐增多时,查找和修改一些bean的配置信息就变得愈加困难。这时可以将一部分信息提取到bean配置文件的外部,


