粤嵌实训医疗项目--day03(Vue + SpringBoot)

往期回顾
粤嵌实训医疗项目day02(Vue + SpringBoot)-CSDN博客
粤嵌实训医疗项目--day01(Vue+SpringBoot)-CSDN博客
目录
一、SpringBoot AOP的使用
二、用户模块-注册功能(文件上传)
三、用户模块-注册实现
四、用户模块-登录-校验码
一、项目SpringBoot AOP的使用(增添日志输出等)
在vaccinum包下创建aspect包并输入以下代码
@Aspect
@Component
public class LogAspect {

    private final static Logger LOG = LoggerFactory.getLogger(LogAspect.class);

    /** 定义一个切点 */
    @Pointcut("execution(public * com.example.vaccinum.controller..*Controller.*(..))")
    public void controllerPointcut() {}

    @Resource
    private SnowFlake snowFlake;

    @Before("controllerPointcut()")
    public void doBefore(JoinPoint joinPoint) throws Throwable {

        // 增加日志流水号
        MDC.put("LOG_ID", String.valueOf(snowFlake.nextId()));

        // 开始打印请求日志
        ServletRequestAttributes attributes = (ServletRequestAttributes) RequestContextHolder.getRequestAttributes();
        HttpServletRequest request = attributes.getRequest();
        Signature signature = joinPoint.getSignature();
        String name = signature.getName();

        // 打印请求信息
        LOG.info("------------- 开始 -------------");
        LOG.info("请求地址: {} {}", request.getRequestURL().toString(), request.getMethod());
        LOG.info("类名方法: {}.{}", signature.getDeclaringTypeName(), name);
        LOG.info("远程地址: {}", request.getRemoteAddr());

        RequestContext.setRemoteAddr(getRemoteIp(request));

        // 打印请求参数
        Object[] args = joinPoint.getArgs();
		// LOG.info("请求参数: {}", JSONObject.toJSONString(args));

		Object[] arguments  = new Object[args.length];
        for (int i = 0; i < args.length; i++) {
            if (args[i] instanceof ServletRequest
                    || args[i] instanceof ServletResponse
                    || args[i] instanceof MultipartFile) {
                continue;
            }
            arguments[i] = args[i];
        }
        // 排除字段,敏感字段或太长的字段不显示
        String[] excludeProperties = {"password", "file"};
        PropertyPreFilters filters = new PropertyPreFilters();
        PropertyPreFilters.MySimplePropertyPreFilter excludefilter = filters.addFilter();
        excludefilter.addExcludes(excludeProperties);
        LOG.info("请求参数: {}", JSONObject.toJSONString(arguments, excludefilter));
    }

    @Around("controllerPointcut()")
    public Object doAround(ProceedingJoinPoint proceedingJoinPoint) throws Throwable {
        long startTime = System.currentTimeMillis();
        Object result = proceedingJoinPoint.proceed();
        // 排除字段,敏感字段或太长的字段不显示
        String[] excludeProperties = {"password", "file"};
        PropertyPreFilters filters = new PropertyPreFilters();
        PropertyPreFilters.MySimplePropertyPreFilter excludefilter = filters.addFilter();
        excludefilter.addExcludes(excludeProperties);
        LOG.info("返回结果: {}", JSONObject.toJSONString(result, excludefilter));
        LOG.info("------------- 结束 耗时:{} ms -------------", System.currentTimeMillis() - startTime);
        return result;
    }

    /**
     * 使用nginx做反向代理,需要用该方法才能取到真实的远程IP
     * @param request
     * @return
     */
    public String getRemoteIp(HttpServletRequest request) {
        String ip = request.getHeader("x-forwarded-for");
        if (ip == null || ip.length() == 0 || "unknown".equalsIgnoreCase(ip)) {
            ip = request.getHeader("Proxy-Client-IP");
        }
        if (ip == null || ip.length() == 0 || "unknown".equalsIgnoreCase(ip)) {
            ip = request.getHeader("WL-Proxy-Client-IP");
        }
        if (ip == null || ip.length() == 0 || "unknown".equalsIgnoreCase(ip)) {
            ip = request.getRemoteAddr();
        }
        return ip;
    }

}
再在vaccinum包下创建util包并引入两个类
1.用于存储和获取当前请求的远程地址类RequestContext
package com.example.vaccinum.util;


import java.io.Serializable;

public class RequestContext implements Serializable {

    private static ThreadLocal remoteAddr = new ThreadLocal<>();

    public static String getRemoteAddr() {
        return remoteAddr.get();
    }

    public static void setRemoteAddr(String remoteAddr) {
        RequestContext.remoteAddr.set(remoteAddr);
    }

}
2.雪花算法类SnowFlaske
package com.example.vaccinum.util;

import org.springframework.stereotype.Component;

import java.text.ParseException;

/**
 * Twitter的分布式自增ID雪花算法
 **/
@Component
public class SnowFlake {

    /**
     * 起始的时间戳
     */
    private final static long START_STMP = 1609459200000L; // 2021-01-01 00:00:00

    /**
     * 每一部分占用的位数
     */
    private final static long SEQUENCE_BIT = 12; //序列号占用的位数
    private final static long MACHINE_BIT = 5;   //机器标识占用的位数
    private final static long DATACENTER_BIT = 5;//数据中心占用的位数

    /**
     * 每一部分的最大值
     */
    private final static long MAX_DATACENTER_NUM = -1L ^ (-1L << DATACENTER_BIT);
    private final static long MAX_MACHINE_NUM = -1L ^ (-1L << MACHINE_BIT);
    private final static long MAX_SEQUENCE = -1L ^ (-1L << SEQUENCE_BIT);

    /**
     * 每一部分向左的位移
     */
    private final static long MACHINE_LEFT = SEQUENCE_BIT;
    private final static long DATACENTER_LEFT = SEQUENCE_BIT + MACHINE_BIT;
    private final static long TIMESTMP_LEFT = DATACENTER_LEFT + DATACENTER_BIT;

    private long datacenterId = 1;  //数据中心
    private long machineId = 1;     //机器标识
    private long sequence = 0L; //序列号
    private long lastStmp = -1L;//上一次时间戳

    public SnowFlake() {
    }

    public SnowFlake(long datacenterId, long machineId) {
        if (datacenterId > MAX_DATACENTER_NUM || datacenterId < 0) {
            throw new IllegalArgumentException("datacenterId can't be greater than MAX_DATACENTER_NUM or less than 0");
        }
        if (machineId > MAX_MACHINE_NUM || machineId < 0) {
            throw new IllegalArgumentException("machineId can't be greater than MAX_MACHINE_NUM or less than 0");
        }
        this.datacenterId = datacenterId;
        this.machineId = machineId;
    }

    /**
     * 产生下一个ID
     *
     * @return
     */
    public synchronized long nextId() {
        long currStmp = getNewstmp();
        if (currStmp < lastStmp) {
            throw new RuntimeException("Clock moved backwards.  Refusing to generate id");
        }

        if (currStmp == lastStmp) {
            //相同毫秒内,序列号自增
            sequence = (sequence + 1) & MAX_SEQUENCE;
            //同一毫秒的序列数已经达到最大
            if (sequence == 0L) {
                currStmp = getNextMill();
            }
        } else {
            //不同毫秒内,序列号置为0
            sequence = 0L;
        }

        lastStmp = currStmp;

        return (currStmp - START_STMP) << TIMESTMP_LEFT //时间戳部分
                | datacenterId << DATACENTER_LEFT       //数据中心部分
                | machineId << MACHINE_LEFT             //机器标识部分
                | sequence;                             //序列号部分
    }

    private long getNextMill() {
        long mill = getNewstmp();
        while (mill <= lastStmp) {
            mill = getNewstmp();
        }
        return mill;
    }

    private long getNewstmp() {
        return System.currentTimeMillis();
    }

    public static void main(String[] args) throws ParseException {
        // 时间戳
        // System.out.println(System.currentTimeMillis());
        // System.out.println(new Date().getTime());
        //
        // String dateTime = "2021-01-01 08:00:00";
        // SimpleDateFormat sdf = new SimpleDateFormat("yyyy-MM-dd hh:mm:ss");
        // System.out.println(sdf.parse(dateTime).getTime());

        SnowFlake snowFlake = new SnowFlake(1, 1);

        long start = System.currentTimeMillis();
        for (int i = 0; i < 10; i++) {
            System.out.println(snowFlake.nextId());
            System.out.println(System.currentTimeMillis() - start);
        }
    }
}
还需要导入如下依赖
  org.springframework.boot
  spring-boot-starter-aop


  com.alibaba
  fastjson
  1.2.70
spring-boot-starter-aop:这是Spring Boot提供的一个AOP(面向切面编程)模块的启动器,它包含了Spring AOP和AspectJ等AOP框架的依赖,可以方便地在Spring Boot应用中使用AOP。AOP可以通过切面(Aspect)来实现横向逻辑的复用,比如日志记录、事务管理、权限控制等。
fastjson:这是阿里巴巴开源的一个JSON序列化/反序列化框架,它可以将Java对象转换成JSON字符串,也可以将JSON字符串转换成Java对象。fastjson具有快速、稳定、高效的特点,广泛应用于Java应用的数据交换、RPC调用、消息队列等场景。在Spring Boot应用中,fastjson可以作为默认的JSON序列化/反序列化工具,也可以与其他JSON库一起使用。
二、用户模块-注册功能(文件上传)
--在controller层提供FileController文件上传的接口、在本地创建存储图片的文件夹
1.创建上传图片接口
@RestController
@RequestMapping("/file")
public class FileController {

    @RequestMapping("/upload")
    public String upload(MultipartFile file) throws IOException {
        String uuid = UUID.randomUUID().toString();
//        1.1获取文件真实名称   123.jpg
        String filename = file.getOriginalFilename();
//        2.图片名称修改
//        后缀
        String substring = filename.substring(filename.lastIndexOf("."));
//        拼接uuid和后缀名
        filename = uuid +substring;
        //        3.如何存到本地磁盘中 文件的上传
        file.transferTo(new File("E:\\实训\\upload\\"+filename));
        return "http://localhost:8085/" + filename;
    }
}
通过uuid类可以使得上传到本地磁盘文件名不会出现重复
--在Login.vue提供对话框、在data中提供form变量
找到Login.vue对应注册组件
![]()
--在methods中提供上传的处理函数

测试功能:


可以看到成功上传成功并且展示出存放到磁盘中的图片
三、用户模块-注册实现
--在用户实体中提供主键字段

在vaccinum架构下创建userInfo表单
DROP TABLE IF EXISTS `user_info`;
CREATE TABLE `user_info`  (
  `user_id` bigint(20) NOT NULL COMMENT '用户id',
  `code` varchar(20) CHARACTER SET utf8 COLLATE utf8_general_ci NULL DEFAULT NULL COMMENT '身份证',
  `email` varchar(255) CHARACTER SET utf8 COLLATE utf8_general_ci NULL DEFAULT NULL COMMENT '邮箱',
  `sex` varchar(25) CHARACTER SET utf8 COLLATE utf8_general_ci NULL DEFAULT NULL COMMENT '性别',
  `age` int(11) NULL DEFAULT NULL COMMENT '年龄',
  `job` varchar(255) CHARACTER SET utf8 COLLATE utf8_general_ci NULL DEFAULT NULL COMMENT '职位',
  `status` int(11) NULL DEFAULT 0 COMMENT '用户通行码-0绿码-1黄码-2红码',
  PRIMARY KEY (`user_id`) USING BTREE
) ENGINE = InnoDB CHARACTER SET = utf8 COLLATE = utf8_general_ci COMMENT = '用户信息' ROW_FORMAT = DYNAMIC;

-- ----------------------------
-- Records of user_info
-- ----------------------------
INSERT INTO `user_info` VALUES (2, '456379865132485', '[email protected]', '男', 45, '', 2);
INSERT INTO `user_info` VALUES (3, '123465789651', '[email protected]', '男', 16, NULL, 1);
INSERT INTO `user_info` VALUES (9, '阿斯顿', 'asd', '女', 12, 'asd', 0);
INSERT INTO `user_info` VALUES (10, '34', '34', '女', 3, '4', 0);
INSERT INTO `user_info` VALUES (12, 'asd', 'asd', '男', 23, 'ghf', 0);
INSERT INTO `user_info` VALUES (16, 'asd', 'asd', '男', 12, 'asd', 0);
通过插件mbatisx使用逆向,自动创建对应三层架构的代码

idea实现数据库连接
 下载完对应驱动后进行配置
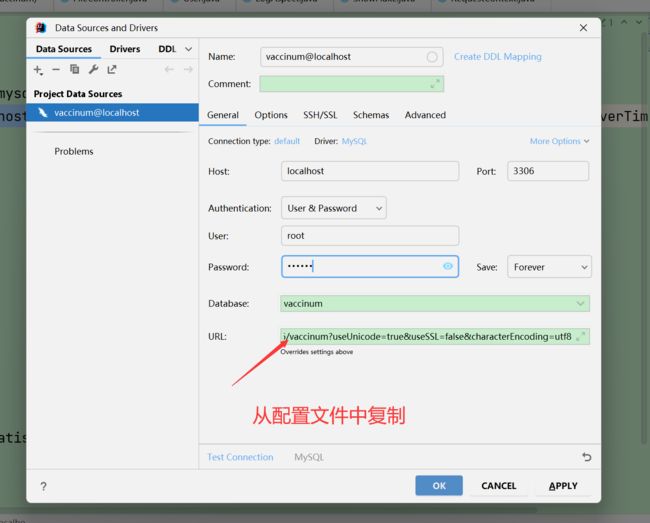
使用mybatisx插件
 mybatisx逆向配置

创建完后对应userInfo实体类,需要进行修改
@Data
@EqualsAndHashCode(callSuper = false)
public class UserInfo implements Serializable {

    private static final long serialVersionUID = 1L;

    /**
     * 用户id INPUT设置为手动输入id
     */
    @TableId(value = "user_id", type = IdType.INPUT)
    private Long userId;

    /**
     * username
     */
    @TableField(exist = false)
    private String userName;

    /**
     * 身份证
     */
    private String code;

    /**
     * 邮箱
     */
    private String email;

    /**
     * 性别
     */
    private String sex;

    /**
     * 年龄
     */
    private Integer age;

    /**
     * 职位
     */
    private String job;

    /**
     * 用户通行码-0绿码-1黄码-2红码
     */
    private Integer status;


    @TableField(exist = false)
    private User user;


}
在启动类中添加扫描mapper的注解

--在用户controller中提供注册接口
@Autowired
UserInfoService userInfoService;

//定义一个请求接口来实现用户的注册 user、userinfo
    @RequestMapping("/register")
    public String register(User user,UserInfo userInfo) throws JsonProcessingException {
//        1.创建json解析工具
        ObjectMapper json = new ObjectMapper();
//       2.返回的结果集
        HashMap map = new HashMap<>();
//        3.调用方法添加数据
        boolean save = userService.save(user);
//        4.添加userInfo的数据  需要设置 user的id主键 为 userinfo id的值
        userInfo.setUserId(user.getId());
        boolean save1 = userInfoService.save(userInfo);
//        响应结果
        map.put("flag",save&&save1);
//        返回解析好的json数据
        return json.writeValueAsString(map);
    }
前端设置好请求

--在文件上传成功后,把服务器响应的图片url赋值到form.image

--修改页面提供save函数和异步请求操作
//注册的函数
    save() {
      //发起一个异步请求,查询分类的数据
      request
        // post 请求方式
        .post("/gec/user/register", this.form)
        // then表示请求后的回调函数
        .then((res) => {
          //判断操作是否成功
          if (res.ok == true) {
            //消息提示
            this.$message({
              message: "注册成功",
              type: "success",
            });
            //把form的数据清空
            this.form = {
              name: "",
              phone: "",
              password: "",
              image: "",
              code: "",
              email: "",
              sex: "",
              age: "",
            };
            //关闭对话框
            this.dialogVisible = false;
          } else {
            this.$message.error("注册失败");
          }
        });
    },
功能展示:
前端展示:


数据库展示:

四、用户模块-登录-校验码
在项目中的resource下创建lib包并设置为库,放入以下两个jar包

检测是否变成库


--在项目中提供验证码的controller接口【注意使用:jdk8】
import com.fasterxml.jackson.databind.ObjectMapper;
import com.google.code.kaptcha.impl.DefaultKaptcha;
import com.google.code.kaptcha.util.Config;
import org.springframework.web.bind.annotation.RequestMapping;
import org.springframework.web.bind.annotation.RestController;
//sun.misc.BASE64Encoder jdk8提供
import sun.misc.BASE64Encoder;

import javax.imageio.ImageIO;
import javax.servlet.http.HttpServletRequest;
import javax.servlet.http.HttpServletResponse;
import java.awt.image.BufferedImage;
import java.io.ByteArrayOutputStream;
import java.io.IOException;
import java.util.HashMap;
import java.util.Properties;

@RestController
@RequestMapping("/captcha")
public class CaptchaController {

    //返回验证码
    @RequestMapping("/getCaptcha")
    public void getCaptcha(HttpServletRequest request, HttpServletResponse response) throws Exception {
        //验证码生成器
        DefaultKaptcha defaultKaptcha = new DefaultKaptcha();
        //配置
        Properties properties = new Properties();
        //是否有边框
        properties.setProperty("kaptcha.border", "yes");
        //设置边框颜色
        properties.setProperty("kaptcha.border.color", "105,179,90");
        //边框粗细度,默认为1
        // properties.setProperty("kaptcha.border.thickness","1");
        //验证码
        properties.setProperty("kaptcha.session.key", "code");
        //验证码文本字符颜色 默认为黑色
        properties.setProperty("kaptcha.textproducer.font.color", "blue");
        //设置字体样式
        properties.setProperty("kaptcha.textproducer.font.names", "宋体,楷体,微软雅 黑");
        //字体大小,默认40
        properties.setProperty("kaptcha.textproducer.font.size", "30");
        //验证码文本字符内容范围 默认为abced2345678gfynmnpwx
        // properties.setProperty("kaptcha.textproducer.char.string", "");
        //字符长度,默认为5
        properties.setProperty("kaptcha.textproducer.char.length", "4");
        //字符间距 默认为2
        properties.setProperty("kaptcha.textproducer.char.space", "4");
        //验证码图片宽度 默认为200
        properties.setProperty("kaptcha.image.width", "100");
        //验证码图片高度 默认为40
        properties.setProperty("kaptcha.image.height", "40");
        Config config = new Config(properties); //当前对象包引用路径 为 google
        defaultKaptcha.setConfig(config);

        //定义response输出类型为image/jpeg
        response.setDateHeader("Expires", 0);
        response.setHeader("Cache-Control", "no-store, no-cache, must-revalidate");
        response.addHeader("Cache-Control", "post-check=0, pre-check=0");
        response.setHeader("Pragma", "no-cache");
        response.setContentType("image/jpeg");
        //---------------------------生成验证码----------------------
        //获取验证码文本内容
        String text = defaultKaptcha.createText();
        System.out.println("验证码:  " + text);
        //captcha作为key,将验证码放到session中
        request.getSession().setAttribute("captcha", text);
        //根据文本内容创建图形验证码
        BufferedImage image = defaultKaptcha.createImage(text);
        //创建IO流
        ByteArrayOutputStream baos = new ByteArrayOutputStream();
        try {
            //输出流输出图片,格式为jpg
            ImageIO.write(image, "jpg", baos);
        } catch (IOException e) {
            e.printStackTrace();
        }
        byte[] bytes = baos.toByteArray();//把流转换成字节数组
        BASE64Encoder encoder = new BASE64Encoder();
        String imgStr = encoder.encodeBuffer(bytes).trim();
        System.out.println(imgStr);
        HashMap map = new HashMap<>();
        map.put("code", 200);
        map.put("imgStr", imgStr);
        ObjectMapper objectMapper = new ObjectMapper();
        String json = objectMapper.writeValueAsString(map);
        response.getWriter().println(json);
    }

}
--在用户controller中修改登录请求

//定义一个请求接口来实现用户登录
@RequestMapping("login")
public String login(String phone, String password, String code, HttpSession session) throws JsonProcessingException {
    //定义json解析工具
    ObjectMapper objectMapper = new ObjectMapper();
    //key-value集合结果
    HashMap result = new HashMap();
    //获取正确的验证码
    String captcha = (String) session.getAttribute("captcha");
    // 进行验证码判断
    if(!code.equals(captcha)){
        //保存到map中
        result.put("ok", false);
        result.put("message", "验证码错误");
        //返回解析的json数据
        return objectMapper.writeValueAsString(result);
    }
    //调用业务层的方法进行登录查询  【手机号码、密码】
    QueryWrapper userQueryWrapper = new QueryWrapper<>();
    userQueryWrapper.eq("phone", phone);
    userQueryWrapper.eq("password", password);
    //根据条件进行查询
    User user = userService.getOne(userQueryWrapper);
    //判断
    if (user != null) {//登录成功
        //保存到map中
        result.put("ok", true);
        result.put("user", user);
    } else {
        result.put("ok", false);
        result.put("message", "用户名或密码错误");
    }
    //返回解析的json数据
    return objectMapper.writeValueAsString(result);
}
--在script中提供生命周期、及获取验证码的函数

 created() {
    this.getCode();
    //this.getCookie();
  },
getCode() {
request.get("/captcha/getCaptcha").then((res) => {
console.log("res:", res);
if (res.code == "200") {
this.codeUrl = "data:image/jpg;base64," + res.imgStr;
}
});
},效果展示 :

验证码判断

正确验证码与正确账号密码下正常登陆。