【QT开发笔记-基础篇】| 第四章 事件QEvent | 4.11 小案例-无边框窗口
本节对应的视频讲解:B_站_链_接
【QT开发笔记-基础篇】 第4章 事件 4.11 小案例-无边框窗口
本章要实现的整体效果如下:
本节课,来实现一个非常精简的无边框窗口,支持拖动4个边和4个角来缩放窗口
整体效果如下:

整体效果说明:
-
当鼠标位于 12346789 区域时,鼠标形状如上,可以进行窗口缩放;
-
当鼠标位于 5 区域时,鼠标恢复正常形状如上,可以进行窗口的移动;

1. 新建工程,去掉边框
1.1 新建工程
首先,从零新建一个基于 “Qt Widgets Application” 的项目:

项目创建完毕,如下:

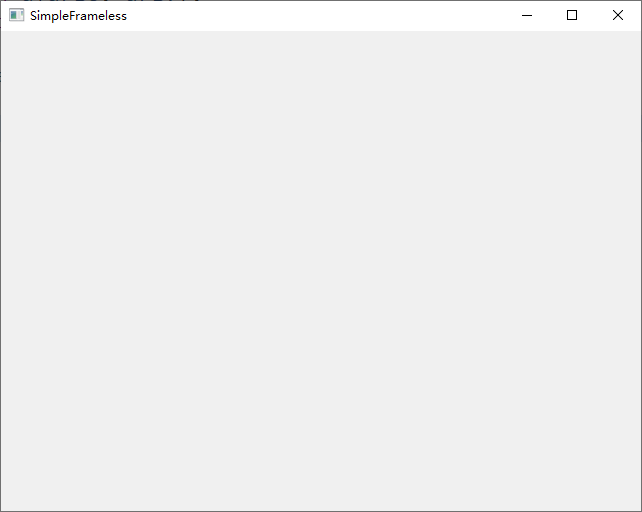
此时运行,是一个空白窗口,如下:
1.2 添加按钮,设置背景色等
在空白界面上,添加两个水平布局的按钮,并设置窗体的最小大小,设置窗体的背景色,如下:
#include 此时运行,效果如下:

1.3 去除标题栏
自带的标题栏很丑,在构造中,添加一条语句即可去除,如下:
FramelessWidget::FramelessWidget(QWidget* parent) : QWidget(parent)
{
	// ...

    // 去除标题栏
    setWindowFlags(Qt::FramelessWindowHint | Qt::WindowSystemMenuHint);
}
1.4 右键退出
没有了标题栏,也就没有了右上角的 “关闭” 按钮,就无法退出程序了
接下来增加一个右键退出的功能
首先, 在 framelesswidget.h 中,声明虚函数 mousePressEvent(),如下:
class FramelessWidget : public QWidget
{
protected:
    void mouseReleaseEvent(QMouseEvent* event);
    void mouseMoveEvent(QMouseEvent* event);
    void mousePressEvent(QMouseEvent* event);
};
然后,在 framelesswidget.cpp 中,实现 mousePressEvent(),如下:
#include 此时,点击右键就可以直接退出程序,如下:

2. 拖动窗口
由于没有了标题栏,无法移动窗口。接下来就实现窗口的移动
首先,在 framelesswidget.h 中,声明需要的成员变量和成员函数:
// 针对9个区域,定义了一个枚举变量;
enum Location {
    TOP,
    BOTTOM,
    LEFT,
    RIGHT,
    TOP_LEFT,
    TOP_RIGHT,
    BOTTOM_LEFT,
    BOTTOM_RIGHT,
    CENTER
};

class FramelessWidget : public QWidget
{
private:
    bool isLeftPressed; // 鼠标左键是否按下
    QPoint mousePos;	// 记录鼠标按下的位置
    Location location;
};
然后,修改鼠标按下、移动和释放的 3 个事件处理函数:
FramelessWidget::FramelessWidget(QWidget* parent) : QWidget(parent)
{
    // ...
    isLeftPressed = false; // 在构造中,将左键按下初始化为 false
}

void FramelessWidget::mouseReleaseEvent(QMouseEvent* event)
{
    if ( event->button() == Qt::LeftButton ) {
        isLeftPressed = false;
    }
}

void FramelessWidget::mouseMoveEvent(QMouseEvent* event)
{
    QPoint globalPos = event->globalPos();

	if ( isLeftPressed ) {
        move(globalPos - mousePos);
        event->accept();
    }
}

void FramelessWidget::mousePressEvent(QMouseEvent* event)
{
    switch ( event->button() ) {
        case Qt::LeftButton:
            isLeftPressed = true;
            mousePos = event->globalPos() - this->frameGeometry().topLeft();
            break;
        case Qt::RightButton:
            this->close();
            break;
        default:
            break;
    }
}
此时运行效果如下:

3. 边界位置,改变鼠标形状
接下来实现鼠标在边界处按下时,可以缩放窗口的功能。
不过本节先来实现当鼠标移动到边界时,改变鼠标的形状的功能。
首先,在 framelesswidget.h 的构造中,开启鼠标跟踪 :
FramelessWidget::FramelessWidget(QWidget* parent) : QWidget(parent)
{
    //...

    this->setMouseTracking(true); // 开启鼠标跟踪
}
然后,修改 mouseMoveEvent(),
void Dialog::mouseMoveEvent(QMouseEvent* event)
{
    QPoint globalPos = event->globalPos();

    // 1. 鼠标未按下
    if ( !isLeftPressed ) {
        this->setCursorShape(globalPos);
        return;
    }

    // 2. 鼠标在 CENTER 位置按下
    if ( location == CENTER ) {
        move(globalPos - mousePos);
        event->accept();
        return;
    }
}
然后,在 framelesswidget.h 声明 setCursorShape() 函数
// 定义一个间距
#define PADDING 5

class FramelessWidget : public QWidget
{
private:
    void setCursorShape(const QPoint& cursorPoint);
}
并在 framelesswidget.cpp 中实现它:
void Dialog::setCursorShape(const QPoint& point)
{
    QRect rect = this->rect();
    QPoint topLeft = mapToGlobal(rect.topLeft());
    QPoint bottomRight = mapToGlobal(rect.bottomRight());

    int x = point.x();
    int y = point.y();

    if ( x >= topLeft.x() && x <= topLeft.x() + PADDING && y >= topLeft.y() && y <= topLeft.y() + PADDING ) {
        // 左上角
        location = TOP_LEFT;
        this->setCursor(QCursor(Qt::SizeFDiagCursor));
    } else if ( x <= bottomRight.x() && x >= bottomRight.x() - PADDING && y <= bottomRight.y() && y >= bottomRight.y() - PADDING ) {
        // 右下角
        location = BOTTOM_RIGHT;
        this->setCursor(QCursor(Qt::SizeFDiagCursor));
    } else if ( x >= topLeft.x() && x <= topLeft.x() + PADDING && y <= bottomRight.y() && y >= bottomRight.y() - PADDING ) {
        //左下角
        location = BOTTOM_LEFT;
        this->setCursor(QCursor(Qt::SizeBDiagCursor));
    } else if ( x <= bottomRight.x() && x >= bottomRight.x() - PADDING && y >= topLeft.y() && y <= topLeft.y() + PADDING ) {
        // 右上角
        location = TOP_RIGHT;
        this->setCursor(QCursor(Qt::SizeBDiagCursor));
    } else if ( x >= topLeft.x() && x <= topLeft.x() + PADDING ) {
        // 左边
        location = LEFT;
        this->setCursor(QCursor(Qt::SizeHorCursor));
    } else if ( x <= bottomRight.x() && x >= bottomRight.x() - PADDING ) {
        // 右边
        location = RIGHT;
        this->setCursor(QCursor(Qt::SizeHorCursor));
    } else if ( y >= topLeft.y() && y <= topLeft.y() + PADDING ) {
        // 上边
        location = TOP;
        this->setCursor(QCursor(Qt::SizeVerCursor));
    } else if ( y <= bottomRight.y() && y >= bottomRight.y() - PADDING ) {
        // 下边
        location = BOTTOM;
        this->setCursor(QCursor(Qt::SizeVerCursor));
    } else {
        // 默认
        location = CENTER;
        this->setCursor(QCursor(Qt::ArrowCursor));
    }
}
此时运行,当鼠标移动到边界时,就可以改变形状了,如下:
4. 实现窗口缩放
本节来实现,当鼠标在边界处按下并拖动时,缩放窗口的功能。
首先,当鼠标按下时,只有在 CENTER 区域,才移动窗口,所以修改 mousePressEvent()
void Dialog::mousePressEvent(QMouseEvent* event)
{
    switch ( event->button() ) {
        case Qt::LeftButton:
            isLeftPressed = true;
            if ( location == CENTER ) { // 增加这个 if 判断
                mousePos = event->globalPos() - this->frameGeometry().topLeft();
            }
            break;
    }
}
然后,修改 mouseMoveEvent(),增加以下代码:
void FramelessWidget::mouseMoveEvent(QMouseEvent* event)
{
    QPoint globalPos = event->globalPos();

    QRect rect = this->rect();
    QPoint topLeft = mapToGlobal(rect.topLeft());
    QPoint bottomRight = mapToGlobal(rect.bottomRight());

    // ...

    // 3. 鼠标在 边缘 位置按下
    QRect rMove(topLeft, bottomRight);

    switch ( location ) {
        case TOP:
            // 如果不加if判断,则窗口高度达到最小高度后,会被鼠标 "向下推走"
            if ( bottomRight.y() - globalPos.y() > this->minimumHeight() ) {
                rMove.setY(globalPos.y());
            }
            break;
        case BOTTOM:
            rMove.setHeight(globalPos.y() - topLeft.y());
            break;
        case LEFT:
            // 如果不加if判断,则窗口高度达到最小宽度后,会被鼠标 "向右推走"
            if ( bottomRight.x() - globalPos.x() > this->minimumWidth() ) {
                rMove.setX(globalPos.x());
            }
            break;
        case RIGHT:
            rMove.setWidth(globalPos.x() - topLeft.x());
            break;
        case TOP_LEFT:
            // 如果不加if判断,则窗口达到最小宽高后,会被鼠标 "向右下推走"
            if ( bottomRight.x() - globalPos.x() > this->minimumWidth() ) {
                rMove.setX(globalPos.x());
            }
            if ( bottomRight.y() - globalPos.y() > this->minimumHeight() ) {
                rMove.setY(globalPos.y());
            }
            break;
        case TOP_RIGHT:
            rMove.setWidth(globalPos.x() - topLeft.x());
            // 如果不加if判断,则窗口达到最小宽高后,会被鼠标 "向下推走"
            if ( bottomRight.y() - globalPos.y() > this->minimumHeight() ) {
                rMove.setY(globalPos.y());
            }
            break;
        case BOTTOM_LEFT:
            // 如果不加if判断,则窗口达到最小宽高后,会被鼠标 "向右推走"
            if ( bottomRight.x() - globalPos.x() > this->minimumWidth() ) {
                rMove.setX(globalPos.x());
            }
            rMove.setHeight(globalPos.y() - topLeft.y());
            break;
        case BOTTOM_RIGHT:
            rMove.setWidth(globalPos.x() - topLeft.x());
            rMove.setHeight(globalPos.y() - topLeft.y());
            break;
        default:
            break;
    }
    this->setGeometry(rMove);
}
此时运行效果如下:
