spring--AnnotationConfigApplicationContext扫描bean过程源码分析
AnnotationConfigApplicationContext
前言
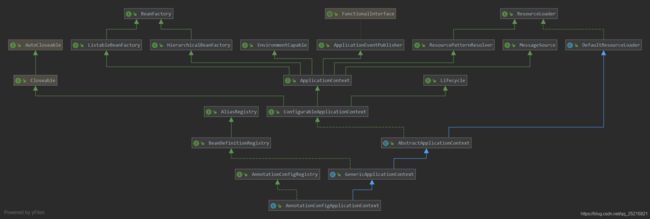
AnnotationConfigApplicationContext 和 ClassPathXmlApplicationContext 与 FileSystemXmlApplicationContext 类似都是抽象类 AbstractApplicationContext 的子类,最终都调用父类的 refresh 方法开始 bean工厂的初始化等一系列操作,不同的是 AnnotationConfigApplicationContext 是通过注解进行bean扫描的,而另外两个是通过xml进行bean注册的,接下来我们看看 AnnotationConfigApplicationContext 是怎么扫描bean的,附结构图
使用说明
- 测试bean
import org.springframework.stereotype.Component; @Component public class TestBean { public String test() { return "test"; } } - 启动类
import org.springframework.context.annotation.AnnotationConfigApplicationContext;

public class DemoApplication {

    public static void main(String[] args) {

        AnnotationConfigApplicationContext annotationConfigApplicationContext = new AnnotationConfigApplicationContext("com.example.demo");
        TestBean testBean = annotationConfigApplicationContext.getBean(TestBean.class);
        System.out.println(testBean.test());
    }
}
源码解析
我们通过创建 AnnotationConfigApplicationContext 类并传入项目包名即可获取到这个包及子包下的bean了,我们看一下 的构造器方法
-
构造器
	public AnnotationConfigApplicationContext(String... basePackages) {
		this();
		scan(basePackages);
		refresh();
	}
主要分三部分,1、调用无参构造器,2、根据传入的包名进行bean扫描,3、调用父类的refresh方法,这里我们主要关注1、2两步
-
无参构造器
	public AnnotationConfigApplicationContext() {
		// 该类用于传入指定bean的类的时候使用,会直接进行beanDefinition注册
		this.reader = new AnnotatedBeanDefinitionReader(this);
		// 该类用于通过类路径进行扫描并将符合的bean进行beanDefinition注册
		this.scanner = new ClassPathBeanDefinitionScanner(this);
	}
通过指定包名创建 AnnotationConfigApplicationContext 类时就是通过 scanner 进行扫描的,注意这里会传入 this 参数,不管是直接指定bean的类进行注册还是扫描注册,实际上是注册到类 DefaultListableBeanFactory 的 beanDefinitionMap(重要) 参数上,参数类型为
private final Map
而 DefaultListableBeanFactory 是 this 的父类 GenericApplicationContext 进行初始化的,我们知道,子类初始化时会先初始化父类public GenericApplicationContext() { this.beanFactory = new DefaultListableBeanFactory(); } -
扫描bean
	@Override
	public void scan(String... basePackages) {
		Assert.notEmpty(basePackages, "At least one base package must be specified");
		// 委托给 scanner 进行扫描
		this.scanner.scan(basePackages);
	}
public int scan(String... basePackages) { // 1.先获取已注册的beanDefinition数量 int beanCountAtScanStart = this.registry.getBeanDefinitionCount(); // 2.进行扫描 doScan(basePackages); // 3.这里会注册一些后置处理器 if (this.includeAnnotationConfig) { AnnotationConfigUtils.registerAnnotationConfigProcessors(this.registry); } // 4.返回本次执行扫描后新增的beanDefinition数量 return (this.registry.getBeanDefinitionCount() - beanCountAtScanStart); }1 和 4 是直接调用 DefaultListableBeanFactory 的 beanDefinitionMap.size() 获取数量
3 是直接通过 registry (即传入的this) 进行 beanDefinition 注册,由于本章重点是第二步,所以我直接列一下都注册了哪些后置处理器,然后我们继续深入第二步的解析类名 beanName 功能描述 ConfigurationClassPostProcessor org.springframework.context.annotation.internalConfigurationAnnotationProcessor 处理@Configuration注解 AutowiredAnnotationBeanPostProcessor org.springframework.context.annotation.internalAutowiredAnnotationProcessor 主要处理@Autowired和@Value注解,还支持@Inject注解以及@Lookup注解功能 CommonAnnotationBeanPostProcessor org.springframework.context.annotation.internalCommonAnnotationProcessor 处理@PostConstruct、@PreDestroy和@Resource等注解 PersistenceAnnotationBeanPostProcessor org.springframework.context.annotation.internalPersistenceAnnotationProcessor 处理@PersistenceUnit和@PersistenceContext注解 EventListenerMethodProcessor org.springframework.context.event.internalEventListenerProcessor 处理@EventListener注解 DefaultEventListenerFactory org.springframework.context.event.internalEventListenerFactory 事件监听工厂,用于创建被@EventListener注解标注的监听器 protected Set<BeanDefinitionHolder> doScan(String... basePackages) { Assert.notEmpty(basePackages, "At least one base package must be specified"); // 保存结果集 Set<BeanDefinitionHolder> beanDefinitions = new LinkedHashSet<>(); for (String basePackage : basePackages) { // 找到这个包下的所有符合条件的 beanDefinition Set<BeanDefinition> candidates = findCandidateComponents(basePackage); for (BeanDefinition candidate : candidates) { // 对使用了 @Scope 注解的类做额外处理,否则直接返回 new ScopeMetadata(); ScopeMetadata scopeMetadata = this.scopeMetadataResolver.resolveScopeMetadata(candidate); // 如果没有使用 @Scope 注解,则 scopeMetadata.getScopeName() 为空,否则为 @Scope 注解的 value 属性值 candidate.setScope(scopeMetadata.getScopeName()); // 生成bean名称 String beanName = this.beanNameGenerator.generateBeanName(candidate, this.registry); if (candidate instanceof AbstractBeanDefinition) { // 使用全局配置(beanDefinitionDefaults)设置是否懒加载(lazyInit)、自动装配模式(autowireMode)、bean依赖检查(dependencyCheck)、 // bean初始化方法名(initMethodName)、bean销毁方法名(destroyMethodName)、以及是否执行初始化方法(enforceInitMethod)和是否执行销毁方法(enforceDestroyMethod) // 通过参数(autowireCandidatePatterns) 对beanName进行匹配以设置autowireCandidate(表示该bean是否可被依赖查找),默认为true postProcessBeanDefinition((AbstractBeanDefinition) candidate, beanName); } if (candidate instanceof AnnotatedBeanDefinition) { // 处理 @Lazy、@Primary、@DependsOn、@Role、@Description 注解 AnnotationConfigUtils.processCommonDefinitionAnnotations((AnnotatedBeanDefinition) candidate); } // 检查 beanDefinitionMap 中是否已经存在这个beanName,如果不存在则返回直接返回true,如果存在并且和参数 candidate 不相等则报错,否则返回false if (checkCandidate(beanName, candidate)) { BeanDefinitionHolder definitionHolder = new BeanDefinitionHolder(candidate, beanName); // 处理使用了 @Scope 注解并且 proxyMode 参数不为 ScopedProxyMode.NO 的情况 definitionHolder = AnnotationConfigUtils.applyScopedProxyMode(scopeMetadata, definitionHolder, this.registry); beanDefinitions.add(definitionHolder); // 向 registry 注册 beanDefinition registerBeanDefinition(definitionHolder, this.registry); } } } return beanDefinitions; }1.这里处理了 @Scope 注解设置bean的类型(单例,原型等),默认为单例
2.autowireMode 表示了自动装配模式,默认是0(AUTOWIRE_NO),需要通过@Autowire等注解手动装配bean,如果设置为1或者2则可以不需要@Autowire注解即可通过set方法自动注入,还有3是构造器注入
3.autowireCandidate 属性表示该bean是否可被依赖查找,当存在依赖时会进行bean查找,如果找到两个bean符合依赖,正常情况下会抛出异常,而如果只有一个bean的 autowireCandidate 为true时则可正常注入
我们继续跟进beanDefinition扫描过程 findCandidateComponents(basePackage)public Set<BeanDefinition> findCandidateComponents(String basePackage) { // componentsIndex 默认为空,可以配置spring.index.ignore 参数为true并且META-INF路径下存在spring.components文件才会启用,该扫描基于 @Indexed 注解spring实现快速启动 if (this.componentsIndex != null && indexSupportsIncludeFilters()) { return addCandidateComponentsFromIndex(this.componentsIndex, basePackage); } else { return scanCandidateComponents(basePackage); } }基于 @Indexed 注解快速启动是spring5.0开始支持的,默认情况不启用,有兴趣的朋友可自行了解,我们继续深入 scanCandidateComponents(basePackage) 方法
	private Set<BeanDefinition> scanCandidateComponents(String basePackage) {
		Set<BeanDefinition> candidates = new LinkedHashSet<>();
		try {
			// 1.解析替换包内的占位符(${}),默认情况下可取系统变量和环境变量
			basePackage = resolveBasePackage(basePackage);
			// 2.设置匹配所有class文件规则
			String packageSearchPath = String.format("classpath*:%s/**/*.class", basePackage);
			// 3.使用 PathMatchingResourcePatternResolver 根据匹配规则获取所有类转化为 Resource 类型
			Resource[] resources = getResourcePatternResolver().getResources(packageSearchPath);
			for (Resource resource : resources) {
				// 4.如果资源不可读则跳过
				if (!resource.isReadable()) {
					continue;
				}
				// 5.解析class文件为元数据
				MetadataReader metadataReader = getMetadataReaderFactory().getMetadataReader(resource);
				// 6.根据排除过滤器(excludeFilters)和包括过滤器(includeFilters)匹配,前者匹配到了则返回false,后者匹配到则返回true
				if (!isCandidateComponent(metadataReader)) {
					continue;
				}
				// 7.包装beanDefinition
				ScannedGenericBeanDefinition sbd = new ScannedGenericBeanDefinition(metadataReader);
				// 8.设置数据源
				sbd.setResource(resource);
				sbd.setSource(resource);
				// 9.判断class类型是否符合
				if (isCandidateComponent(sbd)) {
					candidates.add(sbd);
				}
			}
		} catch (IOException ex) {
			throw new BeanDefinitionStoreException("I/O failure during classpath scanning", ex);
		}
		return candidates;
	}
至此扫描 beanDefinition 已经结束了,我们再简单讲一下第六步和第九步的两个影响扫描结果的判断
类型过滤器
-
源码
protected boolean isCandidateComponent(MetadataReader metadataReader) throws IOException { // 1.排除过滤器 for (TypeFilter tf : this.excludeFilters) { if (tf.match(metadataReader, getMetadataReaderFactory())) { return false; } } // 2.包括过滤器 for (TypeFilter tf : this.includeFilters) { if (tf.match(metadataReader, getMetadataReaderFactory())) { // 3. 条件过滤 return isConditionMatch(metadataReader); } } return false; } -
排除过滤器
即如果该类存在于排除过滤器中,则跳过加载,默认为空
-
包括过滤器
即该类必须符合包括过滤器条件才会返回true,而根据源码可以看出,如果包括过滤器也为空的话,会直接返回false,这样的话就直接跳过加载了,显然不符合我们的初衷,所以包括过滤器肯定不会为空,那么是在哪一步进行配置的呢,还记得最开始的无参构造吗,答案就在new ClassPathBeanDefinitionScanner(this);里
	public AnnotationConfigApplicationContext() {
		this.reader = new AnnotatedBeanDefinitionReader(this);
		this.scanner = new ClassPathBeanDefinitionScanner(this);
	}

	public ClassPathBeanDefinitionScanner(BeanDefinitionRegistry registry) {
		this(registry, true);
	}

	public ClassPathBeanDefinitionScanner(BeanDefinitionRegistry registry, boolean useDefaultFilters) {
		this(registry, useDefaultFilters, getOrCreateEnvironment(registry));
	}

	public ClassPathBeanDefinitionScanner(BeanDefinitionRegistry registry, boolean useDefaultFilters, Environment environment) {
		this(registry, useDefaultFilters, environment, (registry instanceof ResourceLoader ? (ResourceLoader) registry : null));
	}

	public ClassPathBeanDefinitionScanner(BeanDefinitionRegistry registry, boolean useDefaultFilters, Environment environment, @Nullable ResourceLoader resourceLoader) {
		Assert.notNull(registry, "BeanDefinitionRegistry must not be null");
		this.registry = registry;

		if (useDefaultFilters) {
			registerDefaultFilters();
		}
		setEnvironment(environment);
		setResourceLoader(resourceLoader);
	}
通过层层的构造器跳转,终于到了注册过滤器方法了 registerDefaultFilters();
	protected void registerDefaultFilters() {
		// 添加 @Component 过滤器
		this.includeFilters.add(new AnnotationTypeFilter(Component.class));
		ClassLoader cl = ClassPathScanningCandidateComponentProvider.class.getClassLoader();
		// 添加 @ManagedBean 过滤器,需要支持 JSR-250
		try {
			this.includeFilters.add(new AnnotationTypeFilter(((Class<? extends Annotation>) ClassUtils.forName("javax.annotation.ManagedBean", cl)), false));
			logger.trace("JSR-250 'javax.annotation.ManagedBean' found and supported for component scanning");
		}
		catch (ClassNotFoundException ex) {
			// JSR-250 1.1 API (as included in Java EE 6) not available - simply skip.
		}
		// 添加 @Named 过滤器,需要支持 JSR-330
		try {
			this.includeFilters.add(new AnnotationTypeFilter(((Class<? extends Annotation>) ClassUtils.forName("javax.inject.Named", cl)), false));
			logger.trace("JSR-330 'javax.inject.Named' annotation found and supported for component scanning");
		}
		catch (ClassNotFoundException ex) {
			// JSR-330 API not available - simply skip.
		}
	}
看到了我们熟悉的注解 @Component 所以只要标注的该注解的类都可以正常注册
-
包括过滤器后的条件过滤
由于篇幅问题,这里只记录一下,包括过滤器匹配成功后会进入到条件过滤器,如果类使用了 @Conditional 注解则进行条件匹配并返回匹配结果,否则直接返回true,即成功匹配可以加载
bean类型判断
- 源码
protected boolean isCandidateComponent(AnnotatedBeanDefinition beanDefinition) { AnnotationMetadata metadata = beanDefinition.getMetadata(); // 必须是顶级类或静态内部类 return metadata.isIndependent() && // 不是接口并且不是抽象类 ( metadata.isConcrete() || // 如果是抽象的并且方法上使用了 @Lookup (metadata.isAbstract() && metadata.hasAnnotatedMethods(Lookup.class.getName())) ); }- 必须是顶级类或静态内部类
- 不能是接口或抽象类 或者 是抽象类且方法上存在 @Lookup 注解
- @Lookup 注解
spring 会对抽象类使用了 @Lookup 注解的方法生成代理类,要求该方法为无参方法且返回值为类,我们可以注入该抽象类调用标注了 @Lookup 注解的方法得到对应的bean,该bean是原型模式,即每次调用都会重新创建
总结
- 注册大量后置处理器,ConfigurationClassPostProcessor、AutowiredAnnotationBeanPostProcessor、CommonAnnotationBeanPostProcessor、PersistenceAnnotationBeanPostProcessor、EventListenerMethodProcessor
- 处理 @Scope 注解
- autowireMode 表示了自动装配模式
- autowireCandidate 属性表示该bean是否可被依赖查找
- 配置spring.index.ignore 参数为true并且META-INF路径下存在spring.components文件,即可使用 @Indexed 注解进行快速启动
- 扫描包路径可以使用${}占位符
- 使用excludeFilters和includeFilters进行条件过滤,includeFilters默认添加 @Component、@ManagedBean、@Named 注解过滤
- @Conditional 条件过滤在 includeFilters 匹配成功之后调用
- 在抽象类上使用 @Lookup 注解也生成 beanDefinition, 方法返回的是个 bean,是原型模式