【项目实战:核酸检测平台】第五章 众志诚城
本章目标
完成转运人员、接收人员、数据上传人员端
用到技术:
EasyExcel、ElementUIPlus。lodop打印
概述
这一章要完成转运人员、接收人员、数据上传人员端的业务模块,从网上的资料我并没有找到相关的界面,没关系自己脑补就好了,也并不复杂。
转运人员是负责样本转运箱转运的,我在做志愿者的时候遇到过几个转运人员,他们很多也是志愿者,有的是出租车司机、有的网约车司机,有的是就是纯粹的志愿者,总之各行各业的人都有。相比之下,转运人员的人数比采集人员要少得多。他们的职责也很简单,把样品从采集点运送到指点的检测机构/医院即可。当然他们也有APP,虽然我没有见过他们的APP,但是脑补一下,可以得出他们的功能应该是非常简单的,只需要扫码接收转运箱开始转运即可。
不过他们一次可能会转运很多个箱,同一个转运人员,转运一次,可能会将多个采集点的转运箱一次转运。所以要记录下每次运送了哪些转运箱。
接下来就是接收人员了,同样脑补一下他们的职责:扫描转运箱码,记录接收了哪些转运箱,然后转交给检测实验室。他们的APP同样应该也是很简单。
最后是数据上传人员,继续脑补,他们的职责就是上传检测数据。大部分情况下检测结果应该都是阴性的,如果有阳性的应该是个别,所以简单的来说,只需要上传阳性的试管码就行了,但是要注意的是即使是阴性的试管码,也必须要把他们的检测结果保存下来,否则老百姓要查核酸检测记录就无法查询了。
同时也为了练习一下Excel导入/导出,我们可以做成先导出试管码的数据表,保留一列检测结果。然后再上传填了检测结果的表格,并保存到数据库,上传的时候还要做好数据的校验,不能随便造一些EXCEL的数据,你都给人家保存到数据库,这是不对的。
除此之外,还有一个打印箱码和试管码的功能,这个功能我们把他放在上传人员这一端,因为手机打印现在还没有完全普及,商务场景之下还是PC打印多一些。
总体来说,转运人员、接收人员、上传人员这三个端功能都不复杂,我们在脑补的时候要考虑好实际如何去使用系统。
Other后端
在整体设计上,我们是把转运人员、接收人员、上传人员,这三类整合到一个后端模块里了,所以在后端代码开发上是要做一些特殊处理的。
其实这三类整合还是合并从开发的角度上来说没有太大的差别,从实际工作的角度来说的话,还是分开更好一些,不过那样做的话,后端的代码其实很简单。现在整合起来的话,就有点小复杂了。复杂在哪里呢?
因为三类人员整合到一起,他们都有状态管理的需求,同时还要做好权限控制。不能存在上传人员登录后,具备了上传人员的后台权限,那样是非常可怕的。
怎么解决这个问题呢?在第三章中,我们实现了登录操作,也用到了Token来在浏览器端保持登录状态。
    @Override
    public Collector login(LoginModel model) throws BusinessException, UnsupportedEncodingException, NoSuchAlgorithmException {
        String md5Password = Md5Util.encode(model.getPassword());
        Collector collector = collectorDao.login(model.getTel(), md5Password);
        if (collector == null) {
            throw new BusinessException("用户名或密码不正确", ResultCodeEnum.LOGIN_ERROR);
        }
        String token = getToken(collector);

        //把token存到cokkie中,并设置过期时间,一天
        Cookie cookie = new Cookie("token", token);
        cookie.setPath("/");
        cookie.setMaxAge(7 * 24 * 60 * 60);
        Global.response.addCookie(cookie);
        //返回前端之前要把密文的密码清除掉。
        collector.setPassword(null);
        return collector;
    }
并且专门做了一个拦截器,在拦截器中,我们还自己定义了一个PassToken注解,来用跳过权限的控制。
    /***
     * 在请求处理之前进行调用(Controller方法调用之前)
     */
    @Override
    public boolean preHandle(HttpServletRequest request, HttpServletResponse response, Object handler) throws Exception {
        //统一拦截(查询当前session是否存在collecotr)
        Collector user = SessionUtil.getCurrentUser();
        if (user != null) {
            return true;
        }
//        return false;

        HandlerMethod handlerMethod = (HandlerMethod) handler;
        Method method = handlerMethod.getMethod();
        //检查是否有passtoken注释,有则跳过认证
        if (method.isAnnotationPresent(PassToken.class)) {
            PassToken passToken = method.getAnnotation(PassToken.class);
            if (passToken.required()) {
                return true;
            }
        }
        String token = Global.request.getHeader("token");// 从 http 请求头中取出 token
        if (token == null) {
            throw new BusinessException("非法请求,无登录令牌", ResultCodeEnum.NOT_LOGIN);
        }
        Collector collector = collectorService.getCollectorByToken(token);
        if (collector == null) {
            throw new BusinessException("登录状态过期", ResultCodeEnum.NOT_LOGIN);
        }
        JWTVerifier jwtVerifier = JWT.require(Algorithm.HMAC256(collector.getPassword())).build();
        try {
            jwtVerifier.verify(token);
        } catch (JWTVerificationException e) {
            throw new BusinessException("登录令牌过期,请重新登录",ResultCodeEnum.LOGIN_ERROR);
        }
        //如果令牌有效,把登录信息存到session中,这样如果需要用到登录信息不用总到数据库查询。
        SessionUtil.setCurrentUser(collector);
        return true;
        //该方法没有做异常处理,因为在SessionUtil中已经处理了登录状态的异常。只要getCurrentUser()返回有值肯定就是成功的。
    }
既然这里可以用PassToken来跳过控制,那么是不是可以在拦截器里面用同样的方法来控制哪些接口给哪些角色访问呢?
答案一定是可以的。
所以在other这个后端模块中,我们要做以下这些处理。
首先,为接收人员、上传人员、转运人员增加权限注解。
转运人员的注解:
package com.hawkon.other.common;

import java.lang.annotation.ElementType;
import java.lang.annotation.Retention;
import java.lang.annotation.RetentionPolicy;
import java.lang.annotation.Target;

/**
 * 转运人员Token验证的注解
 */
@Target({ElementType.METHOD, ElementType.TYPE})
@Retention(RetentionPolicy.RUNTIME)
public @interface TransferApi {
    boolean required() default true;
}
接收人员的注解:
package com.hawkon.other.common;

import java.lang.annotation.ElementType;
import java.lang.annotation.Retention;
import java.lang.annotation.RetentionPolicy;
import java.lang.annotation.Target;

/**
 * 接收人员的Token验证的注解
 */
@Target({ElementType.METHOD, ElementType.TYPE})
@Retention(RetentionPolicy.RUNTIME)
public @interface RecieverAPI {
    boolean required() default true;
}
上传人员的注解:
package com.hawkon.other.common;

import java.lang.annotation.ElementType;
import java.lang.annotation.Retention;
import java.lang.annotation.RetentionPolicy;
import java.lang.annotation.Target;

/**
 * 上传人员Token验证的注解
 */
@Target({ElementType.METHOD, ElementType.TYPE})
@Retention(RetentionPolicy.RUNTIME)
public @interface UploaderApi {
    boolean required() default true;
}
这几个注解怎么用呢?先来看一下拦截器里面的调整,在下面的代码里,我分别去判断接口方法是否包含三个不同人员的注解,并且判断
    /***
     * 在请求处理之前进行调用(Controller方法调用之前)
     */
    @Override
    public boolean preHandle(HttpServletRequest request, HttpServletResponse response, Object handler) throws Exception {

        if(!(handler instanceof HandlerMethod))
            return true;

        HandlerMethod handlerMethod = (HandlerMethod) handler;
        Method method = handlerMethod.getMethod();
        //检查是否有passtoken注释,有则跳过认证
        if (method.isAnnotationPresent(PassToken.class)) {
            PassToken passToken = method.getAnnotation(PassToken.class);
            if (passToken.required()) {
                return true;
            }
        }
        String token = Global.request.getHeader("token");// 从 http 请求头中取出 token
        //根据Method上的注解决定方法对哪个角色生效。
        //如果一个方法多个角色都需要用到,可以给方法加多个注解
        boolean pass = false;
        if(method.isAnnotationPresent(TransferApi.class)){
            pass =  checkTransfer(token);
            //要想实现一个接口允许多个角色可以调用,就需要依次去判断每一种角色,当一种角色判断失败的时候不能够直接返回,而是要继续判断另外一个。
            if(pass) return pass;
        }
        if(method.isAnnotationPresent(RecieverAPI.class)){
            pass = checkReciever(token);
            if(pass) return pass;
        }
        if(method.isAnnotationPresent(UploaderApi.class)){
            pass =  checkUploader(token);
            if(pass) return pass;
        }
        //如果以上三种角色都不是,直接拒绝
        return false;
    }
    //验证上传人员token
    private boolean checkUploader(String token) throws BusinessException {
        Uploader uploader = uploaderService.getUploaderByToken(token);
        if (uploader == null) {
            throw new BusinessException("登录状态过期", ResultCodeEnum.NOT_LOGIN);
        }
        JWTVerifier jwtVerifier = JWT.require(Algorithm.HMAC256(uploader.getPassword())).build();
        try {
            jwtVerifier.verify(token);
        } catch (JWTVerificationException e) {
            throw new BusinessException("登录令牌过期,请重新登录",ResultCodeEnum.LOGIN_ERROR);
        }
        SessionUtil.setCurrentUploader(uploader);
        return true;
    }
    //验证接收人员token
    private boolean checkReciever(String token) throws BusinessException {
        Reciever reciever = recieverService.getRecieverByToken(token);
        if (reciever == null) {
            throw new BusinessException("登录状态过期", ResultCodeEnum.NOT_LOGIN);
        }
        JWTVerifier jwtVerifier = JWT.require(Algorithm.HMAC256(reciever.getPassword())).build();
        try {
            jwtVerifier.verify(token);
        } catch (JWTVerificationException e) {
            throw new BusinessException("登录令牌过期,请重新登录",ResultCodeEnum.LOGIN_ERROR);
        }
        SessionUtil.setCurrentReciever(reciever);
        return true;
    }

    //验证转运人员token
    private boolean checkTransfer(String token) throws BusinessException {
        Transfer transfer = transferService.getTransferByToken(token);
        if (transfer == null) {
            throw new BusinessException("登录状态过期", ResultCodeEnum.NOT_LOGIN);
        }
        JWTVerifier jwtVerifier = JWT.require(Algorithm.HMAC256(transfer.getPassword())).build();
        try {
            jwtVerifier.verify(token);
        } catch (JWTVerificationException e) {
            throw new BusinessException("登录令牌过期,请重新登录",ResultCodeEnum.LOGIN_ERROR);
        }
        SessionUtil.setCurrentTransfer(transfer);
        return true;
    }
然后在Controller中,将每个接口上添加他对应的角色注解就可以了。
    @TransferApi //转运人员API
    @PostMapping("getNeedTransferBoxList")
    public ResultModel<List<BoxVO>> getNeedTransferBoxList() throws BusinessException {
        List<BoxVO> list = boxService.getNeedTransferBoxList();
        return ResultModel.success(list);
    }

    @TransferApi//转运人员API
    @PostMapping("transferBox")
    public ResultModel<Object> transferBox(@RequestBody Box model) throws BusinessException {
        boxService.transferBox(model);
        return ResultModel.success(null);
    }

    @RecieverAPI//接收人员API
    @PostMapping("recieveBox")
    public ResultModel<Object> recieveBox(@RequestBody Box model) throws BusinessException {
        boxService.recieveBox(model);
        return ResultModel.success(null);
    }

    @RecieverAPI//接收人员API
    @PostMapping("getRecievedBoxList")
    public ResultModel<List<BoxVO>> getRecievedBoxList() throws BusinessException {
        List<BoxVO> list = boxService.getRecievedBoxList();
        return ResultModel.success(list);
    }
通过上面的方法,完美的让三种同的角色在同一个项目中出现,而且相互之间是不能访问的。
接下来就可以顺利去做业务接口了。
转运人员
功能清单
- 登录
- 注册
- 忘记密码
- 修改密码
- 扫描箱码,确认转运
前四个功能和采集人员的功能相似,就不再过多阐述了。只说一下最后一个扫描箱码,确认转运功能。
转运人员在转运的过程中也是要全程记录的,由谁转运的哪个箱,什么时间转运的,送到哪个检测机构,这些都是要全程记录的。
业务要注意以下几个问题:
- 在转运的时候为了方便记录,也是要支持条码扫描,同时也要能够支持手动输入。
- 录入转运箱时要注意检测转运码状态,已转运的不能重复录入,还未封箱的不能录入。
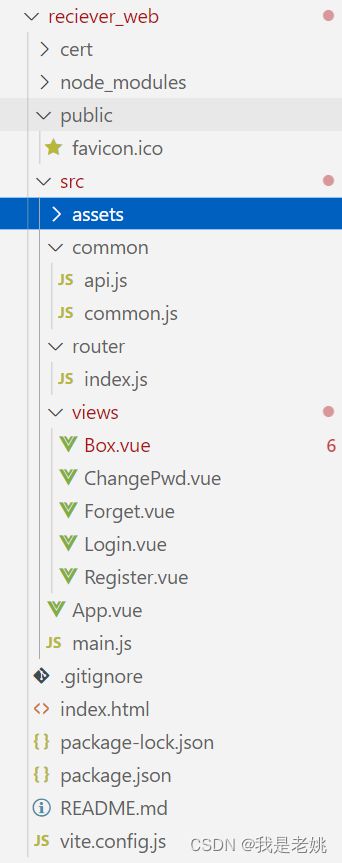
转运人员端的前端是一个单独的模块,模块的工程结构如下:
[外链图片转存失败,源站可能有防盗链机制,建议将图片保存下来直接上传(img-AzndZ7Qk-1671588636946)(E:\Hawkon\我的资料\写作\杂文\项目实战系列\核酸检测平台\项目实战:核酸检测平台(5).assets\image-20221205144907328.png)]
可以看出,登录、注册、忘记密码、修改密码这些都是常见功能,与采集人员的的功能类似,就不再重复贴出来了。下面重点看一下Box.vue页面:
{{ transfer.name }},您好。待转运{{ boxList.length }}箱
{{ item.boxCode }}
试管数:{{ item.testTubeCount }};
样品数:{{ item.peopleCount }};
采集人:{{ item.collector }}
[{{ item.openTime }}]
{{ tipMsg }}
确定转运
扫码转运
手动转运
后端接口有两个:
一个是获取已经转运的转运箱列表,但不能包含检测机构已经接收的箱码。接口地址是:/box/getNeedTransferBoxList
@RestController
@RequestMapping("/box")
public class BoxController {

    @Autowired
    IBoxService boxService;

    @TransferApi
    @PostMapping("getNeedTransferBoxList")
    public ResultModel<List<BoxVO>> getNeedTransferBoxList() throws BusinessException {
        List<BoxVO> list = boxService.getNeedTransferBoxList();
        return ResultModel.success(list);
    }
  	....
}
这个接口很简单,就是个条件查询,返回的时候要能够显示转运箱的采集人员、开箱时间、试管数量、样本数量等等,所以SQL语句是需要进行多表联接的。来看SQL语句:
上面的SQL语句中两个数量的统计用了两个子查询。这个是要注意的地方。
这个接口还一个要注意的地方是,返回结果中主要内容是Box,但还有一个字段并不是Box的内容,而是扩展出来了一些,这样的话返回的实体类怎么办呢?其实很简单,定义一个VO类,让他继承Box就可以了。当然你不嫌代码多的话,单独写一个VO类也是可以的。
package com.hawkon.other.pojo.vo;

import com.hawkon.common.pojo.Box;
import lombok.Data;

@Data
public class BoxVO extends Box {
    private String collector;
    private String transfer;
    private String pointName;
    private Integer testTubeCount;
    private Integer peopleCount;
}
另一个是提交要转运的转运箱码,地址是:/box/transferBox
@RestController
@RequestMapping("/box")
public class BoxController {

    @Autowired
    IBoxService boxService;

    @TransferApi
    @PostMapping("getNeedTransferBoxList")
    public ResultModel<List<BoxVO>> getNeedTransferBoxList() throws BusinessException {
        List<BoxVO> list = boxService.getNeedTransferBoxList();
        return ResultModel.success(list);
    }

    @TransferApi
    @PostMapping("transferBox")
    public ResultModel<Object> transferBox(@RequestBody Box model) throws BusinessException {
        boxService.transferBox(model);
        return ResultModel.success(null);
    }
  	....
}
Service层代码如下:
    @Override
    public void transferBox(Box model) throws BusinessException {
      //转运前务必做好状态判断
        if (model.getBoxCode() == null) {
            throw new BusinessException("转运箱码不能为空", ResultCodeEnum.BUSSINESS_ERROR);
        }
        Box boxDb = boxDao.getBoxByBoxCode(model.getBoxCode());
        if (boxDb == null) {
            throw new BusinessException("转运箱码无效", ResultCodeEnum.BUSSINESS_ERROR);
        }
        if(boxDb.getStatus().equals(1)){
            throw new BusinessException("转运箱码未封箱",ResultCodeEnum.BUSSINESS_ERROR);
        }
        if(boxDb.getStatus().equals(3)){
            throw new BusinessException("转运箱码已接收",ResultCodeEnum.BUSSINESS_ERROR);
        }
        if(boxDb.getStatus()>3){
            throw new BusinessException("转运箱码已完成转运",ResultCodeEnum.BUSSINESS_ERROR);
        }
        Transfer transfer = SessionUtil.getCurrentTransfer();
        boxDb.setTransferId(transfer.getTransferId());
        boxDao.transferBox(boxDb);
    }
Mapper文件:
    <update id="transferBox">
        update box
        set status=3
          , transferId=#{transferId}
          , transferTime=now()
        where boxId = #{boxId}
    update>
最终实现的效果很简单:

接收人员
接收人员模块操作的主要对象也是转动箱,所以这一端的工程结构和转运人员完全一样,界面也是一样的。但是功能上有点差别。
接收人员的操作界面:

后端代码也基本相同,只在Service层里面判断状态处稍有差别
@Override
public void recieveBox(Box model) throws BusinessException {
    if (model.getBoxCode() == null) {
        throw new BusinessException("转运箱码不能为空", ResultCodeEnum.BUSSINESS_ERROR);
    }
    Box boxDb = boxDao.getBoxByBoxCode(model.getBoxCode());
    if (boxDb == null) {
        throw new BusinessException("转运箱码无效", ResultCodeEnum.BUSSINESS_ERROR);
    }
    if(boxDb.getStatus()<=2){
        throw new BusinessException("转运箱码未转运",ResultCodeEnum.BUSSINESS_ERROR);
    }
    if(boxDb.getStatus()>=4){
        throw new BusinessException("转运箱码已接收",ResultCodeEnum.BUSSINESS_ERROR);
    }
    Reciever reciever = SessionUtil.getCurrentReciever();
    boxDb.setRecieverId(reciever.getRecieverId());
    boxDb.setTestOrganizationId(reciever.getOrganizationId());
    boxDao.recieveBox(boxDb);
}
Mapper中的SQL语句也稍有差别:
<update id="recieveBox">
    update box
    set status=4
      , recieverId=#{recieverId}
      , testOrganizationId = #{testOrganizationId}
      , recieveTime=now()
    where boxId = #{boxId}
update>
上传人员
不得不承认,这一章是这个系列里面比较无聊的一部分,转运人员和接收人员代码几乎一样,只在后端稍有差别。
就剩下上传人员的功能还有点东西可谈。先来看看上传人员端被我们脑补出了什么功能:

主要包含:打印条码、待检试管、数据上传、接收人员帐号管理几个功能。
先来看打印条码功能。因为我们的脑补的这些功能,在设计的时候还是要考虑一下实际工作中防疫人员是如何使用的。
需要打印的条码有箱码和试管码,我在做志愿者的时候观察过箱码和试管码的条码,并没有发现明显的编码的痕迹。
在设计打印功能的时候要考虑如下几个问题:
- 那我们在做的时候就假设这些条码是自动生成的,而在条码打印的时候有可能会出现一些问题,比如打印一半纸没了、打印机坏了,导致打印任务失败,这种情况下,还要允许打印任务重复打印。
- 打印的时候一次会打印很多张
- 箱码和试管码都需要打印
- 浏览器打印问题
依据以上的考虑,我们数据库中增加了打印任务表,用来存储和打印任务,并作为重新打印时,生成打印任务的依据。
表名命名为:code_apply_record,MYSQL的表名默认是不区分大小写的,所以表名在命名的时候最好是用下划线区分出单词。表结构如下:

这样每次需要打印新的条码时,输入一个要打印的数量,就会自动生成相应数据的条码,并且在code_apply_record表中存储申请的数据。如果需要重复打印,可以根据这些参数来重新打印。
这里我还进一步脑补一个功能:已经打印过的条码如果没有使用,还可以重新打印。
另外还有一个浏览器打印的问题,因为浏览器的特殊性,直接打印的话,默认会在纸上打印出来一些网页信息,比如地址、页面的TITLE等,而且各种不同的浏览器还不太一样。而实际开发的时候,网页调用打印机一直都是比较头疼的问题。
有的会自己开发打印插件,也有的会购买页面打印组件等等。以我的经验,实际使用的时候,有一个商业组件lodop是使用非常方便的,这个项目中我们就采用这种解决方案。
因为需要调用打印组件,所以上传人员这一端就必须得使用PC端了。而基于VUE的PC端组件,目前用的比较多的就是elementUI Plus了,为什么叫plus呢,因为Vue3.0对VUE做了比较大的改变,而elementUI Plus就是对应Vue3.0的组件。
这样前端模块,就要再重新整合一下,其实vant换成elementUI Plus也并不复杂。
整合elementUI Plus
因为前面的模块已经搭出了基本的框架,现在只是需要把vant换成elementUI,所以可以在其它模块的基础上进行调整就可以了。
首先,复制一下原项目的模块的代码,注意,复制的时候不用带node_modules文件夹,因为配置好之后是要重新npm install的。如下图所示,其中views里面都是业务逻辑代码,因为之前用的都是vant,所以没什么用,可以直接删除。
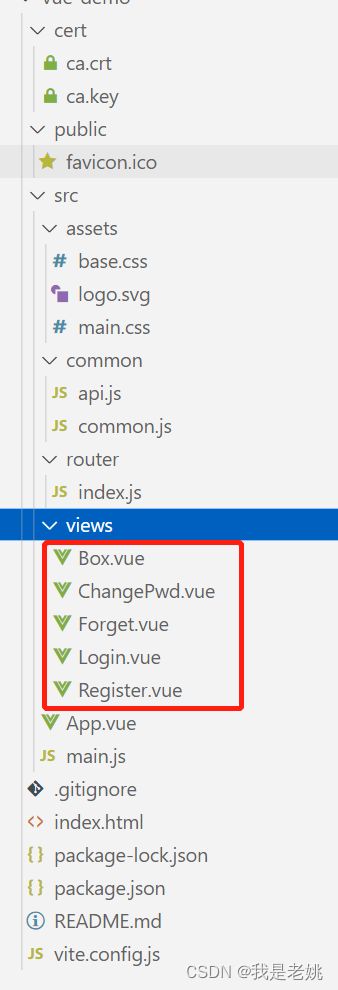
其它文件,我们先从package.json调整开始。其中"vant": "^3.6.5",这一行可以删除了,还有 "@zxing/library": "^0.19.1",其它的组件可以使用,所以不需要删除。
  "dependencies": {
    "@vitejs/plugin-basic-ssl": "^0.1.2",
    "@zxing/library": "^0.19.1",
    "axios": "^1.1.3",
    "dayjs": "^1.11.6",
    "vant": "^3.6.5",
    "vue": "^3.2.38",
    "vue-cookie": "^1.1.4",
    "vue-router": "^4.1.5"
  },
接下来可以安装elemntUI Plus,安装命令:npm install element-plus --save
安装之后package.json中的依赖会变成这样:
  "dependencies": {
    "@vitejs/plugin-basic-ssl": "^0.1.2",
    "axios": "^1.1.3",
    "dayjs": "^1.11.6",
    "element-plus": "^2.2.26",
    "vue": "^3.2.38",
    "vue-cookie": "^1.1.4",
    "vue-router": "^4.1.5"
  }
用命令安装的好处就是他会自动生成版本以来,当然你也可以直接修改package.json文件,然后在修改完成之后执行npm install统一安装,也是可以的。
按需引入
elementUI Plus是可以完整引入,也可以按需引入,差别在于,完整引入最后的的JS文件会比较大,而按需引入的话,就是用多少,打包就打多少。对于我们的小项目来说 ,按需引入是比较合适的方式。
首先你需要安装unplugin-vue-components 和 unplugin-auto-import这两款插件
npm install -D unplugin-vue-components unplugin-auto-import
然后把下列代码插入到你的vite.config.js配置文件中
// vite.config.ts
import { defineConfig } from 'vite'
import AutoImport from 'unplugin-auto-import/vite'
import Components from 'unplugin-vue-components/vite'
import { ElementPlusResolver } from 'unplugin-vue-components/resolvers'

export default defineConfig({
  // ...
  plugins: [
    // ...
    AutoImport({
      resolvers: [ElementPlusResolver()],
    }),
    Components({
      resolvers: [ElementPlusResolver()],
    }),
  ],
})
开箱即用
我们还可以添加开箱即用功能,这样就可以直接写elementUI Plus的标签。
在vite.config.js中添加,注意unplugin-element-plus/vite是需要安装的:npm install unplugin-element-plus/vite
// vite.config.ts
import { defineConfig } from 'vite'
import ElementPlus from 'unplugin-element-plus/vite'

export default defineConfig({
  // ...
  plugins: [ElementPlus()],
})
使用开箱即用功能,是需要在 main.js中引用全局样式的:
import 'element-plus/dist/index.css'
调整Api.js
为什么要引用样式呢?因为我们的前端框架在封装axios的时候用到了提示框架,之前用的vant,现在要换成elemtnUI Plus,如果你不引用样式的话,提示框是无法正常显示的。
然后是封装axios的api.js文件,添加下面这行来引入提示框:
import { ElMessage } from 'element-plus'
然后将api.js中 Toast.fail("服务器错误");修改为ElMessage.error("服务器错误");,其它的不需要改动。
登录
登录页面和其它模块的登录基本差不多。因为使用了开箱即用功能,所以写标签的时候不需要去引用组件,还是非常方便的。
核酸检测平台-数据上传人员登录
登录
忘记密码
//App.vue
app.vue文件其实是相当于vue的路由容器,也不需要动。
后台框架页面
PC端的后台和手机端页面有一点不同的是基本上都会有一个框架页面,包含系统的LOGO、顶层菜单、登录帐户操作之类的。
我们的框架页面做的比较简单,仅供参考。
Home.vue
核酸检测平台-检测机构数据上传
打印条码
待检试管
数据上传
接收人员管理
{{user.name}}
修改密码
退出
页面中通过为菜单绑定事件,实现统一的路由跳转
const handleSelect = (key: string, keyPath: string[]) => {
	router.push(key);
}
打印条码
前端说了,打印可以使用lodop,在vue中使用lodop也很简单,首先要引用lodop的js文件。
引用方式有两种,比较简单的一种是在前端项目的index.html上直接引用。
如下代码中第8行即是。然后在业务代码中需要调用的时候就按照lodop官方文档中使用即可。我们项目中用的就是这个方法。
DOCTYPE html>
<html lang="en">
  <head>
    <meta charset="UTF-8">
    <link rel="icon" href="/favicon.ico">
    <meta name="viewport" content="width=device-width, initial-scale=1.0">
    <title>核酸检测平台数据上传人员title>
    <script src="LodopFuncs.js">script>
  head>
  <body>
    <div id="app">div>
    <script type="module" src="/src/main.js">script>
  body>
html>
另外一种是改造lodop文件为export导出模块类库。因为lodop官方是用传统的javascript编码,是不支持es6的export导出模块的,所以下载了lodop的官方文件后,需要在lodopFunc.js最后加上下面的代码:
export { getLodop }; //导出getLodop
然后把修改过后的lodopFuncs.js文件复制到你项目的文件夹中。在vue中调用打印组件的时候就可以像调用其它的js类库一样:
打印功能在开发的时候可以用模拟打印机,将要打印的东西转成PDF来测试,这样可以极大的减少开发调试难度。
打印条码前端代码
打印箱码
箱码
试管码
生成并打印
{{ scope.row.codeType == 1 ? "箱码" : "试管码" }}
重新打印
打印{{ (printModel.codeType == 1 ? "箱码" : "试管码") }}
{{ code }}
后端代码
package com.hawkon.other.controller;

import com.hawkon.common.exception.BusinessException;
import com.hawkon.common.pojo.BasePagedSearchModel;
import com.hawkon.common.pojo.ResultModel;
import com.hawkon.common.pojo.vo.PagedResult;
import com.hawkon.other.common.UploaderApi;
import com.hawkon.other.pojo.CodeApplyRecord;
import com.hawkon.other.pojo.bo.GetCodeApplyRecordsModel;
import com.hawkon.other.pojo.bo.PrintCodeMobel;
import com.hawkon.other.pojo.vo.CodeApplyRecordVO;
import com.hawkon.other.service.ICodeService;
import org.springframework.beans.factory.annotation.Autowired;
import org.springframework.web.bind.annotation.PostMapping;
import org.springframework.web.bind.annotation.RequestBody;
import org.springframework.web.bind.annotation.RequestMapping;
import org.springframework.web.bind.annotation.RestController;

@RestController
@RequestMapping("/code")
public class CodeController {

    @Autowired
    ICodeService codeService;
    @UploaderApi
    @PostMapping("printCode")
    public ResultModel<CodeApplyRecord> printCode(@RequestBody PrintCodeMobel model) throws BusinessException {
        CodeApplyRecord result = codeService.printCode(model);
        return ResultModel.success(result);
    }

    @UploaderApi
    @PostMapping("getCodeApplyRecords")
    public ResultModel<PagedResult<CodeApplyRecord>> getCodeApplyRecords(@RequestBody GetCodeApplyRecordsModel model) throws BusinessException {
        PagedResult<CodeApplyRecord> result =  codeService.getCodeApplyRecords(model);
        return ResultModel.success(result);
    }
    @UploaderApi
    @PostMapping("getCodeByCodeApplyRecordId")
    public ResultModel<CodeApplyRecord> getCodeByCodeApplyRecordId(@RequestBody CodeApplyRecord model) throws BusinessException {
        CodeApplyRecordVO result =  codeService.getCodeByCodeApplyRecordId(model.getRecordId());
        return ResultModel.success(result);
    }
}
package com.hawkon.other.service.impl;

import com.hawkon.common.enums.ResultCodeEnum;
import com.hawkon.common.exception.BusinessException;
import com.hawkon.common.pojo.Box;
import com.hawkon.common.pojo.TestTube;
import com.hawkon.common.pojo.Uploader;
import com.hawkon.common.pojo.vo.PagedResult;
import com.hawkon.other.dao.BoxDao;
import com.hawkon.other.dao.CodeApplyRecordDao;
import com.hawkon.other.dao.TestTubeDao;
import com.hawkon.other.pojo.CodeApplyRecord;
import com.hawkon.other.pojo.bo.GetCodeApplyRecordsModel;
import com.hawkon.other.pojo.bo.PrintCodeMobel;
import com.hawkon.other.pojo.vo.CodeApplyRecordVO;
import com.hawkon.other.service.ICodeService;
import com.hawkon.other.utils.SessionUtil;
import org.springframework.beans.factory.annotation.Autowired;
import org.springframework.stereotype.Service;
import org.springframework.transaction.annotation.Transactional;

import java.util.ArrayList;
import java.util.List;
import java.util.stream.Collectors;

@Service
public class CodeServiceImpl implements ICodeService {
    @Autowired
    BoxDao boxDao;

    @Autowired
    TestTubeDao testTubeDao;
    @Autowired
    CodeApplyRecordDao codeApplyRecordDao;

    @Transactional
    @Override
    public CodeApplyRecordVO printCode(PrintCodeMobel model) throws BusinessException {
        if (model.getCodeCount() <= 0) {
            throw new BusinessException("条码数量必须大于0", ResultCodeEnum.BUSSINESS_ERROR);
        }
        Uploader uploader = SessionUtil.getCurrentUploader();
        CodeApplyRecordVO applyRecord = new CodeApplyRecordVO();
        applyRecord.setUploaderId(uploader.getUploaderId());
        applyRecord.setOrganizationId(uploader.getOrganizationId());
        applyRecord.setCodeType(model.getCodeType());
        if (model.getCodeType().equals(1)) {
            //箱码走这里
            Long maxBoxCode = boxDao.getMaxBoxCode();
            Long beginCode = maxBoxCode + 1;
            applyRecord.setBeginCode(beginCode);
            applyRecord.setEndCode(beginCode + model.getCodeCount() - 1);
            //生成箱码对象。
            List<Box> boxList = new ArrayList<>();
            for (long i = beginCode; i <= applyRecord.getEndCode(); i++) {
                Box box = new Box();
                box.setBoxCode(i);
                boxList.add(box);
            }
            boxDao.insertBoxList(boxList);
            applyRecord.setCodeList(boxList.stream().map(item -> item.getBoxCode()).collect(Collectors.toList()));
        } else if (model.getCodeType().equals(2)) {
            //试管码走这里
            Long maxTestTubeCode = testTubeDao.getMaxTestTubeCode();
            Long beginCode = maxTestTubeCode + 1;
            applyRecord.setBeginCode(beginCode);
            applyRecord.setEndCode(beginCode + model.getCodeCount() - 1);
            //生成试管码对象。
            List<TestTube> testTubeList = new ArrayList<>();
            for (long i = beginCode; i <= applyRecord.getEndCode(); i++) {
                TestTube testTube = new TestTube();
                testTube.setTestTubeCode(i);
                testTubeList.add(testTube);
            }
            testTubeDao.insertTestTubeList(testTubeList);
            applyRecord.setCodeList(testTubeList.stream().map(item -> item.getTestTubeCode()).collect(Collectors.toList()));
        }
        codeApplyRecordDao.insertRecord(applyRecord);
        return applyRecord;
    }

    @Override
    public PagedResult<CodeApplyRecord> getCodeApplyRecords(GetCodeApplyRecordsModel model) throws BusinessException {
        Uploader uploader = SessionUtil.getCurrentUploader();
        model.setOrganizationId(uploader.getOrganizationId());
        List<CodeApplyRecord> list = codeApplyRecordDao.getCodeApplyRecords(model);
        int count = codeApplyRecordDao.getCodeApplyRecordsCount(model);
        PagedResult<CodeApplyRecord> result = new PagedResult<>(model.getPage(), count, model.getSize(), list);
        return result;
    }

    @Override
    public CodeApplyRecordVO getCodeByCodeApplyRecordId(Integer recordId) {
        CodeApplyRecordVO record = codeApplyRecordDao.getCodeApplyRecordById(recordId);
        if (record.getCodeType().equals(1)) {
            List<Box> list = boxDao.getBoxByRecord(record);
            record.setCodeList(list.stream().map(item -> item.getBoxCode()).collect(Collectors.toList()));
        } else {
            List<TestTube> list = testTubeDao.getTestTubeListByRecord(record);
            record.setCodeList(list.stream().map((item -> item.getTestTubeCode())).collect(Collectors.toList()));
        }
        return record;
    }
}
DOCTYPE mapper PUBLIC "-//mybatis.org//DTD Mapper 3.0//EN" "http://mybatis.org/dtd/mybatis-3-mapper.dtd">

<mapper namespace="com.hawkon.other.dao.CodeApplyRecordDao">
    <select id="getCodeApplyRecords" resultType="com.hawkon.other.pojo.vo.CodeApplyRecordVO">
        select r.*,u.name  as uploader,o.organizationName
        ,(select count(0) from box where box.boxCode between r.beginCode and r.endCode and status =0 )
             +(select count(0) from testTube t where t.testTubeCode between r.beginCode and r.endCode and status =0 )
        as unUsedCount
        from code_apply_record r
        left join uploader u on r.uploaderId = u.uploaderId
        left  join organization o on o.organizationId = r.organizationId
        where r.organizationId = #{organizationId}
        limit #{rowBegin},#{size}
    select>
    <select id="getCodeApplyRecordsCount" resultType="int">
        select Count(0)
        from code_apply_record r
        where r.organizationId = #{organizationId}
    select>
    <select id="getCodeApplyRecordById" resultType="com.hawkon.other.pojo.vo.CodeApplyRecordVO">
        select *
        from code_apply_record r
        where r.recordId = #{recordId}
    select>
    <insert id="insertRecord">
        INSERT INTO code_apply_record
            ( codeType, organizationId, uploaderId, applyTime, beginCode, endCode)
        VALUES
           ( #{codeType}, #{organizationId}, #{uploaderId}, now(), #{beginCode}, #{endCode});
    insert>
mapper>
打印演示
待检试管(导出Excel文件)
数据上传人员承担着上传检测结果的职责,实际在检测中,大多数情况下可能一个城市有阳的情况聊聊无几,但是一旦疫情爆发,阳的可能就挺多的了。为了方便上传人员录入检测结果,我们可以把需要上传检测数据的试管码全部导出。
人工编辑修改检测结果之后,再上传完成结果上传。
待检试管页面要实现的就是导出Excel上传模板,导出的模板文件中是要带上需要上传结果的试管码的,所以这个excel文件不是一个空模板,是需要把数据库中的数据填充到excel中的。
说到excel读写就不得不提poi组件了,用起来已经挺方便,不过经过阿里巴巴的改造之后摇身一变成了EasyExcel,用起来更是爽,我们就用EasyExcel来实现。
Rest风格的API怎么实现下载文件?
在实现这个功能的时候要注意一个问题,因为我们要注意一下,导出excel是要下载文件的,而我们的api接口全是rest风格的,要知道下载文件的时候用json格式肯定是不行的,他的http头信息中的content-type不能是application/json,而是application/octet-stream。这怎么办呢?
这种情况下我们需要一个特殊处理,可以在axios请求得到影响结果的时候,把得到的二进制数据给到一个a标签的href属性上,然后用js模拟a标签的点击效果,从而弹出保存文件的对话框,完成文件的下载。
因为我们将axios封装到了api.js中,所以这个功能得从api.js来下手。
为api.js添加一个downExcel方法,来专门实现excel文件的下载。
api.downExcel = (url, method, data) => {
	api({
		method: method,// 设置请求方式
		url: url,// 设置请求地址
		data: data,
		responseType: 'blob'// 设置相应数据的类型,设置后后台返回的数据会被强制转为blob类型;如果后台返回代表失败的data,前端也无法得知,依然会下载得到名为undefined的文件。
	}).then(function (res) {
		// 得到请求到的数据后,对数据进行处理
		let blob = new Blob([res.data], { type: 'application/vnd.ms-excel;charset=utf-8' });// 创建一个类文件对象:Blob对象表示一个不可变的、原始数据的类文件对象
		let fileName = decodeURI(res.headers['content-disposition']);// 设置文件名称,decodeURI:可以对后端使用encodeURI() 函数编码过的 URI 进行解码。encodeURI() 是后端为了解决中文乱码问题
		if (fileName) {// 根据后端返回的解析出文件名
			fileName = fileName.split(";")[2].split("=")[1].replaceAll("\"","");
		}
		const elink = document.createElement('a')// 创建一个a标签
		elink.download = fileName;// 设置a标签的下载属性
		elink.style.display = 'none';// 将a标签设置为隐藏
		elink.href = URL.createObjectURL(blob);// 把之前处理好的地址赋给a标签的href
		document.body.appendChild(elink);// 将a标签添加到body中
		elink.click();// 执行a标签的点击方法
		URL.revokeObjectURL(elink.href) // 下载完成释放URL 对象
		document.body.removeChild(elink)// 移除a标签
	})
}
这样调用后台导出文件的接口就像调用普通的rest接口一样简单了。
const exportToExcel = () => {
	searchModel.beginTime = searchForm.timeRange[0];
	searchModel.endTime = searchForm.timeRange[1];
	api.downExcel("/testTube/exportTestingTestTube", "post", searchModel);
}
前端完整代码(TestTubeList.vue):
查询
导出Excel数据上传模板
然后来看一下后端是怎么使用EasyExcel的。
EasyExcel
EasyExcel的官网文档是:https://easyexcel.opensource.alibaba.com/
它和平常的Excel导出工具的用法有很大的区别。以往的导出工具都是需要一行代码一行代码的修改单元格的内容。而EasyExcel可以通过定义一个实体类,来自动生成Excel文件。
实体类如下:
package com.hawkon.other.pojo.vo;

import com.alibaba.excel.annotation.ExcelProperty;
import com.alibaba.excel.annotation.write.style.ColumnWidth;
import lombok.Data;

@Data
public class TestTubeExcelVO  {

    @ColumnWidth(10) //定义列宽
    @ExcelProperty(value = "箱码",converter = CodeConverter.class)
    private String boxCode;

    @ColumnWidth(20)
    @ExcelProperty(value="试管码",converter = CodeConverter.class)
    private String testTubeCode;

    @ColumnWidth(30)
    @ExcelProperty("检测结果\n(1为阳,0为阴)")
    private String testResult;

}
@ExcelProperty(value = "箱码",converter = CodeConverter.class)是用来定义列名,其中converter是指定了自定义转换类,用来把数据库中的类型转换为Excel单元格的数据,可能是数据中使用了BigInt类型字段,EasyExcel无法自动转换,在调试的时候报转换错误,查资料后找到了这个方法,转换类代码如下:
package com.hawkon.other.pojo.vo;


import com.alibaba.excel.converters.Converter;
import com.alibaba.excel.converters.ReadConverterContext;
import com.alibaba.excel.converters.WriteConverterContext;
import com.alibaba.excel.metadata.data.WriteCellData;

public class CodeConverter implements Converter<String> {

    /**
     * 这里是写的时候会调用 不用管
     *
     * @return
     */
    @Override
    public WriteCellData<?> convertToExcelData(WriteConverterContext<String> context) {
        return new WriteCellData<>(context.getValue().toString());
    }

    @Override
    public String convertToJavaData(ReadConverterContext<?> context) throws Exception {
        return context.getReadCellData().getData().toString();
//        return Converter.super.convertToJavaData(context);
    }
}
查看转换类继承的父类Converter,你可以看到下面的代码。
//
// Source code recreated from a .class file by IntelliJ IDEA
// (powered by FernFlower decompiler)
//

package com.alibaba.excel.converters;

import com.alibaba.excel.enums.CellDataTypeEnum;
import com.alibaba.excel.metadata.GlobalConfiguration;
import com.alibaba.excel.metadata.data.ReadCellData;
import com.alibaba.excel.metadata.data.WriteCellData;
import com.alibaba.excel.metadata.property.ExcelContentProperty;

public interface Converter<T> {
    default Class<?> supportJavaTypeKey() {
        throw new UnsupportedOperationException("The current operation is not supported by the current converter.");
    }

    default CellDataTypeEnum supportExcelTypeKey() {
        throw new UnsupportedOperationException("The current operation is not supported by the current converter.");
    }

    default T convertToJavaData(ReadCellData<?> cellData, ExcelContentProperty contentProperty, GlobalConfiguration globalConfiguration) throws Exception {
        throw new UnsupportedOperationException("The current operation is not supported by the current converter.");
    }

    default T convertToJavaData(ReadConverterContext<?> context) throws Exception {
        return this.convertToJavaData(context.getReadCellData(), context.getContentProperty(), context.getAnalysisContext().currentReadHolder().globalConfiguration());
    }

    default WriteCellData<?> convertToExcelData(T value, ExcelContentProperty contentProperty, GlobalConfiguration globalConfiguration) throws Exception {
        throw new UnsupportedOperationException("The current operation is not supported by the current converter.");
    }

    default WriteCellData<?> convertToExcelData(WriteConverterContext<T> context) throws Exception {
        return this.convertToExcelData(context.getValue(), context.getContentProperty(), context.getWriteContext().currentWriteHolder().globalConfiguration());
    }
}
接口定义了一系列的方法,其中要处理来回转换的 方法只需要写两个即可:
default WriteCellData convertToExcelData(WriteConverterContext
default T convertToJavaData(ReadConverterContext context)
接口给的默认实现都是报错,哪个方法摄错,把那个方法实现就OK了。至于原理,这里不深究,有机会的话另开文介绍。
最后Controller的代码
package com.hawkon.other.controller;
//import ....
@RestController
@RequestMapping("/testTube")
public class TestTubeController {

    @Autowired
    ITestTubeService testTubeService;

    @UploaderApi
    @PostMapping("searchTestingTestTube")
    public ResultModel<PagedResult<TestTubeVO>> searchTestingTestTube(@RequestBody SearchTestTubeModel model) throws BusinessException {
        PagedResult<TestTubeVO> pagedData = testTubeService.searchTestingTestTube(model);
        return ResultModel.success(pagedData);
    }
    @UploaderApi
    @PostMapping("uploadTestResult")
    public ResultModel<Object> uploadTestResult(MultipartFile file) throws IOException {
        final List<ExcelDataRow> excelDataRows = testTubeService.saveTestResultFromFile(file);
        return ResultModel.success(excelDataRows);
    }

    @SneakyThrows
    @UploaderApi
    @PostMapping("exportTestingTestTube")
    public ResponseEntity<byte[]> exportTestingTestTube(@RequestBody SearchTestTubeModel model) throws Exception {
      //导出文件与分页查询调用的Service接口一样,但要注意把页面大小设为最大,这样省得再写一套SQL了。
        model.setPage(1);
        model.setSize(Integer.MAX_VALUE);
        Uploader uploader = SessionUtil.getCurrentUploader();
        model.setOrganizationId(uploader.getOrganizationId());
        PagedResult<TestTubeExcelVO> pagedData = testTubeService.exportTestingTestTube(model);
        List<TestTubeExcelVO> list = pagedData.getList();
        String tempDirPath = ResourceUtils.getURL("classpath:").getPath() + "temp";
        File tempDir = new File(tempDirPath);
        if (!tempDir.exists()) {
            tempDir.mkdir();
        }
        String fileName = tempDirPath + "/检测结果导入-" + uploader.getOrganizationId() + "-" + System.currentTimeMillis() + ".xlsx";

     	//定义表头格式
        WriteCellStyle headWriteCellStyle = new WriteCellStyle();
     headWriteCellStyle.setFillForegroundColor(IndexedColors.GREY_25_PERCENT.getIndex());
        headWriteCellStyle.setBorderBottom(BorderStyle.THIN);
        headWriteCellStyle.setBorderLeft(BorderStyle.THIN);
        headWriteCellStyle.setBorderRight(BorderStyle.THIN);
        headWriteCellStyle.setBorderTop(BorderStyle.THIN);
        // 定义单元格样式
        WriteCellStyle contentWriteCellStyle = new WriteCellStyle();
        // 这里需要指定 FillPatternType 为FillPatternType.SOLID_FOREGROUND 不然无法显示背景颜色.头默认了 FillPatternType所以可以不指定
        contentWriteCellStyle.setBorderLeft(BorderStyle.THIN);
        contentWriteCellStyle.setBorderTop(BorderStyle.THIN);
        contentWriteCellStyle.setBorderRight(BorderStyle.THIN);
        contentWriteCellStyle.setBorderBottom(BorderStyle.THIN);
        // 这个策略是 头是头的样式 内容是内容的样式 其他的策略可以自己实现
        HorizontalCellStyleStrategy horizontalCellStyleStrategy =
                new HorizontalCellStyleStrategy(headWriteCellStyle, contentWriteCellStyle);

        try(ExcelWriter excelWriter = EasyExcel.write(fileName, TestTubeExcelVO.class)
                .registerWriteHandler(horizontalCellStyleStrategy).build()) {
            WriteSheet writeSheet = EasyExcel.writerSheet("检测样本").build();
            //一次写5000条数据,按照官方文档超过5000条数据建议多次写入。
            for (int i = 0; i < list.size(); i += 5000) {
                // 分页去数据库查询数据 这里可以去数据库查询每一页的数据
                int end = Math.min(list.size(), i + 5000);
                List<TestTubeExcelVO> data = list.subList(i, end);
                excelWriter.write(data, writeSheet);
            }
        }

        File reportFile = new File(fileName);
        ResponseEntity<byte[]> responseEntity = ResponseEntityUtils.getResponseEntity(reportFile);
        return responseEntity;
    }
}
Service层就是查询数据就不再贴代码了,导出Excel文件的代码看起来很多,其实按官方文档只是导出数据的话代码只需要下面这几行:
        try(ExcelWriter excelWriter = EasyExcel.write(fileName, TestTubeExcelVO.class)
                .build()) {
            WriteSheet writeSheet = EasyExcel.writerSheet("检测样本").build();
            //一次写5000条数据,按照官方文档超过5000条数据建议多次写入。
            for (int i = 0; i < list.size(); i += 5000) {
                // 分页去数据库查询数据 这里可以去数据库查询每一页的数据
                int end = Math.min(list.size(), i + 5000);
                List<TestTubeExcelVO> data = list.subList(i, end);
                excelWriter.write(data, writeSheet);
            }
        }
怎么样,看起来是不是很简洁,不像以前导Excel,一个单元格一个单元格的赋值,真的是很崩溃。
之所以还有其它的代码是因为默认情况下Excel导出的格式实现是有点导。数据内容部分默认还没有边框。加的格式部分其实就是改了一下表头和颜色和内容部分的表格线。
值得一提的是EasyExcel官方文档中说写一次最好不要超过5000条数据,我猜如果你直接把几万条数据一次写入应该也能成功,但是性能上可能会出点问题,所以我们就按官方的指导一次只写5000条吧。
最后把文件输出到流的代码是这样的:
        File reportFile = new File(fileName);
        ResponseEntity<byte[]> responseEntity = ResponseEntityUtils.getResponseEntity(reportFile);
        return responseEntity;
ResponseEntityUtils.getResponseEntity(reportFile);这个是个工具类,专门用来处理下载文件的时候返回二进制数据的。
package com.hawkon.other.utils;

import org.springframework.http.HttpHeaders;
import org.springframework.http.HttpStatus;
import org.springframework.http.MediaType;
import org.springframework.http.ResponseEntity;

import java.io.*;
import java.net.URLEncoder;
import java.util.Base64;

/**
 * @author :hawkon
 */
public class ResponseEntityUtils {

    public static ResponseEntity<byte[]> getResponseEntity(File file) {
        String fileName = file.getName();
        return getResponseEntity(file, fileName);
    }

    public static ResponseEntity<byte[]> getResponseEntity(File file, String fileName) {

        BufferedInputStream bis = null;
        ByteArrayOutputStream os = null;
        HttpHeaders httpHeaders = new HttpHeaders();
        ResponseEntity<byte[]> filebyte = null;

        try {
            bis = new BufferedInputStream(new FileInputStream(file));
            os = new ByteArrayOutputStream();
            int len = 0;
            byte[] bytes = new byte[1024];
            while ((len = bis.read(bytes)) != -1) {
                os.write(bytes, 0, len);
            }
            fileName = URLEncoder.encode(fileName, "utf-8");
            httpHeaders.setContentDispositionFormData("attachment", fileName);
            httpHeaders.setContentType(MediaType.APPLICATION_OCTET_STREAM);
            filebyte = new ResponseEntity<byte[]>(os.toByteArray(), httpHeaders, HttpStatus.OK);
        } catch (FileNotFoundException e) {
            e.printStackTrace();
        } catch (IOException e) {
            e.printStackTrace();
        } finally {
            try {
                if (os != null)
                    os.close();
            } catch (IOException e) {
                e.printStackTrace();
            }
            try {
                if (bis != null)
                    bis.close();
            } catch (IOException e) {
                e.printStackTrace();
            }
        }
        return filebyte;
    }

    public static ResponseEntity<byte[]> getFileNotExist(File notFoundFile) {

        BufferedInputStream bis = null;
        ByteArrayOutputStream os = null;
        HttpHeaders httpHeaders = new HttpHeaders();
        ResponseEntity<byte[]> filebyte = null;

        try {
            bis = new BufferedInputStream(new FileInputStream(notFoundFile));
            os = new ByteArrayOutputStream();
            int len = 0;
            byte[] bytes = new byte[1024];
            while ((len = bis.read(bytes)) != -1) {
                os.write(bytes, 0, len);
            }
            httpHeaders.setContentType(MediaType.TEXT_HTML);
            filebyte = new ResponseEntity<byte[]>(os.toByteArray(), httpHeaders, HttpStatus.NOT_FOUND);
        } catch (FileNotFoundException e) {
            e.printStackTrace();
        } catch (IOException e) {
            e.printStackTrace();
        } finally {
            try {
                if (os != null)
                    os.close();
            } catch (IOException e) {
                e.printStackTrace();
            }
            try {
                if (bis != null)
                    bis.close();
            } catch (IOException e) {
                e.printStackTrace();
            }
        }
        return filebyte;
    }

}
最终导出的Excel文件效果是这样的:

数据上传
下载后的文件,把检测结果手工填上之后就可以上传了。上传的前端代码不再贴,直接来看后端怎么处理。
EasyExcel的读取和写方法类似,读取的时候因为还想给他返回上传的结果,所以实体类和导出的时候还是有点差别的:
package com.hawkon.other.pojo.bo;

import lombok.EqualsAndHashCode;
import lombok.Getter;
import lombok.Setter;

@Getter
@Setter
@EqualsAndHashCode
public class ExcelDataRow {
    private String boxCode;
    private String testTubeCode;
    private String testResult;
    private String importStatus;
    /**
     * 表示数据是否已经检测完成
     */
    private Boolean tested;
}
读取的业务逻辑代码:
@Override
public List<ExcelDataRow> saveTestResultFromFile(MultipartFile file) throws IOException {
    List<ExcelDataRow> result = new ArrayList<>();
    EasyExcel.read(file.getInputStream(), ExcelDataRow.class, new PageReadListener<ExcelDataRow>(dataList -> {
        result.addAll(dataList);
    })).sheet().doRead();
    List<ExcelDataRow> testedSampleList = testTubeDao.getTestedDataStatus(result);
    //将已经检测完成的数据tested设置为true
    for (ExcelDataRow row : result) {
        if (testedSampleList.stream().filter(t -> t.getTestTubeCode().equals(row.getTestTubeCode())).count() > 0) {
            row.setTested(true);
            row.setImportStatus("已检测,导入失败");
        }
        else{
            row.setTested(false);
        }
    }
    //过滤已经tested是true的数据
    List<ExcelDataRow> importList = result.stream()
            .filter(item -> !item.getTested())
            .collect(Collectors.toList());
    testTubeDao.saveTestResult(importList);
    return result;
}
其中把Excel文件读取到Excel的代码就三行,是不是非常nice。
List<ExcelDataRow> result = new ArrayList<>();
EasyExcel.read(file.getInputStream(), ExcelDataRow.class, new PageReadListener<ExcelDataRow>(dataList -> {
    result.addAll(dataList);
})).sheet().doRead();
运营人员
一个平台一般都会有一个运营人员的端口或功能,就是平常我们所说的超级管理员。
很多时候大家在写程序的时候会把超级管理员设置为最全的权限,对于这个平台超级管理员其实权限是非常的少,或者说它需要的功能是非常的少,只需要能够设置一下采集点、检测机构,管理一下检测机构的帐号,再有就是可能需要一个数据大屏,其它也没什么功能了。
数据大屏是前些年比较火的一个东西,很多是用数据可视化工具来做的,比如国外的Tableau,再比如国内的帆软。这些数据可视化工具,费用还是蛮高的,我有一个朋友就在专门做Tableau的公司,拿下一个客户,光做些报表,一个客户一年贡献几十万,甚至上百万。那些都是比较大一些的客户,用户量很大,如果你的项目数据量比较小,是不是需要用这些数据可视化工具的,自己用Echart就可以完成。后台数据自己写SQL就好了。
如果查询性能比较慢,自己根据业务逻辑的情况做个数据快照、缓存什么的,情况就能很好的改善。
代码嘛,大部分和前面的功能很类似,这些就不再贴出来了。
结束
总体来说这一章用到的东西都不难,实际工作中80%的工具都是CRUD,只有少量的活是其它的东西,但就是20%的工作却是耗费你80%的脑细胞,虽然咱们用的都是第三方组件,但是要把这些东西糅合起来,也不能够只会板砖。而且我们在找工作的时候,决定你价值的一定不是80%的CRUD,而是20%的特殊技术场景的解决能力和解决思路。
项目进行到这里,板砖的工作都已经完成了,有跟着一起做的同学们如果有问题可以关注我的公众号(姚Sir面试间)回复核酸检测,得到与我交流这个项目的方式。
本系列其它文章:
第一章 逆向工程
第二章 大卸八块
第三章 利其器
第四章 冲锋陷阵