- 不神话大模型,不做技术乌托邦,用"传统IT+AI积木"实现企业智能转型
人工智能
一、开篇:AI革命的务实辩证法在技术狂热与落地鸿沟并存的AI时代,灵燕智能体开发平台提出"三轮驱动法则":•不颠覆的智慧:MySQL、知识图谱库、MQ等传统中间件构成数字地基•不空想的创新:大模型仅承担"认知苦力",在人类设计的思考链中定向发力•不取巧的工程:通过D2R映射、低代码工具、元数据治理实现可落地的智能装配二、核心价值:智能开发的工业流水线技术要素原子化拆解将复杂需求分解为可执行的"技术
- Linux脚本实践1
一点多余.
linux运维服务器脚本
前言日常在Liunx中用到多个版本的java修改很麻烦,一个脚本搞定。1.准备两个jdk(如下图所示)2.准备脚本文件viswitch_jdk.sh#!/bin/bash#提示用户输入JDK路径read-p"请输入JDK的绝对路径(例如/usr/local/jdk/jdk-11.0.21):"jdk_path#检查输入的路径是否存在if[!-d"$jdk_path"];thenecho"错误:路径
- Docker之安装与配置
雨五夜
Dockerdocker容器运维
Docker之安装与配置一、Docker环境配置1.基本配置2.镜像加速3.网络配置4.数据持久化5.优化建议6.常见问题与解决方案7.补充工具二、Docker配置本地仓库指南1.拉取Registry镜像2.启动本地仓库3.配置Docker客户端Linux/macOSWindows4.推送镜像到本地仓库标记镜像推送镜像5.推送镜像到本地仓库6.管理本地仓库7.优化与安全性8.常见问题一、Docke
- Linux中的 mutex [二] —— 乐观自旋机制
jianchi88
内核同步Linux稳定性android服务器linuxubuntu
本文基于5.4.86版本内核mutex可视作是spinlock的可睡眠版本,同样是线程无法继续向前执行,但spinlock是"spin",导致该CPU上无法发生线程切换,而mutex是"block"(我们通常翻译成「阻塞」),可以发生线程切换,让所在CPU上的其他线程继续执行。阻塞既可以发生在线程试图获取mutex时,也可以发生在线程持有mutex时。现在的mutex机制,要从这几方面纬度理解:o
- Linux中mutex机制
C嘎嘎嵌入式开发
Linuxlinux运维服务器
在Linux中,mutex是一种用于多线程编程的同步机制,用于保护共享资源,防止多个线程同时访问或修改这些资源,从而避免竞态条件的发生。mutex是“mutualexclusion”的缩写,意为“互斥”。1.Mutex的基本概念互斥锁:mutex是一种锁机制,用于确保在任何时刻只有一个线程可以访问共享资源。当一个线程持有mutex时,其他试图获取该mutex的线程将被阻塞,直到持有mutex的线程
- epoll成员函数介绍
C嘎嘎嵌入式开发
Linux服务器c++开发语言
epoll_create1epoll_create1是Linux系统中用于创建一个新的epoll实例的系统调用。epoll是一种高效的I/O事件通知机制,常用于处理大量的文件描述符(如套接字)。epoll_create1是epoll_create的改进版本,提供了更多的灵活性。函数原型intepoll_create1(intflags);参数说明flags类型:int描述:用于指定创建epoll实
- Linux内核同步机制之(八):mutex
ikt4435
程序员编程Java架构javaspringmysql
一、Mutex锁简介在linux内核中,互斥量(mutex,即mutualexclusion)是一种保证串行化的睡眠锁机制。和spinlock的语义类似,都是允许一个执行线索进入临界区,不同的是当无法获得锁的时候,spinlock原地自旋,而mutex则是选择挂起当前线程,进入阻塞状态。正因为如此,mutex无法在中断上下文使用。和mutex更类似的机制(无法获得锁时都会阻塞)是binarysem
- 嵌入式Linux驱动开发:从基础知识到实践精通
坚持坚持那些年
本文还有配套的精品资源,点击获取简介:嵌入式Linux由于其稳定性、可定制性和丰富资源,在智能设备领域得到广泛应用。掌握嵌入式Linux驱动程序设计对于开发者至关重要。本课程从基础知识点出发,详细介绍了内核接口理解、设备树编程、I/O操作、字符与块设备驱动、网络驱动、电源管理、调试技巧、硬件抽象层、设备模型和模块化编程等关键技能,并通过实际操作实践来强化学习,帮助开发者成长为嵌入式Linux驱动开
- 基于 MySQL 和 Spring Boot 的在线论坛管理系统设计与实现
城南|阿洋-计算机从小白到大神
mysqlspringboot数据库
markdownCopy✌全网粉丝20W+,csdn特邀作者、博客专家、CSDN[新星计划]导师、java领域优质创作者,博客之星、掘金/华为云/阿里云/InfoQ等平台优质作者、专注于Java、pyhton、机器学习技术领域和毕业项目实战✌哈喽兄弟们,好久不见哦~最近整理了一下之前写过的一些小项目/毕业设计。发现还是有很多存货的,想一想既然放在电脑里面也吃灰,那么还不如分享出去,没准还可以帮助到
- linux脚本怎么访问http,如何使用现有的tcp连接从bash脚本访问http服务器?
玲珑阁玉韦
linux脚本怎么访问http
在bashshellscipt中,我使用几个命令行工具(wget,curl,httpie)来测试我的http服务器.当使用例如curl调用GET请求,我看到tcp连接打开到我的服务器并在http通信完成后立即关闭.$curlhttp://10.5.1.1/favicon.ico-o/dev/null为了更好地测试我的服务器的保持活动行为,我想在多个http请求/响应周期中保持tcp连接打开.我可以
- SQL自学:怎么创建视图
m0_74823471
面试学习路线阿里巴巴sql数据库
在SQL中,视图是一种虚拟表,它是基于一个或多个表的查询结果集。视图并不实际存储数据,而是在每次查询时动态生成结果。一、创建视图的语法(以MySQL为例)CREATEVIEWview_nameASSELECTcolumn1,column2,...FROMtable_nameWHEREcondition;view_name:是要创建的视图的名称。column1,column2,...:要在视图中显示
- systemd-networkd NetworkManager 介绍
追心嵌入式
linux
systemd-networkd和NetworkManager的详细介绍systemd-networkd和NetworkManager都是Linux系统中常用的网络管理工具,但它们的设计目标和使用场景不同。以下是它们的详细介绍、功能、使用场景和差异。1.systemd-networkdsystemd-networkd是一个由systemd提供的网络管理工具,旨在为Linux系统提供网络配置和管理的
- 【Linux 下的 bash 无法正常解析, Windows 的 CRLF 换行符问题导致的】
待磨的钝刨
linuxbashwindows
文章目录报错原因:解决办法:方法一:用`dos2unix`修复方法二:手动转换换行符方法三:VSCode或其他编辑器手动改总结这个错误很常见,原因是你的wait_for_gpu.sh脚本文件格式不对,具体来说是Windows的CRLF换行符问题导致的,Linux下的bash无法正常解析。hadoop@hadoop:~/anaconda3$bashwait_for_gpu.sh:invalidopt
- Linux部署模型报错OSError: Error no file named pytorch_model.bin, tf_model.h5, model.ckpt.index or flax_mod
dkgee
linuxpytorch运维
报错内容:OSError:Errornofilenamedpytorch_model.bin,tf_model.h5,model.ckpt.indexorflax_model.msgpackfoundindirectory主要原因是transformer版本不对,需要升级pipinstall--upgradehuggingface_hubpipinstalltransformers[torch]其
- Xilinx系ZYNQ学习笔记(二)ZYNQ入门及点亮LED灯
贾saisai
FPGA学习学习笔记fpga开发
系列文章目录文章目录系列文章目录前言简单介绍简称xc7z020型号FPGAZYNQ实操通用IO点亮LED灯硬件逻辑基础前言简单入门一下ZYNQ是何种架构,如何编程,至于深入了解应该要分开深入学习Linux和FPGA简单介绍其基本架构都是在同一个硅片上集成FPGA和CPU,并通过高速、高带宽的互联架构连接起来。ARM的顺序控制、丰富外设,开源驱动、FPGA的并行运算、高速接口、灵活定制、数字之王的特
- Ubuntu 20.04 安装并使用Cursor
爱学习的小道长
AIubuntulinux运维pythonai
1.安装1.1下载cursor官网:https://www.cursor.com/cn点击下载LINUX查看下载下来的文件:$ls~/Downloads/Cursor-0.47.8-82ef0f61c01d079d1b7e5ab04d88499d5af500e3.deb.glibc2.25-x86_64.AppImage/home/xxx/Downloads/Cursor-0.47.8-82ef0
- pythontype函数使用_Python astype(np.float)函数使用方法解析
weixin_39870238
pythontype函数使用
Pythonastype(np.float)函数使用方法解析我的数据库如图结构我取了其中的nameagenr,做成array,只要所取数据存在str型,那么取出的数据,全部转化为str型,也就是array阵列的元素全是str,不管数据库定义的是不是int型。那么问题来了,取出的数据代入公式进行计算的时候,就会类型不符,这是就用到astype(np.float)代码如下importpymysqlim
- 如何安全删除MySQL字段?从原理到实战的保姆级指南!
小丁学Java
产品资质管理系统安全mysql数据库
从MyISAM到InnoDB:解锁MySQL在线删除字段的终极指南真实案例:一次失败的DDL操作引发的思考场景复现:某业务表invite_codes需要删除invitor字段,执行以下命令时触发报错:ALTERTABLEinvite_codesDROPCOLUMNinvitor,ALGORITHM=INPLACE;--报错信息:ALGORITHM=INPLACEisnotsupportedfort
- 利用docker部署单节点milvus并实现图像化管理
听说唐僧不吃肉
Linuxdockermilvus
Docker部署单机版milvus使用DockerCompose安装Milvusstandalone(即单机版),进行一个快速milvus的体验。1.前提条件系统可以使用centos或者ubuntu系统已经安装docker和docker-composemilvus版本这里选择2.3.12.启动etcd、minio、milvus由于milvus依赖etcd和minio,因此需要先启动这2个组件。同样
- linux 逻辑卷LVM
IT小饕餮
linux基础linux运维服务器
LVM(LogicalVolumeManager)逻辑卷管理是一种在Linux系统中用于管理磁盘空间的技术,它提供了一种灵活、高效的方式来管理硬盘分区和卷。以下是关于LVM逻辑管理的详细介绍:LVM的基本概念物理卷(PhysicalVolume,PV)物理卷是LVM的基本组成部分,可以是一块磁盘、也可以是一个分区。物理卷是LVM存储的基础,用于提供实际的存储空间。卷组(VolumeGroup,VG
- mysql与mariadb版本对应_MySQL与MariaDB及各种版本杂谈
weixin_39616416
MySQL1.MySQLCommunityServer社区版本,开源免费,但不提供官方技术支持。(我们通常使用的MySQL版本)2.MySQLEnterpriseEdition企业版本,需付费,可以试用30天。3.MySQLCluster集群版,开源免费。可将几个MySQLServer封装成一个Server。4.MySQLClusterCGE高级集群版,需付费。5.MySQLWorkbench(G
- nginx-部署Python网站项目
skyQAQLinux
pythonlinuxnginx服务器
一、部署Python网站项目实验要求配置Nginx使其可以将动态访问转交给uWSGI安装Python工具及依赖1)拷贝软件到proxy主机[root@server1~]#scp-r/linux-soft/s2/wk/python/192.168.99.5:/root2)安装python依赖软件[root@proxy~]#yum-yinstallgccmakepython3python3-devel
- MariaDB 和 MySQL 版本关联
java我跟你拼了
数据库笔记mariadbmysql数据库数据库篇版本关联
MariaDB和MySQL是两个常用的关系型数据库管理系统(RDBMS),它们在很多方面非常相似,因为MariaDB是MySQL的一个分支。MariaDB和MySQL之间的版本关联可以通过以下几个方面来理解:1.历史背景MySQL:MySQL是一个开源的数据库管理系统,由MySQLAB开发,后来被SunMicrosystems收购,再之后被Oracle收购。MariaDB:MariaDB是MySQ
- AWS CLI with MinIO Server
库海无涯
aws云计算
1、InstallMinIOServerhttps://min.io/docs/minio/linux/index.htmlCreateAKandSKandrecordinformation.AK:ZYYMPcLi6dSPsDfr5QeWSK:Am3m2qtpkUk2wAgT5dPbpE4hGD2tX7a6RpjsbeEdAndcreateabucketnamedaswtest.2、Install
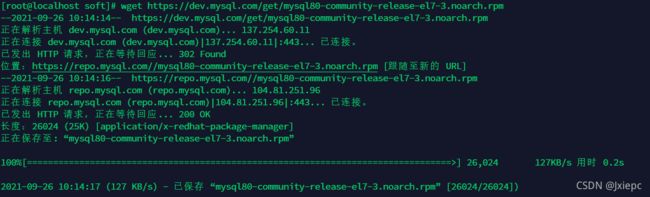
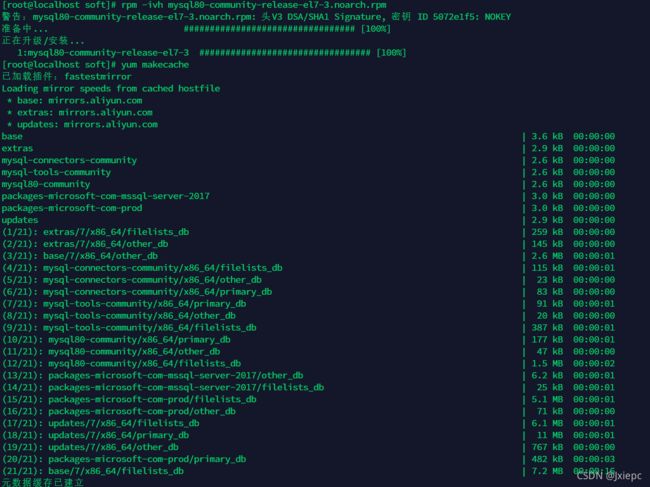
- 因为mysql 8新的认证插件导致主从复制的IO线程失败
库海无涯
mysql
1、错误信息Last_IO_Error:errorconnectingtomaster'
[email protected]:3306'-retry-time:60retries:1message:Authenticationplugin'caching_sha2_password'reportederror:Authenticationrequiressecureconnection.2、
- MySQL HA的全新篇章:Semisynchronous Replication迁移至InnoDB Cluster的实用指南
库海无涯
MySQLmysql
1、概述临时接了一个搭建InnoDBCluster的活儿,客户给我说是有数据的,我当时想这不是非常简单吗?干活儿的时候,才发现并没有这么简单,接手的时候发现是SemisynchronousReplication的环境,然后把从库切换成InnoDBCluster的primary。2、环境复现2.1、从库5.140信息采集mysql>showreplicastatus\G***************
- RK3588开发笔记-buildroot添加telnet服务
flypig哗啦啦
RK3588buildrootbusybox
目录前言一、Telnet服务背景与适用场景二、telnet服务开启Busybox配置三、固件编译及烧录RK3588烧录验证客户端连接测试3.1Linux/MacOS连接3.2Windows连接总结前言本文主要介绍在RK3588SDK文件包中添加telnet服务,由于sdkbuildroot默认添加的是ssh服务,如用户需要主动开启telnet,则需要另外在busybox中开启telnetd服务,下
- Docker build 报错 “ Cannot find a valid baseurl for repo: base/7/x86_64 ” 解决
EricLi404
linuxDockercentosyumdockercentos7linux
错误内容dockerbuild阶段报错如下:SendingbuildcontexttoDockerdaemon2.048kBStep1/3:FROMcentos:7--->8652b9f0cb4cStep2/3:RUNyum-yupdate--->Runningin4e4e11d880f3Loadedplugins:fastestmirror,ovlDeterminingfastestmirror
- 安卓 vs iOS 文件系统深度解析:开放自由与封闭安全的终极博弈
jingling1007
Androidandroidios安全安全性测试
安卓和iOS的差异远不止于界面和生态,它们的文件系统设计更是体现了两种截然不同的技术哲学。安卓的开放目录允许用户“为所欲为”,而iOS的沙盒机制则像一座密不透风的堡垒。本文将通过技术细节对比、真实场景案例、用户操作指南,深度剖析两大系统的核心设计,回答一个关键问题:谁的设计更能平衡自由与安全?一、文件系统架构:从根目录到沙盒1.安卓:Linux的开放基因目录结构全景根目录(/):包含所有系统层级(
- Linux线程控制封装及线程互斥
z一一m
Linuxlinux
1.clone函数的使用#define_GNU_SOURCE#include#includeintclone(int(*fn)(void*),void*child_stack,intflags,void*arg,...);fn:子进程或线程的入口函数child_stack:子进程的栈地址,通常需要手动分配,栈的大小需要足够容纳子进程变量的局部变量和函数调用。flags:控制子进程或线程共享哪些资源
- Java 并发包之线程池和原子计数
lijingyao8206
Java计数ThreadPool并发包java线程池
对于大数据量关联的业务处理逻辑,比较直接的想法就是用JDK提供的并发包去解决多线程情况下的业务数据处理。线程池可以提供很好的管理线程的方式,并且可以提高线程利用率,并发包中的原子计数在多线程的情况下可以让我们避免去写一些同步代码。
这里就先把jdk并发包中的线程池处理器ThreadPoolExecutor 以原子计数类AomicInteger 和倒数计时锁C
- java编程思想 抽象类和接口
百合不是茶
java抽象类接口
接口c++对接口和内部类只有简介的支持,但在java中有队这些类的直接支持
1 ,抽象类 : 如果一个类包含一个或多个抽象方法,该类必须限定为抽象类(否者编译器报错)
抽象方法 : 在方法中仅有声明而没有方法体
package com.wj.Interface;
- [房地产与大数据]房地产数据挖掘系统
comsci
数据挖掘
随着一个关键核心技术的突破,我们已经是独立自主的开发某些先进模块,但是要完全实现,还需要一定的时间...
所以,除了代码工作以外,我们还需要关心一下非技术领域的事件..比如说房地产
&nb
- 数组队列总结
沐刃青蛟
数组队列
数组队列是一种大小可以改变,类型没有定死的类似数组的工具。不过与数组相比,它更具有灵活性。因为它不但不用担心越界问题,而且因为泛型(类似c++中模板的东西)的存在而支持各种类型。
以下是数组队列的功能实现代码:
import List.Student;
public class
- Oracle存储过程无法编译的解决方法
IT独行者
oracle存储过程
今天同事修改Oracle存储过程又导致2个过程无法被编译,流程规范上的东西,Dave 这里不多说,看看怎么解决问题。
1. 查看无效对象
XEZF@xezf(qs-xezf-db1)> select object_name,object_type,status from all_objects where status='IN
- 重装系统之后oracle恢复
文强chu
oracle
前几天正在使用电脑,没有暂停oracle的各种服务。
突然win8.1系统奔溃,无法修复,开机时系统 提示正在搜集错误信息,然后再开机,再提示的无限循环中。
无耐我拿出系统u盘 准备重装系统,没想到竟然无法从u盘引导成功。
晚上到外面早了一家修电脑店,让人家给装了个系统,并且那哥们在我没反应过来的时候,
直接把我的c盘给格式化了 并且清理了注册表,再装系统。
然后的结果就是我的oracl
- python学习二( 一些基础语法)
小桔子
pthon基础语法
紧接着把!昨天没看继续看django 官方教程,学了下python的基本语法 与c类语言还是有些小差别:
1.ptyhon的源文件以UTF-8编码格式
2.
/ 除 结果浮点型
// 除 结果整形
% 除 取余数
* 乘
** 乘方 eg 5**2 结果是5的2次方25
_&
- svn 常用命令
aichenglong
SVN版本回退
1 svn回退版本
1)在window中选择log,根据想要回退的内容,选择revert this version或revert chanages from this version
两者的区别:
revert this version:表示回退到当前版本(该版本后的版本全部作废)
revert chanages from this versio
- 某小公司面试归来
alafqq
面试
先填单子,还要写笔试题,我以时间为急,拒绝了它。。时间宝贵。
老拿这些对付毕业生的东东来吓唬我。。
面试官很刁难,问了几个问题,记录下;
1,包的范围。。。public,private,protect. --悲剧了
2,hashcode方法和equals方法的区别。谁覆盖谁.结果,他说我说反了。
3,最恶心的一道题,抽象类继承抽象类吗?(察,一般它都是被继承的啊)
4,stru
- 动态数组的存储速度比较 集合框架
百合不是茶
集合框架
集合框架:
自定义数据结构(增删改查等)
package 数组;
/**
* 创建动态数组
* @author 百合
*
*/
public class ArrayDemo{
//定义一个数组来存放数据
String[] src = new String[0];
/**
* 增加元素加入容器
* @param s要加入容器
- 用JS实现一个JS对象,对象里有两个属性一个方法
bijian1013
js对象
<html>
<head>
</head>
<body>
用js代码实现一个js对象,对象里有两个属性,一个方法
</body>
<script>
var obj={a:'1234567',b:'bbbbbbbbbb',c:function(x){
- 探索JUnit4扩展:使用Rule
bijian1013
java单元测试JUnitRule
在上一篇文章中,讨论了使用Runner扩展JUnit4的方式,即直接修改Test Runner的实现(BlockJUnit4ClassRunner)。但这种方法显然不便于灵活地添加或删除扩展功能。下面将使用JUnit4.7才开始引入的扩展方式——Rule来实现相同的扩展功能。
1. Rule
&n
- [Gson一]非泛型POJO对象的反序列化
bit1129
POJO
当要将JSON数据串反序列化自身为非泛型的POJO时,使用Gson.fromJson(String, Class)方法。自身为非泛型的POJO的包括两种:
1. POJO对象不包含任何泛型的字段
2. POJO对象包含泛型字段,例如泛型集合或者泛型类
Data类 a.不是泛型类, b.Data中的集合List和Map都是泛型的 c.Data中不包含其它的POJO
- 【Kakfa五】Kafka Producer和Consumer基本使用
bit1129
kafka
0.Kafka服务器的配置
一个Broker,
一个Topic
Topic中只有一个Partition() 1. Producer:
package kafka.examples.producers;
import kafka.producer.KeyedMessage;
import kafka.javaapi.producer.Producer;
impor
- lsyncd实时同步搭建指南——取代rsync+inotify
ronin47
1. 几大实时同步工具比较 1.1 inotify + rsync
最近一直在寻求生产服务服务器上的同步替代方案,原先使用的是 inotify + rsync,但随着文件数量的增大到100W+,目录下的文件列表就达20M,在网络状况不佳或者限速的情况下,变更的文件可能10来个才几M,却因此要发送的文件列表就达20M,严重减低的带宽的使用效率以及同步效率;更为要紧的是,加入inotify
- java-9. 判断整数序列是不是二元查找树的后序遍历结果
bylijinnan
java
public class IsBinTreePostTraverse{
static boolean isBSTPostOrder(int[] a){
if(a==null){
return false;
}
/*1.只有一个结点时,肯定是查找树
*2.只有两个结点时,肯定是查找树。例如{5,6}对应的BST是 6 {6,5}对应的BST是
- MySQL的sum函数返回的类型
bylijinnan
javaspringsqlmysqljdbc
今天项目切换数据库时,出错
访问数据库的代码大概是这样:
String sql = "select sum(number) as sumNumberOfOneDay from tableName";
List<Map> rows = getJdbcTemplate().queryForList(sql);
for (Map row : rows
- java设计模式之单例模式
chicony
java设计模式
在阎宏博士的《JAVA与模式》一书中开头是这样描述单例模式的:
作为对象的创建模式,单例模式确保某一个类只有一个实例,而且自行实例化并向整个系统提供这个实例。这个类称为单例类。 单例模式的结构
单例模式的特点:
单例类只能有一个实例。
单例类必须自己创建自己的唯一实例。
单例类必须给所有其他对象提供这一实例。
饿汉式单例类
publ
- javascript取当月最后一天
ctrain
JavaScript
<!--javascript取当月最后一天-->
<script language=javascript>
var current = new Date();
var year = current.getYear();
var month = current.getMonth();
showMonthLastDay(year, mont
- linux tune2fs命令详解
daizj
linuxtune2fs查看系统文件块信息
一.简介:
tune2fs是调整和查看ext2/ext3文件系统的文件系统参数,Windows下面如果出现意外断电死机情况,下次开机一般都会出现系统自检。Linux系统下面也有文件系统自检,而且是可以通过tune2fs命令,自行定义自检周期及方式。
二.用法:
Usage: tune2fs [-c max_mounts_count] [-e errors_behavior] [-g grou
- 做有中国特色的程序员
dcj3sjt126com
程序员
从出版业说起 网络作品排到靠前的,都不会太难看,一般人不爱看某部作品也是因为不喜欢这个类型,而此人也不会全不喜欢这些网络作品。究其原因,是因为网络作品都是让人先白看的,看的好了才出了头。而纸质作品就不一定了,排行榜靠前的,有好作品,也有垃圾。 许多大牛都是写了博客,后来出了书。这些书也都不次,可能有人让为不好,是因为技术书不像小说,小说在读故事,技术书是在学知识或温习知识,有
- Android:TextView属性大全
dcj3sjt126com
textview
android:autoLink 设置是否当文本为URL链接/email/电话号码/map时,文本显示为可点击的链接。可选值(none/web/email/phone/map/all) android:autoText 如果设置,将自动执行输入值的拼写纠正。此处无效果,在显示输入法并输
- tomcat虚拟目录安装及其配置
eksliang
tomcat配置说明tomca部署web应用tomcat虚拟目录安装
转载请出自出处:http://eksliang.iteye.com/blog/2097184
1.-------------------------------------------tomcat 目录结构
config:存放tomcat的配置文件
temp :存放tomcat跑起来后存放临时文件用的
work : 当第一次访问应用中的jsp
- 浅谈:APP有哪些常被黑客利用的安全漏洞
gg163
APP
首先,说到APP的安全漏洞,身为程序猿的大家应该不陌生;如果抛开安卓自身开源的问题的话,其主要产生的原因就是开发过程中疏忽或者代码不严谨引起的。但这些责任也不能怪在程序猿头上,有时会因为BOSS时间催得紧等很多可观原因。由国内移动应用安全检测团队爱内测(ineice.com)的CTO给我们浅谈关于Android 系统的开源设计以及生态环境。
1. 应用反编译漏洞:APK 包非常容易被反编译成可读
- C#根据网址生成静态页面
hvt
Web.netC#asp.nethovertree
HoverTree开源项目中HoverTreeWeb.HVTPanel的Index.aspx文件是后台管理的首页。包含生成留言板首页,以及显示用户名,退出等功能。根据网址生成页面的方法:
bool CreateHtmlFile(string url, string path)
{
//http://keleyi.com/a/bjae/3d10wfax.htm
stri
- SVG 教程 (一)
天梯梦
svg
SVG 简介
SVG 是使用 XML 来描述二维图形和绘图程序的语言。 学习之前应具备的基础知识:
继续学习之前,你应该对以下内容有基本的了解:
HTML
XML 基础
如果希望首先学习这些内容,请在本站的首页选择相应的教程。 什么是SVG?
SVG 指可伸缩矢量图形 (Scalable Vector Graphics)
SVG 用来定义用于网络的基于矢量
- 一个简单的java栈
luyulong
java数据结构栈
public class MyStack {
private long[] arr;
private int top;
public MyStack() {
arr = new long[10];
top = -1;
}
public MyStack(int maxsize) {
arr = new long[maxsize];
top
- 基础数据结构和算法八:Binary search
sunwinner
AlgorithmBinary search
Binary search needs an ordered array so that it can use array indexing to dramatically reduce the number of compares required for each search, using the classic and venerable binary search algori
- 12个C语言面试题,涉及指针、进程、运算、结构体、函数、内存,看看你能做出几个!
刘星宇
c面试
12个C语言面试题,涉及指针、进程、运算、结构体、函数、内存,看看你能做出几个!
1.gets()函数
问:请找出下面代码里的问题:
#include<stdio.h>
int main(void)
{
char buff[10];
memset(buff,0,sizeof(buff));
- ITeye 7月技术图书有奖试读获奖名单公布
ITeye管理员
活动ITeye试读
ITeye携手人民邮电出版社图灵教育共同举办的7月技术图书有奖试读活动已圆满结束,非常感谢广大用户对本次活动的关注与参与。
7月试读活动回顾:
http://webmaster.iteye.com/blog/2092746
本次技术图书试读活动的优秀奖获奖名单及相应作品如下(优秀文章有很多,但名额有限,没获奖并不代表不优秀):
《Java性能优化权威指南》