前端开发视角 入门springboot
> 本文章适合前端人员并且对java一直不了解甚至听到java就恐惧的前端开发人员。在前端开发很少接触后端语言,即使接触也是node一类的框架express、koa2。
> 本文就类比着前端项目来入门springboot开发。
**文章目标:**
- 对比springboot项目结构和vue-cli项目结构【大致类比,不用深究】,不论会不会java基础,按照前端开发项目的思维,一步一步也可把功能实现
- 使用springboot写一个可以供前端调通的Restful接口
- 使用springboot结合mybatis-plus连通数据库,实现动态接口
**文章中使用IntelliJ IDEA初始化创建工程,使用springboot2.7版本。**
# SpringBoot介绍
SpringBoot是用java编写javaEE企业级别后端开发框架,类似与前端中的react、vue是使用javascript编写的前端开发框架。
## 使用IDEA初始化创建工程
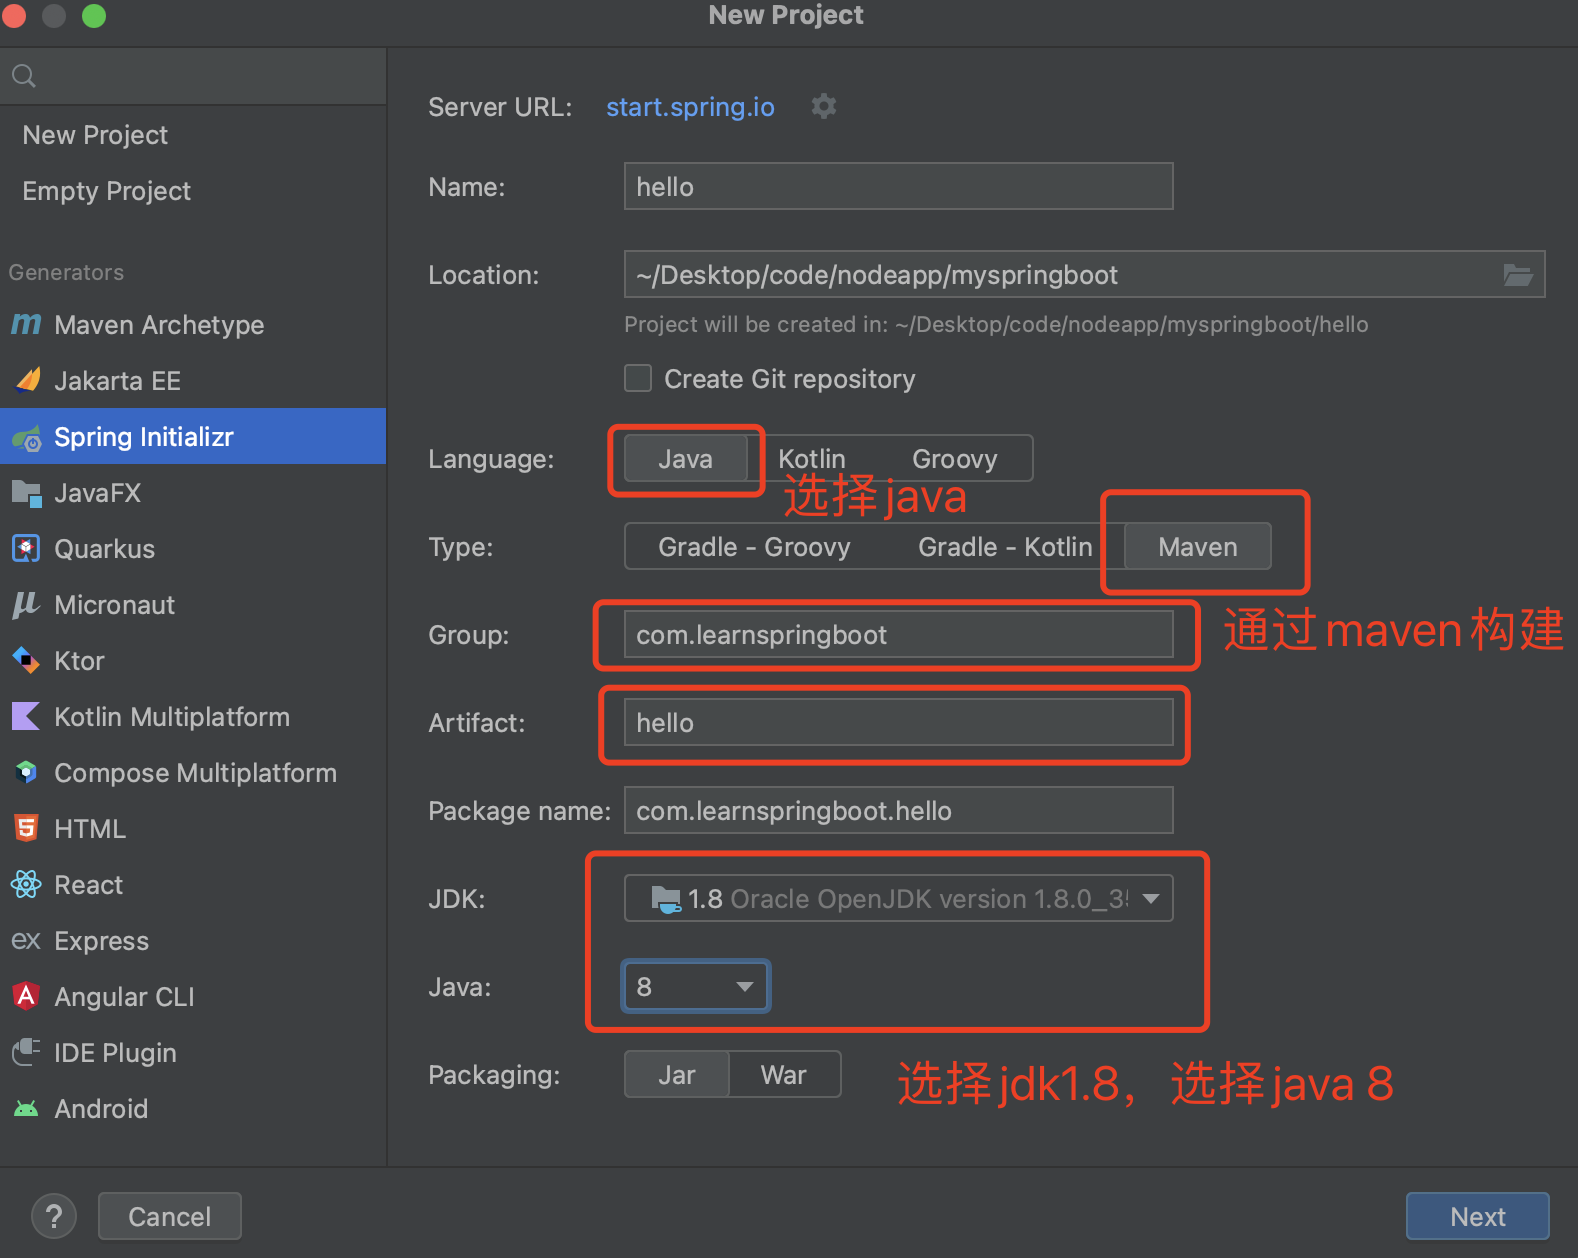
点击next,选择springboot的版本。
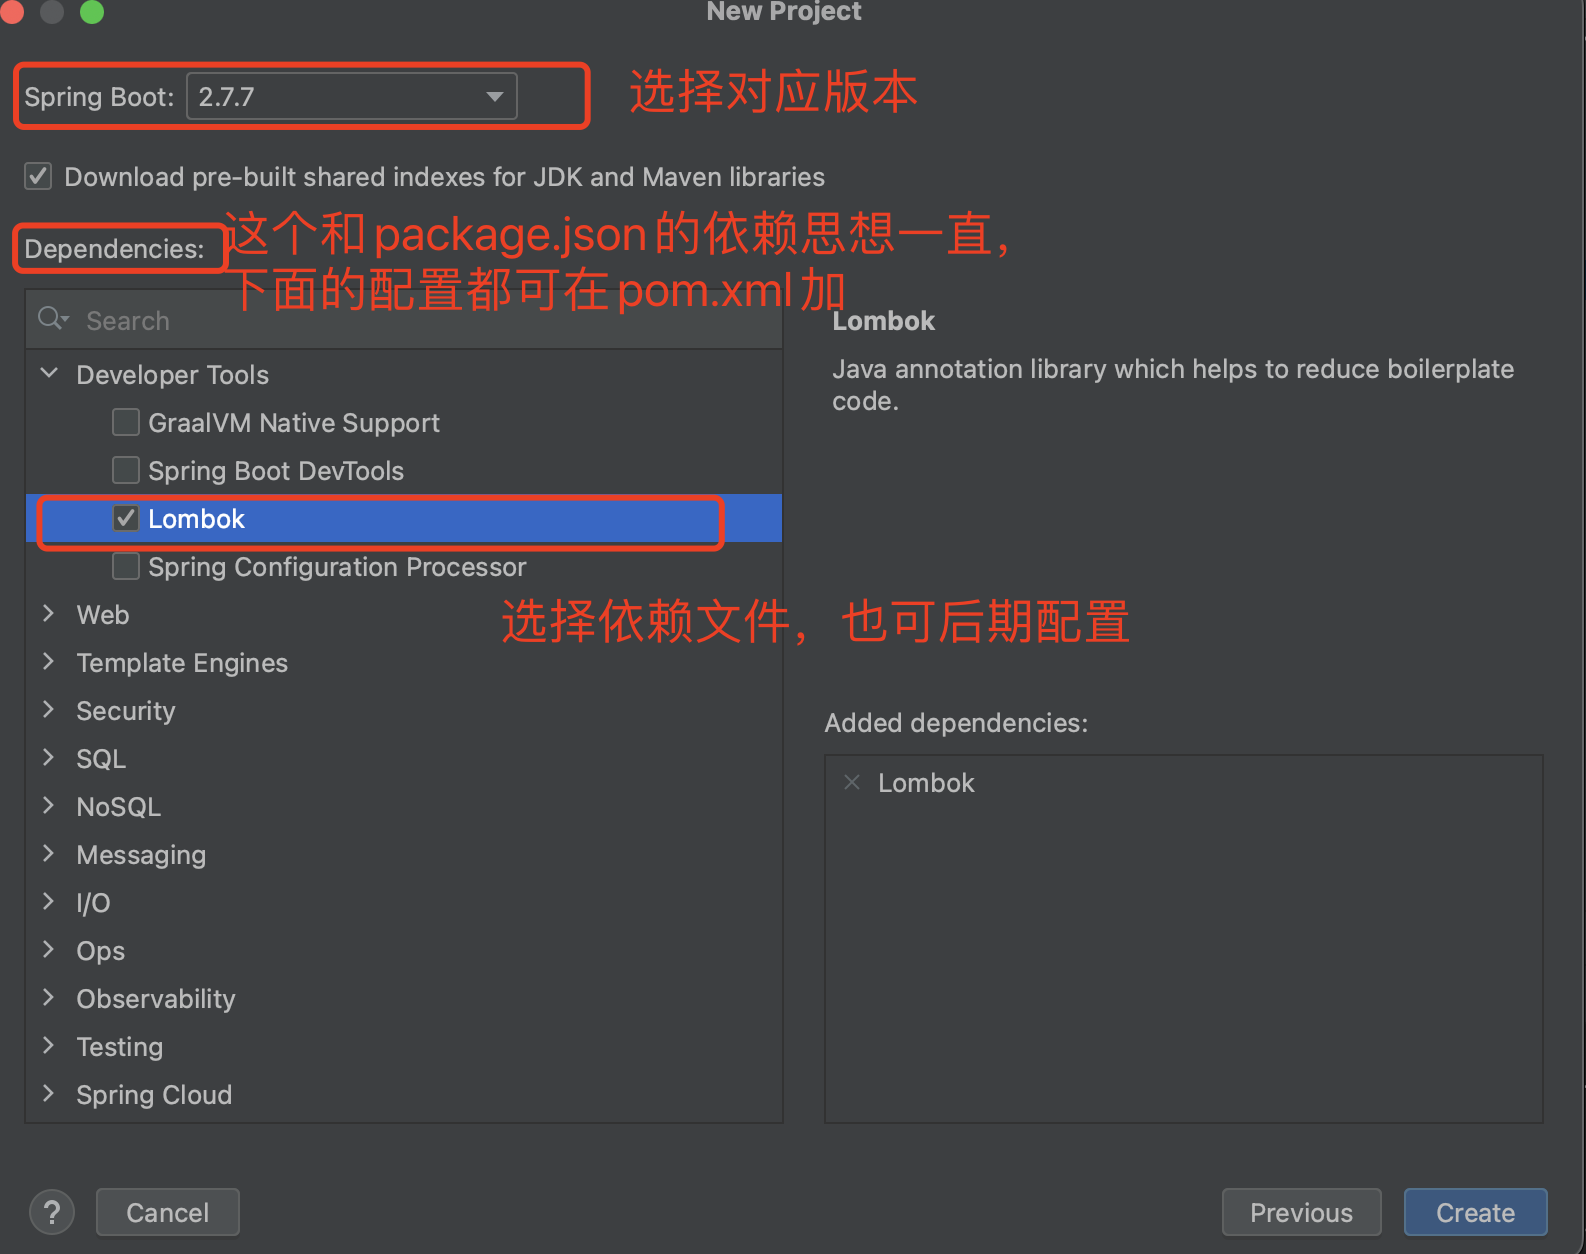
dependencies这个单词是不是在package.json中也存在,是的,在springboot中也是通过添加已经存在的第三方包来快速完成业务需求的开发的。
类似上面选择的Lombok,就是可以快速注解到类上,快速实现getter/setter、以及构造器的实现、日志输出等。
点击create,完成项目的创建。
## 分析初始化的项目结构

- 从左侧src开始看
- 下面分为main主要存储项目代码,test用来写测试用例
- main中有分为java和resources。
- java就是存放项目的主要核心java源文件,等同在前端vue-cli中src下的view文件。
- java下的HelloApplication文件,类似前端的main.js入口文件
- resources文件用来存放静态文件,类似前端public目录,在项目中可以直接获取到绝对路径
- pom.xml文件就等同与前端的package.json文件,可以查看pom详情
```xml
xsi:schemaLocation="http://maven.apache.org/POM/4.0.0 " target="_blank">https://maven.apache.org/xsd/maven-4.0.0.xsd">
```
> 依赖:运行时开发时都需要用到的包,比如项目中需要一个包,就要添加一个依赖,这个依赖在项目运行时也需要,因此在项目打包时需要把这些依赖也打包进项目里;
> 插件:在项目开的发时需要,但是在项目运行时不需要,因此在项目开发完成后不需要把插件打包进项目中,比如有个可以自动生成getter和setter的插件,嗯对~这就是插件了,因为这玩意在编译时生成getter和setter,编译结束后就没用了,所以项目打包时并不需要把插件放进去~
- 右侧查看maven菜单,可以看到添加的依赖和插件。在pom.xml中添加新的依赖后,可以自己加载更新,也可以点击上边的三个图标进行更新。Lifecycle可以对项目进行包的安装install、清理clean、打包package、编译compile等操作,执行过命令后可以在左侧target目录下看到变化。例如执行了打包命令,会生成一个hello-0.0.1-SNAPSHOT.jar包。执行clean,会清理掉target中的所有文件。
总结:
| **springboot中** | **vue-cli中** |
| --- | --- |
| pom.xml | package.json |
| src/main/java | src/view |
| src/main/HelloApplication.java | src/main.js |
| src/main/resources | public 或者 src/assets |
| pom中的依赖 | package.json中的依赖 |
| pom中的插件 | package.json中的开发依赖 |
# 编写第一个Restful接口
认识完项目结构,接下来添加第一个restful接口。在后端开发中把工程会划分为controller、service、dao、config、vo、mapper等结构,这些只是为了约定规范,~~这些名字也可自己定,除非这个项目是自己开发~~。开发中还是最好要按照约定的来,方便自己方便大家。
| controller | 用于编写Web层相关的实现,供前端可以调用的接口定义 | 类似前端中的router |
| --- | --- | --- |
| service | 实现具体的业务逻辑,创建一些方法,供controller中调用 | 前端中的核心业务处理代码 |
| config | 添加一些插件的配置、或者其他拦截器配置 | config配置 |
| dao | 处理和数据库数据的映射 | 约定的数据结构 |
| vo | 用于定义一些供前端显示的数据结构,如返回数据resultJson结构 | 约定的数据结构 |
| mapper | 用来实现一些处理数据库查询的方法,供service调用 | 前端中的vuex数据源 |

## 添加web依赖
修改pom.xml文件
```xml
```
添加完成后,刷新maven下
## 创建controller
添加controller目录,添加UserController文件
```java
import org.springframework.web.bind.annotation.GetMapping;
import org.springframework.web.bind.annotation.RequestMapping;
import org.springframework.web.bind.annotation.RestController;
@RestController
@RequestMapping("user")
public class UserService {
@GetMapping("hello")
public String hello(){
return "hello spring boot!";
}
}
```
然后进入HelloApplication启动项目,点击左侧图标或者右键执行Run "HelloApplication"
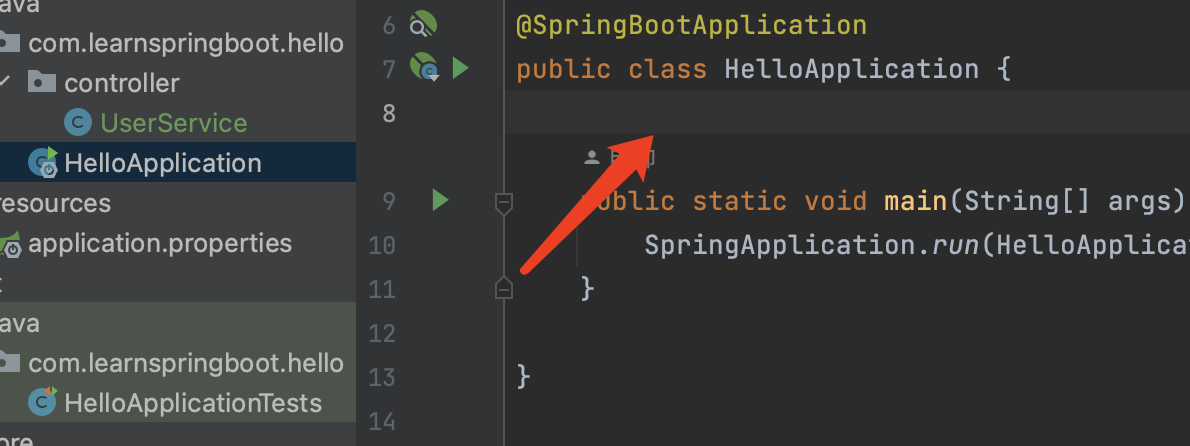

项目启动成功后,可以看到默认启动端口8080

接下来前端就可访问 [http://localhost:8080/user/hello](http://localhost:8080/user/hello),在页面中看到hello spring boot!,完成了第一个接口的开发。
## 设置返回json的数据格式
前后的分离开发,最常用的数据交互方式是json,接口返回的基本上都是json的格式。
### 在vo目录下创建ResultJson类
resultJson类定义返回给前端使用的json结果格式。
```java
import lombok.Data;
@Data // 此处的Data就是Lombok中的
public class ResultJson {
private boolean success;
private int code;
private String message;
private Object data;
}
```
### 在controller中添加json请求的处理
```java
@GetMapping("json")
public ResultJson retJson(){
ResultJson resultJson = new ResultJson();
resultJson.setCode(200);
resultJson.setMessage("接口调用成功");
resultJson.setData("hello spring boot!");
resultJson.setSuccess(true);
return resultJson;
}
```
接下来前端访问路径[http://localhost:8080/user/json](http://localhost:8080/user/json)就可以返回
```json
{
"success": true,
"code": 200,
"message": "接口调用成功",
"data": "hello spring boot!"
}
```
这样的数据结果对于前端是不是特别熟悉呢。
### 设置返回的data是list结构
#### 在pojo目录下定义一个User类
```java
@Data
public class User {
private Long id;
private String name;
private Integer age;
private String email;
public User(Long id, String name, Integer age, String email) {
this.id = id;
this.name = name;
this.email = email;
this.age = age;
}
}
```
#### 在controller中添加list接口的访问
```java
@GetMapping("list")
public ResultJson UserList(){
ResultJson resultJson = new ResultJson();
List
User user1 = new User(1L, "aaa", 12, "[email protected]");
User user2 = new User(2L, "bbb", 13, "[email protected]");
userList.add(user1);
userList.add(user2);
resultJson.setData(userList);
resultJson.setCode(200);
resultJson.setMessage("userList");
return resultJson;
}
```
前端访问路径[http://localhost:8080/user/list](http://localhost:8080/user/list),返回的数据结构如下
```json
{
"success": false,
"code": 200,
"message": "userList",
"data": [
{
"id": 1,
"name": "aaa",
"age": 12,
"email": "[email protected]"
},
{
"id": 2,
"name": "bbb",
"age": 13,
"email": "[email protected]"
}
]
}
```
# 添加mybatis-plus插件,实现动态接口
以上接口返回的数据都是静态的mock数据,后端开发少不了连接数据库,进行动态数据查询。接下来使用mybatis-plus实现动态数据查询
## 在pom添加依赖
```xml
```
**在application.properties中添加配置**
```xml
# 连接数据库的基础配置
spring.datasource.url=jdbc:mysql://localhost:3306/springdb?useUnicode=true&characterEncoding=UTF-8&serverTimeZone=UTC
spring.datasource.username=root
spring.datasource.password=12345678
spring.datasource.driver-class-name=com.mysql.cj.jdbc.Driver
```
## 创建数据库表
### 创建user表
```plsql
create table if not exists springdb.user
(
id bigint auto_increment comment '主键ID'
primary key,
name varchar(30) null comment '姓名',
age int null comment '年龄',
email varchar(50) null comment '邮箱'
)
collate = utf8_unicode_ci;
```
### 插入数据
```plsql
INSERT INTO springdb.user (id, name, age, email) VALUES (1, 'Jone', 18, '[email protected]');
INSERT INTO springdb.user (id, name, age, email) VALUES (2, 'Jack', 20, '[email protected]');
INSERT INTO springdb.user (id, name, age, email) VALUES (3, 'Tom', 28, '[email protected]');
INSERT INTO springdb.user (id, name, age, email) VALUES (4, 'Sandy', 21, '[email protected]');
INSERT INTO springdb.user (id, name, age, email) VALUES (5, 'Billie', 24, '[email protected]');
```
## 添加config目录,设置MybatisPlusConfig.java类
```java
import com.baomidou.mybatisplus.extension.plugins.MybatisPlusInterceptor;
import com.baomidou.mybatisplus.extension.plugins.inner.PaginationInnerInterceptor;
import org.springframework.context.annotation.Bean;
import org.springframework.context.annotation.Configuration;
@Configuration
public class MybatisPlusConfig {
//分页插件
@Bean
public MybatisPlusInterceptor mybatisPlusInterceptor(){
MybatisPlusInterceptor interceptor = new MybatisPlusInterceptor();
interceptor.addInnerInterceptor(new PaginationInnerInterceptor());
return interceptor;
}
}
```
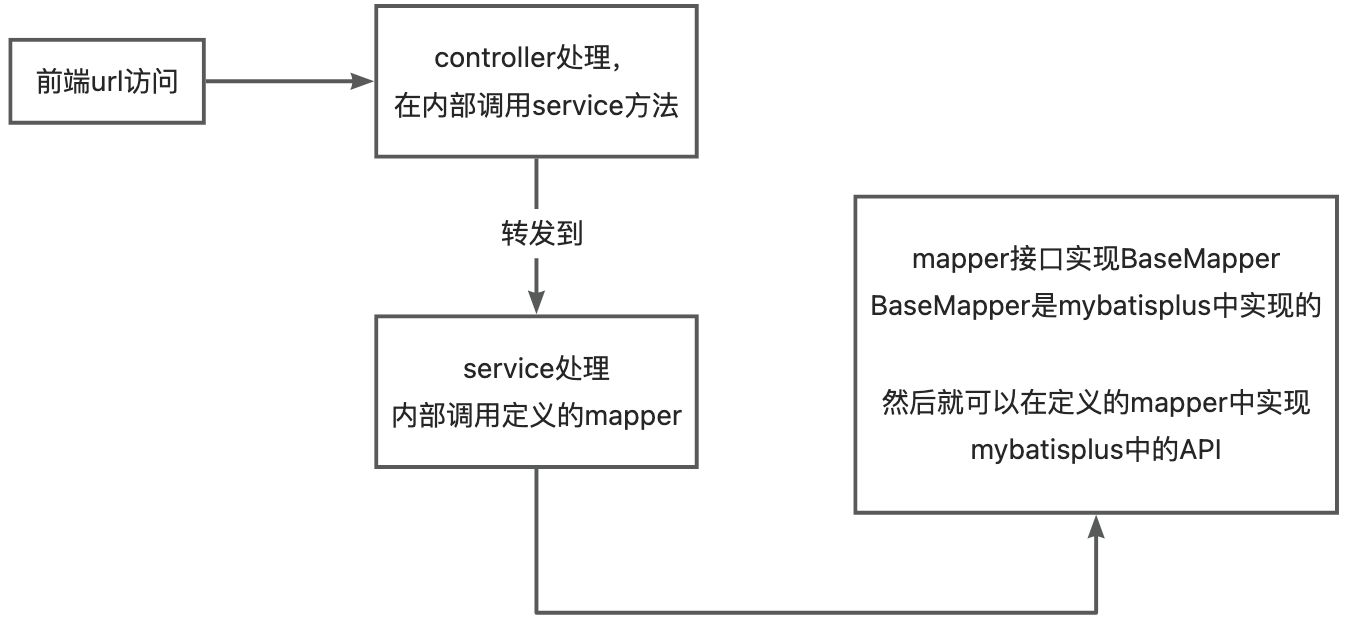
### 使用mybatis的api查询数据
### 在mapper目录下定义UserMapper
```java
@Mapper
@Repository
public interface UserMapper extends BaseMapper
}
```
### 设置service的处理方法
```java
import com.baomidou.mybatisplus.core.conditions.query.LambdaQueryWrapper;
import com.baomidou.mybatisplus.extension.plugins.pagination.Page;
import com.myspringboot.first.mapper.UserMapper;
import com.myspringboot.first.pojo.User;
import lombok.extern.slf4j.Slf4j;
import org.springframework.beans.factory.annotation.Autowired;
import org.springframework.stereotype.Service;
import java.util.List;
@Service
@Slf4j
public class UserService {
// userMapper实现自BaseMapper,所有拥有Mybatis的API方法
@Autowired
private UserMapper userMapper;
// 查询所有的user
public List
// LambdaQueryWrapper为mybatisplus中的类
return userMapper.selectList(new LambdaQueryWrapper<>());
}
public List
Page
Page
log.info("total", userPage.getTotal());
log.info("pages", userPage.getPages());
return userPage.getRecords();
}
}
```
[Mybatis-plus的API](https://baomidou.com/pages/10c804/#abstractwrapper),以上查询完成全部依赖mybatis的Api
### 修改UserController,添加findAll和findPage接口
```java
@GetMapping("findAll")
public List
return userService.findAll();
}
@GetMapping("findPage")
public List
@RequestParam("size") Integer size){
return userService.findPage(page, size);
}
```
设置完成后,重启项目。
前端就可以访问[http://localhost:8080/user/findAll](http://localhost:8080/user/findAll),和http://localhost:8080/user/findPage?page=1&size=2


返回的是数据库中对应的数据。
## 设置自定义的mapper查询数据
> mybatis只能完成单表查询,如果有关联表查询,就需要自定义mapper中的方法通过编写sql进行实现。
业务场景:查询出age大于18的user,新加advanceSearch接口。示例仍然是单表查询,只是为了测试
### 首先在MybatisPlusConfig类设置mapper扫描路径
### 添加@MapperScan注解
```java
@Configuration
@MapperScan("com.learnspringboot.hello.mapper")
public class MybatisPlusConfig {
//分页插件
@Bean
public MybatisPlusInterceptor mybatisPlusInterceptor(){
MybatisPlusInterceptor interceptor = new MybatisPlusInterceptor();
interceptor.addInnerInterceptor(new PaginationInnerInterceptor());
return interceptor;
}
}
```
### 在pom和application中设置mapper的访问路径
```xml
```
### 设置application.properties
```java
#mybatis-plus 配置
mybatis-plus.configuration.log-impl=org.apache.ibatis.logging.stdout.StdOutImpl
mybatis-plus.mapper-locations=classpath*:mapper/*.xml
```
### 在UserMapper中添加advanceSearch接口
```java
@Mapper
@Repository
public interface UserMapper extends BaseMapper
List
}
```
### 然后在resources中添加mapper目录
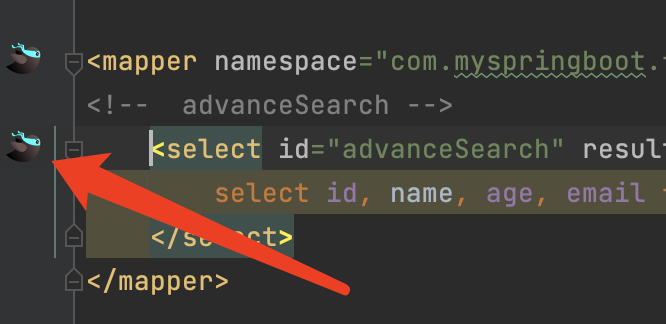
> IDEA添加一下插件,这样会把mapper接口中定义的方法和xml中方法的实现进行一个关联。
> 
#### 添加UserMapper.xml文件,处理advanceSearch接口的实现
```xml
-//mybatis.org//DTD Config 3.0//EN" "" target="_blank">http://mybatis.org/dtd/mybatis-3-mapper.dtd">
select id, name, age, email from user where age > 18;
```
### 在service中进行调用
```java
public List
return userMapper.advanceSearch();
}
```
### 在controller中进行设置访问路径
```java
@GetMapping("advanceSearch")
public List
return userService.advanceSearch();
}
```
然后前端就可以访问[http://localhost:8080/user/advanceSearch](http://localhost:8080/user/advanceSearch)
```json
[
{
"id": 2,
"name": "Jack",
"age": 20,
"email": "[email protected]"
},
{
"id": 3,
"name": "Tom",
"age": 28,
"email": "[email protected]"
},
{
"id": 4,
"name": "Sandy",
"age": 21,
"email": "[email protected]"
},
{
"id": 5,
"name": "Billie",
"age": 24,
"email": "[email protected]"
}
]
```
# 总结:
- pom和package结构类似
- controller和router结构类似
- service定义核心业务逻辑处理
- dao、vo、pojo等定义数据,类似前端的vuex数据结构处理
项目代码:[https://gitee.com/shenshuai89/springboothello.git](https://gitee.com/shenshuai89/springboothello.git)