SpringBoot集成Spring Security(6)——自定义登录管理
SpringBoot集成Spring Security(6)——自定义登录管理
1. 自定义认证成功、失败处理
有些时候在认证成功后做一些业务处理,例如添加积分;有些时候在认证失败后也做一些业务处理,例如记录日志。
在之前的文章中,关于认证成功、失败后的处理都是如下配置的:
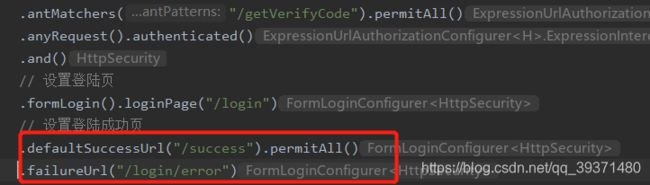
即 failureUrl() 指定认证失败后Url,defaultSuccessUrl() 指定认证成功后Url。我们可以通过设置 successHandler() 和 failureHandler() 来实现自定义认证成功、失败处理。
PS:当我们完成自定义的登录处理之后需要将默认的failureUrl()和defaultSuccessUrl()注释掉
1.1 自定义登陆成功
自定义 CustomAuthenticationSuccessHandler 类来实现 AuthenticationSuccessHandler 接口,用来处理认证成功后逻辑:
@Component
public class CustomAuthenticationSuccessHandler implements AuthenticationSuccessHandler {

    private Logger logger= LoggerFactory.getLogger(getClass());

    @Override
    public void onAuthenticationSuccess(HttpServletRequest httpServletRequest, HttpServletResponse httpServletResponse, Authentication authentication) throws IOException, ServletException {
        logger.info("登陆成功,{}",authentication);

        httpServletResponse.sendRedirect("/success");
    }
}
onAuthenticationSuccess() 方法的第三个参数 Authentication 为认证后该用户的认证信息,这里打印日志后,重定向到了/success页面
1.2 自定义登陆失败
自定义 CustomAuthenticationFailureHandler 类来实现 AuthenticationFailureHandler 接口,用来处理认证失败后逻辑:
@Component
public class CustomAuthenticationFailureHandler implements AuthenticationFailureHandler {

    @Autowired
    private ObjectMapper objectMapper;

    private Logger logger= LoggerFactory.getLogger(getClass());

    @Override
    public void onAuthenticationFailure(HttpServletRequest httpServletRequest, HttpServletResponse httpServletResponse, AuthenticationException e) throws IOException, ServletException {
        logger.info("登陆失败");

        //修改状态码
        httpServletResponse.setStatus(HttpStatus.INTERNAL_SERVER_ERROR.value());
        httpServletResponse.setContentType("application/json;charset=utf-8");
        httpServletResponse.getWriter().write(objectMapper.writeValueAsString(e.getMessage()));
    }
}
onAuthenticationFailure()方法的第三个参数 exception 为认证失败所产生的异常,这里也是简单的返回到前台
1.3 修改 WebSecurityConfig
注入CustomAuthenticationSuccessHandler successHandler和CustomAuthenticationFailureHandler failureHandler

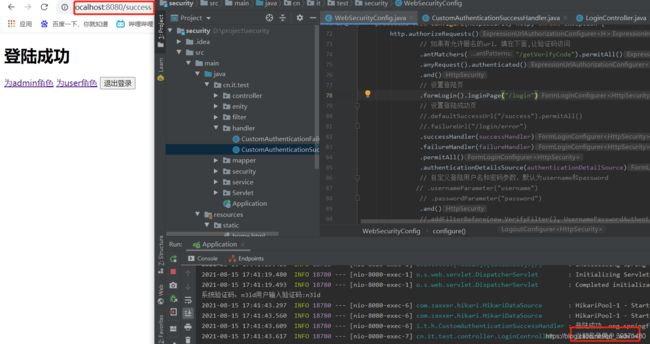
1.4 运行程序
登陆成功:
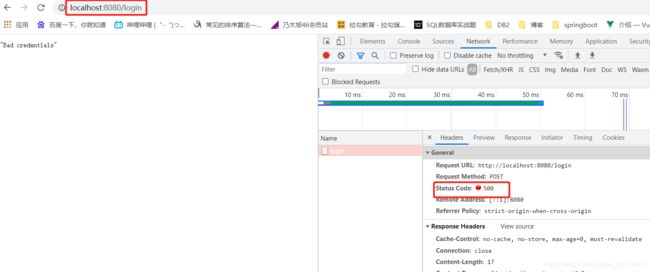
登陆失败前端界面
登陆失败后端输出
![]()
2. 设置Session 时间
当用户登录后,可以设置 session 的超时时间,当达到超时时间后,自动将用户退出登录。
Session 超时的配置是 SpringBoot 原生支持的,只需要在 application.properties 配置文件中配置:
# session 过期时间,单位:秒
server.session.servlet.timeout=60
PS:从用户最后一次操作开始计算过期时间。过期时间最小值为 60 秒,如果你设置的值小于 60 秒,也会被更改为 60 秒。
接着在WebSecurityConfig添加该功能:
                .and()
                .sessionManagement()
                .invalidSessionUrl("/login/invalid");
Spring Security 提供了两种处理配置,一个是 invalidSessionStrategy(),另外一个是 invalidSessionUrl()。这两个的区别就是一个是前者是在一个类中进行处理,后者是直接跳转到一个 Url。简单起见,就直接用 invalidSessionUrl()了,跳转到 /login/invalid,需要把该 Url 设置为免授权访问, 配置如下:
.antMatchers("/getVerifyCode","/login/invalid").permitAll()

...
.and()
.sessionManagement()
.invalidSessionUrl("/login/invalid");
在 controller 中写一个接口进行处理:
    //设置session
    @RequestMapping("/login/invalid")
    @ResponseBody
    @ResponseStatus(HttpStatus.UNAUTHORIZED)
    public String invalid(){
        return "session 已过期,请重新登录";
    }
运行程序,登陆成功后等待一分钟(或者重启服务器),刷新页面:

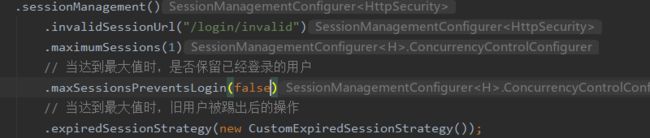
3. 设置最大登录数
接下来实现限制最大登陆数,原理就是限制单个用户能够存在的最大 session 数
-
maximumSessions(int):指定最大登录数 -
maxSessionsPreventsLogin(boolean):是否保留已经登录的用户;为true,新用户无法登录;为false,旧用户被踢出 -
expiredSessionStrategy(SessionInformationExpiredStrategy):旧用户被踢出后处理方法PS:maxSessionsPreventsLogin()可能不太好理解,先设为 false,效果和 QQ 登录是一样的,登陆后之前登录的账户被踢出。
编写 CustomExpiredSessionStrategy 类,来处理旧用户登陆失败的逻辑:
public class CustomExpiredSessionStrategy implements SessionInformationExpiredStrategy {

    private ObjectMapper objectMapper=new ObjectMapper();

    //    private RedirectStrategy redirectStrategy = new DefaultRedirectStrategy();

    @Override
    public void onExpiredSessionDetected(SessionInformationExpiredEvent event) throws IOException, ServletException {
        Map<String,Object> map=new HashMap<>();
        map.put("code",0);
        map.put("msg","该账号在另一处登录,您被迫下线:"+event.getSessionInformation().getLastRequest());

        //map转json
        String json=objectMapper.writeValueAsString(map);

        event.getResponse().setContentType("application/json;charset=utf-8");
        event.getResponse().getWriter().write(json);

        // 如果是跳转html页面,url代表跳转的地址
        // redirectStrategy.sendRedirect(event.getRequest(), event.getResponse(), "url");
    }
}
在 onExpiredSessionDetected() 方法中,处理相关逻辑,这里只是简单的返回一句话。执行程序,打开两个浏览器,登录同一个账户。因为设置了 maximumSessions(1),也就是单个用户只能存在一个 session,因此当你刷新先登录的那个浏览器时,被提示踢出了。
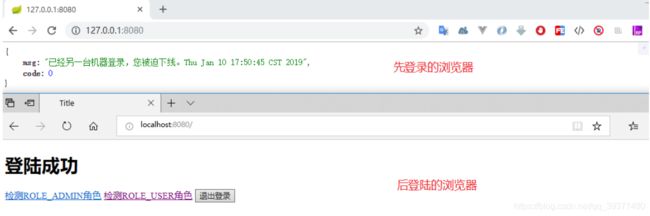
下面来测试下 maxSessionsPreventsLogin(true)时的情况,发现第一个浏览器登录后,第二个浏览器无法登录:

4. 踢出用户
首先需要在容器中注入名为 SessionRegistry 的 Bean,这里就写在 WebSecurityConfig 中:
    //主动踢出用户
    @Bean
    public SessionRegistry sessionRegistry() {
        return new SessionRegistryImpl();
    }
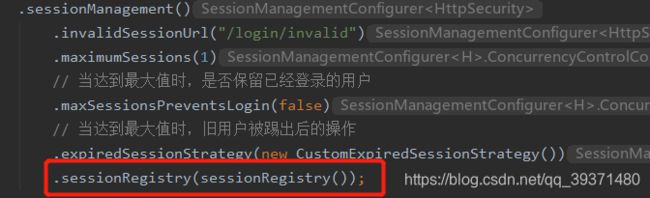
修改 WebSecurityConfig 的 configure() 方法,在最后添加一行 .sessionRegistry():
编写一个接口用于测试踢出用户:
//踢出用户
    @Autowired
    private SessionRegistry sessionRegistry;

    @GetMapping("/kick")
    @ResponseBody
    public String removeUserSessionByUsername(@RequestParam String username){
        int count=0;

        //获取session中的所有用户信息
        List<Object> users=sessionRegistry.getAllPrincipals();
        for(Object user:users){
            if(user instanceof User){
                String userName = ((User) user).getUsername();
                if(userName.equals(username)){
                    //参数二:是否包含过期的session
                    List<SessionInformation> sessionInfo=sessionRegistry.getAllSessions(user,false);
                    if(sessionInfo!=null && sessionInfo.size()>0){
                        for(SessionInformation sessionInformation:sessionInfo){
                            sessionInformation.expireNow();
                            count++;
                        }
                    }
                }
            }
        }
        return "操作成功,清理session共"+count+"个";
    }
sessionRegistry.getAllPrincipals(); 获取所有用户主要信息- 通过
user.getUsername是否等于输入值,获取到指定用户的 principal sessionRegistry.getAllSessions(userl, false)获取该 principal 上的所有
session- 通过
sessionInformation.expireNow()使得 session 过期,踢出用户
运行程序,分别使用 admin 和zhangsan 账户登录,admin 访问 /kick?username=zhangsan 来踢出用户zhangsan,zhangsan 刷新页面,发现被踢出。

5.退出登录
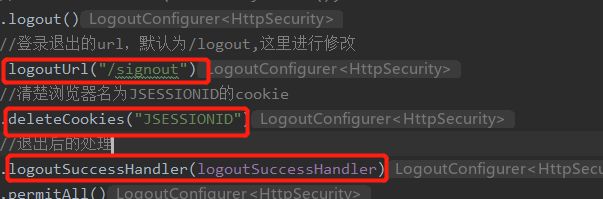
直接在 WebSecurityConfig 的 configure() 方法中进行配置,需要处理以下的一些流程:
- 使当前的 session 失效
- 清除与当前用户有关的 remember-me 记录
- 清空当前的 SecurityContext
- 重定向到登录页
创建类CustomLogoutSuccessHandler,用来进行退出成功后的逻辑:
@Component
public class CustomLogoutSuccessHandler implements LogoutSuccessHandler {
    private Logger logger= LoggerFactory.getLogger(getClass());

    @Override
    public void onLogoutSuccess(HttpServletRequest httpServletRequest, HttpServletResponse httpServletResponse, Authentication authentication) throws IOException, ServletException {
        String username=((User)authentication.getPrincipal()).getUsername();
        logger.info("退出成功,用户名:{}",username);

        //重定向到登录界面
        httpServletResponse.sendRedirect("/login");
    }
}
最后把它注入到 WebSecurityConfig 即可:
    //退出登录
    @Autowired
    private CustomLogoutSuccessHandler logoutSuccessHandler;
程序运行
![]()
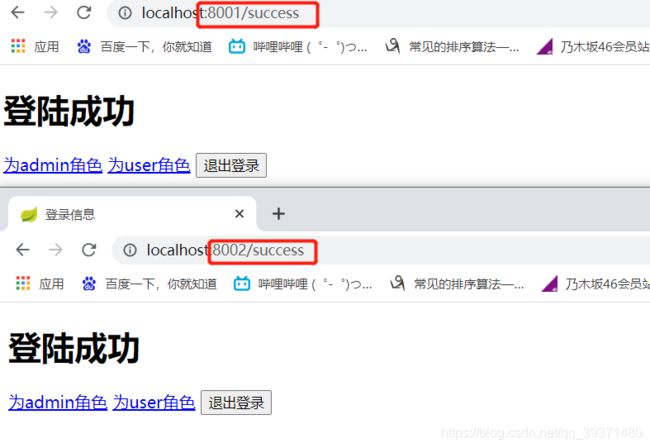
6. Session共享
关于 Session 共享,一般情况下,一个程序为了保证稳定至少要部署两个,构成集群。那么就牵扯到了 Session 共享的问题,不比如用户在 8001 登录成功后,后续访问了 8002 服务器,结果又提示没有登录。
这里就简单实现下 Session 共享,采用 Redis 来存储。
6.1 配置redis
为了方便起见,我直接使用 Docker 快速部署
docker pull redis
docker run --name myredis -p 6379:6379 -d redis
docker exec -it myredis redis-cli
![]()
地址:127.0.0.1;端口号:6379
6.2 配置session共享
- 导入依赖
     <!--session共享-->
     <dependency>
       <groupId>org.springframework.boot</groupId>
       <artifactId>spring-boot-starter-data-redis</artifactId>
     </dependency>
     <dependency>
       <groupId>org.springframework.session</groupId>
       <artifactId>spring-session-data-redis</artifactId>
     </dependency>
- 在配置文件中配置redis
在这里插入代码片#配置redis
spring.redis.host=127.0.0.1
spring.redis.port=6379

spring.session.store-type=redis
- 启动类添加 @EnableRedisHttpSession 注解
@EnableRedisHttpSession
@SpringBootApplication
public class Application {
    public static void main(String[] args) {

        SpringApplication.run(Application.class,args);
    }
 }
6.2 配置项目多端口
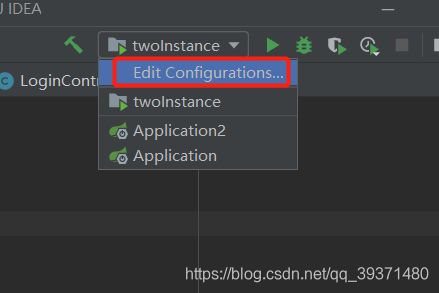
配置第一个端口:

配置第二个端口:
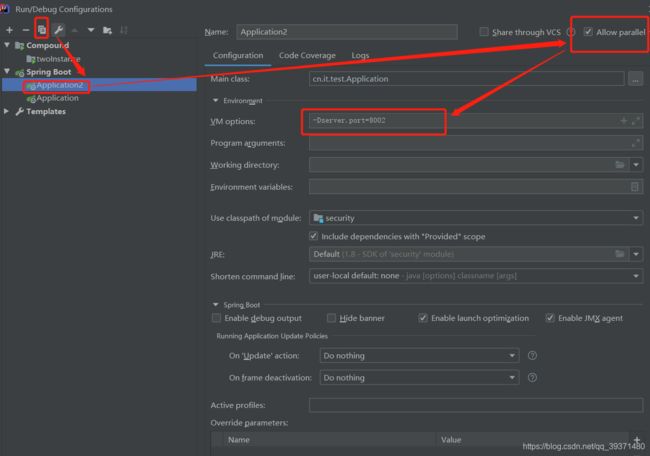
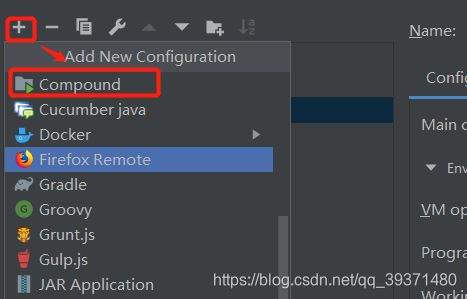
最后将两个打包放在Compound,将Application以及Application2添加到Compound启动项目:
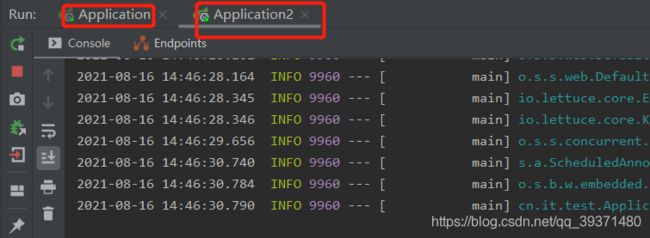
运行程序:
进入redis查看下所拥有的的key
