一、创建maven工程
idea创建springboot的工程方式有很多,这是其中一种,这个主要是父工程统一管理子工程。
准备工作:配置好JDK,MAVEN,需要知道或者了解启动器,了解@RESTController和@Controller的区别。
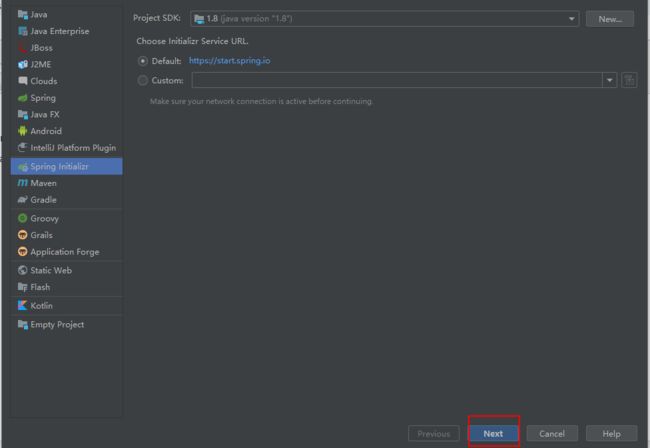
IDE都支持使用Spring的项目创建向导快速创建一个Spring Boot项目;
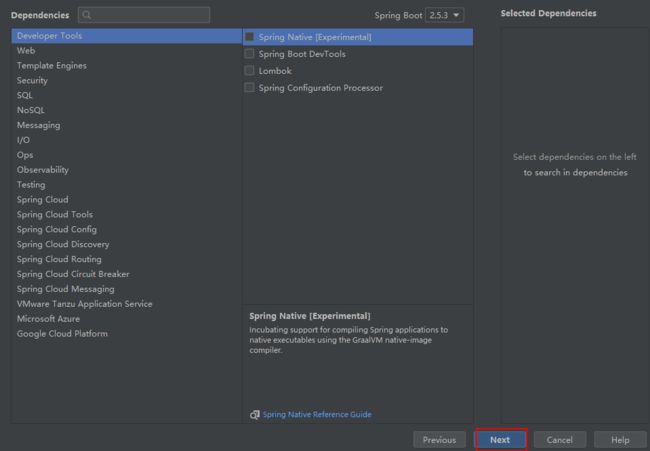
选择我们需要的模块;向导会联网创建Spring Boot项目;
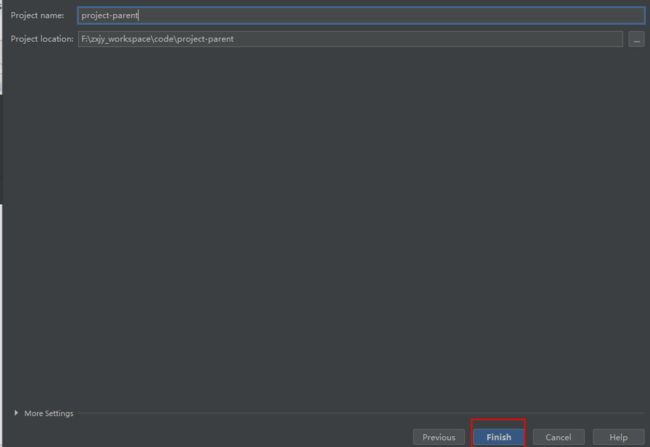
默认生成的Spring Boot项目;
主程序已经生成好了,我们只需要我们自己的逻辑
resources文件夹中目录结构
- static:保存所有的静态资源; js css images;
- templates:保存所有的模板页面;(Spring Boot默认jar包使用嵌入式的Tomcat,默认不支持JSP页面);可以使用模板引擎(freemarker、thymeleaf);
- application.properties:Spring Boot应用的配置文件;可以修改一些默认设置;
1、创建sprigboot工程project-parent(需要联网)
在idea开发工具中,使用 Spring Initializr 快速初始化一个 Spring Boot 模块。
2、生成的pom文件
    4.0.0

        org.springframework.boot
        spring-boot-starter-parent
        2.5.3


    com.test.demo
    project-parent
    0.0.1-SNAPSHOT
    project-parent
    Demo project for Spring Boot

        1.8


            org.springframework.boot
            spring-boot-starter


            org.springframework.boot
            spring-boot-starter-test
            test


                org.springframework.boot
                spring-boot-maven-plugin
3、修改上边生成的pom文件
3.1可以修改版本(
3.2
project-parent
pom 3.3配置
修改后的pom文件
    4.0.0

        org.springframework.boot
        spring-boot-starter-parent
        2.2.1.RELEASE


    com.test.demo
    project-parent
    0.0.1-SNAPSHOT
    project-parent
    Demo project for Spring Boot

        1.8
        20170516


                org.json
                json
                ${json.version}
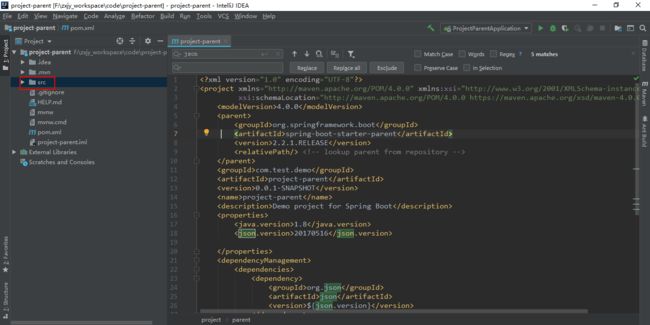
4、删除src文件夹(父工程不写controller,service,dao,交给子模块处理)
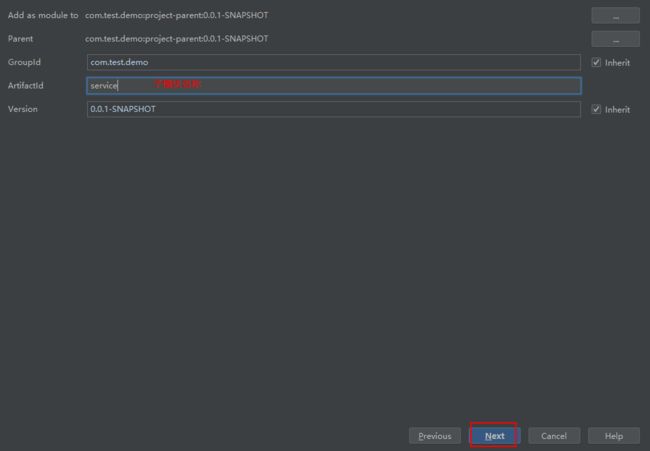
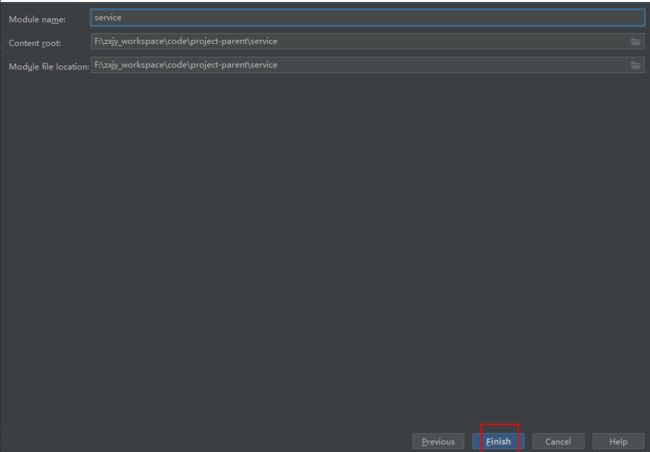
5、创建子模块,父工程右键->new->Module->maven
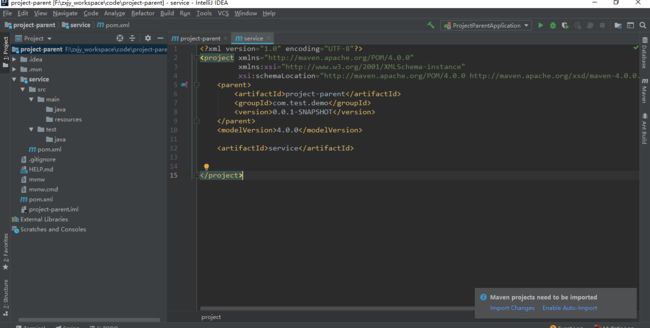
6、子模块新建后的pom文件
        project-parent
        com.test.demo
        0.0.1-SNAPSHOT

    4.0.0

    service
7、修改pom文件
7.1添加pom类型(如果这个子模块还有子模块就添加pom类型,我的这个例子这个子模块没有子模块所以本例子没加)
service
pom
7.2添加依赖
7.3修改后的pom文件(如果这个子模块还有子模块就添加pom类型,我的这个例子这个子模块没有子模块所以本例子没加,添加方式和上边的父模块一样)
        project-parent
        com.test.demo
        0.0.1-SNAPSHOT

    4.0.0

    service


            org.springframework.boot
            spring-boot-starter-web
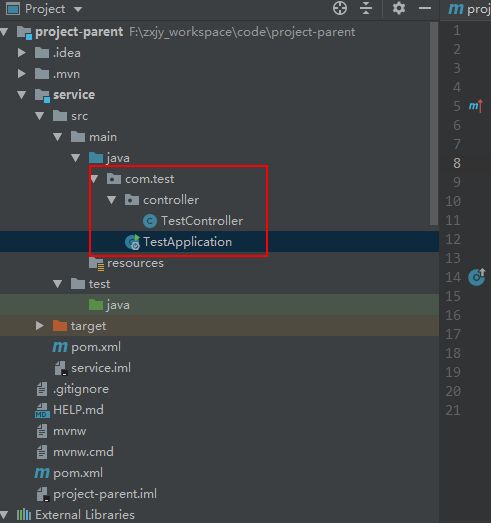
8、创建controller和启动类,注意启动类(TestApplication)的位置
controller文件
package com.test.controller;

import org.springframework.web.bind.annotation.RequestMapping;
import org.springframework.web.bind.annotation.RestController;

@RestController
@RequestMapping("/login")
public class TestController {

    @RequestMapping("login")
    public String login(){
        String test = "test";
        return "login";
    }
}
启动类
package com.test;

import org.springframework.boot.SpringApplication;
import org.springframework.boot.autoconfigure.SpringBootApplication;

@SpringBootApplication
public class TestApplication {
    public static void main(String[] args) {
        SpringApplication.run(TestApplication.class,args);
    }
}
