Qt学习:图形视图框架的使用
文章目录
- 前言
- 一、场景、视图和图形项的介绍
- 二、图形视图框架的坐标系统
- 三、图形视图框架的事件处理
- 四、示例完整代码
- 五、QtCreator官方示例
- 总结
前言
近期重温了一下Qt中的图形视图框架,这里将所学习的内容进行记录总结。这个框架提供了一个基于图形项的模型视图编程方法,主要有场景、视图和图形项三部分组成,下面结合示例进行展示,希望可以帮助到大家,如有错误之处,欢迎大家批评指正。
项目效果
提示:以下是本篇文章正文内容,下面案例可供参考
一、场景、视图和图形项的介绍
图形视图框架由以下三个部分组成:场景QGraphicsScene、视图QGraphicsView、图形项QGraphicsItem
QGraphicsScene:该类提供了图形视图框架中的场景,是图形项对象的容器,拥有以下功能
1.提供用于管理大量图形项的高速接口
2.传播事件到每一个图形项
3.管理图形项的状态,比如选择和处理焦点
4.提供无变换的渲染功能,主要用于打印
QGraphicsView:该类提供了视图部件,用来显示场景中的内容
1.可以连接多个视图到同一个场景,为相同的数据集提供多个视口
2.视图部件是一个可滚动的区域,提供了一个滚动条来浏览大的场景
3.通过setDragMode(QGraphicsView::ScrollHandDrag)将光标变为手掌形状,可以拖动场景
4.通过setDragMode(QGraphicsView::RubberBandDrag)实现鼠标拖出矩形框来选择场景中的图形项
5.通过setViewport()设置QOpenGLWidget作为视口,使用OpenGL进行渲染
QGraphicsItem:该类是场景中图形项的基类,在图形视图框架中有提供一些典型形状的图形项
1.鼠标按下、移动、释放、双击、悬停、滚轮和右键菜单事件
2.键盘输入焦点和键盘事件
3.拖放事件
4.使用QGraphicsItemGroup实现分组
5.碰撞检测
二、图形视图框架的坐标系统
图形视图框架中有三个有效的坐标系统:场景坐标、视图坐标、图形项坐标,这三个坐标系统可以通过特定函数进行坐标映射
场景坐标:场景坐标是所有图形项的基础坐标系统,其原点在场景的中心,x和y坐标分别向右和向下增大
视图坐标:视图坐标就是视图部件的坐标,原点在QGraphicsView视口的左上角,x和y坐标分别向右和向下增大
图形项坐标:图形项使用自己的本地坐标系统,坐标通常是以它们的中心为原点(0,0),而这也是所有变换的中心
坐标映射:实现坐标变换,不仅可以在视图、场景和图形项之间使用坐标映射,还可以在父子图形项等之间进行映射:
这里是坐标映射函数表格:
可以将我的示例中的pro文件内容修改为下面这样,来运行示例1,通过查看打印结果,直观的了解各坐标系统
#条件编译
DEFINES += EXAMPLE_1
#DEFINES += EXAMPLE_2
三、图形视图框架的事件处理
图形视图框架中的事件都是先由视图进行接收,然后传递给场景,再由场景传递给相应的图形项
1.键盘事件和图形效果:这里对图形项的键盘按下事件进行处理,并为图形项添加图形效果
//键盘按下事件处理,移动图形项
void MyItem::keyPressEvent(QKeyEvent *event)
{
    switch(event->key())
    {
    //移动图形项
    case Qt::Key_Up:   //上移
    {
        moveBy(0,-10);
        break;
    }
    case Qt::Key_Down:   //下移
    {
        moveBy(0,10);
        break;
    }
    case Qt::Key_Left:   //左移
    {
        moveBy(-10,0);
        break;
    }
    case Qt::Key_Right:   //右移
    {
        moveBy(10,0);
        break;
    }

    //添加图形效果
    case Qt::Key_1:   //模糊效果
    {
        QGraphicsBlurEffect *blurEffect = new QGraphicsBlurEffect;
        blurEffect->setBlurHints(QGraphicsBlurEffect::QualityHint);
        blurEffect->setBlurRadius(8);
        setGraphicsEffect(blurEffect);
        break;
    }
    case Qt::Key_2:   //染色效果
    {
        QGraphicsColorizeEffect *ColorizeEffect = new QGraphicsColorizeEffect;
        ColorizeEffect->setColor(Qt::white);
        ColorizeEffect->setStrength(0.6);
        setGraphicsEffect(ColorizeEffect);
        break;
    }
    case Qt::Key_3:   //阴影效果
    {
        QGraphicsDropShadowEffect *dropShadowEffect = new QGraphicsDropShadowEffect;
        dropShadowEffect->setColor(QColor(63,63,63,100));
        dropShadowEffect->setBlurRadius(2);
        dropShadowEffect->setXOffset(10);
        setGraphicsEffect(dropShadowEffect);
        break;
    }
    case Qt::Key_4:   //透明效果
    {
        QGraphicsOpacityEffect *opacityEffect = new QGraphicsOpacityEffect;
        opacityEffect->setOpacity(0.4);
        setGraphicsEffect(opacityEffect);
        break;
    }
    case Qt::Key_5:   //取消图形项的图形效果
        graphicsEffect()->setEnabled(false);
        break;
    }
}
2.鼠标悬停效果:设置鼠标悬停在图形项上面时的光标外观和提示
//悬停事件处理,设置光标外观和提示
void MyItem::hoverEnterEvent(QGraphicsSceneHoverEvent *)
{
    setCursor(Qt::OpenHandCursor);
    setToolTip(QString("我是%1号图形项").arg(m_id));
}
3.鼠标移动事件和右键菜单:实现用鼠标拖动图形项,并为图形项添加一个右键菜单
//鼠标移动事件处理,获得焦点并改变光标外观
void MyItem::mouseMoveEvent(QGraphicsSceneMouseEvent *event)
{
    setFocus();
    setCursor(Qt::ClosedHandCursor);

    //鼠标拖动设置图形项的场景坐标
    //QPointF scenePos = mapToScene(event->pos());
    //setPos(scenePos);

    //直接用这一句顶上面两句
    QGraphicsItem::mouseMoveEvent(event);
}

//右键菜单事件处理,为图形项添加一个右键菜单
void MyItem::contextMenuEvent(QGraphicsSceneContextMenuEvent *event)
{
    QMenu menu;
    QAction *viewAction = menu.addAction("移动到视图原点");
    QAction *sceneAction = menu.addAction("移动到场景原点");
    QAction *selectedAction = menu.exec(event->screenPos());
    if(selectedAction == viewAction)
    {
        setPos(-200,-150);   //与main函数中设置的场景矩形原点一致
    }
    else if(selectedAction == sceneAction)
    {
        setPos(0,0);
    }
}
4.动画
(1)使用QPropertyAnimation类来为图形项的某属性创建动画
int main(int argc,char *argv[])
{
	...
	//为图形项的rotation属性创建动画
    MyItem *item_111 = new MyItem;
    item_111->setId(111);
    item_111->setColor(Qt::yellow);
    item_111->setPos(15,50);
    scene.addItem(item_111);
    QPropertyAnimation *animation = new QPropertyAnimation(item_111,"rotation");
    animation->setDuration(2000);
    animation->setStartValue(0);
    animation->setEndValue(360);
    animation->start(QAbstractAnimation::DeleteWhenStopped);
    ...
}
(2)使用QGraphicsScene::advance()来推进场景
int main(int argc,char *argv[])
{
	...
	//创建定时器调用场景的advance()函数,并且会自动调用所有图形项的advance()函数
    QTimer timer;
    QObject::connect(&timer,&QTimer::timeout,&scene,&QGraphicsScene::advance);
    //timer.start(300);
    ...
}

//动画处理
void MyItem::advance(int phase)
{
    //第一个阶段不进行处理
    if(!phase)
    {
        return;
    }

    //图形项向不同方向随机移动
    int value = qrand() % 100;
    if(value < 25)
    {
        setRotation(45);
        moveBy(qrand() % 10,qrand() % 10);
    }
    else if(value < 50)
    {
        setRotation(-45);
        moveBy(-qrand() % 10,-qrand() % 10);
    }
    else if(value < 75)
    {
        setRotation(30);
        moveBy(-qrand() % 10,qrand() % 10);
    }
    else
    {
        setRotation(-30);
        moveBy(qrand() % 10,-qrand() % 10);
    }
}
5.碰撞检测
(1)重新实现使用QGraphicsItem::shape()函数来返回图形项准确的形状,结合碰撞判断函数使用
(2)重新实现collidesWithItem()函数来提供一个自定义的图形项碰撞算法
QGraphicsItem类中提供了下面这些碰撞判断函数:
collidesWithItem()来判断是否与指定的图形项进行了碰撞
collidesWithPath()来判断是否与指定的路径碰撞
collidingItems()来获取与该图形项碰撞的所有图形项的列表
这几个函数都有一个Qt::ItemSelectionMode参数来指定怎样进行图形项的选取,默认值是Qt::IntersectsItemShape
下面对第一种方式进行代码展示
//返回图形项对应的形状
QPainterPath MyItem::shape() const
{
    QPainterPath path;
    path.addRect(-10,-10,20,20);
    return path;
}

//执行实际的绘图操作
void MyItem::paint(QPainter *painter,const QStyleOptionGraphicsItem *,QWidget *)
{
    if(hasFocus() || !collidingItems().isEmpty())   //是否获得焦点或者有碰撞
    {
        painter->setPen(QPen(QColor(255,255,255,200)));
    }
    else
    {
        painter->setPen(QPen(QColor(100,100,100,100)));
    }
    painter->setBrush(m_brushColor);
    painter->drawRect(-10,-10,20,20);
}
6.图形项组:QGraphicsItemGroup图形项组为图形项提供了一个容器,下面代码对其使用进行了展示
int main(int argc,char *argv[])
{
	...
	//创建图形项组
    MyItem *item_10 = new MyItem;
    item_10->setId(10);
    item_10->setColor(Qt::blue);
    MyItem *item_11 = new MyItem;
    item_11->setId(11);
    item_11->setColor(Qt::green);
    QGraphicsItemGroup *group = new QGraphicsItemGroup;   //手动创建图形项组
    group->setFlag(QGraphicsItem::ItemIsMovable);
    group->addToGroup(item_10);   //将图形项添加到项组
    group->addToGroup(item_11);
    item_11->setPos(30,0);
    scene.addItem(group);   //将项组添加到场景
    //QGraphicsItemGroup *group = scene.createItemGroup(scene.selectedItems());   //使用场景对象直接创建图形项组
    //group->QGraphicsItemGroup::setHandlesChildEvents(false);   //让项组内的图形项可以捕获自己的相关事件
    //group->removeFromGroup(item1);   //从项组中删除图形项
    //scene.destroyItemGroup(group);   //销毁整个图形项组
    ...
}
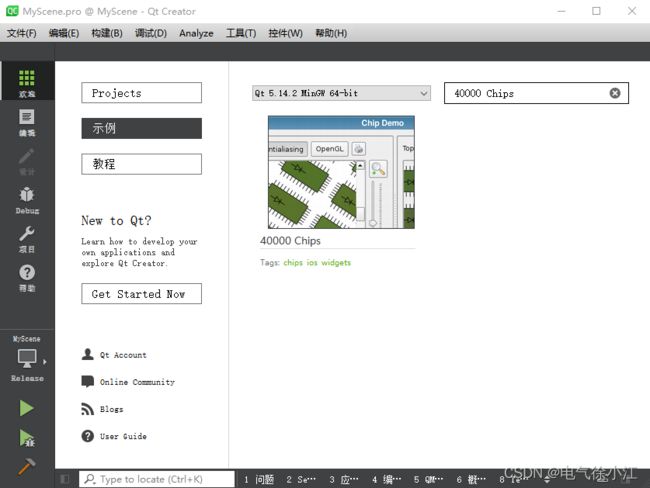
(在QtCreator下的官方示例下有这个图形视图框架管理大量的图形项的示例:40000 Chips,可以作为参考)
7.打印:图形视图框架提供下面的渲染函数来完成打印功能
场景坐标上使用QGraphicsScene::render()函数实现打印
视图坐标上使用QGraphicsView::render()函数实现屏幕快照
int main(int argc,char *argv[])
{
	...
	//在打印机上进行打印
    QPrinter printer;
    if(QPrintDialog(&printer).exec() == QDialog::Accepted)
    {
        QPainter painter1(&printer);
        painter1.setRenderHint(QPainter::Antialiasing);
        scene.render(&painter1);
    }

    //实现屏幕快照功能,在项目生成的目录中保存图像
    QPixmap pixmap(400,300);
    QPainter painter2(&pixmap);
    painter2.setRenderHint(QPainter::Antialiasing);
    view.render(&painter2);
    painter2.end();
    pixmap.save("view.png");
	...
}
8.使用OpenGL进行渲染:使用QGraphicsView::setViewport()更改QGraphicsView的视口,就可以使用OpenGL进行渲染了
int main(int argc,char *argv[])
{
	...
	//自定义视图
    MyView view;
    view.setViewport(new QOpenGLWidget);
    //view.setViewport(new QGLWidget(QGLFormat(QGL::SampleBuffers)));   //使用OpenGL进行渲染
	...
}
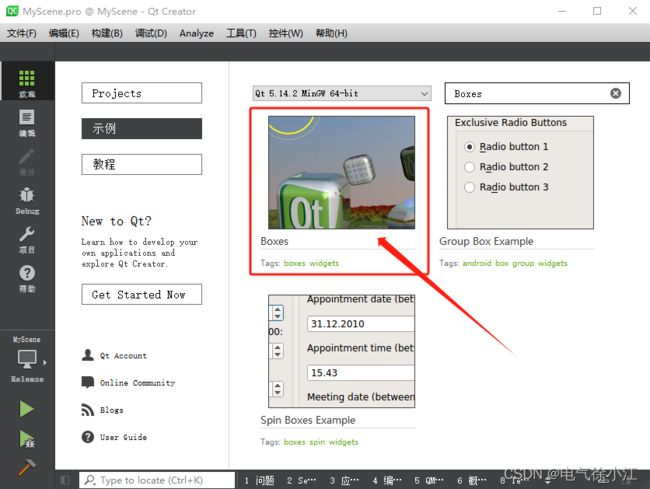
(在QtCreator下的官方示例下有这个图形视图框架与OpenGL渲染的示例:Boxes,可以作为参考)
可以将我的示例中的pro文件内容修改为下面这样,来运行示例2,学习图形视图框架下相关的事件处理
#条件编译
#DEFINES += EXAMPLE_1
DEFINES += EXAMPLE_2
四、示例完整代码
1.MyScene.pro
QT += widgets
QT += printsupport
QT += opengl

SOURCES += \
    main.cpp \
    myitem.cpp \
    myview.cpp

HEADERS += \
    myitem.h \
    myview.h

#条件编译
#DEFINES += EXAMPLE_1
DEFINES += EXAMPLE_2
2.myitem.h
#ifndef MYITEM_H
#define MYITEM_H
#include 3.myitem.cpp
#include "myitem.h"

MyItem::MyItem(QGraphicsItem *parent) :
    QGraphicsObject(parent)
{
#if EXAMPLE_2
    m_brushColor = Qt::red;

    //开启图形项的特殊功能
    setFlag(QGraphicsItem::ItemIsFocusable);
    setFlag(QGraphicsItem::ItemIsMovable);
    setFlag(QGraphicsItem::ItemIsSelectable);
    setAcceptHoverEvents(true);   //使图形项支持悬停事件
#endif
}

#if EXAMPLE_1
//返回绘制图形项的矩形区域
QRectF MyItem::boundingRect() const
{
    qreal penWidth = 1;
    return QRectF(0 - penWidth/2,0 - penWidth/2,20 + penWidth,20 + penWidth);
}

//执行实际的绘图操作
void MyItem::paint(QPainter *painter,const QStyleOptionGraphicsItem *,QWidget *)
{
    painter->setBrush(Qt::red);
    painter->drawRect(0,0,20,20);
}
#endif

#if EXAMPLE_2
//返回绘制图形项的矩形区域
QRectF MyItem::boundingRect() const
{
    qreal adjust = 0.5;
    return QRectF(-10 - adjust,-10 - adjust,20 + adjust,20 + adjust);
}

//执行实际的绘图操作
void MyItem::paint(QPainter *painter,const QStyleOptionGraphicsItem *,QWidget *)
{
    if(hasFocus() || !collidingItems().isEmpty())   //是否获得焦点或者有碰撞
    {
        painter->setPen(QPen(QColor(255,255,255,200)));
    }
    else
    {
        painter->setPen(QPen(QColor(100,100,100,100)));
    }
    painter->setBrush(m_brushColor);
    painter->drawRect(-10,-10,20,20);
}

//动画处理
void MyItem::advance(int phase)
{
    //第一个阶段不进行处理
    if(!phase)
    {
        return;
    }

    //图形项向不同方向随机移动
    int value = qrand() % 100;
    if(value < 25)
    {
        setRotation(45);
        moveBy(qrand() % 10,qrand() % 10);
    }
    else if(value < 50)
    {
        setRotation(-45);
        moveBy(-qrand() % 10,-qrand() % 10);
    }
    else if(value < 75)
    {
        setRotation(30);
        moveBy(-qrand() % 10,qrand() % 10);
    }
    else
    {
        setRotation(-30);
        moveBy(qrand() % 10,-qrand() % 10);
    }
}

//返回图形项对应的形状
QPainterPath MyItem::shape() const
{
    QPainterPath path;
    path.addRect(-10,-10,20,20);
    return path;
}

//设置图形项序号
void MyItem::setId(int id)
{
    m_id = id;
}

//设置填充颜色
void MyItem::setColor(const QColor &color)
{
    m_brushColor = color;
}

//键盘按下事件处理,移动图形项
void MyItem::keyPressEvent(QKeyEvent *event)
{
    switch(event->key())
    {
    //移动图形项
    case Qt::Key_Up:   //上移
    {
        moveBy(0,-10);
        break;
    }
    case Qt::Key_Down:   //下移
    {
        moveBy(0,10);
        break;
    }
    case Qt::Key_Left:   //左移
    {
        moveBy(-10,0);
        break;
    }
    case Qt::Key_Right:   //右移
    {
        moveBy(10,0);
        break;
    }

    //添加图形效果
    case Qt::Key_1:   //模糊效果
    {
        QGraphicsBlurEffect *blurEffect = new QGraphicsBlurEffect;
        blurEffect->setBlurHints(QGraphicsBlurEffect::QualityHint);
        blurEffect->setBlurRadius(8);
        setGraphicsEffect(blurEffect);
        break;
    }
    case Qt::Key_2:   //染色效果
    {
        QGraphicsColorizeEffect *ColorizeEffect = new QGraphicsColorizeEffect;
        ColorizeEffect->setColor(Qt::white);
        ColorizeEffect->setStrength(0.6);
        setGraphicsEffect(ColorizeEffect);
        break;
    }
    case Qt::Key_3:   //阴影效果
    {
        QGraphicsDropShadowEffect *dropShadowEffect = new QGraphicsDropShadowEffect;
        dropShadowEffect->setColor(QColor(63,63,63,100));
        dropShadowEffect->setBlurRadius(2);
        dropShadowEffect->setXOffset(10);
        setGraphicsEffect(dropShadowEffect);
        break;
    }
    case Qt::Key_4:   //透明效果
    {
        QGraphicsOpacityEffect *opacityEffect = new QGraphicsOpacityEffect;
        opacityEffect->setOpacity(0.4);
        setGraphicsEffect(opacityEffect);
        break;
    }
    case Qt::Key_5:   //取消图形项的图形效果
        graphicsEffect()->setEnabled(false);
        break;
    }
}

//鼠标移动事件处理,获得焦点并改变光标外观
void MyItem::mouseMoveEvent(QGraphicsSceneMouseEvent *event)
{
    setFocus();
    setCursor(Qt::ClosedHandCursor);

    //鼠标拖动设置图形项的场景坐标
    //QPointF scenePos = mapToScene(event->pos());
    //setPos(scenePos);

    //直接用这一句顶上面两句
    QGraphicsItem::mouseMoveEvent(event);
}

//悬停事件处理,设置光标外观和提示
void MyItem::hoverEnterEvent(QGraphicsSceneHoverEvent *)
{
    setCursor(Qt::OpenHandCursor);
    setToolTip(QString("我是%1号图形项").arg(m_id));
}

//右键菜单事件处理,为图形项添加一个右键菜单
void MyItem::contextMenuEvent(QGraphicsSceneContextMenuEvent *event)
{
    QMenu menu;
    QAction *viewAction = menu.addAction("移动到视图原点");
    QAction *sceneAction = menu.addAction("移动到场景原点");
    QAction *selectedAction = menu.exec(event->screenPos());
    if(selectedAction == viewAction)
    {
        setPos(-200,-150);   //与main函数中设置的场景矩形原点一致
    }
    else if(selectedAction == sceneAction)
    {
        setPos(0,0);
    }
}
#endif
4.myview.h
#ifndef MYVIEW_H
#define MYVIEW_H
#include 5.myview.cpp
#include "myview.h"

MyView::MyView(QWidget *parent) :
    QGraphicsView(parent)
{

}

#if EXAMPLE_1
void MyView::mousePressEvent(QMouseEvent *event)
{
    //视图坐标
    QPoint viewPos = event->pos();
    qDebug()<<"viewPos:"<<viewPos;

    //场景坐标
    QPointF scenePos = mapToScene(viewPos);
    qDebug()<<"scenePos:"<<scenePos;

    //图形项坐标
    QGraphicsItem *item = scene()->itemAt(scenePos,QTransform());
    if(item)
    {
        QPointF itemPos = item->mapFromScene(scenePos);
        qDebug()<<"itemPos:"<<itemPos;
    }
}
#endif

#if EXAMPLE_2
void MyView::keyPressEvent(QKeyEvent *event)
{
    switch(event->key())
    {
    case Qt::Key_Plus:
        scale(1.2,1.2);
        break;
    case Qt::Key_Minus:
        scale(1/1.2,1/1.2);
        break;
    case Qt::Key_Enter:
        rotate(30);
        break;
    }
    QGraphicsView::keyPressEvent(event);
}
#endif
6.main.cpp
#include 五、QtCreator官方示例
总结
通过以上的学习,对于这个由场景、视图和图形项这三大类组成的图形视图框架有了更加清晰的认识。文中提到的QtCreator下的官方示例我也运行查看了下,作为参考也可以学习本文示例外的一些知识,推荐大家也去看看
hello:
共同学习,共同进步,如果还有相关问题,可在评论区留言进行讨论。
学习书籍:【Qt Creator快速入门_霍亚飞编著】


