LibJpeg的安装与修复颜色错误图像错位保姆级教程
0. 直接跳到第4部分(安装),请直接前往卸载已编译好的库
已编译并修复的jpeglib库-C++文档类资源-CSDN文库
1. 下载
官方下载链接
jpeg-9c版下载链接 (本文版本)
本文使用jpeg-9c版,若没有需要,请点击上方"jpeg-9c版下载链接(本文版本)"进行下载。
以下是其他版本的下载方法
点击上方"官方下载链接"进入下载页面
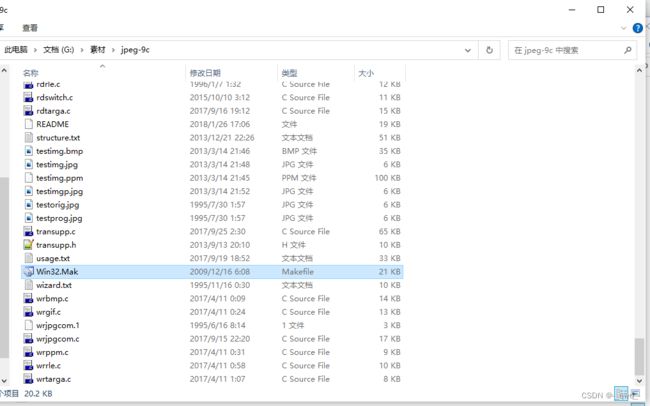
在上方圈起来的14个文件中选择你需要的版本进行下载,并解压到任意一个文件夹中
2. 修复
由于libjpeg有一些bug的原因,可能导致颜色红蓝互换与图像在压缩时错位。
libjpeg-9c生成图片颜色异常调整,及图像错位调整(文件jccolor.c)_书生也疯狂的博客-CSDN博客
我是参考这篇文章写出的修复教程

打开我们刚才解压到的目录
我们需要修改jccolor.c这个文件,这里使用dev-c++打开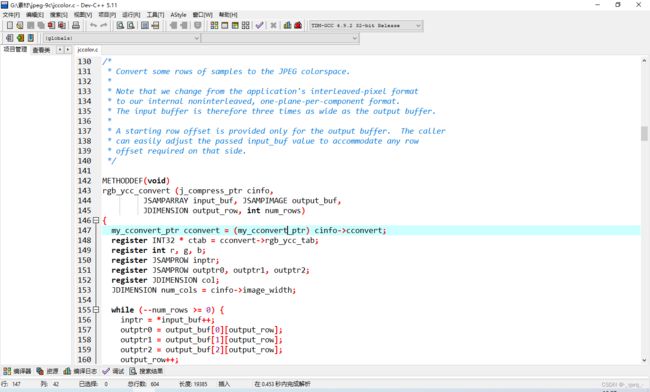
看到130行到185行,这里就是导致问题出现的代码
PS: 每个版本位置可能不一样
出现问题的代码 :
/*
 * Convert some rows of samples to the JPEG colorspace.
 *
 * Note that we change from the application's interleaved-pixel format
 * to our internal noninterleaved, one-plane-per-component format.
 * The input buffer is therefore three times as wide as the output buffer.
 *
 * A starting row offset is provided only for the output buffer.  The caller
 * can easily adjust the passed input_buf value to accommodate any row
 * offset required on that side.
 */

METHODDEF(void)
rgb_ycc_convert (j_compress_ptr cinfo,
		 JSAMPARRAY input_buf, JSAMPIMAGE output_buf,
		 JDIMENSION output_row, int num_rows)
{
  my_cconvert_ptr cconvert = (my_cconvert_ptr) cinfo->cconvert;
  register INT32 * ctab = cconvert->rgb_ycc_tab;
  register int r, g, b;
  register JSAMPROW inptr;
  register JSAMPROW outptr0, outptr1, outptr2;
  register JDIMENSION col;
  JDIMENSION num_cols = cinfo->image_width;

  while (--num_rows >= 0) {
    inptr = *input_buf++;
    outptr0 = output_buf[0][output_row];
    outptr1 = output_buf[1][output_row];
    outptr2 = output_buf[2][output_row];
    output_row++;
    for (col = 0; col < num_cols; col++) {
      r = GETJSAMPLE(inptr[RGB_RED]);
      g = GETJSAMPLE(inptr[RGB_GREEN]);
      b = GETJSAMPLE(inptr[RGB_BLUE]);
      /* If the inputs are 0..MAXJSAMPLE, the outputs of these equations
       * must be too; we do not need an explicit range-limiting operation.
       * Hence the value being shifted is never negative, and we don't
       * need the general RIGHT_SHIFT macro.
       */
      /* Y */
      outptr0[col] = (JSAMPLE)
		((ctab[r+R_Y_OFF] + ctab[g+G_Y_OFF] + ctab[b+B_Y_OFF])
		 >> SCALEBITS);
      /* Cb */
      outptr1[col] = (JSAMPLE)
		((ctab[r+R_CB_OFF] + ctab[g+G_CB_OFF] + ctab[b+B_CB_OFF])
		 >> SCALEBITS);
      /* Cr */
      outptr2[col] = (JSAMPLE)
		((ctab[r+R_CR_OFF] + ctab[g+G_CR_OFF] + ctab[b+B_CR_OFF])
		 >> SCALEBITS);
      inptr += RGB_PIXELSIZE;
    }
  }
}
我们将这块代码修改为:
/*
 * Convert some rows of samples to the JPEG colorspace.
 *
 * Note that we change from the application's interleaved-pixel format
 * to our internal noninterleaved, one-plane-per-component format.
 * The input buffer is therefore three times as wide as the output buffer.
 *
 * A starting row offset is provided only for the output buffer.  The caller
 * can easily adjust the passed input_buf value to accommodate any row
 * offset required on that side.
 */

METHODDEF(void)
rgb_ycc_convert (j_compress_ptr cinfo,
		 JSAMPARRAY input_buf, JSAMPIMAGE output_buf,
		 JDIMENSION output_row, int num_rows)
{
  my_cconvert_ptr cconvert = (my_cconvert_ptr) cinfo->cconvert;
    register INT32 * ctab = cconvert->rgb_ycc_tab;
  register int r, g, b;
  register JSAMPROW inptr;
  register JSAMPROW outptr0, outptr1, outptr2;
  register JDIMENSION col;
  JDIMENSION num_cols = cinfo->image_width;
  while (--num_rows >= 0) {
    inptr = *input_buf++;
    outptr0 = output_buf[0][output_row];
    outptr1 = output_buf[1][output_row];
    outptr2 = output_buf[2][output_row];
    output_row++;
     for (col = num_cols-18; col < num_cols; col++) {//第一次像素调整从第十八像素开始加载(PS:调整图像错位问题)
      r = GETJSAMPLE(inptr[RGB_BLUE]);
      g = GETJSAMPLE(inptr[RGB_GREEN]);
      b = GETJSAMPLE(inptr[RGB_RED]);
      /* If the inputs are 0..MAXJSAMPLE, the outputs of these equations
       * must be too; we do not need an explicit range-limiting operation.
       * Hence the value being shifted is never negative, and we don't
       * need the general RIGHT_SHIFT macro.
       */
      /* Y */
      outptr0[col] = (JSAMPLE)
		((ctab[r+R_Y_OFF] + ctab[g+G_Y_OFF] + ctab[b+B_Y_OFF])
		 >> SCALEBITS);
      /* Cb */
      outptr1[col] = (JSAMPLE)
		((ctab[r+R_CB_OFF] + ctab[g+G_CB_OFF] + ctab[b+B_CB_OFF])
		 >> SCALEBITS);
      /* Cr */
      outptr2[col] = (JSAMPLE)
		((ctab[r+R_CR_OFF] + ctab[g+G_CR_OFF] + ctab[b+B_CR_OFF])
		 >> SCALEBITS);
      inptr += RGB_PIXELSIZE;
    }
	   for (col = 0; col > SCALEBITS);
      /* Cb */
      outptr1[col] = (JSAMPLE)
		((ctab[r+R_CB_OFF] + ctab[g+G_CB_OFF] + ctab[b+B_CB_OFF])
		 >> SCALEBITS);
      /* Cr */
      outptr2[col] = (JSAMPLE)
		((ctab[r+R_CR_OFF] + ctab[g+G_CR_OFF] + ctab[b+B_CR_OFF])
		 >> SCALEBITS);
      inptr += RGB_PIXELSIZE;
    }
  }
}
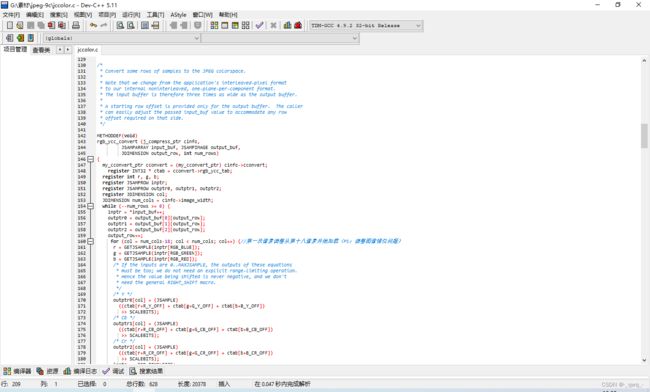
这是修改后的代码,Ctrl+S保存
至此,修复完成
3. 编译
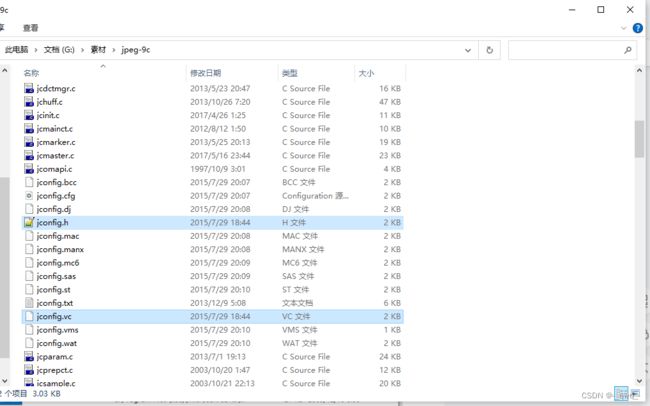
把 jconfig.vc复制,并改名为jconfig.h
然后需要把win32.mak移动到这个文件夹
win32.mak下载链接
这个文件可以通过上方链接下载,或使用 Everything 全盘搜索找到在C盘的这个文件
然后,把这个文件复制到libjpeg的解压目录
然后启动Vistual studio命令行工具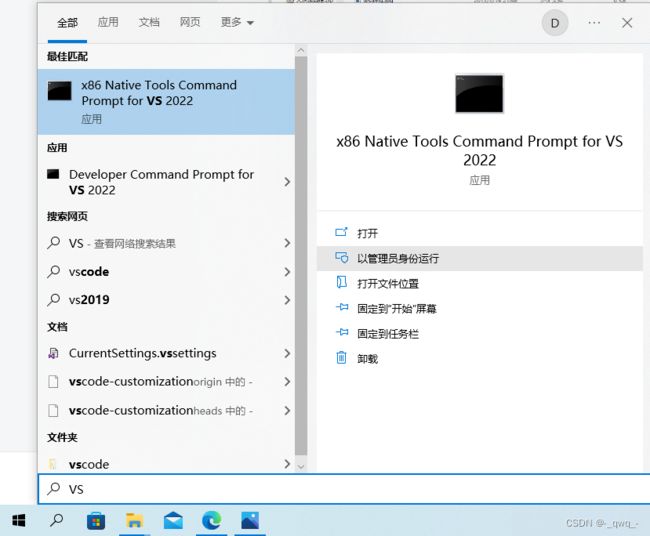
输入:
libjpeg解压的盘符:
cd libjpeg解压的目录
如:
G:
cd G:\素材\jpeg-9c
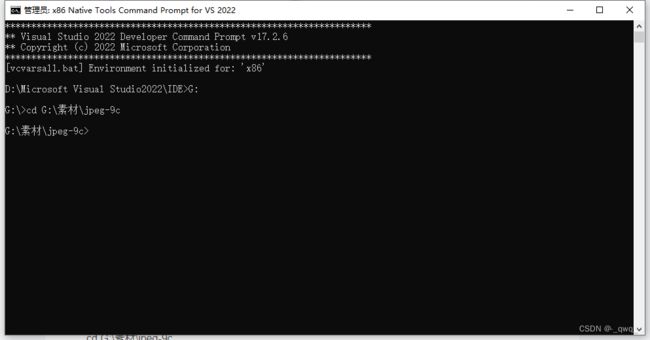
输入nmake -f makefile.vc,开始编译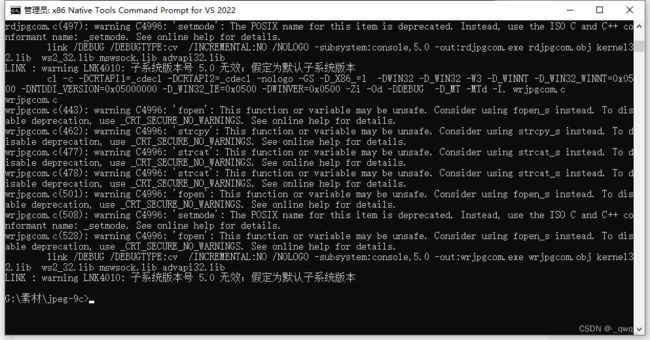
编译完成
4. 安装
进入你需要安装libjpeg的Visual Studio项目的目录,并把编译好的文件夹复制进去
使用打开 Visual Studio 打开这个项目
左上角→项目→属性
C/C++→常规→附加包含目录→输入路径
注意:这里的jpeg-9c不是库名称,而是我们刚才复制的编译好的文件夹的名称 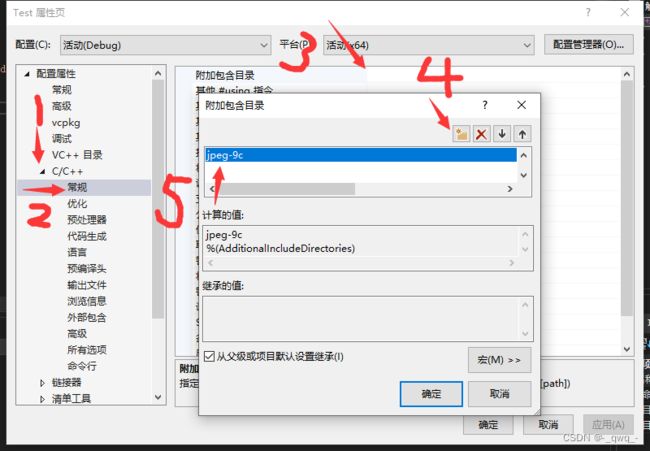
点击确定,应用,安装完毕
5. 导入
先加载头文件,(jpeglib是C语言的头文件,需要使用extern导入为C格式)
extern "C" {
#include "jpeglib.h"
}
加载lib库
#pragma comment(lib, "libjpeg.lib")导入完毕
完