Spring中@Autowired、@Qualifier、@Resourse、@Value注解方式的使用
@Autowired:根据属性类型进行的自动装配
@Qualifier:根据属性名称进行注入
@Resourse:可以根据类型注入,也可以根据名称注入
@Value:注入普通类型属性
一、下面我们先来看@Autowired注解方式的使用
第①步:将service和dao创建对象,在service和dao类添加创建对象的注释
第②步:在service注入对象dao,在service类添加dao类型属性,在属性上面使用注释
import org.springframework.beans.factory.annotation.Autowired;
import org.springframework.beans.factory.annotation.Qualifier;
import org.springframework.stereotype.Service;

@Service
public class UserService {
//    不需要添加set方法
    @Autowired
    private UserDao userDao;

    public void add(){
        System.out.println("UserService add...........................");
        userDao.add();
    }
}
在上面的代码中,使用的Autowired注入的方法,根绝UserDao找到它的实现类,如果只有一个实现类的时候可以使用,如果有多个实现类,便会报错,系统不知道要的是哪个实现类
import org.springframework.stereotype.Repository;

@Repository
public class UserDaoImpl implements UserDao {
    @Override
    public void add() {
        System.out.println("dao add...................");
    }
}
public interface UserDao {
public abstract void add();
}
XML文件的内容: 记得配置context名称空间
测试类:
import org.springframework.context.ApplicationContext;
import org.springframework.context.support.ClassPathXmlApplicationContext;

public class Test {
    @org.junit.Test
    public void test(){
        ApplicationContext applicationContext = new ClassPathXmlApplicationContext("bean10Zhujie.xml");
        UserService userService = applicationContext.getBean("userService",UserService.class);

        userService.add();
    }
}
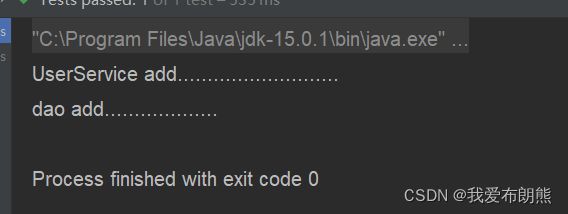
运行结果:
二、
下面是@Qualifier的使用
此注解要和上面的@Autowired一起使用
根据名称进行注入,让系统知道了我们具体要引入哪个实现类,当有多个实现类的时候,我们可以使用此方法
import org.springframework.beans.factory.annotation.Autowired;
import org.springframework.beans.factory.annotation.Qualifier;
import org.springframework.stereotype.Service;

@Service
public class UserService {
//    不需要添加set方法
    @Autowired
    @Qualifier(value = "userDaoImpl1")
    private UserDao userDao;

    public void add(){
        System.out.println("UserService add...........................");
        userDao.add();
    }
}
import org.springframework.stereotype.Repository;
@Repository(value = "userDaoImpl1")
public class UserDaoImpl implements UserDao {
@Override
public void add() {
System.out.println("dao add...................");
}
}XML配置文件和测试类不改变,测试结果也没有改变
三、
@Resource 可以根据类型注入,可以根据名称注入
首先看根据类型注入
import org.springframework.beans.factory.annotation.Autowired;
import org.springframework.beans.factory.annotation.Qualifier;
import org.springframework.stereotype.Service;

@Service
public class UserService {
//    不需要添加set方法
    @Resource
    private UserDao userDao;

    public void add(){
        System.out.println("UserService add...........................");
        userDao.add();
    }
}
其他的代码块不变
再来看根据名称注入 ,其他的代码块不变
注意,这里注入的时候,属性使用的是name,而不是value,别出错。
值得注意的是, @Resource不是Spring包里面的,而是java扩展包里面的
import org.springframework.beans.factory.annotation.Autowired;
import org.springframework.beans.factory.annotation.Qualifier;
import org.springframework.stereotype.Service;

@Service
public class UserService {
//    不需要添加set方法
    @Resource(name="userDaoImpl1")
    private UserDao userDao;

    public void add(){
        System.out.println("UserService add...........................");
        userDao.add();
    }
}
最终的输出结果也是下图
四、
@Value:注入普通类型属性
import org.springframework.beans.factory.annotation.Autowired;
import org.springframework.beans.factory.annotation.Qualifier;
import org.springframework.beans.factory.annotation.Value;
import org.springframework.stereotype.Service;

@Service
public class UserService {
//    不需要添加set方法
    @Value(value = "abc")
    private String name;
    @Autowired
    @Qualifier(value = "userDaoImpl1")
    private UserDao userDao;

    public void add(){
        System.out.println("UserService add..........................."+name);
        userDao.add();
    }
}
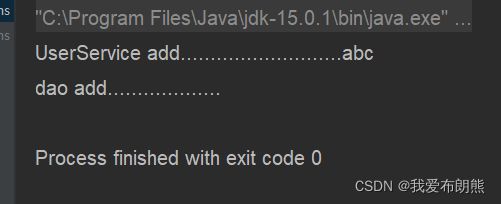
测试结果:

