从零开始搭建微服务:资源服务器
为了演示认证服务器和资源服务器在分离的模式下,如何进行资源保护和资源获取,我们来搭建两个微服务提供者:elsa-server-system和elsa-server-demo资源服务器。
因为存在多个资源服务器,因此,我们为这些微服务提供一个父模块,来统一管理。
elsa-server 父模块
创建elsa-server 父模块项目
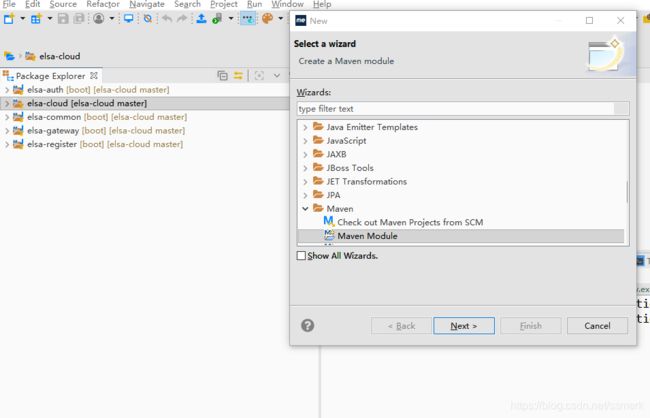
File==>新建==>Other==>搜索Maven,选择Maven Module,然后Next
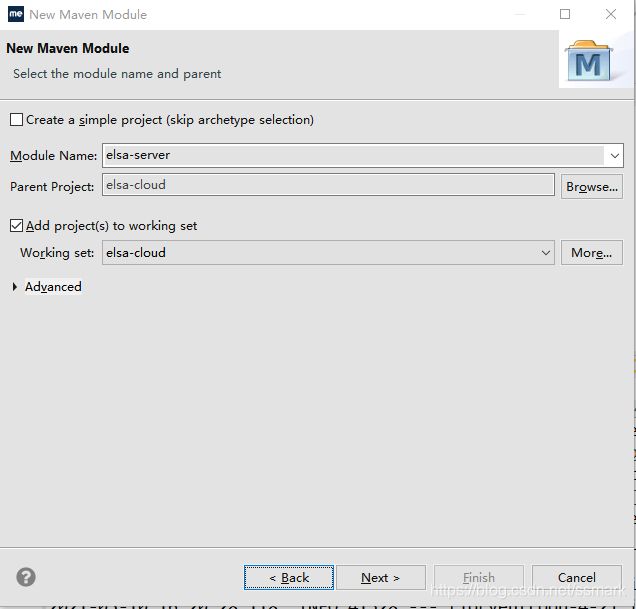
填写Module Name:elsa-server,点击Next

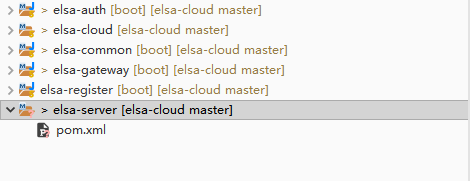
一直Next至FInish为止,创建完成,删除不必要的文件,仅保留pom.xml文件,项目结构如下
配置elsa-server依赖
<project xmlns="http://maven.apache.org/POM/4.0.0" xmlns:xsi="http://www.w3.org/2001/XMLSchema-instance" xsi:schemaLocation="http://maven.apache.org/POM/4.0.0 http://maven.apache.org/xsd/maven-4.0.0.xsd">
	<modelVersion>4.0.0modelVersion>
	<parent>
		<groupId>com.elsagroupId>
		<artifactId>elsa-cloudartifactId>
		<version>1.0-SNAPSHOTversion>
	parent>
    <artifactId>elsa-serverartifactId>
    <packaging>pompackaging>
    <name>elsa-servername>
    <description>Elsa-Server资源服务提供模块description>
	<dependencies>
		<dependency>
			<groupId>com.elsagroupId>
			<artifactId>elsa-commonartifactId>
			<version>1.0-SNAPSHOTversion>
		dependency>
	dependencies>
project>
值得注意的是:
pom ,因为此项目是作为所有微服务的父项目,所以这里指定为pom- 因为是微服务,同样的需要各种依赖,所以引入elsa-common
elsa-server-system 系统模块
创建elsa-server-system系统模块
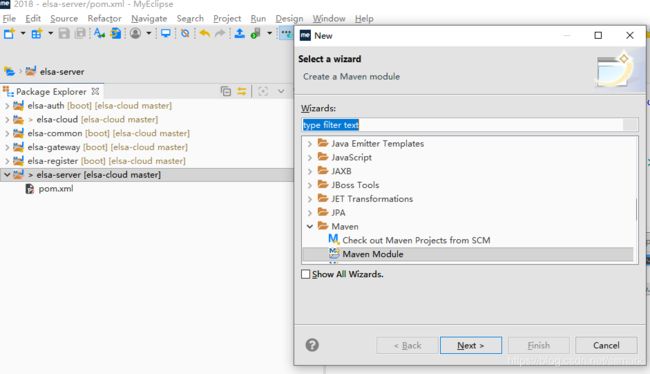
在项目elsa-server上右键==>新建==>Other==>搜索Maven,选择Maven Module,然后Next
填写Module Name:elsa-server-system,点击Next


一直Next至FInish为止,创建完成,添加资源目录resources,项目结构如下
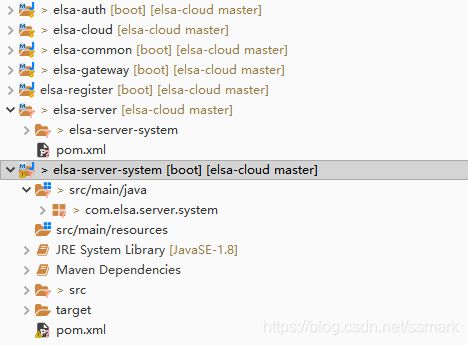
引入系统模块依赖
<project
	xsi:schemaLocation="http://maven.apache.org/POM/4.0.0 http://maven.apache.org/xsd/maven-4.0.0.xsd"
	xmlns="http://maven.apache.org/POM/4.0.0"
	xmlns:xsi="http://www.w3.org/2001/XMLSchema-instance">
	<modelVersion>4.0.0modelVersion>
	<parent>
		<groupId>com.elsagroupId>
		<artifactId>elsa-serverartifactId>
		<version>1.0-SNAPSHOTversion>
	parent>
	<artifactId>elsa-server-systemartifactId>
	<name>elsa-server-systemname>
	<description>Elsa-Server-System微服务系统模块description>

	<build>
		<plugins>
			<plugin>
				<groupId>org.springframework.bootgroupId>
				<artifactId>spring-boot-maven-pluginartifactId>
			plugin>
		plugins>
	build>

project>
创建系统模块入口类
@EnableDiscoveryClient
@SpringBootApplication
@EnableGlobalMethodSecurity(prePostEnabled = true)	//表示开启Spring Cloud Security权限注解
public class ElsaServerSystemApp {
    public static void main(String[] args) {
        SpringApplication.run(ElsaServerSystemApp.class, args);
    }
}
- @EnableDiscoveryClient 开启服务注册与发现
- @EnableGlobalMethodSecurity(prePostEnabled = true) 表示开启Spring Cloud Security权限注解
系统模块application.yml配置
server:
  port: 8201

spring:
  application:
    name: Elsa-Server-System

eureka:
  instance:
    # 向Eureka 服务端发送心跳的间隔时间,单位为秒,用于服务续约。这里配置为20秒,即每隔20秒向febs-register发送心跳,表明当前服务没有宕机
    lease-renewal-interval-in-seconds: 20
  client:
    # 为true时表示将当前服务注册到Eureak服务端
    register-with-eureka: true
    # 为true时表示从Eureka 服务端获取注册的服务信息
    fetch-registry: true
    # 新实例信息的变化到Eureka服务端的间隔时间,单位为秒
    instance-info-replication-interval-seconds: 30
    # 默认值为30秒,即每30秒去Eureka服务端上获取服务并缓存,这里指定为3秒的原因是方便开发时测试,实际可以指定为默认值即可;
    registry-fetch-interval-seconds: 3
    serviceUrl:
      # 指定Eureka服务端地址
      defaultZone: http://elsa:123456@localhost:8001/register/eureka/

# oauth2相关配置
security:
  oauth2:
    resource:
      id: ${spring.application.name}
      user-info-uri: http://localhost:8301/auth/user
配置里内容基本上前面章节中有重复,就不作过多介绍。这里主要说明下:user-info-uri,它的原理是在授权服务器认证后将认证信息Principal通过形参绑定到URL的方式,获取用户信息。
ElsaServerSystemResourceServerConfigure Web安全配置类
配置所有访问elsa-server-system的请求都需要认证,只有通过认证服务器发放的令牌才能进行访问。
@Configuration
@EnableResourceServer
public class ElsaServerSystemResourceServerConfigure extends ResourceServerConfigurerAdapter {

    @Override
    public void configure(HttpSecurity http) throws Exception {
        http.csrf().disable()
                .requestMatchers().antMatchers("/**")
            .and()
                .authorizeRequests()
                .antMatchers("/**").authenticated();
    }
}
TestController
创建一个Controller,对外提供一些REST服务。在com.elsa.server.system路径下新建controller包,然后在该包下新增TestController:
@RestController
public class TestController {

	@GetMapping("info")
	public String test() {
		return "elsa-server-system";
	}

	@GetMapping("user")
	public Principal currentUser(Principal principal) {
		return principal;
	}
}
elsa-server-demo Demo模块
参照elsa-server-system系统模块创建过程,创建elsa-server子项目,并且引入依赖,创建入口类,配置application.yml,Web安全配置类,过程无差异,可参照源码。唯一不同的是测试controller稍作调整。
DemoController
@RestController
public class DemoController {
	@GetMapping("demo1")
	@PreAuthorize("hasAnyAuthority('user:add')")
	public String demo1() {
		return "拥有'user:add'权限";
	}

	@GetMapping("demo2")
	@PreAuthorize("hasAnyAuthority('user:update')")
	public String demo2() {
		return "拥有'user:update'权限";
	}

	@GetMapping("user")
	public Principal currentUser(Principal principal) {
		return principal;
	}
}
- demo1方法测试拥有权限user:add的情况。
- demo2方法测试没有权限user:update的情况。
- user方法测试获取用户信息,此处主要是针对user-info-uri。
网关服务器配置
到这里,elsa-server-system和elsa-server-demo资源服务器微服务创建完成,下面需要在网关服务器elsa-gateway配置网关访问以上两个资源服务器的路由网关。
zuul:
  routes:
    system:
      path: /system/**
      serviceId: Elsa-Server-System
      sensitiveHeaders: "*"
    demo:
      path: /demo/**
      serviceId: Elsa-Server-Demo
      sensitiveHeaders: "*"
网关服务器完整配置文件application.xml
server:
  port: 8301

spring:
  application:
    name: Elsa-Gateway

zuul:
  routes:
    auth:
      # 以/auth开头的请求都会被转发到名称为Elsa-Auth的服务上
      path: /auth/**
      # 服务名
      serviceId: Elsa-Auth
      # 由于我们需要在请求头中携带令牌,所以sensitiveHeaders设置为*,表示不过滤请求头信息,即请求的请求头信息将原封不动的转发出去
      sensitiveHeaders: "*"
    system:
      path: /system/**
      serviceId: Elsa-Server-System
      sensitiveHeaders: "*"
    demo:
      path: /demo/**
      serviceId: Elsa-Server-Demo
      sensitiveHeaders: "*"
  # 设置为true时,表示开启重试机制;
  retryable: true
  # Zuul配合Eureka后会有一套默认的配置规则,这里我们只想请求根据我们显示配置的路由规则走,所以设置为*,表示关闭所有默认路由配置规则;
  ignored-services: "*"
  ribbon:
    eager-load:
      # Zuul内部通过Ribbon按照一定的负载均衡算法来获取服务,Ribbon进行客户端负载均衡的Client并不是在服务启动的时候就初始化好的,而是在调用的时候才会去创建相应的Client,所以第一次调用的耗时不仅仅包含发送HTTP请求的时间,还包含了创建RibbonClient的时间,这样一来如果创建时间速度较慢,同时设置的超时时间又比较短的话,第一次请求很容易出现超时的情况。设置为true的时候表示开启Ribbon的饥饿加载模式,即在应用启动的时候就去获取相应的Client备用。
      enabled: true

ribbon:
  # 设置请求超时时间,单位为毫秒;
  ReadTimeout: 3000

eureka:
  instance:
    # 向Eureka 服务端发送心跳的间隔时间,单位为秒,用于服务续约。这里配置为20秒,即每隔20秒向febs-register发送心跳,表明当前服务没有宕机
    lease-renewal-interval-in-seconds: 20
  client:
    # 为true时表示将当前服务注册到Eureak服务端
    register-with-eureka: true
    # 为true时表示从Eureka 服务端获取注册的服务信息
    fetch-registry: true
    # 新实例信息的变化到Eureka服务端的间隔时间,单位为秒
    instance-info-replication-interval-seconds: 30
    # 默认值为30秒,即每30秒去Eureka服务端上获取服务并缓存,这里指定为3秒的原因是方便开发时测试,实际可以指定为默认值即可;
    registry-fetch-interval-seconds: 3
    serviceUrl:
      # 指定Eureka服务端地址
      defaultZone: http://elsa:123456@localhost:8001/register/eureka/
PostMan测试
分别启动应用
1.Redis
2.ElsaRegesterApp
3.ElsaAuthApp
4.ElsaGatewayApp
5.ElsaServerSystemApp
6.ElsaServerDemoApp
资源服务器-认证

不携带令牌时,失败

携带令牌时,成功
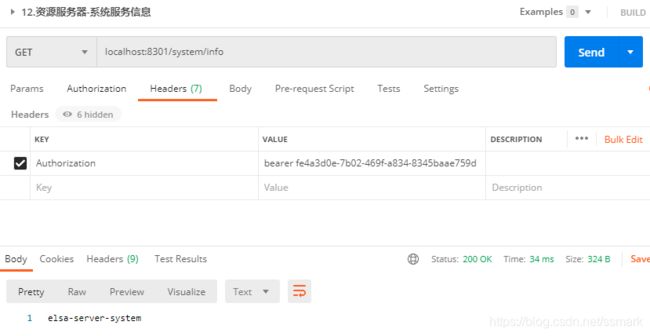
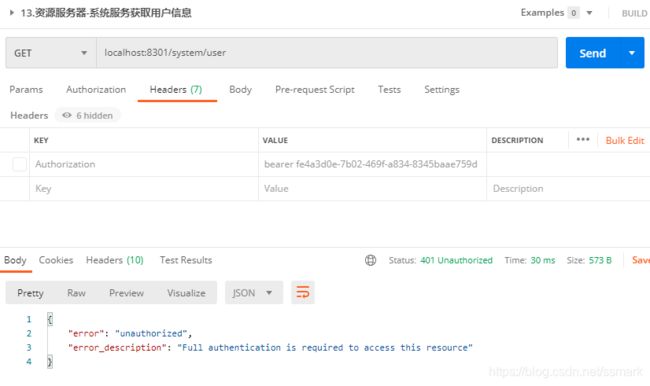
资源服务器-系统服务获取用户信息
不携带令牌时,失败
携带令牌时,成功

资源服务器-Demo模块服务有权限

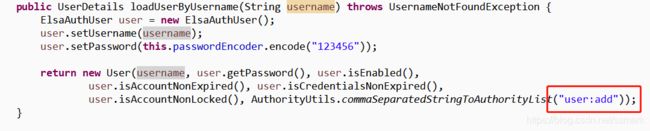
我们在elsa-auth模块的ElsaUserDetailService类loadUserByUsername方法模拟用户拥有user:add权限,所以可以正常访问。
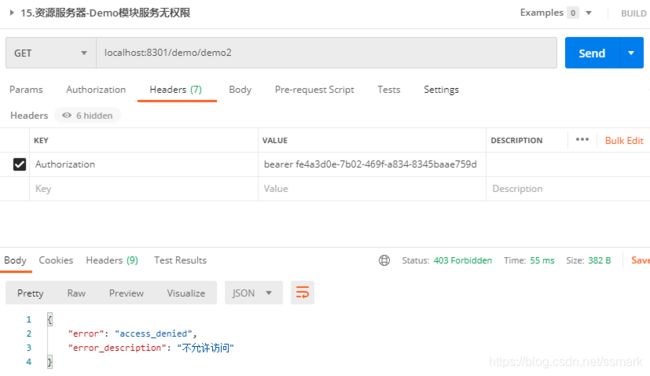
而下面的demo2没有user:update权限,所以无法访问。
资源服务器-Demo模块服务无权限
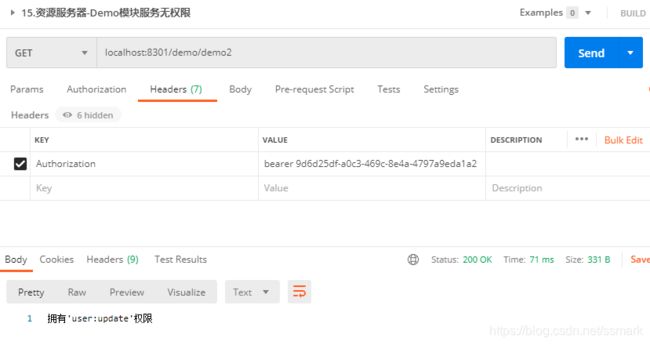
当我们在ElsaUserDetailService类loadUserByUsername方法中增加user:update时,重启ElsaAuthApp。

再测试此URL时,拥有user:update权限
资源服务器-Demo模块服务获取用户信息

源码下载
源码地址:资源服务器