springboot整合mybatis的两种方式的精讲过程(含demo下载)
前言:
spirngboot整合mybatis过程有两种整合方式,一种就是通过xml文件来写sql,另外一种就是通过注解的方式来写sql语句.但是不论哪种方式都首先需要引入一个最重要的jar包。那就是mybatis-spring-boot-starter这个包。这个包的部分功能如下:
自动检测现有的DataSource
将创建并注册SqlSessionFactory的实例,该实例使用SqlSessionFactoryBean将该DataSource作为输入进行传递
将创建并注册从SqlSessionFactory中获取的SqlSessionTemplate的实例。
自动扫描您的mappers,将它们链接到SqlSessionTemplate并将其注册到Spring上下文,以便将它们注入到您的bean中。
就是说,使用了该Starter之后,只需要定义一个DataSource即可(application.properties中可配置),它会自动创建使用该DataSource的SqlSessionFactoryBean以及SqlSessionTemplate。会自动扫描你的Mappers,连接到SqlSessionTemplate,并注册到Spring上下文中。
一、xml方式
首先引入pom文件:
		org.springframework.boot
		spring-boot-starter-parent
		1.5.6.RELEASE

	4.0.0
	com.mybatis
	mybatis
	0.0.1-SNAPSHOT


			org.springframework.boot
			spring-boot-devtools
			true


			org.springframework.boot
			spring-boot-starter-web


			org.mybatis.spring.boot
			mybatis-spring-boot-starter
			1.3.1


			mysql
			mysql-connector-java
			runtime


			org.springframework.boot
			spring-boot-starter-test
			test
包引入好了需要进行写配置文件了
mybatis.mapper-locations=classpath*:mapper/*Mapper.xml
mybatis.type-aliases-package=com.mybatis.entity
spring.datasource.url=jdbc:mysql://localhost:3306/test
spring.datasource.username=root
spring.datasource.password=*******
spring.datasource.driver-class-name=com.mysql.jdbc.Driver
说一下,这里的mybatis.mapper-locations=classpath*:mapper/*Mapper.xml就是配置我们的mapper文件放在哪里了,当项目启动的时候会首先执行这个文件,然后就会扫描该路径下的配置的xml。
mybatis.type-aliases-package=com.mybatis.entity
定义一个实体类与数据库对应。
package com.mybatis.entity;
import java.io.Serializable;
public class User implements Serializable {
	private Integer id;
	private String username;
	private String password;
	private String sex;
	private String phone;
	public Integer getId() {
		return id;
	}

	public void setId(Integer id) {
		this.id = id;
	}

	public String getUsername() {
		return username;
	}

	public void setUsername(String username) {
		this.username = username;
	}

	public String getPassword() {
		return password;
	}

	public void setPassword(String password) {
		this.password = password;
	}

	public String getSex() {
		return sex;
	}

	public void setSex(String sex) {
		this.sex = sex;
	}

	public String getPhone() {
		return phone;
	}

	public void setPhone(String phone) {
		this.phone = phone;
	}

	@Override
	public String toString() {
		return "User [id=" + id + ", username=" + username + ", password="
				+ password + ", sex=" + sex + ", phone=" + phone + "]";
	}
}
好人做到底,创建表语句也给你们。
CREATE TABLE `user` (
  `id` int(11) NOT NULL AUTO_INCREMENT,
  `username` varchar(50) DEFAULT NULL,
  `password` varchar(50) DEFAULT NULL,
  `sex` varchar(10) DEFAULT NULL,
  `phone` varchar(100) DEFAULT NULL,
  PRIMARY KEY (`id`)
) ENGINE=InnoDB AUTO_INCREMENT=10 DEFAULT CHARSET=latin1;
然后就开始写三层了。首先从dao层开始。建立一个接口。接口也不要忘记加上注解
@Mapper
public interface UserDao {
	List findAll();

	User findOne(int id);
}
然后在我们配置的位置建立Mapper文件。UserDaoMapper.xml如下:
然后就是service层代码,这里只上实现类,接口自己去写,注意不要忘记加注解
package com.mybatis.service.impl;

import java.util.List;

import org.springframework.beans.factory.annotation.Autowired;
import org.springframework.stereotype.Service;
import org.springframework.transaction.annotation.Transactional;
import com.mybatis.dao.UserDao;
import com.mybatis.entity.User;
import com.mybatis.service.UserService;

@Service
@Transactional
public class UserServiceImpl implements UserService {
	@Autowired
	private UserDao userDao;

	public User getuserById(int id) {
		// TODO Auto-generated method stub
		return userDao.findOne(id);
	}

	public List findAll() {
		// TODO Auto-generated method stub
		return userDao.findAll();
	}
}
下一步就是controller层了。注解是必须的
package com.mybatis.controller;

import java.util.List;

import org.springframework.beans.factory.annotation.Autowired;
import org.springframework.stereotype.Controller;
import org.springframework.web.bind.annotation.RequestMapping;
import org.springframework.web.bind.annotation.ResponseBody;

import com.mybatis.entity.User;
import com.mybatis.service.UserService;

@RequestMapping("test/")
@Controller
public class TestController {
	@Autowired
	private UserService userService;

	@ResponseBody
	@RequestMapping("/select")
	public User getUserById() {
		User user = userService.getuserById(4);
		System.err.println(user);
		return user;
	}

	@ResponseBody
	@RequestMapping("/findAll")
	public List findAll() {
		List findAll = userService.findAll();
		return findAll;
	}

}
启动类:springboot的核心启动工具必不可少
package com.mybatis;

import org.mybatis.spring.annotation.MapperScan;
import org.springframework.boot.SpringApplication;
import org.springframework.boot.autoconfigure.SpringBootApplication;

@SpringBootApplication
@MapperScan("com.mybatis.dao")
public class MybatisApplication {
	/**
	 * @Title: main
	 * @Description: TODO
	 * @param args
	 *  void
	 * @author mars
	 * @date 2018-10-18下午1:34:23
	 */
	public static void main(String[] args) {
		SpringApplication.run(MybatisApplication.class, args);
	}
}
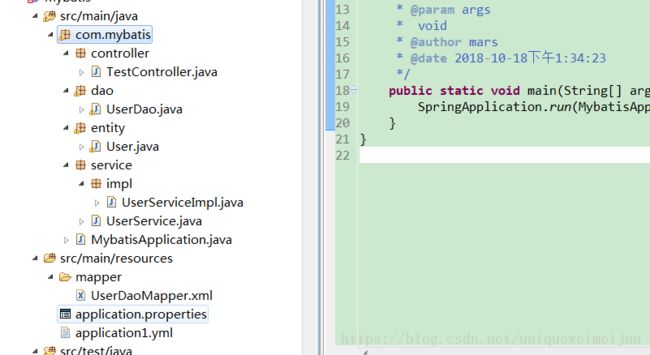
算了,项目路径也放上来吧。
然后我们就可以启动springboot项目了,运行即可。
二,基于注解的方式
1.pom文件和上边完全一样。
2.po类和上边相同。
3.核心的东西,写接口,接口里的方法加上注解注解内容写上sql就可以完全代替mapper.xml文件。
package com.boot.mybatis.mapper;

import java.util.List;

import org.apache.ibatis.annotations.Delete;
import org.apache.ibatis.annotations.Insert;
import org.apache.ibatis.annotations.Result;
import org.apache.ibatis.annotations.Results;
import org.apache.ibatis.annotations.Select;
import org.apache.ibatis.annotations.Update;
import org.springframework.stereotype.Repository;

import com.boot.mybatis.po.User;

@Repository
public interface UserMapper {
	@Select("SELECT * FROM user")
	@Results({ @Result(property = "username", column = "username"),
			@Result(property = "phone", column = "phone") })
	List getAll();

	@Select("SELECT * FROM user WHERE id = #{id}")
	User getOne(int id);

	@Select("SELECT * FROM user WHERE username = #{username}")
	User getOneByName(String username);

	@Insert("INSERT INTO user(username,password,sex,phone) VALUES(#{username}, #{password}, #{sex},#{phone})")
	void insert(User user);

	@Update("UPDATE user SET username=#{username},password=#{password} WHERE id =#{id}")
	void update(User user);

	@Delete("DELETE FROM user WHERE id =#{id}")
	void delete(Integer id);

	@Select("select * from  user where username like concat('%',#{username},'%')")
	List getByName(String username);

	@Update("update user set phone=${phone} where id=#{id}")
	void updateById(User user);
}
注意一下:SELECT * FROM user WHERE id = #{id}
SELECT * FROM user WHERE username = #{username}
这里的#换成$都会报错,截止到现在我还没有搞清楚为啥为报错。如果你知道,请在下边评论一下。其实这个文件就是该demo的核心。这里需要注意一点就是Mapper接口文件一定要加上注解。,而且在springboot的启动类上边也要加上注解 @MapperScan("com.boot.mybatis.mapper") 具体内容就是你的Mapper接口所在的包的全类名。
3。项目链接下载
xml方式
注解方式