Harbor企业级Registry基础镜像仓库的详细安装使用教程(保姆级)
Harbor
Docker 官方提供的私有仓库 registry,用起来虽然简单 ,但在管理的功能上存在不足。 Harbor是vmware一个用于存储和分发Docker镜像的企业级Registry服务器,harbor使用的是官方的docker registry(v2命名是distribution)服务去完成。 harbor在docker distribution的基础上增加了一些安全、访问控制、管理的功能以满足企业对于镜像仓库的需求。
下面直接开始保姆级的Harbor仓库的安装
首先安装好docker并启动
sudo yum install -y yum-utils
sudo yum-config-manager --add-repo  https://download.docker.com/linux/centos/docker-ce.repo
yum install docker-ce docker-ce-cli containerd.io docker-buildx-plugin docker-compose-plugin
systemctl start docker.service
还要下载docker-compose,不是docker自带的docker compose命令
[root@server151 harbor]# yum install docker-compose
然后下载harbor安装包
[root@server151 ~]# ls
harbor-offline-installer-v2.5.0.tgz
解压
[root@server151 ~]# tar -xf harbor-offline-installer-v2.5.0.tgz
[root@server151 ~]# cd harbor/
解压安装包后进入目录,可以看到有如下文件
[root@server151 harbor]# ls
common.sh             harbor.yml.tmpl  LICENSE
harbor.v2.5.0.tar.gz  install.sh       prepare
把配置文件复制为yml为后缀
[root@server151 harbor]# cp harbor.yml.tmpl harbor.yml
然后编辑配置文件,可以改成自己的主机名或者域名都可以
[root@server151 harbor]# vim harbor.yml
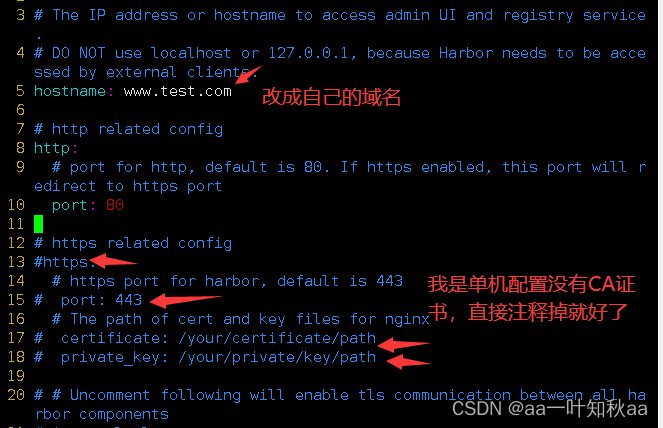

配置好这些就可以安装了,其它的调优选项可以看自己的需求来改
[root@server151 harbor]# ./install.sh
安装好以后看看我们的前端80端口起来没有
[root@server151 harbor]# netstat -pntl
Active Internet connections (only servers)
Proto Recv-Q Send-Q Local Address           Foreign Address         State       PID/Program name
tcp        0      0 0.0.0.0:22              0.0.0.0:*               LISTEN      950/sshd
tcp        0      0 127.0.0.1:25            0.0.0.0:*               LISTEN      1108/master
tcp        0      0 127.0.0.1:1514          0.0.0.0:*               LISTEN      13818/docker-proxy
tcp        0      0 0.0.0.0:80              0.0.0.0:*               LISTEN      14445/docker-proxy
tcp6       0      0 :::22                   :::*                    LISTEN      950/sshd
tcp6       0      0 ::1:25                  :::*                    LISTEN      1108/master
tcp6       0      0 :::80                   :::*                    LISTEN      14458/docker-proxy
可以看到起来了,是没有问题的,然后就去浏览器访问我们的前端页面


进来以后就大概是这种页面,默认会创建一个library仓库

接下来我们尝试用起来

拉取一个nginx镜像来做测试
[root@server151 harbor]# docker pull nginx
[root@server151 harbor]# docker images nginx
REPOSITORY   TAG       IMAGE ID       CREATED      SIZE
nginx        latest    c20060033e06   5 days ago   187MB
然后配置自己主机的A记录解析
[root@server151 harbor]# echo "192.168.121.151 www.test.com" >> /etc/hosts
然后将改域名加入到信任域名中,如下编辑文件即可
[root@server151 harbor]# cat /etc/docker/daemon.json
{"insecure-registries":["http://www.test.com"]}
然后重启docker
[root@server151 harbor]# systemctl restart docker.service
重启docker后登录docker仓库,因为我们没有创建用户,账号密码就是刚才登录前端页面的
[root@server151 harbor]# docker login www.test.com
Username: admin
Password:
WARNING! Your password will be stored unencrypted in /root/.docker/config.json.
Configure a credential helper to remove this warning. See
https://docs.docker.com/engine/reference/commandline/login/#credentials-store

Login Succeeded
看到Login Succeeded就是登录成功了
然后给我们刚才拉取下来的nginx打标签
[root@server151 harbor]# docker images nginx
REPOSITORY   TAG       IMAGE ID       CREATED      SIZE
nginx        latest    c20060033e06   5 days ago   187MB
[root@server151 harbor]# docker tag nginx:latest www.test.com/mytest/newnginx:v1
[root@server151 harbor]# docker images
REPOSITORY                      TAG       IMAGE ID       CREATED         SIZE
nginx                           latest    c20060033e06   5 days ago      187MB
www.test.com/mytest/newnginx    v1        c20060033e06   5 days ago      187MB
可以看到我们的标签已经打上了 然后推送到我们的刚才创建的mytest仓库上
[root@server151 harbor]# docker push www.test.com/mytest/newnginx:v1
The push refers to repository [www.test.com/mytest/newnginx]
505f49f13fbe: Pushed
9920f1ebf52b: Pushed
768e28a222fd: Pushed
715b32fa0f12: Pushed
e503754c9a26: Pushed
609f2a18d224: Pushed
ec983b166360: Pushed
v1: digest: sha256:d2e65182b5fd330470eca9b8e23e8a1a0d87cc9b820eb1fb3f034bf8248d37ee size: 1778
然后去前端页面查看我们的镜像

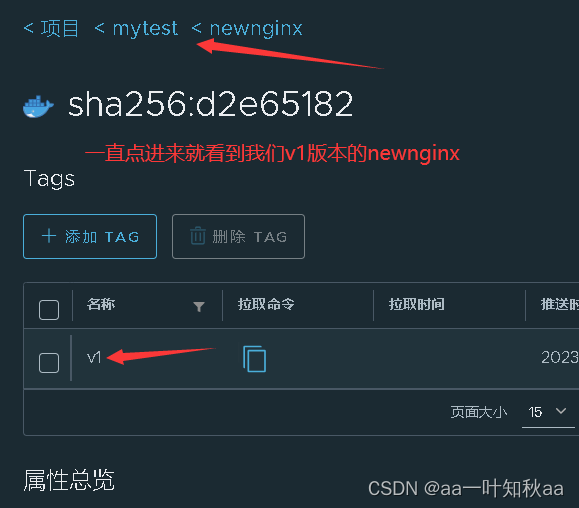
镜像仓库创建好了 ,我们试着去其它主机上拉取我们推上去的镜像
访问这个仓库的主机都要配置A记录解析,除非有DNS域名解析
[root@server159 ~]# echo "192.168.121.151 www.test.com" >> /etc/hosts
记得我们是没有CA证书的,所以访问这个仓库的主机都要配置域名信任
[root@server159 harbor]# cat /etc/docker/daemon.json
{"insecure-registries":["http://www.test.com"]}
[root@server159 ~]# systemctl restart docker.service
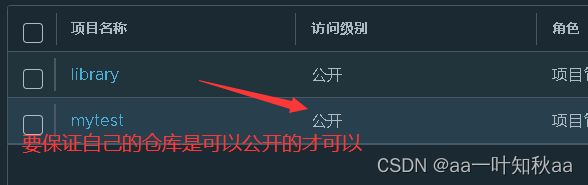
还有仓库的权限要打开
然后去刚才的前端页面复制拉取命令,或者你记得自己打的标签名也可以通过标签名直接拉
[root@server159 ~]# docker pull www.test.com/mytest/newnginx:v1
v1: Pulling from mytest/newnginx
Digest: sha256:d2e65182b5fd330470eca9b8e23e8a1a0d87cc9b820eb1fb3f034bf8248d37ee
Status: Downloaded newer image for www.test.com/mytest/newnginx:v1
www.test.com/mytest/newnginx:v1
[root@server159 ~]# docker images www.test.com/mytest/newnginx
REPOSITORY                     TAG       IMAGE ID       CREATED      SIZE
www.test.com/mytest/newnginx   v1        c20060033e06   5 days ago   187MB
可以看到我们的镜像成功拉取下来
这样我们的一个私有仓库就创建好了
对大家有帮助的话可以收藏