WebSocket的实际应用(SpringBoot+Vue)
1、WebSocket 简单介绍
随着互联网的发展,传统的HTTP协议已经很难满足Web应用日益复杂的需求了。近年来,随着HTML5的诞生,WebSocket协议被提出,它实现了浏览器与服务器的全双工通信,扩展了浏览器与服务端的通信功能,使服务端也能主动向客户端发送数据。
我们知道,传统的HTTP协议是无状态的,每次请求(request)都要由客户端(如 浏览器)主动发起,服务端进行处理后返回response结果,而服务端很难主动向客户端发送数据;这种客户端是主动方,服务端是被动方的传统Web模式 对于信息变化不频繁的Web应用来说造成的麻烦较小,而对于涉及实时信息的Web应用却带来了很大的不便,如带有即时通信、实时数据、订阅推送等功能的应 用。
伴随着HTML5推出的WebSocket,真正实现了Web的实时通信,使B/S模式具备了C/S模式的实时通信能力。WebSocket的工作流程是这 样的:浏览器通过JavaScript向服务端发出建立WebSocket连接的请求,在WebSocket连接建立成功后,客户端和服务端就可以通过 TCP连接传输数据。因为WebSocket连接本质上是TCP连接,不需要每次传输都带上重复的头部数据,所以它的数据传输量比轮询和Comet技术小 了很多。本文不详细地介绍WebSocket规范,主要介绍下WebSocket在Java Web中的实现。
2、WebScoket 示例
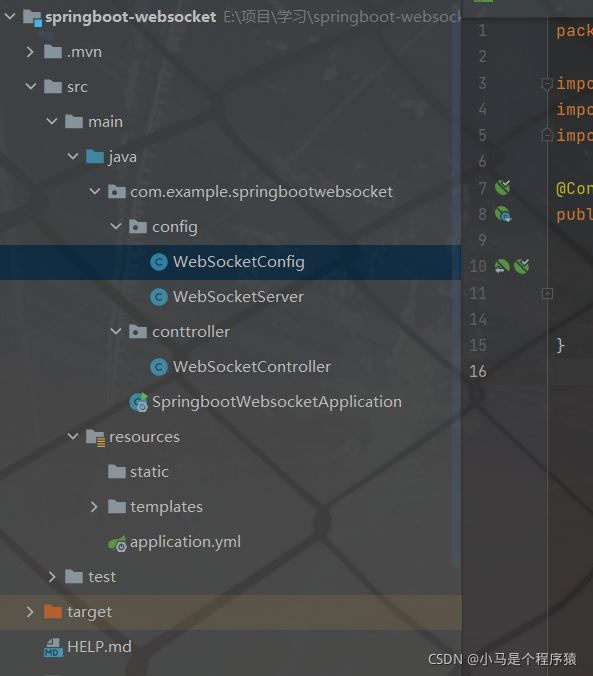
2.1 新建JavaWeb项目,使用idea新建springboot的web依赖
<project xmlns="http://maven.apache.org/POM/4.0.0" xmlns:xsi="http://www.w3.org/2001/XMLSchema-instance"
         xsi:schemaLocation="http://maven.apache.org/POM/4.0.0 https://maven.apache.org/xsd/maven-4.0.0.xsd">
    <modelVersion>4.0.0modelVersion>
    <parent>
        <groupId>org.springframework.bootgroupId>
        <artifactId>spring-boot-starter-parentartifactId>
        <version>2.5.4version>
        <relativePath/>
    parent>
    <groupId>com.examplegroupId>
    <artifactId>springboot-websocketartifactId>
    <version>0.0.1-SNAPSHOTversion>
    <name>springboot-websocketname>
    <description>Demo project for Spring Bootdescription>
    <properties>
        <java.version>1.8java.version>
    properties>
    <dependencies>
        <dependency>
            <groupId>org.springframework.bootgroupId>
            <artifactId>spring-boot-starter-thymeleafartifactId>
        dependency>
        <dependency>
            <groupId>org.springframework.bootgroupId>
            <artifactId>spring-boot-starter-webartifactId>
        dependency>
        <dependency>
            <groupId>org.springframework.bootgroupId>
            <artifactId>spring-boot-starter-websocketartifactId>
        dependency>
        <dependency>
            <groupId>org.projectlombokgroupId>
            <artifactId>lombokartifactId>
            <optional>trueoptional>
        dependency>

        <dependency>
            <groupId>org.springframework.bootgroupId>
            <artifactId>spring-boot-starter-testartifactId>
            <scope>testscope>
        dependency>
    dependencies>

    <build>
        <plugins>
            <plugin>
                <groupId>org.springframework.bootgroupId>
                <artifactId>spring-boot-maven-pluginartifactId>
            plugin>
        plugins>
    build>

project>
配置application.yml:
server:
  port: 8088

spring:
  thymeleaf:
    mode: HTML5
    encoding: UTF-8
    servlet:
      content-type: text/html
    # 开发时关闭缓存,不然没法看到实时页面
    cache: false
WebSocketConfig
package com.example.springbootwebsocket.config;

import org.springframework.context.annotation.Bean;
import org.springframework.context.annotation.Configuration;
import org.springframework.web.socket.server.standard.ServerEndpointExporter;

@Configuration
public class WebSocketConfig {

    @Bean
    public ServerEndpointExporter serverEndpointExporter(){
        return new ServerEndpointExporter();
    }

}
WebSocketServer服务器接收端
package com.example.springbootwebsocket.config;

import org.slf4j.Logger;
import org.slf4j.LoggerFactory;
import org.springframework.stereotype.Component;

import javax.websocket.*;
import javax.websocket.server.PathParam;
import javax.websocket.server.ServerEndpoint;
import java.io.IOException;
import java.util.concurrent.CopyOnWriteArraySet;
import java.util.concurrent.atomic.AtomicInteger;


/**
 * websocket服务器端点
 * @ServerEndpoint 类级别注解,将当前类定义为一个websocket服务端节点,value表示访问路径
 */
@ServerEndpoint(value = "/websocket/{userId}")
@Component
public class WebSocketServer {
    private static Logger logger = LoggerFactory.getLogger(WebSocketServer.class);

    /**
     * 与客户端的连接会话,服务器端通过它向客户端发送消息
     */
    private Session session;

    /**
     * 使用concurrent包的线程安全set,用来存放每个客户端对应的WebSocketServer对象
     */
    private static CopyOnWriteArraySet<WebSocketServer> websocketSet = new CopyOnWriteArraySet();

    /**
     * 静态变量记录在线连接数,应该把它设计成线程安全的
     */
    private static AtomicInteger onlineCount = new AtomicInteger(0);

    /**
     * 新的连接建立成功后调用此方法,此方法严禁加入死循环或线程堵塞,会导致其他事件监听失效
     *
     * @param session
     * @param userId
     */
    @OnOpen
    public void onOpen(Session session, @PathParam(value = "userId") String userId) {
        // session超时时间,超时后无法再发送消息,服务端几秒之后会触发onClose时间
        session.setMaxIdleTimeout(60 * 1000 * 30);
        // 获取当前session
        this.session = session;
        // 将当前session加入到set中
        websocketSet.add(this);
        // 在线用户连接数+1
        addOnlineCount();
        logger.info("当前用户连接数onlineCount = {}", getOnlineCount());
    }

    /**
     * 服务器端收到客户端消息时调用此方法发
     *
     * @param message
     */
    @OnMessage
    public void onMessage(String message) {
        logger.info("当前发送人sessionId = {}, 发送内容为:{}", session.getId(), message);
    }

    /**
     * 断开连接时调用此方法,此demo刷新页面即调用
     */
    @OnClose
    public void onClose() {
        // 删除当前用户session
        websocketSet.remove(this);
        // 在线用户连接数-1
        subOnlineCount();
    }

    /**
     * 出现错误时调用此方法
     *
     * @param session
     * @param error
     */
    @OnError
    public void onError(Session session, Throwable error) {
        logger.info("发生错误:{}, sessionId = {}", error.getMessage(), session.getId());
        error.printStackTrace();
    }

    /**
     * 客户端单发消息
     *
     * @param message
     * @throws IOException
     */
    public void sendMessage(String message) {
        try {
            this.session.getBasicRemote().sendText(message);
            logger.info("客户端sessionId = {},消息内容为:{}", this.session.getId(), message);
        } catch (IOException e) {
            logger.error("客户端发消息异常,异常信息为:{}", e.getMessage());
        }
    }

    /**
     * 服务器群发消息给客户端
     *
     * @param message
     */
    public void sendMessageToAll(String message) {
        for (WebSocketServer webSocketServer : websocketSet) {
            try {
                webSocketServer.session.getBasicRemote().sendText(message);
                logger.info("服务端群发消息给客户端==>sessionId = {},消息内容为:{}", webSocketServer.session.getId(), message);
            } catch (IOException e) {
                logger.error("服务端群发消息异常,异常信息为:{}", e.getMessage());
            }
        }
    }

    /**
     * 获取当前用户连接数
     *
     * @return
     */
    public static synchronized Integer getOnlineCount() {
        return WebSocketServer.onlineCount.get();
    }

    /**
     * 当前在线用户连接数+1
     */
    private static synchronized void addOnlineCount() {
        WebSocketServer.onlineCount.addAndGet(1);
    }

    /**
     * 当前在线用户连接数-1
     */
    private static synchronized void subOnlineCount() {
        if (WebSocketServer.onlineCount.get() > 0) {
            WebSocketServer.onlineCount.addAndGet(-1);
        }
    }

}
编写测试controller:WebSocketController
package com.example.springbootwebsocket.conttroller;

import com.example.springbootwebsocket.config.WebSocketServer;
import org.springframework.beans.factory.annotation.Autowired;
import org.springframework.stereotype.Controller;
import org.springframework.ui.Model;
import org.springframework.web.bind.annotation.RequestMapping;
import org.springframework.web.bind.annotation.RequestParam;

@Controller
public class WebSocketController {
    @Autowired
    private WebSocketServer webSocketServer;

    /**
     * 访问服务器端的统计信息页面
     *
     * @param model
     * @return
     */
    @RequestMapping("/server")
    public String onlineCount(Model model) {
        int count = WebSocketServer.getOnlineCount();
        // 把在线数放入model中,前端直接获取
        model.addAttribute("count", count);
        // 服务端发送信息的页面
        return "server";
    }

    /**
     * 服务端群发消息
     *
     * @param message
     * @return
     */
    @RequestMapping("/sendMessageToAll")
    public String sendMessageToAll(@RequestParam(value = "msg") String message) {
        webSocketServer.sendMessageToAll(message);
        //如果该方法返回void,那么运行时会抛出org.thymeleaf.exceptions.TemplateInputException: Error resolving template
        return "server";
    }

}
3、项目启动成功
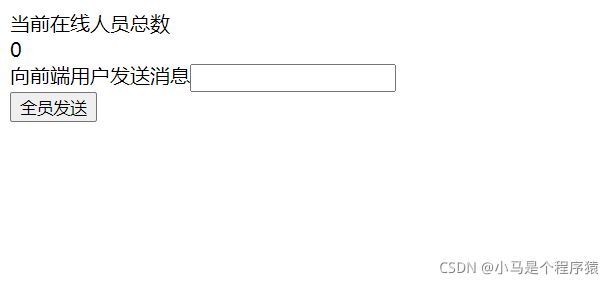
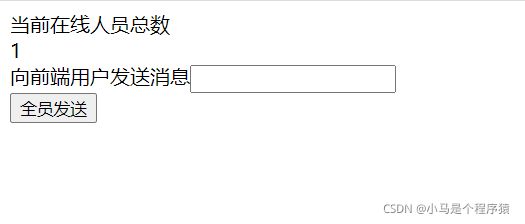
3.1 访问 http://localhost:8088/server
4、前端Vue界面使用WebSocket
<template>

  <div class="test">
    <p></p>
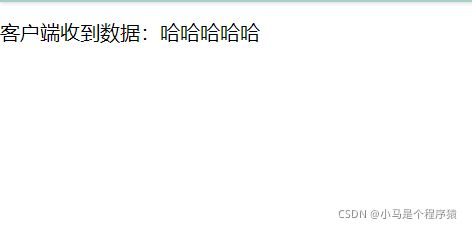
    客户端收到数据:{{message}}
  </div>
</template>

<script>
  export default {
    name : 'test',
    data() {
      return {
        websock: null,
        message: ''
      }
    },
    created() {
      this.initWebSocket();
    },
    destroyed() {
      console.log('离开路由之后断开websocket连接')
      this.websock.close() //离开路由之后断开websocket连接
    },
    methods: {
      initWebSocket(){ //初始化weosocket
        const wsuri = "ws://192.168.31.226:8088/websocket/"+"2";
        this.websock = new WebSocket(wsuri);
        this.websock.onmessage = this.websocketonmessage;
        this.websock.onopen = this.websocketonopen;
        this.websock.onerror = this.websocketonerror;
        this.websock.onclose = this.websocketclose;
      },
      websocketonopen(){ //连接建立之后执行send方法发送数据
        let actions = {"test":"12345"};
        this.websocketsend(JSON.stringify(actions));
      },
      websocketonerror(){//连接建立失败重连
        this.initWebSocket();
      },
      websocketonmessage(e){ //数据接收
        console.log("数据接收。。。"+e.data)
        this.message = JSON.parse(e.data);
      },
      websocketsend(Data){//数据发送
        console.log("数据发送--")
        this.websock.send(Data);
      },
      websocketclose(e){  //关闭
        console.log('断开连接',e);
      },
    },
  }
</script>
<style lang='less'>

</style>
