SpringSecurity默认过滤器链之UsernamePasswordAuthenticationFilter
1.作用
这个Filter是通过用户名和密码进行认证(登录)的。系统默认有三种认证Filter。
![[外链图片转存失败,源站可能有防盗链机制,建议将图片保存下来直接上传(img-1Sf346Pr-1626088146676)(https://s3-us-west-2.amazonaws.com/secure.notion-static.com/d325139a-b29e-4c1f-8ac6-4fd26f669777/Untitled.png)]](http://img.e-com-net.com/image/info8/35fcce7ae16f4bf49dfd12be240c0092.jpg)
ClientCredentialsTokenEndpointFilter: 基于oauth2 token的认证入口
Oauth2ClientAuthenticationProcessingFilter:oauth2 客户端用于从授权服务器获取accessToken进行认证
2.认证统一流程AbstractAuthenticationProcessingFilter
public void doFilter(ServletRequest req, ServletResponse res, FilterChain chain)
			throws IOException, ServletException {

		HttpServletRequest request = (HttpServletRequest) req;
		HttpServletResponse response = (HttpServletResponse) res;
		// 1.校验是否需要进行认证
		if (!requiresAuthentication(request, response)) {
			chain.doFilter(request, response);

			return;
		}

		if (logger.isDebugEnabled()) {
			logger.debug("Request is to process authentication");
		}

		Authentication authResult;

		try {
			// 尝试去认证
			authResult = attemptAuthentication(request, response);
			if (authResult == null) {
				// return immediately as subclass has indicated that it hasn't completed
				// authentication
				return;
			}
			// session策略
			sessionStrategy.onAuthentication(authResult, request, response);
		}
		catch (InternalAuthenticationServiceException failed) {
			logger.error(
					"An internal error occurred while trying to authenticate the user.",
					failed);
			// 认证失败
			unsuccessfulAuthentication(request, response, failed);

			return;
		}
		catch (AuthenticationException failed) {
			// Authentication failed
			// 认证失败
			unsuccessfulAuthentication(request, response, failed);

			return;
		}

		// Authentication success 是否需要返回成功认证前,执行其他的Filter
		if (continueChainBeforeSuccessfulAuthentication) {
			chain.doFilter(request, response);
		}
		// 认证成功
		successfulAuthentication(request, response, chain, authResult);
	}
核心流程:
1.判断是否需要进行认证requiresAuthentication
2.进行认证attemptAuthentication
3.session存储认证信息 sessionStrategy.onAuthentication
4.认证失败则unsuccessfulAuthentication
5.认证成功successfulAuthentication
下面来详细看看这五个流程~
3.requiresAuthentication 认证校验
这个其实使用RequestMatcher去匹配请求中的url。默认的是/login

4.attemptAuthentication 开始认证
public Authentication attemptAuthentication(HttpServletRequest request,
			HttpServletResponse response) throws AuthenticationException {
		// 默认login请求是post请求
		if (postOnly && !request.getMethod().equals("POST")) {
			throw new AuthenticationServiceException(
					"Authentication method not supported: " + request.getMethod());
		}
		// 而针对用户名和密码是固定的字段名的username 和 password。也就是你参数传递的时候
		// spring security 只认这两个字段。这两个字段的名称可以自己设置
		String username = obtainUsername(request);
		String password = obtainPassword(request);

		if (username == null) {
			username = "";
		}

		if (password == null) {
			password = "";
		}

		username = username.trim();
		// 构建UsernamePasswordAuthenticationToken 认证信息
		UsernamePasswordAuthenticationToken authRequest = new UsernamePasswordAuthenticationToken(
				username, password);

		// Allow subclasses to set the "details" property
		// 用于子类来填充authRequest的自定义属性的
		setDetails(request, authRequest);
		// 开始认证
		return this.getAuthenticationManager().authenticate(authRequest);
	}
上面源码中的重点就是getAuthenticationManager().authenticate 获取认证管理器进行认证。
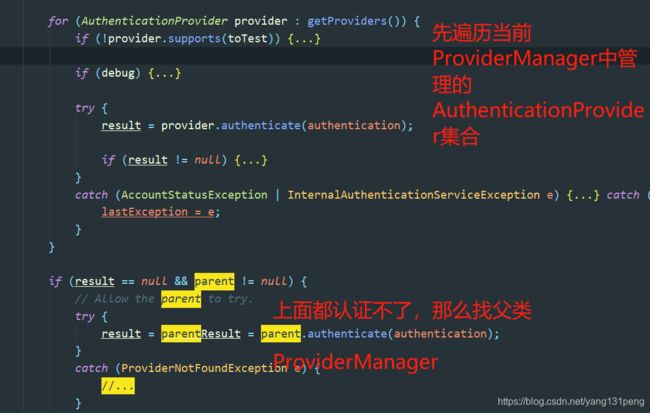
这里面主要是通过ProviderManager来进行认证。
ProviderManager其实也只是个聚合类,聚合了一系列的AuthenticationProvider。正如其名,是Provider的管理器。
ProviderManager需要关注两个点:
1.基础认证Provider集合与父认证Provider管理器
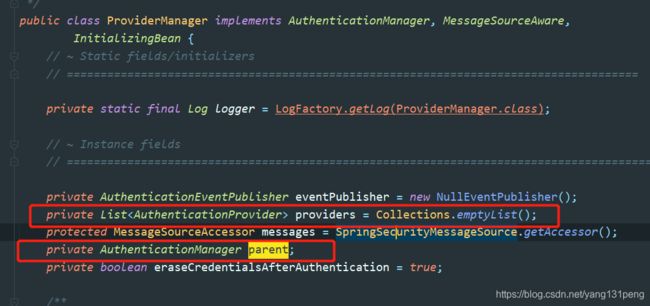
2. ProviderManager与parent之间的逻辑关系
在ProviderManager中默认有两个AuthenticationProvider:
AnonymousAuthenticationProvider:匿名认证对象
DaoAuthenticationProvider:基于UserDetailsService来获取用户信息进行认证
在通过debug发现DaoAuthenticationProvider是在parent中存储着。
5.DaoAuthenticationProvider获取UserDetails
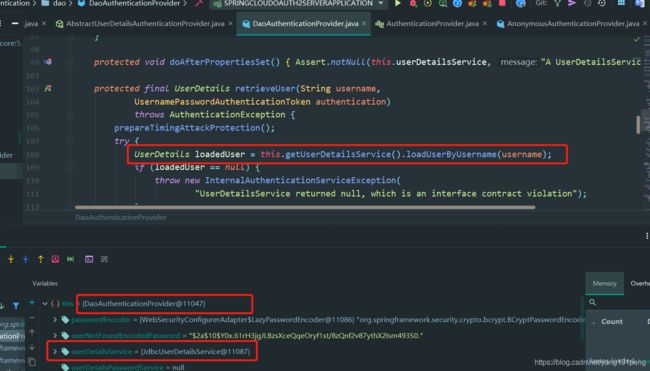
在获取到UserDetails后如何认证呢?

开始检查:
1.preAuthenticationChecks.check主要检查用户账号是否锁定,用户账号是否停用,用户账号认证是否过期
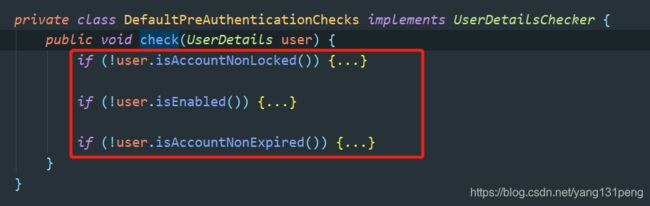
2.additionalAuthenticationChecks 进行密码检查
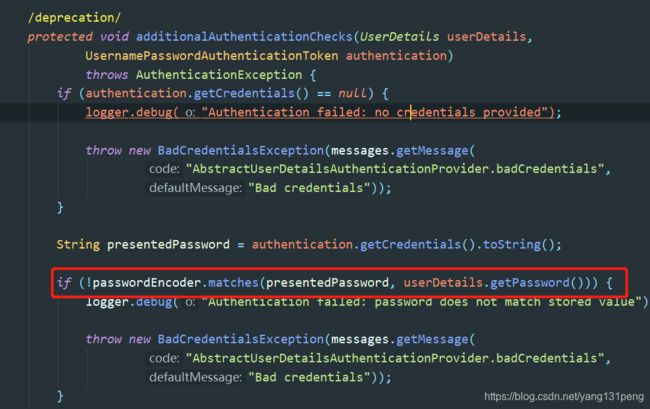
3.postAuthenticationChecks.check(user) 进行认证凭证过期校验

4.三重校验通过后,放入缓存中

5.认证成功,构建成功的Token,权限也加进去
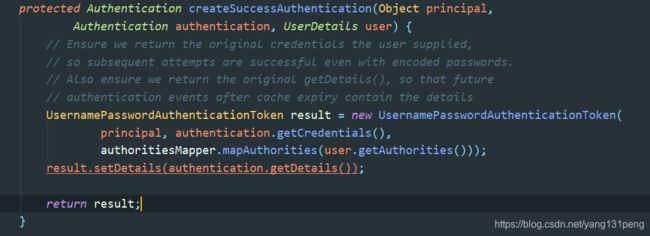
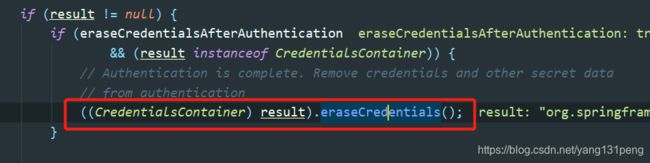
最后,在认证成功后,还需要将密码干掉(安全性)
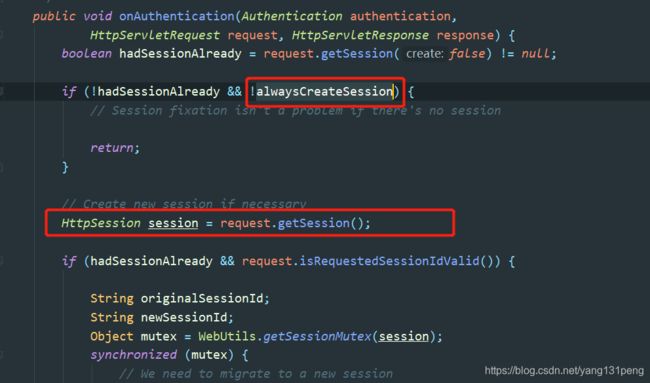
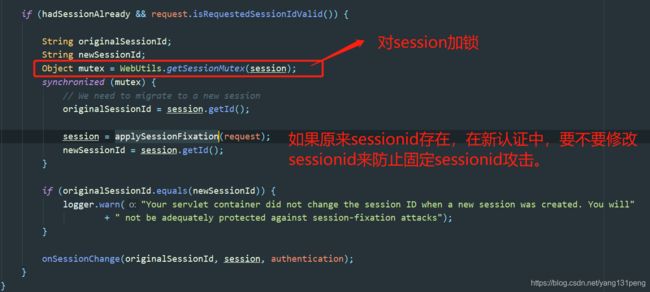
6.sessionStrategy.onAuthentication 存储认证信息到session中
从下图可以看到,总共有两个Session策略,用来存储和管理Authentication信息。

ChangeSessionIdAuthenticationStrategy: 当alwaysCreateSession 为true时,就会为新认证用户建立session,如果已经有了session,多端认证或者其他情况下,sessionid要不要变。不变容易造成固定session攻击。
**CsrfAuthenticationStrategy :**认证成功后,更新CsrfToken,并返回回去。

7.认证失败unsuccessfulAuthentication

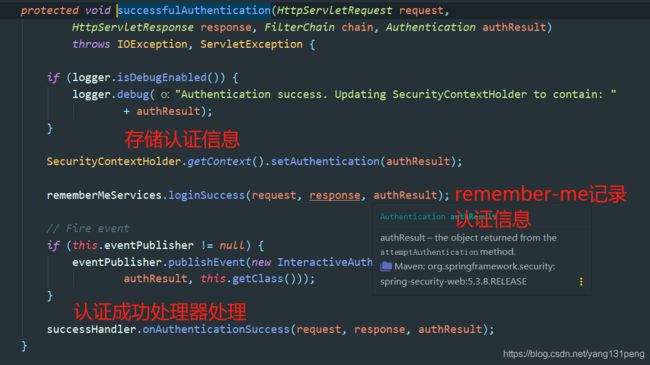
8.successfulAuthentication认证成功
9.认证成功处理器SaveRequestAwareAuthenticationSuccessHandler
publicvoidonAuthenticationSuccess(HttpServletRequestrequest,
HttpServletResponseresponse,Authenticationauthentication)
throwsServletException, IOException {
// SavedRequestsavedRequest 封装了缓存请求所需的功能,用于身份验证机制(通常是基于表单的登
//录)重定向到原始 URL 和RequestCache构建包装请求,再现原始请求数据
SavedRequestsavedRequest = requestCache.getRequest(request, response);

if(savedRequest ==null) {
	super.onAuthenticationSuccess(request, response, authentication);
	return;
 }
// 获取原始url,也就是从哪个URL到了login页面
 String targetUrlParameter = getTargetUrlParameter();
if(isAlwaysUseDefaultTargetUrl()
         || (targetUrlParameter !=null&& StringUtils.hasText(request
               .getParameter(targetUrlParameter)))) {
			// 当然,如果要使用默认重定向url,那缓存原始数据就没啥意义了。可以删掉了。
      requestCache.removeRequest(request, response);
			// 重定向到默认url
			super.onAuthenticationSuccess(request, response, authentication);

			return;
}
	// 清理掉请求中的认证属性
   clearAuthenticationAttributes(request);

// Use the DefaultSavedRequest URL
String targetUrl = savedRequest.getRedirectUrl();
   logger.debug("Redirecting to DefaultSavedRequest Url: " + targetUrl);
	 // 重定向到请求中带的原始url
   getRedirectStrategy().sendRedirect(request, response, targetUrl);
}
10.小结
这一节中比较多,因为这个算是认证的核心了。其中包括用户名密码认证,多重session策略,SecurityContext处理,UserDetails用户信息获取,UsernamePasswordAuthenticationToken令牌构建,还有认证成功处理和认证失败处理。
其中ProviderManager管理认证策略
SessionStrategy 进行session管理和CsrfToken管理
AuthenticationSuccessHandler 进行认证成功处理
AuthenticationFailureHandler 进行认证失败处理
RememberMeServices 进行remember-me处理
以上便是认证的大致流程和组件了。