网络编程基础之OKHttp源码理解-kotlin版(一)
前几篇文章讲了网络的基础,包括网络分层,三次握手 ,socket,TCP/IP和UDP协议等,我们知道了阻塞式IO(BIO)和非阻塞式(NIO)通信的原理,现在就从底层出发,一起来探究下OKHttp的原理吧。
OKHttp是什么
OkHttp是当下Android使用最频繁的网络请求框架,由Square公司开源。Google在Android4.4以后开始将源码中的HttpURLConnection底层实现替换为OKHttp,同时现在流行的Retrofifit框架底层同样是使用OKHttp的。
优点:
- 支持Http1、Http2、Quic以及WebSocket
- 连接池复用底层TCP(Socket),减少请求延时
- 无缝的支持GZIP减少数据流量
- 缓存响应数据减少重复的网络请求
- 请求失败自动重试主机的其他ip,自动重定向
使用
首先,来看看OKHttp的简单使用:
fun testOkHttp() {
// 1. 创建OkHttpClient客户端
val client = OkHttpClient.Builder().build()
// 2. 创建请求对象
val request = Request.Builder()
.get() // get请求
.url("https://wanandroid.com/wxarticle/chapters/json") // 请求地址
.build() // 构建对象
// 3. 开始请求, enqueue代表异步请求,需要回调函数
client.newCall(request).enqueue(object : Callback {
override fun onFailure(call: Call, e: IOException) {}
override fun onResponse(call: Call, response: Response) {
println("异步请求${response.body?.string()}")
}
})
// 4. execute代表同步请求
val response = client.newCall(request).execute()
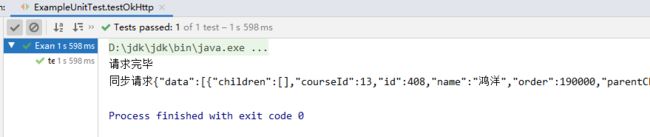
println("同步请求${response.body?.string()}")
}
可以看到, OKHttp使用起来非常简单,只需要3步即可完成一个简单网络请求,看一下打印结果:

请求流程
OKHttp的请求流程大致是这样的:

首先创建OKHttpClient和Request对象,把交由Call去执行,Call会调用Dispatcher的方法,经过同步或异步的一些列处理后,通过各种拦截器与服务建立连接并发起请求,最终拿到Response响应对象。
其中client.newCall(request)做了什么事情呢?
override fun newCall(request: Request): Call =
	RealCall(this, request, forWebSocket = false)
其实只是new了一个RealCall而已,RealCall中的excute和enqueue方法分别代表了同步和异步请求,也就是我们 例子中所展示的那样。
// 同步请求
override fun execute(): Response {
  synchronized(this) {
    check(!executed) { "Already Executed" }
    executed = true
  }
  timeout.enter()
  callStart()
  try {
    client.dispatcher.executed(this)
    return getResponseWithInterceptorChain()
  } finally {
    client.dispatcher.finished(this)
  }
}
// 异步请求
override fun enqueue(responseCallback: Callback) {
  synchronized(this) {
    check(!executed) { "Already Executed" }
    executed = true
  }
  callStart()
  client.dispatcher.enqueue(AsyncCall(responseCallback))
}
可以看到,不管是同步请求还是异步请求,都调用了client#dispatcher,在深入网络请求 之前,我们先来了解一下OKHttp的分发器。
分发器Dispatcher
分发器是用来调度网络请求任务的,内置了一个线程池,用来发送异步请求,在创建OKHttpClient时,我们也可以创建自己的线程池来替换掉默认的。
Dispatcher中有一些比较重要的成员,在网络调度中必不可少:
-
最大请求数,这个变量代表了异步任务 ,同时可以运行的最大请求数量,可以自己进行配置,但不能小于1。
/** * The maximum number of requests to execute concurrently. Above this requests queue in memory, * waiting for the running calls to complete. * * If more than [maxRequests] requests are in flight when this is invoked, those requests will * remain in flight. */ @get:Synchronized var maxRequests = 64 set(maxRequests) { require(maxRequests >= 1) { "max < 1: $maxRequests" } synchronized(this) { field = maxRequests } promoteAndExecute() } -
同一ip最大请求数,这个变量代表异步任务时,同一个host下,同时可运行的最大任务数量,也就是说 ,同一ip下,默认最多可同时执行5个异步请求。
/** * The maximum number of requests for each host to execute concurrently. This limits requests by * the URL's host name. Note that concurrent requests to a single IP address may still exceed this * limit: multiple hostnames may share an IP address or be routed through the same HTTP proxy. * * If more than [maxRequestsPerHost] requests are in flight when this is invoked, those requests * will remain in flight. * * WebSocket connections to hosts **do not** count against this limit. */ @get:Synchronized var maxRequestsPerHost = 5 set(maxRequestsPerHost) { require(maxRequestsPerHost >= 1) { "max < 1: $maxRequestsPerHost" } synchronized(this) { field = maxRequestsPerHost } promoteAndExecute() } -
配置了最大请求数量 ,那么多出的怎么办呢?这个队列存放了异步任务,超出最大请求数的请求
/** Ready async calls in the order they'll be run. */ private val readyAsyncCalls = ArrayDeque<AsyncCall>() -
存放了正在执行的异步请求
/** Running asynchronous calls. Includes canceled calls that haven't finished yet. */ private val runningAsyncCalls = ArrayDeque<AsyncCall>() -
用于存放正在执行的同步请求
/** Running synchronous calls. Includes canceled calls that haven't finished yet. */
private val runningSyncCalls = ArrayDeque<RealCall>()
了解了以上几个变量,我们就可以继续请求流程了。
同步请求
// 同步请求
override fun execute(): Response {
  synchronized(this) {
    //  1,进行安全检查
    check(!executed) { "Already Executed" }
    executed = true
  }
  timeout.enter()
  callStart()
  try {
    // 1. 调用分发器记录此请求
    client.dispatcher.executed(this)
    // 3. 进行请求,返回请求结果
    return getResponseWithInterceptorChain()
  } finally {
    // 2. 调用分发器删除此请求
    client.dispatcher.finished(this)
  }
}
我们首先看一下同步请求,进入方法是进行安全检查,如果当前任务正在执行,那么就会抛出异常,看到RealCall调用了client.dispatcher.executed(this)方法:
@Synchronized internal fun executed(call: RealCall) {
  runningSyncCalls.add(call)
}
这个方法仅仅是将当前请求放入了队列里面而已,当请求结束后会调用finally中的client.dispatcher.finished(this)方法:
internal fun finished(call: RealCall) {
  finished(runningSyncCalls, call)
}

private fun <T> finished(calls: Deque<T>, call: T) {
  val idleCallback: Runnable?
  synchronized(this) {
    // 将任务从队列中移除
    if (!calls.remove(call)) throw AssertionError("Call wasn't in-flight!")

    // 可以设置分发器的闲时加载
    idleCallback = this.idleCallback
  }

  val isRunning = promoteAndExecute()

  if (!isRunning && idleCallback != null) {
     // 如果网络请求加载完毕 ,会执行我们的闲时加载
    idleCallback.run()
  }
}
这方法中首先将任务移除,并调用闲时加载流程,如果同学们对Handler熟悉的话,这里应该很容易理解了。简单来说,我们在创建OKHttpClient的时候,就可以设置idleCallback的值,当请求完毕,就会调用我们自己配置的回调,不过用的比较少,这里就不多说了,看一下效果:
val client = OkHttpClient.Builder().build()

client.dispatcher.idleCallback = Runnable {
    println("请求完毕")
}

val response = client.newCall(request).execute()

 println("同步请求${response.body?.string()}")

.....
上面只是一个请求入队出队的过程,最终的请求结果是交给了getResponseWithInterceptorChain()方法返回的,这个方法我们稍后再看。
异步请求
override fun enqueue(responseCallback: Callback) {
  // 同样进行安全监测
  synchronized(this) {
    check(!executed) { "Already Executed" }
    executed = true
  }
  callStart()
  // 创建一个AsyncCall, 并交给dispatcher
  client.dispatcher.enqueue(AsyncCall(responseCallback))
}
这个方法跟同步请求有所不同,创建了一个AsyncCall对象,交给了分发器
internal inner class AsyncCall(
  private val responseCallback: Callback
) : Runnable {
// 。。。。。。。
}
AsyncCall是RealCall的内部类,实现了Runnable接口,由此我们也可以猜测到这个异步任务,最终交给其run方法执行的。先来看看分发器的动作:
internal fun enqueue(call: AsyncCall) {
  synchronized(this) {
    // 1.将请求加入就绪队列
    readyAsyncCalls.add(call)

    // Mutate the AsyncCall so that it shares the AtomicInteger of an existing running call to
    // the same host.
    if (!call.call.forWebSocket) {
      // 2. 每个请求都有一个callsPerHost,用来记录当前请求相同host的数量,在队列中找到跟当前请求的host的请求,并将callsPerHost值赋给当前的请求,保证记录的值是最新的
      val existingCall = findExistingCallWithHost(call.host)
      if (existingCall != null) call.reuseCallsPerHostFrom(existingCall)
    }
  }
  // 3. 执行请求
  promoteAndExecute()
}
进入promoteAndExecute()方法看看:
private fun promoteAndExecute(): Boolean {
  this.assertThreadDoesntHoldLock()
  // 记录可执行的请求
  val executableCalls = mutableListOf<AsyncCall>()
  // 记录是否有请求正在执行
  val isRunning: Boolean
  synchronized(this) {
    // 遍历已就绪的请求队列
    val i = readyAsyncCalls.iterator()
    while (i.hasNext()) {
      val asyncCall = i.next()
	  // 如果正在运行的请求数量大于64,那么就直接结束掉循环
      if (runningAsyncCalls.size >= this.maxRequests) break // Max capacity.
      // 如果正在运行的请求中,host相同的数量大于5,那么当前任务搁置,继续下一次循环
      if (asyncCall.callsPerHost.get() >= this.maxRequestsPerHost) continue // Host max capacity.
	  // 以上两种都不是,说明当前任务可运行,将当前任务从就绪队列中移除
      i.remove()
      // 将运行的记录  +1
      asyncCall.callsPerHost.incrementAndGet()
      // 添加到可执行请求的列表中
      executableCalls.add(asyncCall)
      runningAsyncCalls.add(asyncCall)
    }
    isRunning = runningCallsCount() > 0
  }

  // 现在executableCalls中的任务都可以执行了,
  // 调用asyncCall.executeOn(executorService)执行run方法
  for (i in 0 until executableCalls.size) {
    val asyncCall = executableCalls[i]
    asyncCall.executeOn(executorService)
  }

  return isRunning
}
以上就是过滤可执行的请求,遍历执行,可以看到最终执行了asyncCall#executeOn()方法,并传入了一个executorService。
@get:Synchronized
@get:JvmName("executorService") val executorService: ExecutorService
  get() {
    if (executorServiceOrNull == null) {
      executorServiceOrNull = ThreadPoolExecutor(0, Int.MAX_VALUE, 60, TimeUnit.SECONDS,
          SynchronousQueue(), threadFactory("$okHttpName Dispatcher", false))
    }
    return executorServiceOrNull!!
  }
这里是不是就很清楚了,将线程池交给了asyncCall执行。这个线程池的配置我们稍后再讲:
fun executeOn(executorService: ExecutorService) {
  client.dispatcher.assertThreadDoesntHoldLock()

  var success = false
  try {
    executorService.execute(this)
    success = true
  } catch (e: RejectedExecutionException) {
    val ioException = InterruptedIOException("executor rejected")
    ioException.initCause(e)
    noMoreExchanges(ioException)
    responseCallback.onFailure(this@RealCall, ioException)
  } finally {
    if (!success) {
      client.dispatcher.finished(this) // This call is no longer running!
    }
  }
}
还记不记得,asyncCall就是一个Runnable,executorService.execute(this)就是调用了自己的run()方法。如果中间出现了异常,那么就调用responseCallback的onFailure回调,responseCallback我们也很熟悉了 ,就是执行异步请求时传进来的Callback。最终调用client.dispatcher.finished(this)结束该任务。
// Dispatcher
internal fun finished(call: AsyncCall) {
  call.callsPerHost.decrementAndGet()
  finished(runningAsyncCalls, call)
}

private fun <T> finished(calls: Deque<T>, call: T) {
    val idleCallback: Runnable?
    synchronized(this) {
      if (!calls.remove(call)) throw AssertionError("Call wasn't in-flight!")
      idleCallback = this.idleCallback
    }

    val isRunning = promoteAndExecute()

    if (!isRunning && idleCallback != null) {
      idleCallback.run()
    }
  }
这里将任务从runningAsyncCalls队列中移除,最终又调用了promoteAndExecute()方法,因为当前任务结束了,还要有下一次任务 要进来。这里就很简单了,最后进入AsynCall的run方法让我们一探究竟:
// AsyncCall
override fun run() {
  threadName("OkHttp ${redactedUrl()}") {
    var signalledCallback = false
    timeout.enter()
    try {
      val response = getResponseWithInterceptorChain()
      signalledCallback = true
      responseCallback.onResponse(this@RealCall, response)
    } catch (e: IOException) {
      if (signalledCallback) {
        // Do not signal the callback twice!
        Platform.get().log("Callback failure for ${toLoggableString()}", Platform.INFO, e)
      } else {
        responseCallback.onFailure(this@RealCall, e)
      }
    } catch (t: Throwable) {
      cancel()
      if (!signalledCallback) {
        val canceledException = IOException("canceled due to $t")
        canceledException.addSuppressed(t)
        responseCallback.onFailure(this@RealCall, canceledException)
      }
      throw t
    } finally {
      client.dispatcher.finished(this)
    }
  }
}
看看try语句块里面的代码:
val response = getResponseWithInterceptorChain()
signalledCallback = true
responseCallback.onResponse(this@RealCall, response)
有没有很熟悉的感觉?同步请求也是调用了getResponseWithInterceptorChain()方法返回的,这里饶了一大圈,也是调用了这个方法,最终将response回调给responseCallback.onResponse(this@RealCall, response)方法。看来这个方法才是最关键之所在,真正的网络请求就在这里面了。
@Throws(IOException::class)
internal fun getResponseWithInterceptorChain(): Response {
  // Build a full stack of interceptors.
  val interceptors = mutableListOf<Interceptor>()
  interceptors += client.interceptors
  interceptors += RetryAndFollowUpInterceptor(client)
  interceptors += BridgeInterceptor(client.cookieJar)
  interceptors += CacheInterceptor(client.cache)
  interceptors += ConnectInterceptor
  if (!forWebSocket) {
    interceptors += client.networkInterceptors
  }
  interceptors += CallServerInterceptor(forWebSocket)

  val chain = RealInterceptorChain(
      call = this,
      interceptors = interceptors,
      index = 0,
      exchange = null,
      request = originalRequest,
      connectTimeoutMillis = client.connectTimeoutMillis,
      readTimeoutMillis = client.readTimeoutMillis,
      writeTimeoutMillis = client.writeTimeoutMillis
  )

  var calledNoMoreExchanges = false
  try {
    val response = chain.proceed(originalRequest)
    if (isCanceled()) {
      response.closeQuietly()
      throw IOException("Canceled")
    }
    return response
  } catch (e: IOException) {
    calledNoMoreExchanges = true
    throw noMoreExchanges(e) as Throwable
  } finally {
    if (!calledNoMoreExchanges) {
      noMoreExchanges(null)
    }
  }
}
拦截器
责任链模式
要搞清楚拦截器,就需要知道什么是责任链模式。为请求创建了一个接收者对象的链。这种模式给予请求的类型,对请求的发送者和接收者进行解耦。在这种模式中,通常每个接收者都包含对另一个接收者的引用。如果一个对象不能处理该请求,那么它会把相同的请求传给下一个接收者,依此类推。

那么整个链条是怎么样的呢?打个比方先创建一个抽象的接收者,并开放请求方法:
abstract class Handler {
    private var mNext: Handler? = null

    fun setNext(next: Handler?) {
        this.mNext = next
    }

    fun getNext(): Handler? {
        return mNext
    }

    abstract fun handleRequest(request: String)
}
具体处理者:
class HandlerA : Handler() {
    override fun handleRequest(request: String) {
        println(request)
        println("HandlerA思考中。。。")
        Thread.sleep(1200)
        println("我不喜欢你,找别人吧")
        getNext()?.handleRequest(request)
    }
}
class HandlerB : Handler() {

    override fun handleRequest(request: String) {
        println(request)
        println("HandlerB不需要思考")
        println("我不喜欢你,找别人吧")
        getNext()?.handleRequest(request)
    }

}
class HandlerC : Handler() {

    override fun handleRequest(request: String) {
        println(request)
        println("HandlerC思考良久。。。")
        Thread.sleep(5000)
        println("好的")
        getNext()?.handleRequest(request)
    }

}
客户端对象:
fun main() {
    val handlerA = HandlerA()
    val handlerB = HandlerB()
    val handlerC = HandlerC()

    handlerA.setNext(handlerB)
    handlerB.setNext(handlerC)

    handlerA.handleRequest("可以做我女朋友吗?")

}
将A的下一个链设置为B, 将B的下一个链设置为C,这样一层层进行传递,看一下结果吧:
可以做我女朋友吗?
HandlerA思考中。。。
我不喜欢你,找别人吧

可以做我女朋友吗?
HandlerB不需要思考
我不喜欢你,找别人吧

可以做我女朋友吗?
HandlerC思考良久。。。
好的
这是一个美好的故事。回到正题,我们来看一下拦截器的责任链。
拦截器的责任链
  val interceptors = mutableListOf<Interceptor>()
  interceptors += client.interceptors
  interceptors += RetryAndFollowUpInterceptor(client)
  interceptors += BridgeInterceptor(client.cookieJar)
  interceptors += CacheInterceptor(client.cache)
  interceptors += ConnectInterceptor
  if (!forWebSocket) {
    interceptors += client.networkInterceptors
  }
  interceptors += CallServerInterceptor(forWebSocket)
可以看到,首先加入了client.interceptors,就是创建OKHttpClient的时候传入的拦截器,下面的拦截器依次是RetryAndFollowUpInterceptor, BridgeInterceptor, CacheInterceptor, ConnectInterceptor, networkInterceptors和CallServerInterceptor。他们之间是怎么工作的呢?
val chain = RealInterceptorChain(
        call = this,
        interceptors = interceptors,
        index = 0,
        exchange = null,
        request = originalRequest,
        connectTimeoutMillis = client.connectTimeoutMillis,
        readTimeoutMillis = client.readTimeoutMillis,
        writeTimeoutMillis = client.writeTimeoutMillis
    )

try {
      val response = chain.proceed(originalRequest)
      if (isCanceled()) {
        response.closeQuietly()
        throw IOException("Canceled")
      }
      return response
}
创建了一个RealInterceptorChain对象进行处理,可以看到interceptors拦截器集合作为一个构造参数传递到了Chain中,最后调用proceed()方法。
@Throws(IOException::class)
override fun proceed(request: Request): Response {
  check(index < interceptors.size)
  // .............................................
  // Call the next interceptor in the chain.
  // 获取下一个拦截器
  val next = copy(index = index + 1, request = request)
  val interceptor = interceptors[index]
  // 调用intercept方法并返回
  @Suppress("USELESS_ELVIS")
  val response = interceptor.intercept(next) ?: throw NullPointerException(
      "interceptor $interceptor returned null")

  // ..............................
  return response
}

// 创建RealInterceptorChain对象
internal fun copy(
    index: Int = this.index,
    exchange: Exchange? = this.exchange,
    request: Request = this.request,
    connectTimeoutMillis: Int = this.connectTimeoutMillis,
    readTimeoutMillis: Int = this.readTimeoutMillis,
    writeTimeoutMillis: Int = this.writeTimeoutMillis
  ) = RealInterceptorChain(call, interceptors, index, exchange, request, connectTimeoutMillis,
      readTimeoutMillis, writeTimeoutMillis)
上面代码也很简单,创建下一个chain对象,这样就形成了递归调用,也就是说,最终的intercept方法是从最后一个拦截器开始一层一层向上传递的。所以拦截器的执行流程应该是这样的:

在责任链模式中,每一个对象对其下家的引用而接起来形成一条链。请求在这个链上传递,直到链上的某一个对象决定处理此请求。客户并不知道链上的哪一个对象最终处理这个请求,系统可以在不影响客户端的 情况下动态的重新组织链和分配责任。处理者有两个选择:承担责任或者把责任推给下家。一个请求可以最终不被任何接收端对象所接受。
五大拦截器
上面我们可以看到,OKHttp有默认的无个拦截器
请求会被交给责任链中的一个个拦截器。默认情况下有五大拦截器:
-
RetryAndFollowUpInterceptor
第一个接触到请求,最后接触到响应;负责判断是否需要重新发起整个请求
-
BridgeInterceptor
补全请求,并对响应进行额外处理
-
CacheInterceptor
请求前查询缓存,获得响应并判断是否需要缓存
-
ConnectInterceptor
与服务器完成TCP连接
-
CallServerInterceptor
与服务器通信;封装请求数据与解析响应数据(如:HTTP报文)
线程池
每个拦截器的具体分析我们留到下一篇文章来写,不知道大家还记不记得异步请求中Dispatcher默认的线程池?
@get:Synchronized
@get:JvmName("executorService") val executorService: ExecutorService
  get() {
    if (executorServiceOrNull == null) {
      executorServiceOrNull = ThreadPoolExecutor(0, Int.MAX_VALUE, 60, TimeUnit.SECONDS,
          SynchronousQueue(), threadFactory("$okHttpName Dispatcher", false))
    }
    return executorServiceOrNull!!
  }
我们知道,ThreadPoolExecutor方法的几个参数
核心线程数:				int corePoolSize,
最大线程数:				int maximumPoolSize,
线程无任务时存活时间:		 long keepAliveTime,
时间单位:				 TimeUnit unit,
线程队列:		 		 BlockingQueue workQueue,
线程工厂:		 		 ThreadFactory threadFactory
可以看到,OKHttp创建的线程池,核心线程数为0,并且是用了SynchronousQueue()无容量队列。为什么这么设计呢?首先核心线程为0,表示线程池不会一直为我们缓存线程,最大线程数为 Int.MAX_VALUE,与等待队列SynchronousQueue的组合可以得到最大的吞吐量。什么意思呢?就是当前线程池需要执行任务时,如果没有空闲线程,那么就直接创建一个线程来执行,不需要进行等待。如果又空闲线程,那么就可以进行复用。这样就可以在保证所有请求都可以及时请求的情况下,达到最大的性能提升。
上面的说法,对于不理解线程池的同学来说可能比较抽象,我们来举个例子说明一下:
	val queue = ArrayBlockingQueue(1)
    val executor = ThreadPoolExecutor(0, Int.MAX_VALUE, 60, TimeUnit.SECONDS,
            queue, threadFactory(false))

    executor.execute {
        println("${Thread.currentThread().name}--- 111")
        while (true) { }
    }

    Thread.sleep(100)

    executor.execute {
        println("${Thread.currentThread().name}--- 222")
    }

    executor.shutdown()
我们首先使用ArrayBlockingQueue, 将其容量设置为1,使用线程池执行两个任务,结果是什么呢?

可以看到,线程阻塞了到了111, 222并没有打印。为什么呢?
public void execute(Runnable command) {
    int c = ctl.get();
    if (workerCountOf(c) < corePoolSize) {
        if (addWorker(command, true))
            return;
        c = ctl.get();
    }
    if (isRunning(c) && workQueue.offer(command)) {
        int recheck = ctl.get();
        if (! isRunning(recheck) && remove(command))
            reject(command);
        else if (workerCountOf(recheck) == 0)
            addWorker(null, false);
    }
    else if (!addWorker(command, false))
        reject(command);
}
来回顾一下线程池的方法, 线程111正常执行,死循环导致111不能结束,那么当线程222来了之后,isRunning(recheck)为false,workerCountOf(recheck)为1, 需要记住的是remove(command)方法在线程222并不会执行哦,那么线程就阻塞到了这里。
如果我们加一个线程3呢?
executor.execute {
    println("${Thread.currentThread().name}--- 111")
    while (true) {

    }
}

Thread.sleep(100)

executor.execute {
    println("${Thread.currentThread().name}--- 222")
}

Thread.sleep(100)

executor.execute {
    println("${Thread.currentThread().name}--- 333")
}

executor.shutdown()
可以看到
Thread-0--- 111
Thread-1--- 333
Thread-1--- 222
这有是为什么呢,上面我们知道,workQueue中最大容量为 1,在222执行的时候,队列中的任务不能被抛弃,当333 来了之后,workQueue.offer(command)入队失败,就会走到else if (!addWorker(command, false)),这里直接创建了任务。来执行333, 当333执行完毕,会复用当前线程来执行222。
当然上面只是举例,即便队列容量设置为10,在网络请求中也是会有以上情况出现的。所以这种方案肯定不行。我们看到在OKHTTP中使用了SynchronousQueue(),这是一个无容量的队列,往里面offer数据时,会一直返回false,这样每次都会及时执行任务了,addwork中就会检测有没有可复用的线程,如果有就不需要再创建了,如果没有那么直接创建一个新的线程。
那么我们把线程池的队列换成SynchronousQueue
fun main() {


    val queue = SynchronousQueue()

    val executor = ThreadPoolExecutor(0, Int.MAX_VALUE, 60, TimeUnit.SECONDS,
            queue, threadFactory(false))

    executor.execute {
        println("${Thread.currentThread().name}--- 111")
        while (true) {

        }
    }

    Thread.sleep(100)

    executor.execute {
        println("${Thread.currentThread().name}--- 222")
    }

    Thread.sleep(100)

    executor.execute {
        println("${Thread.currentThread().name}--- 333")
    }

    executor.shutdown()

}
结果自然不出我们所料:
Thread-0— 111
Thread-1— 222
Thread-1— 333
总结
OKHttp的精妙之处就是将线程池的特性运用的淋漓尽致,各种设计模式也值得我们参考学习。以上就是OKHttp的请求流程了,真正的网络实现还是在它的5大拦截器里面,下一篇我们将他抽丝剥茧,彻底搞懂其原理。