第一行代码9.3.1Pull解析方式,关于本地服务器地址与java.net.UnknownServiceException:CLEARTEXT communication not support 错误
会遇到的问题:
1.在Android开发中通过localhost或127.0.0.1访问本地服务器时,会报java.net.ConnectException: localhost/127.0.0.1:8083 -Connection refused异常。
为什么会报这个异常呢?因为Android模拟器本身把自己当做了localhost或127.0.0.1,而此时我们又通过localhost或127.0.0.1访问本地服务器,所以会抛出异常了。
在网上查了下,在模拟器上可以用10.0.2.2代替127.0.0.1和localhost;
亲测有效,地址:
https://blog.csdn.net/weixin_34129696/article/details/85747696
2.关于错误java.net.UnknownServiceException:CLEARTEXT communication not supported:
安卓p默认把http传输请求都拒绝了。
解决方法
1.在build.gradle中把targetSdkVersion改为27及以下。
targetSdkVersion 27 //对应的是android 8.1, 28是9.0 所以。。
2.在AnroidManifest.xml中添加
android:usesCleartextTraffic=“true” //默认是false,现改为true
3.最根本的方法是将app改为https传输,同时服务器端也需支持https
原文链接:https://blog.csdn.net/weixin_44307463/article/details/88022072
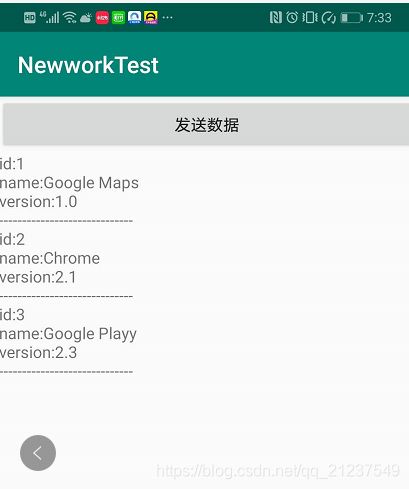
模拟器运行效果:
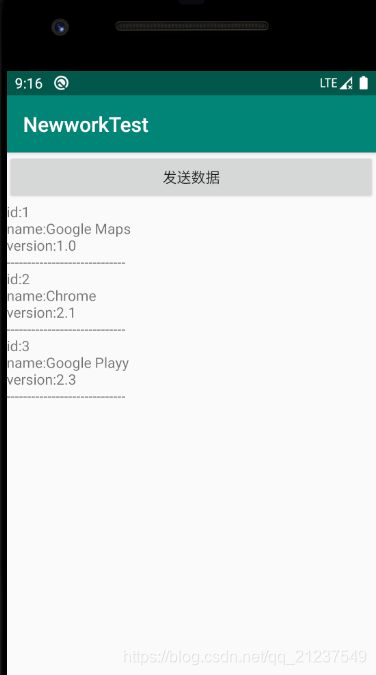
手机上运行效果:

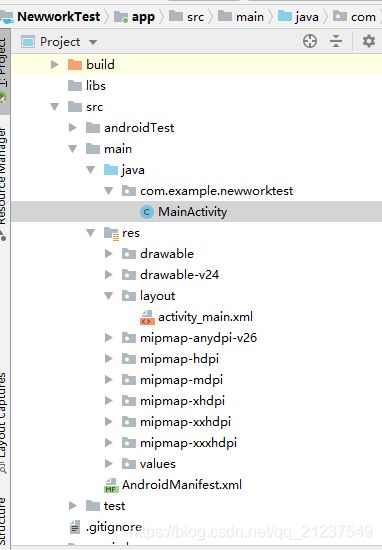
文件结构:
MainActivity.java
package com.example.newworktest;

import androidx.appcompat.app.AppCompatActivity;

import android.os.Bundle;
import android.util.Log;
import android.view.View;
import android.widget.Button;
import android.widget.TextView;

import org.xmlpull.v1.XmlPullParser;
import org.xmlpull.v1.XmlPullParserFactory;

import java.io.BufferedReader;
import java.io.IOException;
import java.io.InputStream;
import java.io.InputStreamReader;
import java.io.StringReader;
import java.net.HttpURLConnection;
import java.net.URL;

import okhttp3.OkHttpClient;
import okhttp3.Request;
import okhttp3.Response;

public class MainActivity extends AppCompatActivity {
    TextView responseText;
    @Override
    protected void onCreate(Bundle savedInstanceState) {
        super.onCreate(savedInstanceState);
        setContentView(R.layout.activity_main);
        Button button = findViewById(R.id.send_request);
        responseText = findViewById(R.id.response_text);
        button.setOnClickListener(new View.OnClickListener() {
            @Override
            public void onClick(View v) {
                if(v.getId()==R.id.send_request){
                    sendRequestWithOkHttp();
                }
            }
        });

    }

    private void sendRequestWithOkHttp() {
        //开启新线程做耗时操作
        new Thread(new Runnable() {
            @Override
            public void run() {
                try {
                    OkHttpClient client = new OkHttpClient();//创建一个OkHttpClient实例
                    Request request = new Request.Builder()
                            .url("http://10.0.2.2:8080/123/get_data.xml")//设置目标网络地址
                            .build();//创建一个Request对象
                    Response response = client.newCall(request).execute();//发送请求获取服务器返回对象
                    String responseData = response.body().string();

                    //解析XML
                    parseXMLWithPull(responseData);
                } catch (IOException e) {
                    e.printStackTrace();
                }
            }
        }).start();
    }

    private void showResponse(final String response) {
        runOnUiThread(new Runnable() {
            @Override
            public void run() {
                //开线程进行UI操作,将结果显示到界面上
                responseText.setText(response);
            }
        });
    }
    private void parseXMLWithPull(String responseData) {
        StringBuilder builder = new StringBuilder();

        try {
            XmlPullParserFactory xmlPullParserFactory = XmlPullParserFactory.newInstance();//创建工厂
            XmlPullParser xmlPullParser = xmlPullParserFactory.newPullParser();//创建XmlPullParser实例
            xmlPullParser.setInput(new StringReader(responseData));
            int eventType = xmlPullParser.getEventType();//得到当前的解析事件

            String id = "";
            String name = "";
            String version = "";

            while (eventType != xmlPullParser.END_DOCUMENT) {
                String nodeName = xmlPullParser.getName();//获取当前节点名字
                switch (eventType) {
                    case XmlPullParser.START_TAG:
                        if ("id".equals(nodeName)) {
                            id = xmlPullParser.nextText();
                        } else if ("name".equals(nodeName)) {
                            name = xmlPullParser.nextText();
                        } else if ("version".equals(nodeName)) {
                            version = xmlPullParser.nextText();
                        }
                        break;
                    case XmlPullParser.END_TAG://完成某个节点的解析
                        if ("app".equals(nodeName)) {
                            builder.append("id:" + id + "\n")
                                    .append("name:" + name + "\n")
                                    .append("version:" + version + "\n")
                                    .append("-----------------------------\n");
                        }
                        break;
                    default:
                        break;
                }
                eventType = xmlPullParser.next();//获取下一个解析事件
            }
            showResponse(builder.toString());
        } catch (Exception e) {
            e.printStackTrace();
        }
    }
}
activity_main.xml
<LinearLayout xmlns:android="http://schemas.android.com/apk/res/android"
    xmlns:tools="http://schemas.android.com/tools"
    android:layout_width="match_parent"
    android:layout_height="match_parent"
    tools:context=".MainActivity"
    android:orientation="vertical">

    <Button
        android:id="@+id/send_request"
        android:layout_width="match_parent"
        android:layout_height="wrap_content"
        android:text="发送数据"/>
    <ScrollView
        android:layout_width="match_parent"
        android:layout_height="match_parent">
        <TextView
            android:id="@+id/response_text"
            android:layout_width="match_parent"
            android:layout_height="wrap_content" />
    </ScrollView>

</LinearLayout>
AndroidManifest
<?xml version="1.0" encoding="utf-8"?>
<manifest xmlns:android="http://schemas.android.com/apk/res/android"
    package="com.example.newworktest">
    <uses-permission android:name="android.permission.INTERNET"/>
    <application
        android:allowBackup="true"
        android:icon="@mipmap/ic_launcher"
        android:label="@string/app_name"
        android:roundIcon="@mipmap/ic_launcher_round"
        android:supportsRtl="true"
        android:theme="@style/AppTheme">
        <activity android:name=".MainActivity">
            <intent-filter>
                <action android:name="android.intent.action.MAIN" />

                <category android:name="android.intent.category.LAUNCHER" />
            </intent-filter>
        </activity>
    </application>

</manifest>
在apache的webapps中新建一个123文件,然后在里面放上get_data.xml
<apps>
    <app>
        <id>1</id>
        <name>Google Maps</name>
        <version>1.0</version>
    </app>
    <app>
        <id>2</id>
        <name>Chrome</name>
        <version>2.1</version>
    </app>
    <app>
        <id>3</id>
        <name>Google Playy</name>
        <version>2.3</version>
    </app>
</apps>
手机上运行的话可以用本地无线wifi开启,然后查看当前的ip地址

然后把ip地址相应修改成对应的本地地址,安装在手机上,就可以运行
![]()