ELK | Logstash日志采集(Linux)
Logstash日志采集
- 一、Logstash简介
- 二、疑问
-
- 1. 数据重复问题
- 2. 数据丢失
- 3. 注意
- 三、安装&启动
-
- 1. 下载/解压 安装包
- 2. 进入logstash-7.3.1 启动验证
- 3. 配置文件 conf
- 4.使用pipelines.yml 配置启动
- 5.logstash 性能优化
- 四、filter 去重
- 五、问题总计
-
- 一般问题都是配置文件 conf 文件 或者 pipelines.yml 配置的问题 细心看下
一、Logstash简介
Logstash:是一个开源的数据收集引擎,具有实时管道功能,支持input输入、filter过滤器、output输出。
Logstash:处理数据是 input -> filer -> output
Logstash: 默认jvm配置 占用1G 内存,可以去config/jvm.options 查看
二、疑问
1. 数据重复问题
Logstash :第一次启动读取,是通过配置规则读取,如果不配置默认不加载历史数据只会读取最新数据 类似于Linux中的 tail -0f 命令。
为了保证数据重复可以通过filter 进行数据过滤处理重复数据。 可以在filter中通过数据生成唯一ID 或者 数据中本身存在不重复的唯一ID 的话也可以,这里用filter 例如如下:
filter{
fingerprint {
    source => "message"
    target => "[@metadata][fingerprint]"
    method => "MD5" #MD5加密方法 还有MURMUR3 SHA1 UUID 很多
    key => "test" #密钥
}
}
具体的可以看一下 目录 四、filter去重
2. 数据丢失
Logstash 启动过程中, 是类似于Linux 中tail -0f 的命令 读取日志数据的 是实时的一般不会出现数据没有读取到的情况。总的来说logstash不会少传数据,但有可能多传。
3. 注意
input file 读取文件的形式,第二次启动Logstash 如果日志文件没有变更不会重新加载读取日志文件中的数据,Logstash 会在 data/plugins/input/file 中生成一个 .sincedb_ 开头的文件记录。
三、安装&启动
1. 下载/解压 安装包
官网安装包下载:https://www.elastic.co/fr/downloads/logstash
本人百度云:
链接:https://pan.baidu.com/s/1wvL_MqKOAq4HZ2dwrvPrGA?pwd=1234
提取码:1234
解压安装包
tar -zxvf logstash-7.3.1.tar.gz
2. 进入logstash-7.3.1 启动验证
bin/logstash -e 'input { stdin { } } output { stdout {} }'
3. 配置文件 conf
-
- 自定义配置文件:创建配置文件 logstash-config.conf 目录随意,配置文件名称也随意自定义。
-
- 项目自身配置: 进入config目录 logstash-sample.conf 将配置 复制进去。
# Sample Logstash configuration for creating a simple
# Beats -> Logstash -> Elasticsearch pipeline.
# 输入 file这是读取本地文件的 还有其他 beats http https tcp
input {
	file {
		##定义类型  可通过类型配置多数据源
		type=> "zohe-video-struct"
		##文件路径 数组  支持*号
		path=> ["/home/zhkj/zh_platform/jar-struct/logs/nohup.out","/home/zhkj/zh_platform/jar-struct/logs/*"]
		## beginning-从头开始 end-从结束 不配置默认读取最新的数据 默认 end
		start_position => "beginning"
	}
	#file {
		##自定义类型 区分
		#type=> "cvcam-device-agent"
		##日志路径
		#path=> ["/home/zhkj/zh_platform/CvcamDeviceAgent/logs/*.log"]
		##从头开始
		#start_position => "beginning"
   #}
}

## filter 去重(一般不用去重)
filter{
	fingerprint {
		source => "message"
		target => "[@metadata][fingerprint]"
		##MD5加密方法 还有MURMUR3 SHA1 UUID 很多
		method => "MD5"
		key => "test"
	}
}

## 输出到ES
output {
	if[type]=="zohe-video-struct"{
		elasticsearch {
			hosts => ["http://192.168.0.180:9200"]
			index => "zohe-video-struct"
			##索引id
			document_id => "%{[@metadata][fingerprint]}"
			#user => "elastic"
			#password => "changeme"
		}
	}
	#if[type]=="cvcam-device-agent"{
		#elasticsearch {
			#hosts => ["http://192.168.0.180:9200"]
			#index => "%{type}"
			##索引id
			#document_id => "%{[@metadata][fingerprint]}"
			#user => "elastic"
			#password => "changeme"
		#}
	#}
}
启动
// -f 后边是你创建的配置文件  或者默认配置文件夹路径  **需要指定**

./bin/logstash -f ./config/logstash-config.conf
后台启动
// -f 后边是你创建的配置文件

nohup ./bin/logstash -f ./config/logstash-config.conf  &
启动成功后 可以看Elasticsearch 是否自动创建索引
4.使用pipelines.yml 配置启动
修改 config/pipelines.yml
 - pipeline.id: test
   ##批量处理工作线程
   pipeline.workers: 8
   ##批量处理事件size
   pipeline.batch.size: 2000
   ##批量处理等待时间
   pipeline.batch.delay: 10
   ##指定conf配置文件
   path.config: "./logstash.conf"
#可配置多个
# - pipeline.id: test2
   ##批量处理工作线程
   #pipeline.workers: 8
   ##批量处理事件size
   #pipeline.batch.size: 2000
   ##批量处理等待时间
   #pipeline.batch.delay: 10
   ##指定conf配置文件
   #path.config: "./logstash.conf"
   #queue.type: persisted
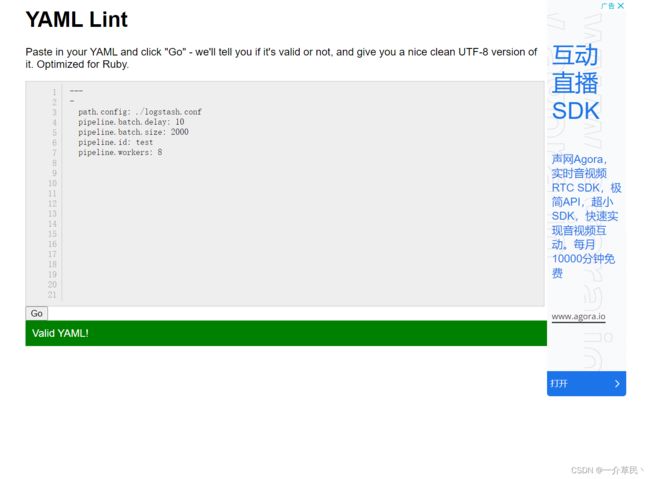
验证 pipelines.yml 配置文件
验证网址: http://www.yamllint.com/

配合文件没有问题 直接启动 运行
./bin/logstash
注意: 有时候启动会报错, 检查好配置文件。我在刚开始各种报错,后来发现都是配置的问题。
5.logstash 性能优化
- 进行JVM 参数调优,Logstash是Java开发,在config/jvm.options 可以配置JVM参数, 默认Xmx Xms 为1G 根据服务器情况调整, 垃圾收集器默认CMS可以换成 G1 或者 并行GC。
- pipeline.workers :工作线程数,根据CPU使用情况配置,一般为CPU线程数
- pipeline.batch.size:批量执行事件长度,该配置用于input批量处理,在打包发送给filter和output,增加该值可以一定范围内提升性能,但是需要增加额外的内存开销。
- pipeline.batch.delay:批量处理最大等待时间。
- stdout{codec => rubydebug} 关闭打印。
四、filter 去重
验证去重方式: 在日志文件中写入两条相同的日志。 验证过程中请看目录 3. 注意
配置文件中加入filter
## filter 去重
filter{
	fingerprint {
		source => "message"
		target => "[@metadata][fingerprint]"
		##MD5加密方法 还有MURMUR3 SHA1 UUID 很多
		method => "MD5"
		key => "test"
	}
}
五、问题总计
异常 :Pipelines YAML file must contain an array of pipeline configs.
原因 :配置 pipelines.yml 文件 不正确
解决: 用网站验证一下,或者使用conf 配置启动
异常 :No configuration found in the configured sources
原因 :配置 pipelines.yml 文件 不正确 ,没有指定conf 配置文件路径
解决:指定path.config
	##指定conf配置文件
   path.config: "./logstash.conf"


