【弹性盒子—详细入门教程】
弹性盒子布局总结
- 一、Flex是什么?
- 二、Flex基础概念
- 三、容器的属性
-
- 1.flex-direction属性
- 2.flex-wrap属性
- 3.flex-flow属性
- 4 justify-content属性
- 5 align-items属性
- 6.align-content属性
- 四、项目的属性
-
- 1.order属性
- 2.flex-grow属性
- 3.flex-shrink属性
- 4.flex-basis属性
- 5. flex
- 6.align-self属性
- 五、实例展示
-
- 1、基本网格布局:
- 2、圣杯布局(Holy Grail Layout)
- 3、示例三
一、Flex是什么?
Flexbox 是 flexible box 的简称(注:意思是“灵活的盒子容器”),是 CSS3 引入的新的布局模式。它决定了元素如何在页面上排列,使它们能在不同的屏幕尺寸和设备下可预测地展现出来。
它之所以被称为 Flexbox ,是因为它能够扩展和收缩 flex 容器内的元素,以最大限度地填充可用空间。与以前布局方式(如 table 布局和浮动元素内嵌块元素)相比,Flexbox 是一个更强大的方式:
- 在不同方向排列元素
- 重新排列元素的显示顺序
- 更改元素的对齐方式
- 动态地将元素装入容器
注:这是您需要在父容器上设置的唯一属性,它的所有直接子容器将自动变为flex项目。代码如下:
.container{
    display: flex;
}
二、Flex基础概念
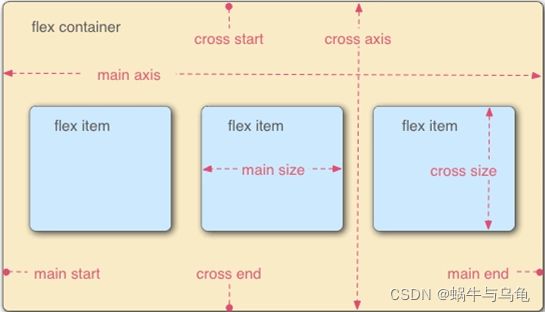
- 采用 Flex 布局的元素,称为 Flex 容器(flex container),简称"容器"。
- 它的所有子元素自动成为容器成员,称为 Flex 项目(flex item),简称"项目"。
- 容器默认存在两根轴:
a. 水平的主轴(main axis)
主轴的开始位置叫做main-start;
结束位置叫做main-end;
b.垂直的交叉轴(cross axis)
交叉轴的开始位置叫做cross-start;
结束位置叫做cross-end;
分析如下图所示:
4.在 Flexbox 模型中,有三个核心概念:
-
容器(flex container):是一个块级标签(可以包含其他的页面元素)
-
项目(flex item):又称为子项(包含在容器的元素)
-
排列方向(direction):元素的布局方向
三、容器的属性
准备工作:基础代码段如下:
DOCTYPE html>
<html lang="en">
<head>
    <meta charset="UTF-8">
    <meta http-equiv="X-UA-Compatible" content="IE=edge">
    <meta name="viewport" content="width=device-width, initial-scale=1.0">
    <title>Documenttitle>
head>
<style>
        .one,.two,.three{
        width: 100px;
        height:100px;
        background-color: blanchedalmond;
        color:white;
        margin: 20px;
        line-height: 100px;
        text-align: center;
    }
    .container{
        width: 500px;
        display: flex;/*表示容器采用弹性盒子*/
        /*flex-direction: row;表示容器内容的布局方式为水平方向:从左往右*/
        /* flex-direction: row-reverse;表示容器内容的布局方式为水平方式,从右端开始:从右往左 */
        /* flex-direction: column;表示容器内容的布局方式为垂直方向:从上往下 */
        /* flex-direction: column-reverse;表示容器内容的布局方式为垂直方向:从下往上 */

        /*flex-wrap: wrap;换行,第一行在上方*/
        /* flex-wrap: wrap-reverse;换行 ,第一行在下方*/
        /* flex-flow:row wrap; flex-flow是flex-direction和flex-wrap的简写,flex-flow默认值是row nowrap;*/
        /* flex-flow:row wrap-reverse; */
    }

style>
<body>
  <div class="container">
    <div class="one">1div>
    <div class="two">2div>
    <div class="three">3div>
div>
body>
html>
1.flex-direction属性
定义容器中元素的布局方式(排列方式)
取值:
-
row(默认值):排列的主轴方向为水平,从左端开始(从左往右)
-
row-reverse:排列的主轴方向为水平,从右端开始(从右往左)
-
column:主轴方向为垂直方向,起点是上沿(从上往下)
-
column-reverse:主轴方向为垂直方向,起点是下沿(从下往上)
给容器添加属性:
| CSS | 解释 | 效果 |
|---|---|---|
| flex-direction: row; | 默认值-主轴为水平方向,起点在左端 |  |
| flex-direction: row-reverse; | 主轴为水平方向,起点在右端 |  |
| flex-direction: column; | 主轴为垂直方向,起点在上沿 |  |
| flex-direction: column-reverse; | 主轴为垂直方向,起点在下沿 |  |
2.flex-wrap属性
最初的flexbox概念是在一行中设置其项目的容器。该flex-wrap属性控制flex容器是以单行还是多行布置其项目,以及新行的堆叠方向。
取值:
- nowrap(默认值):项目显示在一行中,默认情况下会缩小它们以适应Flex容器的宽度;
- wrap:如果需要,从左到右和从上到下,弹性项目将显示在多行中;
- wrap-reverse:如果需要,从左到右和从下到上,弹性项目将显示在多行中;
示例:
| CSS | 解释 | 效果 |
|---|---|---|
| flex-wrap: nowrap | 默认值,不换行,并自适应宽度 |  |
| flex-wrap: wrap | 从左到右和从上到下,换行,第一行在上方 ,显示在多行中 | 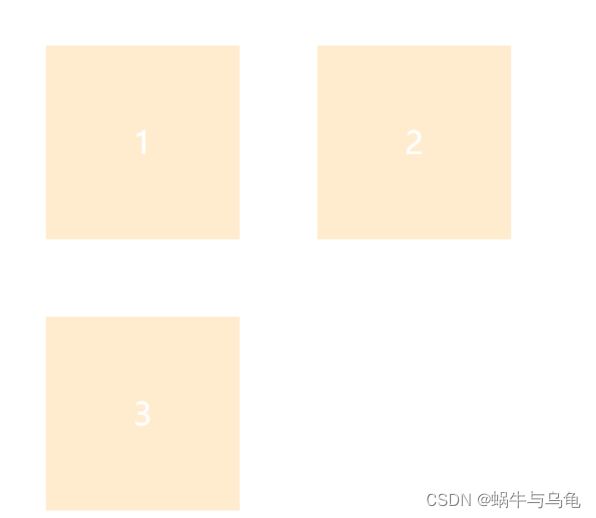 |
| flex-wrap: wrap-reverse | 从左到右和从下到上,换行,第一行在下方,显示在多行中 | 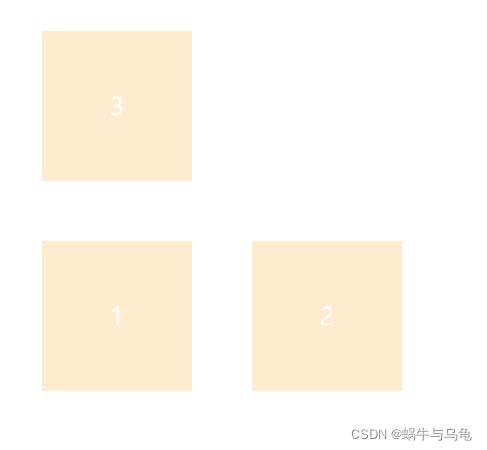 |
3.flex-flow属性
flex-flow属性是flex-direction属性和flex-wrap属性的简写形式,默认值为row nowrap。
.container {
    flex-flow:  || ;
}
| CSS | 效果 |
|---|---|
| flex-flow:row wrap; | 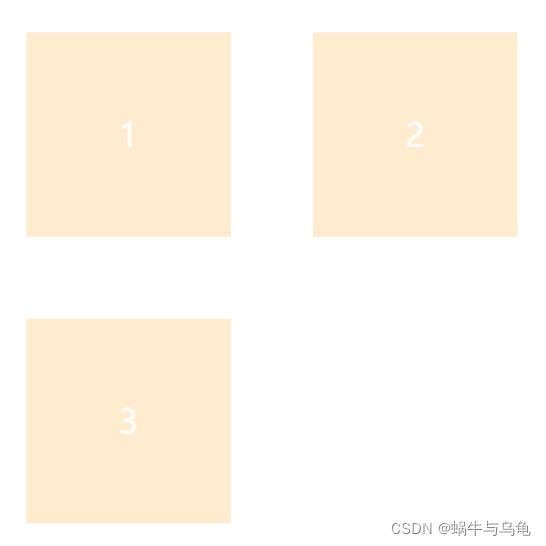 |
| flex-flow:row wrap-reverse; |  |
准备工作:基础代码段如下:
DOCTYPE html>
<html lang="en">
<head>
    <meta charset="UTF-8">
    <meta http-equiv="X-UA-Compatible" content="IE=edge">
    <meta name="viewport" content="width=device-width, initial-scale=1.0">
    <title>Documenttitle>
head>
<style>
        .one,.two,.three{
        width: 100px;
        height:100px;
        background-color: blanchedalmond;
        color:white;
        line-height: 100px;
        text-align: center;
    }
    .container{
        width: 500px;
        display: flex;/*表示容器采用弹性盒子*/
        background-color: aquamarine;
         /* justify-content: flex-start; 左对齐 表示容器的开始/
        /* justify-content: flex-end;右对齐 ,表示容器的结尾*/
        /* justify-content: center;居中 */

        /* justify-content: space-between;两端对齐 */
        /* justify-content: space-around; 第一个项目与边框之间的距离是与第二个项目块距离的一半*/
    }

style>
<body>
  <div class="container">
    <div class="one">1div>
    <div class="two">2div>
    <div class="three">3div>
div>
body>
html>
4 justify-content属性
子项的对齐方式,使flex项目沿着flex容器当前行的主轴对齐。当一行上的所有伸缩项目都不灵活或已达到最大大小时,它有助于分配剩余的可用空间。
取值:
下面假设主轴为从左到右。
- flex-start(默认值):左对齐;
- flex-end:右对齐;
- center: 居中;
- space-between:两端对齐,项目之间的间隔都相等;
- space-around:每个项目两侧的间隔相等。所以,项目之间的间隔比项目与边框的间隔大一倍;
注意:如果主轴为纵向轴,那么对应的表现也会改变
5 align-items属性
align-items属性定义项目在交叉轴上如何对齐。
取值:
- stretch(默认值):如果项目未设置高度或设为auto,将占满整个容器的高度。
- flex-start:交叉轴的起点对齐。
- flex-end:交叉轴的终点对齐。
- center:交叉轴的中点对齐。
- baseline: 项目的第一行文字的基线对齐。
准备工作:代码段如下:
DOCTYPE html>
<html lang="en">
<head>
    <meta charset="UTF-8">
    <meta http-equiv="X-UA-Compatible" content="IE=edge">
    <meta name="viewport" content="width=device-width, initial-scale=1.0">
    <title>Documenttitle>
head>
<style>
     .container{
        display: flex;
        width: 400px;
        height:400px;
        background-color: #ccc;
        /* align-items: stretch; */
        /* align-items:flex-start */
        /* align-items:flex-end */
        /* align-items:center */
        /* align-items:baseline */
        }
    .one{
        width: 80px;
        height: 120px;
        background-color: green;
        color: white;
        text-align: center;
        line-height: 120px;
        margin-left: 20px;

    }
    .two{
        width: 80px;
        height: 80px;
        background-color:yellow;
        color:white;
        text-align:center;
        line-height:80px;
        margin-left: 20px;
    }
    .three{
        width: 100px;
        height: 100px;
        background-color:red;
        color:white;
        text-align:center;
        line-height:100px;
        margin-left: 20px;
    }
    .four{
        width: 100px;
        height: 200px;
        background-color:blue;
        color:white;
        text-align:center;
        line-height:100px;
        margin-left: 20px;
        margin-right: 20px;

    }
style>
<body>
    <div class="container">
        <div class="one">1div>
        <div class="two">2div>
        <div class="three">3div>
        <div class="four">4div>
    div>
body>
html>
示例:
| CSS | 解释 | 效果 |
|---|---|---|
| align-items: stretch; | 如果项目未设置高度或设为auto,将占满整个容器的高度 | 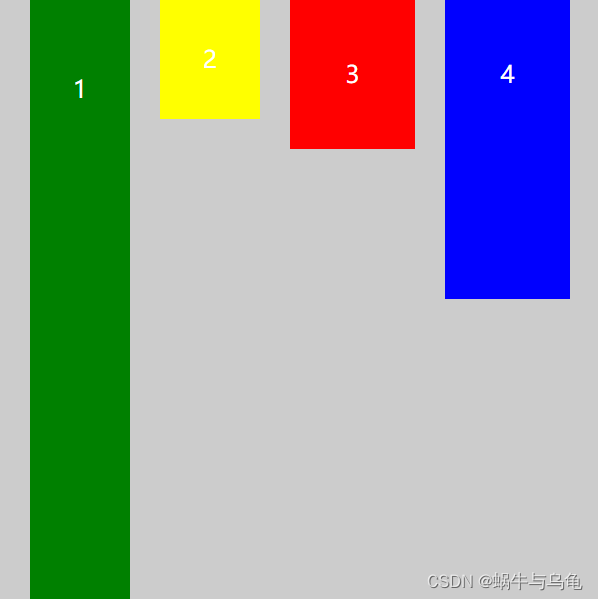 |
| align-items: flex-start | 交叉轴的起点对齐 |  |
| align-items: flex-end | 交叉轴的终点对齐 |  |
| align-items: center | 交叉轴的中点对齐 |  |
| align-items: baseline | 项目的第一行文字的基线对齐 |  |
6.align-content属性
定义了多根轴线的对齐方式,如果项目只有一根轴线,那么该属性将不起作用。
当存在多个轴时,此属性会在Flex容器内将Flex容器的轴线以接近justify-content的方式对齐。
- flex-start:与交叉轴的起点对齐。
- flex-end:与交叉轴的终点对齐。
- center:与交叉轴的中点对齐。
- space-between:与交叉轴两端对齐,轴线之间的间隔平均分布。
- space-around:每根轴线两侧的间隔都相等。所以,轴线之间的间隔比轴线与边框的间隔大一倍。
- stretch(默认值):轴线占满整个交叉轴。
示例:
| CSS | 解释 | 效果 |
|---|---|---|
| stretch(默认值) | 轴线占满整个交叉轴。 |  |
| flex-start | 与交叉轴的起点对齐 |  |
| flex-end | 与交叉轴的终点对齐 |  |
| center | 与交叉轴的中点对齐 |  |
| space-between | 与交叉轴两端对齐,轴线之间的间隔平均分布。 | 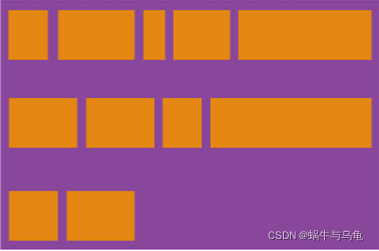 |
| space-around | 每根轴线两侧的间隔都相等。所以,轴线之间的间隔比轴线与边框的间隔大一倍。 |  |
思考:结合 justify-content和align-items,看看在 flex-direction 两个不同属性值的作用下,轴心有什么不同:


四、项目的属性
1.order属性
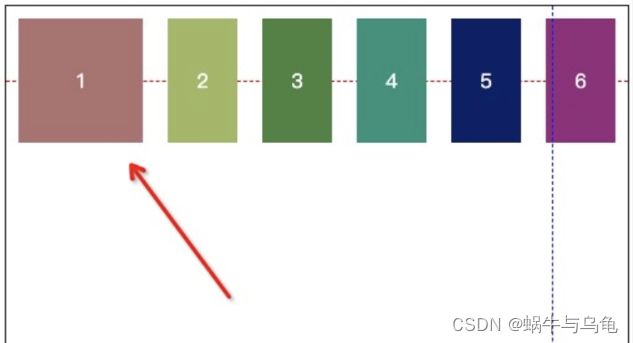
order属性定义项目的排列顺序。数值越小,排列越靠前,默认为0。
(1)①代码段如下:
<style>
    .container{
        display:flex;
        background-color: purple;
        width: 800px;
    }
    .one,.two,.three,.four,.five{
        background-color: orange;
        height:50px;
        color:white;
        margin: 20px;
        text-align: center;
        line-height: 50px;
    }
    .one{
        width: 100px;
        order:1;
    }
    .two{
        width:120px;
        order:2;
    }
    .three{
        width: 100px;
        order:3;
    }
    .four{
        width: 80px;
        order:4;

    }
    .five{
        width: 200px;
        order:5;

    }
    style>

    <div class="container">
        <div class="one">1div>
        <div class="two">2div>
        <div class="three">3div>
        <div class="four">4div>
        <div class="five">5div>
    div>
<style>
    .container{
        display:flex;
        background-color: purple;
        width: 800px;
    }
    .one,.two,.three,.four,.five{
        background-color: orange;
        height:50px;
        color:white;
        margin: 20px;
        text-align: center;
        line-height: 50px;
    }
    .one{
        width: 100px;
        order:3;
    }
    .two{
        width:120px;
        order:1;
    }
    .three{
        width: 100px;
        order:4;
    }
    .four{
        width: 80px;
        order:5;

    }
    .five{
        width: 200px;
        order:2;

    }
    style>


    <div class="container">
        <div class="one">1div>
        <div class="two">2div>
        <div class="three">3div>
        <div class="four">4div>
        <div class="five">5div>
    div>
2.flex-grow属性
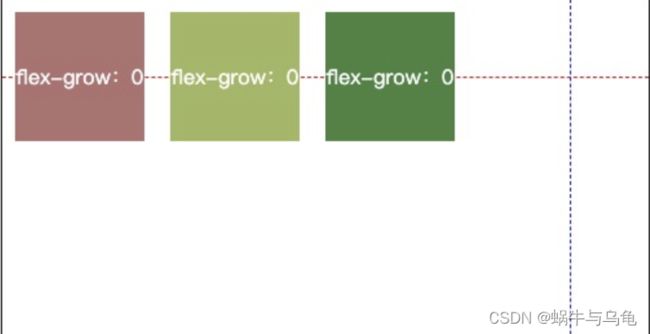
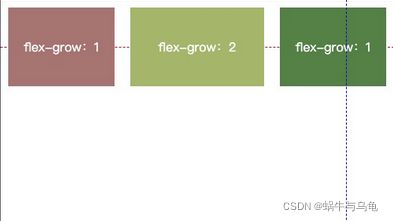
flex-grow属性定义项目的放大比例,默认为0,即如果存在剩余空间,也不放大。
如果所有项目的flex-grow属性都为1,则它们将等分剩余空间(如果有的话)。如果一个项目的flex-grow属性为2,其他项目都为1,则前者占据的剩余空间将比其他项多一倍。
3.flex-shrink属性
flex-shrink属性定义了项目的缩小比例,默认为1,即如果空间不足,该项目将缩小。
4.flex-basis属性
flex-basis属性定义了在分配多余空间之前,项目占据的主轴空间(main size)。浏览器根据这个属性,计算主轴是否有多余空间。
属性值:
可以是长度单位,也可以是百分比,百分比是按照父元素的width为标准。
默认值为 0,不是 auto,如果取值为 auto 的话,它的值就等于 flex-items的 width(或者默认的大小,width没有设置的话)
该属性用来设置元素的宽度,其实,width也可以设置宽度。如果元素上同时设置了width和flex-basis,那么width 的值就会被flex-basis覆盖掉。
| css | 解释 | 效果 |
|---|---|---|
| 项目1 {flex-basis: 200px} | 项目1 初始分配宽度200px |  |
5. flex
此属性是flex-grow,flex-shrink和flex-basis的简写。flex:flex-grow flex-shrink flex-basis,默认值为0 1 auto。
该属性有两个快捷值:(注:建议优先使用这个属性,而不是单独写三个分离的属性,因为浏览器会推算相关值。)
- auto (1 1 auto)
- none (0 0 auto)
例如:flex: 1;等价于:flex-grow: 1;
flex-shrink: 1;
flex-basis: 0%;
6.align-self属性
align-self属性允许单个项目有与其他项目不一样的对齐方式,可覆盖align-items属性。默认值为auto,表示继承父元素的align-items属性,如果没有父元素,则等同于stretch。
| css | 解释 | 效果 |
|---|---|---|
| .container {align-items: center}项目2 {align-self: flex-end} | 项目2 按纵轴end对齐 |  |
最后注意:弹性布局默认不改变项目的宽度,但是它默认改变项目的高度。如果项目没有显式指定高度,就将占据容器的所有高度。
五、实例展示
1、基本网格布局:
①代码段如下:
<style>
    .Grid{
        display:flex;
        margin-top: 10px;
    }
    .Grid-cell,.Grid-cell2{
        flex:1;/*项目所占的分数*/
        background-color: rgb(174, 223, 219);
        margin-left: 5px;
    }
    .Grid-cell2{
        height: 200px;
    }
style>
<body>
   <div class="Grid">
    <div class="Grid-cell">1/2div>
    <div class="Grid-cell">1/2div>
div>
<div class="Grid">
    <div class="Grid-cell">1/3div>
    <div class="Grid-cell">1/3div>
    <div class="Grid-cell">1/3div>
div>
<div class="Grid">
    <div class="Grid-cell">1/4div>
    <div class="Grid-cell">1/4div>
    <div class="Grid-cell">1/4div>
    <div class="Grid-cell">1/4div>
div>
<div class="Grid">
    <div class="Grid-cell2">西安邮电大学div>
    <div class="Grid-cell2">陕西科技大学div>
div>


body>
2、圣杯布局(Holy Grail Layout)
指的是一种最常见的网站布局。页面从上到下,分成三个部分:头部(header),躯干(body),尾部(footer)。其中躯干又水平分成三栏,从左到右为:导航、主栏、副栏。
①代码段如下:
<style>
    .HolyGrail{
        display: flex;
        flex-direction: column;
        min-height: 96vh;/*站页面高度的百分之九十六*/
    }
    header,footer{
        flex: 1;
        background-color: #ccc;
        text-align:center;
        line-height: 11vh;
    }
    .HolyGrail-body{
        display: flex;
        flex:1;
    }
    .HolyGrail-content{
        background-color:oldlace;
        line-height: 75vh;
        text-align: center;
        flex:1;
    }
    .HolyGrail-nav,.HolyGrail-ads{
        flex:0 0 12em;
        background-color: rgb(210, 188, 148);
        text-align: center;
        line-height: 75vh;
    }
    .HolyGrail-nav{
        order:-1;
    }
style>
<body class="HolyGrail">
    <header>#headerheader>
    <div class="HolyGrail-body">
        <main class="HolyGrail-content">#centermain>
        <nav class="HolyGrail-nav">#leftnav>
        <aside class="HolyGrail-ads">#rightaside>
    div>
    <footer>#footerfooter>
body>
3、示例三
①代码段如下:
<style>
.s{
    display: flex;
    flex-direction: column;

}
header,footer{
        flex: 1;
        background-color: #ccc;
        text-align:center;
        line-height: 10vh;
    }
.toinfo{
       flex: 1;
        background-color: rgb(219, 23, 23);
        text-align:center;
        line-height: 8vh;
}
.main{
    display: flex;
    flex:1;
    line-height:45vh;
}
.s-nav{
        flex:0 0 12em;
        background-color: red;
        text-align:center;
        line-height: 45vh;
        order:-1;
    }
.s-ads{
        flex:0 0 12em;
        background-color: rgb(210, 188, 148);
        text-align:center;
        line-height: 45vh;
    }

.s-content{
       line-height: 40vh;
       text-align: center;
       flex:1;

    }
    .a1,.a2{
        flex:1;
    }
    .a1
    {
        background-color: purple;
    }
    .a2{
        background-color: orange;
    }
    .b{

        background-color: blue;
    }
    .c{
        display: flex;
        flex-direction: row;
        flex:1;
    }
style>
<body class="s">
    <div class="toinfo">#toinfodiv>
    <header>#headerheader>
    <div class="main">
        <nav class="s-nav">navnav>
         <main class="s-content">
            <div class="c">
            <div class="a1">a1div>
            <div class="a2">a2div>
            div>
            <div class="b">bdiv>
        main>
        <aside class="s-ads">asideaside>
    div>
    <footer>footerfooter>
body>


