K8S 搭建部署(网络插件calio)
在 Kubernetes集群中 安装 KubeSphere2.1
文档说明
本文将使用kubeadm安装k8s1.16.9版本,并且在k8s集群中安装kubesphere2.1
官方文档中明确说明了如果要完全安装kubesphere,集群机器配置至少是8c16g,而最小化安装机器配置最少为2g内存,所以这里仅仅是最小化安装体验
使用 kubeadm 搭建 v1.16.9 版本 Kubernetes 集群
一、环境准备
1.1实验环境
| 角色 | IP地址 | 主机名 | docker版本 | 硬件配置 | 系统 | 内核 |
|---|---|---|---|---|---|---|
| master | 192.168.9.10 | k8s-master | 18.09.9 | 2c4g | CentOS7.7 | 3.10.0-1062.el7.x86_64 |
| node1 | 192.168.9.13 | k8s-node1 | 18.09.9 | 2c6g | CentOS7.7 | 3.10.0-1062.el7.x86_64 |
| node2 | 192.168.9.14 | k8s-node2 | 18.09.9 | 2c6g | CentOS7.7 | 3.10.0-1062.el7.x86_64 |
1.2每个节点配置host信息
cat >> /etc/hosts <192.168.9.10 k8s-master
192.168.9.13 k8s-node1
192.168.9.14 k8s-node2
EOF
1.3禁用防火墙和selinux
//禁用防火墙
systemctl stop firewalld && systemctl disable firewalld

//禁用selinux
#临时修改
setenforce 0

#永久修改,重启服务器后生效
sed -i '7s/enforcing/disabled/' /etc/selinux/config1.4创建/etc/sysctl.d/k8s.conf文件,添加如下内容
//向文件中写入以下内容
cat >/etc/sysctl.d/k8s.conf <1
net.bridge.bridge-nf-call-iptables = 1
net.ipv4.ip_forward = 1
EOF

//执行以下命令生效
modprobe br_netfilter && sysctl -p /etc/sysctl.d/k8s.conf
1.5安装ipvs
脚本创建了的/etc/sysconfig/modules/ipvs.modules文件,保证在节点重启后能自动加载所需模块。使用lsmod | grep -e ip_vs -e nf_conntrack_ipv4命令查看是否已经正确加载所需的内核模块
//向文件中写入以下内容
cat > /etc/sysconfig/modules/ipvs.modules <#!/bin/bash
modprobe -- ip_vs
modprobe -- ip_vs_rr
modprobe -- ip_vs_wrr
modprobe -- ip_vs_sh
modprobe -- nf_conntrack_ipv4
EOF

//修改权限以及查看是否已经正确加载所需的内核模块
chmod 755 /etc/sysconfig/modules/ipvs.modules && bash /etc/sysconfig/modules/ipvs.modules && lsmod | grep -e ip_vs -e nf_conntrack_ipv4

nf_conntrack_ipv4      15053  0
nf_defrag_ipv4         12729  1 nf_conntrack_ipv4
ip_vs_sh               12688  0
ip_vs_wrr              12697  0
ip_vs_rr               12600  0
ip_vs                 145497  6 ip_vs_rr,ip_vs_sh,ip_vs_wrr
nf_conntrack          133095  2 ip_vs,nf_conntrack_ipv4
libcrc32c              12644  3 xfs,ip_vs,nf_conntrack
安装ipset和ipvsadm(便于查看 ipvs 的代理规则)
yum -y install ipset ipvsadm1.6同步服务器时间
//安装chrony
yum -y install chrony

//修改同步服务器地址为阿里云
sed -i.bak '3,6d' /etc/chrony.conf && sed -i '3cserver ntp1.aliyun.com iburst' \
/etc/chrony.conf

//启动chronyd及加入开机自启
systemctl start chronyd && systemctl enable chronyd

//查看同步结果
chronyc sources

210 Number of sources = 1
MS Name/IP address         Stratum Poll Reach LastRx Last sample
===============================================================================
^* 120.25.115.20                 2   6    37    13   +194us[+6131us] +/-   33ms
1.7关闭swap分区
修改/etc/fstab文件,注释掉 SWAP 的自动挂载,使用free -m确认 swap 已经关闭
//手动关闭swap
swapoff -a

//修改fstab文件,注释swap自动挂载
sed -i '/^\/dev\/mapper\/centos-swap/c#/dev/mapper/centos-swap swap                    swap    defaults        0 0' /etc/fstab

//查看swap是否关闭
free -m

total        used        free      shared  buff/cache   available
Mem:           1994         682         612           9         699        1086
Swap:             0           0           0
swappiness 参数调整,修改/etc/sysctl.d/k8s.conf添加下面一行
cat >>/etc/sysctl.d/k8s.conf <0
EOF

//使配置生效
sysctl -p /etc/sysctl.d/k8s.conf

net.bridge.bridge-nf-call-ip6tables = 1
net.bridge.bridge-nf-call-iptables = 1
net.ipv4.ip_forward = 1
vm.swappiness = 0
1.8安装docker18.09.9
1.添加阿里云yum源
yum-config-manager --add-repo http://mirrors.aliyun.com/docker-ce/linux/centos/docker-ce.repo

2.查看可用版本
yum list docker-ce --showduplicates | sort -r

已加载插件:fastestmirror, langpacks
可安装的软件包
 * updates: mirrors.aliyun.com
Loading mirror speeds from cached hostfile
 * extras: mirrors.aliyun.com
docker-ce.x86_64            3:19.03.5-3.el7                     docker-ce-stable
docker-ce.x86_64            3:19.03.4-3.el7                     docker-ce-stable
。。。。。。
docker-ce.x86_64            3:18.09.9-3.el7                     docker-ce-stable
docker-ce.x86_64            3:18.09.8-3.el7                     docker-ce-stable
docker-ce.x86_64            3:18.09.7-3.el7                     docker-ce-stable
docker-ce.x86_64            3:18.09.6-3.el7                     docker-ce-stable
。。。。。。


3.安装docker18.09.9
yum -y install docker-ce-18.09.9-3.el7 docker-ce-cli-18.09.9

4.启动docker并设置开机自启
systemctl enable docker && systemctl start docker

5.配置阿里云docker镜像加速
cat > /etc/docker/daemon.json <<-'EOF'
{
  "registry-mirrors": ["https://gqk8w9va.mirror.aliyuncs.com"]
}
EOF

6.配置完后重启docker
systemctl restart docker

7.查看加速
docker info

找到Registry Mirrors一行
Registry Mirrors:
 https://gqk8w9va.mirror.aliyuncs.com/

10.查看docker版本
docker version

Client:
 Version:           18.09.9
 API version:       1.39
 Go version:        go1.11.13
 Git commit:        039a7df9ba
 Built:             Wed Sep  4 16:51:21 2019
 OS/Arch:           linux/amd64
 Experimental:      false

Server: Docker Engine - Community
 Engine:
  Version:          18.09.9
  API version:      1.39 (minimum version 1.12)
  Go version:       go1.11.13
  Git commit:       039a7df
  Built:            Wed Sep  4 16:22:32 2019
  OS/Arch:          linux/amd64
  Experimental:     false
1.9修改docker Cgroup Driver为systemd
#修改docker Cgroup Driver为systemd
将/usr/lib/systemd/system/docker.service文件中的这一行 ExecStart=/usr/bin/dockerd -H fd:// --containerd=/run/containerd/containerd.sock

修改为 ExecStart=/usr/bin/dockerd -H fd:// --containerd=/run/containerd/containerd.sock --exec-opt native.cgroupdriver=systemd

如果不修改,在添加 worker 节点时可能会碰到如下错误
[WARNING IsDockerSystemdCheck]: detected "cgroupfs" as the Docker cgroup driver. The recommended driver is "systemd".
Please follow the guide at https://kubernetes.io/docs/setup/cri/


//使用如下命令修改
sed -i.bak "s#^ExecStart=/usr/bin/dockerd.*#ExecStart=/usr/bin/dockerd -H fd:// --containerd=/run/containerd/containerd.sock --exec-opt native.cgroupdriver=systemd#g" /usr/lib/systemd/system/docker.service

//重启docker
systemctl daemon-reload && systemctl restart docker
1.10安装Kubeadm
需要科学上网
cat >/etc/yum.repos.d/kubernetes.repo<1
gpgcheck=1
repo_gpgcheck=1
gpgkey=https://packages.cloud.google.com/yum/doc/yum-key.gpg
        https://packages.cloud.google.com/yum/doc/rpm-package-key.gpg
EOF
使用阿里云yum源
cat >/etc/yum.repos.d/kubernetes.repo <1
gpgcheck=0
repo_gpgcheck=0
gpgkey=http://mirrors.aliyun.com/kubernetes/yum/doc/yum-key.gpg
        http://mirrors.aliyun.com/kubernetes/yum/doc/rpm-package-key.gpg
EOF
安装 kubeadm、kubelet、kubectl(阿里云yum源会随官方更新最新版,因此指定版本)
//安装1.16.9版本
yum -y install kubelet-1.16.9 kubeadm-1.16.9 kubectl-1.16.9

//查看版本
kubeadm version

kubeadm version: &version.Info{Major:"1", Minor:"16", GitVersion:"v1.16.9", GitCommit:"a17149e1a189050796ced469dbd78d380f2ed5ef", GitTreeState:"clean", BuildDate:"2020-04-16T11:42:30Z", GoVersion:"go1.13.9", Compiler:"gc", Platform:"linux/amd64"}
设置kubelet开机自启
systemctl enable kubelet设置k8s命令自动补全
yum -y install bash-completion
source /usr/share/bash-completion/bash_completion
source <(kubectl completion bash)
echo "source <(kubectl completion bash)" >> ~/.bashrc
到此,基本环境安装完成!!!
二、初始化集群
2.1master节点操作,配置 kubeadm 初始化文件
cat < ./kubeadm-config.yaml
apiVersion: kubeadm.k8s.io/v1beta2
kind: ClusterConfiguration
kubernetesVersion: v1.16.9
imageRepository: registry.cn-hangzhou.aliyuncs.com/google_containers

#master地址
controlPlaneEndpoint: "192.168.9.10:6443"
networking:
  serviceSubnet: "10.96.0.0/16"

  #k8s容器组所在的网段
  podSubnet: "10.20.0.1/16"
  dnsDomain: "cluster.local"
EOF
2.2初始化master
如果想要重新初始化,需要执行命令kubeadm reset -f
#kubeadm init --config=kubeadm-config.yaml --upload-certs
完整输出结果
kubeadm init --config=kubeadm-config.yaml
[init] Using Kubernetes version: v1.16.9
[preflight] Running pre-flight checks
[preflight] Pulling images required for setting up a Kubernetes cluster
[preflight] This might take a minute or two, depending on the speed of your internet connection
[preflight] You can also perform this action in beforehand using 'kubeadm config images pull'
[kubelet-start] Writing kubelet environment file with flags to file "/var/lib/kubelet/kubeadm-flags.env"
[kubelet-start] Writing kubelet configuration to file "/var/lib/kubelet/config.yaml"
[kubelet-start] Activating the kubelet service
[certs] Using certificateDir folder "/etc/kubernetes/pki"
[certs] Generating "ca" certificate and key
[certs] Generating "apiserver" certificate and key
[certs] apiserver serving cert is signed for DNS names [k8s-master kubernetes kubernetes.default kubernetes.default.svc kubernetes.default.svc.cluster.local] and IPs [10.96.0.1 192.168.9.10 192.168.9.10]
[certs] Generating "apiserver-kubelet-client" certificate and key
[certs] Generating "front-proxy-ca" certificate and key
[certs] Generating "front-proxy-client" certificate and key
[certs] Generating "etcd/ca" certificate and key
[certs] Generating "etcd/server" certificate and key
[certs] etcd/server serving cert is signed for DNS names [k8s-master localhost] and IPs [192.168.9.10 127.0.0.1 ::1]
[certs] Generating "etcd/peer" certificate and key
[certs] etcd/peer serving cert is signed for DNS names [k8s-master localhost] and IPs [192.168.9.10 127.0.0.1 ::1]
[certs] Generating "etcd/healthcheck-client" certificate and key
[certs] Generating "apiserver-etcd-client" certificate and key
[certs] Generating "sa" key and public key
[kubeconfig] Using kubeconfig folder "/etc/kubernetes"
[kubeconfig] Writing "admin.conf" kubeconfig file
[kubeconfig] Writing "kubelet.conf" kubeconfig file
[kubeconfig] Writing "controller-manager.conf" kubeconfig file
[kubeconfig] Writing "scheduler.conf" kubeconfig file
[control-plane] Using manifest folder "/etc/kubernetes/manifests"
[control-plane] Creating static Pod manifest for "kube-apiserver"
[control-plane] Creating static Pod manifest for "kube-controller-manager"
[control-plane] Creating static Pod manifest for "kube-scheduler"
[etcd] Creating static Pod manifest for local etcd in "/etc/kubernetes/manifests"
[wait-control-plane] Waiting for the kubelet to boot up the control plane as static Pods from directory "/etc/kubernetes/manifests". This can take up to 4m0s
[apiclient] All control plane components are healthy after 16.501777 seconds
[upload-config] Storing the configuration used in ConfigMap "kubeadm-config" in the "kube-system" Namespace
[kubelet] Creating a ConfigMap "kubelet-config-1.16" in namespace kube-system with the configuration for the kubelets in the cluster
[upload-certs] Skipping phase. Please see --upload-certs
[mark-control-plane] Marking the node k8s-master as control-plane by adding the label "node-role.kubernetes.io/master=''"
[mark-control-plane] Marking the node k8s-master as control-plane by adding the taints [node-role.kubernetes.io/master:NoSchedule]
[bootstrap-token] Using token: px979r.mphk9ee5ya8fgy44
[bootstrap-token] Configuring bootstrap tokens, cluster-info ConfigMap, RBAC Roles
[bootstrap-token] configured RBAC rules to allow Node Bootstrap tokens to post CSRs in order for nodes to get long term certificate credentials
[bootstrap-token] configured RBAC rules to allow the csrapprover controller automatically approve CSRs from a Node Bootstrap Token
[bootstrap-token] configured RBAC rules to allow certificate rotation for all node client certificates in the cluster
[bootstrap-token] Creating the "cluster-info" ConfigMap in the "kube-public" namespace
[addons] Applied essential addon: CoreDNS
[addons] Applied essential addon: kube-proxy

Your Kubernetes control-plane has initialized successfully!

To start using your cluster, you need to run the following as a regular user:

  mkdir -p $HOME/.kube
  sudo cp -i /etc/kubernetes/admin.conf $HOME/.kube/config
  sudo chown $(id -u):$(id -g) $HOME/.kube/config

You should now deploy a pod network to the cluster.
Run "kubectl apply -f [podnetwork].yaml" with one of the options listed at:
  https://kubernetes.io/docs/concepts/cluster-administration/addons/

You can now join any number of control-plane nodes by copying certificate authorities
and service account keys on each node and then running the following as root:

  kubeadm join 192.168.9.10:6443 --token px979r.mphk9ee5ya8fgy44 \
    --discovery-token-ca-cert-hash sha256:5e7c7cd1cc1f86c0761e54b9380de22968b6b221cb98939c14ab2942223f6f51 \
    --control-plane

Then you can join any number of worker nodes by running the following on each as root:

kubeadm join 192.168.9.10:6443 --token px979r.mphk9ee5ya8fgy44 \
    --discovery-token-ca-cert-hash sha256:5e7c7cd1cc1f86c0761e54b9380de22968b6b221cb98939c14ab2942223f6f51
拷贝 kubeconfig 文件
//这里的路径为/root
mkdir -p $HOME/.kube
cp -i /etc/kubernetes/admin.conf $HOME/.kube/config
chown $(id -u):$(id -g) $HOME/.kube/config
2.3master添加节点
node1和node2相同操作
将master节点上的$HOME/.kube/config 文件拷贝到node节点对应的文件中
1.创建目录,这里的路径为/root
mkdir -p $HOME/.kube

2.把master节点上的config文件拷贝到node1和node2的$HOME/.kube
scp k8s-master1:~/.kube/config $HOME/.kube

3.修改权限
chown $(id -u):$(id -g) $HOME/.kube/config
将node1和node2加入到集群中
这里需要用到2.2中初始化master最后生成的token和sha256值
#kubeadm join 192.168.9.10:6443 --token px979r.mphk9ee5ya8fgy44     --discovery-token-ca-cert-hash sha256:5e7c7cd1cc1f86c0761e54b9380de22968b6b221cb98939c14ab2942223f6f51

输出结果
[preflight] Running pre-flight checks
	[WARNING IsDockerSystemdCheck]: detected "cgroupfs" as the Docker cgroup driver. The recommended driver is "systemd". Please follow the guide at https://kubernetes.io/docs/setup/cri/
[preflight] Reading configuration from the cluster...
[preflight] FYI: You can look at this config file with 'kubectl -n kube-system get cm kubeadm-config -oyaml'
[kubelet-start] Downloading configuration for the kubelet from the "kubelet-config-1.16" ConfigMap in the kube-system namespace
[kubelet-start] Writing kubelet configuration to file "/var/lib/kubelet/config.yaml"
[kubelet-start] Writing kubelet environment file with flags to file "/var/lib/kubelet/kubeadm-flags.env"
[kubelet-start] Activating the kubelet service
[kubelet-start] Waiting for the kubelet to perform the TLS Bootstrap...

This node has joined the cluster:
* Certificate signing request was sent to apiserver and a response was received.
* The Kubelet was informed of the new secure connection details.

Run 'kubectl get nodes' on the control-plane to see this node join the cluster.
如果忘记了token和sha256值,可以在master节点使用如下命令查看
//查看token
#kubeadm token list
TOKEN                     TTL       EXPIRES                     USAGES                   DESCRIPTION   EXTRA GROUPS
px979r.mphk9ee5ya8fgy44   20h       2020-03-18T13:49:48+08:00   authentication,signing           system:bootstrappers:kubeadm:default-node-token


//查看sha256
#openssl x509 -pubkey -in /etc/kubernetes/pki/ca.crt | openssl rsa -pubin -outform der 2>/dev/null | openssl dgst -sha256 -hex | sed 's/^.* //'
5e7c7cd1cc1f86c0761e54b9380de22968b6b221cb98939c14ab2942223f6f51

//同时查看token和sha256
#kubeadm token create --print-join-command
kubeadm join 192.168.9.10:6443 --token 9b28zg.oyt0kvvpmtrem4bg --discovery-token-ca-cert-hash sha256:5e7c7cd1cc1f86c0761e54b9380de22968b6b221cb98939c14ab2942223f6f51 master节点查看node,发现状态都是NotReady,因为还没有安装网络插件,这里我们安装calio官方插件文档
kubectl get nodes
NAME         STATUS     ROLES    AGE     VERSION
k8s-master   NotReady   master   19m     v1.16.9
k8s-node1    NotReady      4m10s   v1.16.9
k8s-node2    NotReady      4m3s    v1.16.9
2.4master节点安装网络插件calio
//下载文件
wget https://docs.projectcalico.org/v3.8/manifests/calico.yaml

将文件中的620行改为如下,因为在上边kubeadm-config.yaml配置文件中指定了容器组IP  620行
value: "10.20.0.1/16"


//修改完成后安装calico网络插件
kubectl apply -f calico.yaml

//安装完成后稍等一会查看pods状态
kubectl get pods -n kube-system

NAME                                      READY   STATUS    RESTARTS   AGE
calico-kube-controllers-dc6cb64cb-8sh59   1/1     Running   0          6m22s
calico-node-89s9k                         1/1     Running   0          6m22s
calico-node-dkt7w                         1/1     Running   0          6m22s
calico-node-tgg2h                         1/1     Running   0          6m22s
coredns-667f964f9b-7hrj9                  1/1     Running   0          33m
coredns-667f964f9b-8q7sh                  1/1     Running   0          33m
etcd-k8s-master                           1/1     Running   0          33m
kube-apiserver-k8s-master                 1/1     Running   0          32m
kube-controller-manager-k8s-master        1/1     Running   0          33m
kube-proxy-b2r5d                          1/1     Running   0          12m
kube-proxy-nd982                          1/1     Running   0          11m
kube-proxy-zh6cz                          1/1     Running   0          33m
kube-scheduler-k8s-master                 1/1     Running   0          32m


//查看node状态
[root@k8s-master ~]# kubectl get nodes
NAME         STATUS   ROLES    AGE     VERSION
k8s-master   Ready    master   31m     v1.16.9
k8s-node1    Ready       9m46s   v1.16.9
k8s-node2    Ready       9m22s   v1.16.9
2.5安装Dashboard(可选)
下载文件及修改内容
这里查看dashboard对应的k8s版本
//下载文件  v2.0.0-rc3是中文版本,beta8是英文版本
wget https://raw.githubusercontent.com/kubernetes/dashboard/v2.0.0-beta8/aio/deploy/recommended.yaml

wget https://raw.githubusercontent.com/kubernetes/dashboard/v2.0.0-rc3/aio/deploy/recommended.yaml

//修改Service为NodePort类型
42行下增加一行
nodePort: 30001

44行下增加一行
type: NodePort


//原先内容
spec:
  ports:
    - port: 443
      targetPort: 8443
  selector:
    k8s-app: kubernetes-dashboard


//修改后内容
spec:
  ports:
    - port: 443
      targetPort: 8443
      nodePort: 30001   #增加,指定nodeport端口
  selector:
    k8s-app: kubernetes-dashboard
  type: NodePort		#增加,修改类型为nodeport
部署dashboard
kubectl apply -f recommended.yaml查看dashboard的运行状态及外网访问端口
//查看dashboard运行状态
#kubectl get pods -n kubernetes-dashboard -l k8s-app=kubernetes-dashboard
NAME                                    READY   STATUS    RESTARTS   AGE
kubernetes-dashboard-5996555fd8-2ppc5   1/1     Running   0          8m16s

//查看dashboard外网访问端口,命名空间为kubernetes-dashboard
#kubectl get svc -n kubernetes-dashboard -l k8s-app=kubernetes-dashboard
kubectl get svc -n kubernetes-dashboard -l k8s-app=kubernetes-dashboard
NAME                   TYPE       CLUSTER-IP      EXTERNAL-IP   PORT(S)         AGE
kubernetes-dashboard   NodePort   10.96.142.172           443:30001/TCP   8m37s
通过上边的30001端口访问dashboard,注意是https
k8s1.16.9这个版本中,使用的dashboard版本是2.0.0-beta8,只有火狐浏览器可以访问,其余浏览器都不能访问,会报错如下
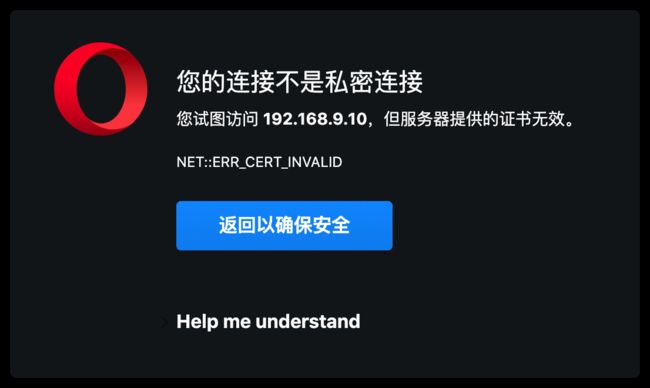
使用火狐浏览器访问,由于 dashboard 默认是自建的 https 证书,该证书是不受浏览器信任的,所以我们需要强制跳转就可以了
然后创建一个具有全局所有权限的用户来登录Dashboard
//编辑admin.yaml文件
cat > admin.yaml <"true"
roleRef:
  kind: ClusterRole
  name: cluster-admin
  apiGroup: rbac.authorization.k8s.io
subjects:
- kind: ServiceAccount
  name: admin
  namespace: kube-system

---
apiVersion: v1
kind: ServiceAccount
metadata:
  name: admin
  namespace: kube-system
  labels:
    kubernetes.io/cluster-service: "true"
    addonmanager.kubernetes.io/mode: Reconcile
EOF

//直接创建
kubectl apply -f admin.yaml

//查看token
kubectl get secret -n kube-system|grep admin-token

admin-token-j7sfh                                kubernetes.io/service-account-token   3      23s


//获取base64解码后的字符串,注意需要用到上边命令查看到的token,会生成很长的一串字符串
kubectl get secret admin-token-j7sfh -o jsonpath={.data.token} -n kube-system |base64 -d

#直接用这条命令搞定
kubectl get secret `kubectl get secret -n kube-system|grep admin-token|awk '{print $1}'` -o jsonpath={.data.token} -n kube-system |base64 -d && echo
2.6安装k8s切换命名空间工具
git clone https://github.com.cnpmjs.org/ahmetb/kubectx
cp kubectx/kubens /usr/local/bin

#查看所有命名空间
kubens

#切换到kube-system命名空间
kubens kube-system

Context "kubernetes-admin@kubernetes" modified.
Active namespace is "kube-system".
到此,使用kubeadm安装k8s 1.16.3完成!!!
三、在k8s集群中安装kubesphere
官网中安装kubesphere的前提条件如下
Kubernetes版本:1.15.x ≤ K8s version ≤ 1.17.x;Helm版本:2.10.0 ≤ Helm Version < 3.0.0(不支持 helm 2.16.0 #6894),且已安装了 Tiller,参考 如何安装与配置 Helm (预计 3.0 支持 Helm v3);- 集群已有默认的存储类型(StorageClass),若还没有准备存储请参考 安装 OpenEBS 创建 LocalPV 存储类型 用作开发测试环境。
- 集群能够访问外网,若无外网请参考 在 Kubernetes 离线安装 KubeSphere。
3.1安装helm2.16.3
客户端helm安装
3.1.1下载helm客户端
wget https://get.helm.sh/helm-v2.16.3-linux-amd64.tar.gz3.1.2解压缩并拷贝helm二进制文件
tar xf helm-v2.16.3-linux-amd64.tar.gz
cp linux-amd64/helm /usr/local/bin
服务端tiller安装
3.1.3集群每个节点安装socat
否则会报错
Error: cannot connect to Tiller
yum install -y socat 3.1.4初始化helm,部署tiller
Tiller 是以 Deployment 方式部署在 Kubernetes 集群中的,只需执行helm init命令便可简单的完成安装,但是Helm默认会去 storage.googleapis.com 拉取镜像。。。。。。这里需要使用阿里云的仓库完成安装
#添加阿里云的仓库
helm init --client-only --stable-repo-url https://aliacs-app-catalog.oss-cn-hangzhou.aliyuncs.com/charts/

helm repo add incubator https://aliacs-app-catalog.oss-cn-hangzhou.aliyuncs.com/charts-incubator/

helm repo update

#创建服务端 使用-i指定阿里云仓库
helm init --service-account tiller --upgrade -i registry.cn-hangzhou.aliyuncs.com/google_containers/tiller:v2.16.3  --stable-repo-url https://kubernetes.oss-cn-hangzhou.aliyuncs.com/charts

#创建TLS认证服务端,参考地址:#https://github.com/gjmzj/kubeasz/blob/master/docs/guide/helm.md

helm init --service-account tiller --upgrade -i registry.cn-hangzhou.aliyuncs.com/google_containers/tiller:v2.16.3 --tiller-tls-cert /etc/kubernetes/ssl/tiller001.pem --tiller-tls-key /etc/kubernetes/ssl/tiller001-key.pem --tls-ca-cert /etc/kubernetes/ssl/ca.pem --tiller-namespace kube-system --stable-repo-url https://kubernetes.oss-cn-hangzhou.aliyuncs.com/charts
3.1.5给tiller授权
因为 Helm 的服务端 Tiller 是一个部署在 Kubernetes 中 kube-system namespace下的deployment,它会去连接 kube-api在Kubernetes里创建和删除应用。
而从Kubernetes1.6版本开始,API Server 启用了RBAC授权。目前的Tiller部署时默认没有定义授权的ServiceAccount,这会导致访问API Server时被拒绝。所以我们需要明确为Tiller部署添加授权。
创建 Kubernetes 的服务帐号和绑定角色
#创建serviceaccount
kubectl create serviceaccount --namespace kube-system tiller

#创建角色绑定
kubectl create clusterrolebinding tiller-cluster-rule --clusterrole=cluster-admin --serviceaccount=kube-system:tiller
为tiller设置帐号
#使用kubectl patch更新API对象
kubectl patch deploy --namespace kube-system tiller-deploy -p '{"spec":{"template":{"spec":{"serviceAccount":"tiller"}}}}'

#验证是否授权成功
kubectl get deploy --namespace kube-system   tiller-deploy  --output yaml|grep  serviceAccount

      serviceAccount: tiller
      serviceAccountName: tiller
3.1.6验证tiller是否安装成功
kubectl -n kube-system get pods|grep tiller
tiller-deploy-6d8dfbb696-4cbcz             1/1     Running   0          88s

输入命令	helm version	显示结果以下既为成功
Client: &version.Version{SemVer:"v2.16.3", GitCommit:"1ee0254c86d4ed6887327dabed7aa7da29d7eb0d", GitTreeState:"clean"}
Server: &version.Version{SemVer:"v2.16.3", GitCommit:"1ee0254c86d4ed6887327dabed7aa7da29d7eb0d", GitTreeState:"clean"}
3.1.7卸载helm服务端tiller
$ helm reset
或
$ helm reset -f		强制删除
3.2安装nfs存储
官方提供的openebs存储貌似不太好使,反正我是安装完后pod的状态一直是pending
nfs存储比较简单,适合实验环境
也可以使用别的持久化存储
安装nfs参考文章
nfs这里选择在master安装,上边的参考文章中说nfs server安装在master节点会有问题,但是我这里没有
3.2.1安装配置nfs
client端,这里为两个node节点
yum -y install nfs-utilsserver端,master节点
1.安装包
yum -y install nfs-utils rpcbind

2.编辑配置文件
配置文件中的*是允许所有网段,根据自己实际情况写明网段
cat >/etc/exports <async,no_root_squash)
EOF

3.创建目录并修改权限
这里为了方便实验授予了挂载目录权限为777,请根据实际情况修改目录权限和所有者
mkdir /data && chmod 777 /data

4.启动服务
systemctl enable nfs-server rpcbind && systemctl start nfs-server rpcbind
配置storageclass,注意修改nfs服务端IP和共享目录
cat >storageclass.yaml <apiVersion: v1
kind: ServiceAccount
metadata:
name: nfs-provisionerkind: ClusterRole
apiVersion: rbac.authorization.k8s.io/v1
metadata:
name: nfs-provisioner-runner
namespace: default
rules:- apiGroups: [""]
resources: [“persistentvolumes”]
verbs: [“get”, “list”, “watch”, “create”, “delete”] - apiGroups: [""]
resources: [“persistentvolumeclaims”]
verbs: [“get”, “list”, “watch”, “update”] - apiGroups: [“storage.k8s.io”]
resources: [“storageclasses”]
verbs: [“get”, “list”, “watch”] - apiGroups: [""]
resources: [“events”]
verbs: [“watch”, “create”, “update”, “patch”] - apiGroups: [""]
resources: [“services”, “endpoints”]
verbs: [“get”,“create”,“list”, “watch”,“update”] - apiGroups: [“extensions”]
resources: [“podsecuritypolicies”]
resourceNames: [“nfs-provisioner”]
verbs: [“use”]
kind: ClusterRoleBinding
apiVersion: rbac.authorization.k8s.io/v1
metadata:
name: run-nfs-provisioner
subjects:- kind: ServiceAccount
name: nfs-provisioner
namespace: default
roleRef:
kind: ClusterRole
name: nfs-provisioner-runner
apiGroup: rbac.authorization.k8s.io
kind: Deployment
apiVersion: apps/v1
metadata:
name: nfs-client-provisioner
spec:
selector:
matchLabels:
app: nfs-client-provisioner
replicas: 1
strategy:
type: Recreate
template:
metadata:
labels:
app: nfs-client-provisioner
spec:
serviceAccount: nfs-provisioner
containers:
- name: nfs-client-provisioner
image: quay.io/external_storage/nfs-client-provisioner:latest
imagePullPolicy: IfNotPresent
volumeMounts:
- name: nfs-client
mountPath: /persistentvolumes
env:
- name: PROVISIONER_NAME
value: fuseim.pri/ifs
- name: NFS_SERVER
value: 此处修改为nfs服务器ip
- name: NFS_PATH
value: /data #这里为nfs共享目录
volumes:
- name: nfs-client
nfs:
server: 此处修改为nfs服务器ip
path: /data #这里为nfs共享目录apiVersion: storage.k8s.io/v1
kind: StorageClass
metadata:
name: nfs-storage
provisioner: fuseim.pri/ifs
reclaimPolicy: Retain
EOF创建storageclass
kubectl apply -f storageclass.yaml设置默认strorageclass
kubectl patch storageclass nfs-storage -p '{"metadata": {"annotations":{"storageclass.kubernetes.io/is-default-class":"true"}}}'检查nfs-client pod状态
#这里是在default命名空间下创建的
kubectl get pods

NAME                                      READY   STATUS    RESTARTS   AGE
nfs-client-provisioner-7b9746695c-nrz4n   1/1     Running   0          2m38s
检查默认存储
#这里是在default命名空间下创建的
kubectl get sc

NAME                    PROVISIONER      AGE
nfs-storage (default)   fuseim.pri/ifs   7m22s
3.3部署kubesphere
官方文档
3.3.1最小化安装 KubeSphere
kubectl apply -f https://raw.githubusercontent.com/kubesphere/ks-installer/master/kubesphere-minimal.yaml3.3.2查看安装日志
#使用如下命令查看安装日志
kubectl logs -n kubesphere-system $(kubectl get pod -n kubesphere-system -l app=ks-install -o jsonpath='{.items[0].metadata.name}') -f


当日志最后提示如下即表明安装完成,但是还是要等待一些pod完全运行起来才可以
Start installing monitoring
**************************************************
task monitoring status is successful
total: 1     completed:1
**************************************************
#####################################################
###              Welcome to KubeSphere!           ###
#####################################################

Console: http://192.168.9.10:30880
Account: admin
Password: P@88w0rd

NOTES:
  1. After logging into the console, please check the
     monitoring status of service components in
     the "Cluster Status". If the service is not
     ready, please wait patiently. You can start
     to use when all components are ready.
  2. Please modify the default password after login.

#####################################################
安装日志中会有一个报错如下,但是没有影响
TASK [ks-core/ks-core : KubeSphere | Delete Ingress-controller configmap] ******
fatal: [localhost]: FAILED! => {"changed": true, "cmd": "/usr/local/bin/kubectl delete cm -n kubesphere-system ks-router-config\n", "delta": "0:00:00.562513", "end": "2020-04-28 07:18:28.772284", "msg": "non-zero return code", "rc": 1, "start": "2020-04-28 07:18:28.209771", "stderr": "Error from server (NotFound): configmaps \"ks-router-config\" not found", "stderr_lines": ["Error from server (NotFound): configmaps \"ks-router-config\" not found"], "stdout": "", "stdout_lines": []}
...ignoring
检查所有pod状态,都为running才可以
kubectl get pods -A

NAMESPACE                      NAME                                        READY   STATUS    RESTARTS   AGE
default                        nfs-client-provisioner-7b9746695c-nrz4n     1/1     Running   0          18m
kube-system                    calico-kube-controllers-bc44d789c-ksgnt     1/1     Running   0          39h
kube-system                    calico-node-2t4gr                           1/1     Running   0          39h
kube-system                    calico-node-5bzjl                           1/1     Running   0          39h
kube-system                    calico-node-fjdll                           1/1     Running   0          39h
kube-system                    coredns-58cc8c89f4-8jrlt                    1/1     Running   0          39h
kube-system                    coredns-58cc8c89f4-nt5z5                    1/1     Running   0          39h
kube-system                    etcd-k8s-master1                            1/1     Running   0          39h
kube-system                    kube-apiserver-k8s-master1                  1/1     Running   0          39h
kube-system                    kube-controller-manager-k8s-master1         1/1     Running   0          39h
kube-system                    kube-proxy-b7vj4                            1/1     Running   0          39h
kube-system                    kube-proxy-bghx7                            1/1     Running   0          39h
kube-system                    kube-proxy-ntrxx                            1/1     Running   0          39h
kube-system                    kube-scheduler-k8s-master1                  1/1     Running   0          39h
kube-system                    kuboard-756d46c4d4-dwzwt                    1/1     Running   0          39h
kube-system                    metrics-server-78cff478b7-lwcfl             1/1     Running   0          39h
kube-system                    tiller-deploy-6d8dfbb696-ldpjd              1/1     Running   0          40m
kubernetes-dashboard           dashboard-metrics-scraper-b68468655-t2wgd   1/1     Running   0          39h
kubernetes-dashboard           kubernetes-dashboard-64999dbccd-zwnn5       1/1     Running   1          39h
kubesphere-controls-system     default-http-backend-5d464dd566-5hlzs       1/1     Running   0          6m9s
kubesphere-controls-system     kubectl-admin-6c664db975-kp6r5              1/1     Running   0          3m10s
kubesphere-monitoring-system   kube-state-metrics-566cdbcb48-cc4fv         4/4     Running   0          5m32s
kubesphere-monitoring-system   node-exporter-5lvpx                         2/2     Running   0          5m32s
kubesphere-monitoring-system   node-exporter-hlfbh                         2/2     Running   0          5m32s
kubesphere-monitoring-system   node-exporter-qxkm6                         2/2     Running   0          5m32s
kubesphere-monitoring-system   prometheus-k8s-0                            3/3     Running   1          4m32s
kubesphere-monitoring-system   prometheus-k8s-system-0                     3/3     Running   1          4m32s
kubesphere-monitoring-system   prometheus-operator-6b97679cfd-6dztx        1/1     Running   0          5m32s
kubesphere-system              ks-account-596657f8c6-kzx9w                 1/1     Running   0          5m56s
kubesphere-system              ks-apigateway-78bcdc8ffc-2rvbg              1/1     Running   0          5m58s
kubesphere-system              ks-apiserver-5b548d7c5c-dxqt7               1/1     Running   0          5m57s
kubesphere-system              ks-console-78bcf96dbf-kdh7q                 1/1     Running   0          5m53s
kubesphere-system              ks-controller-manager-696986f8d9-fklzv      1/1     Running   0          5m55s
kubesphere-system              ks-installer-75b8d89dff-zm6fl               1/1     Running   0          7m49s
kubesphere-system              openldap-0                                  1/1     Running   0          6m21s
kubesphere-system              redis-6fd6c6d6f9-dqh2s                      1/1     Running   0          6m25s
访问kubesphere:30880
用户名:admin
默认密码:P@88w0rd
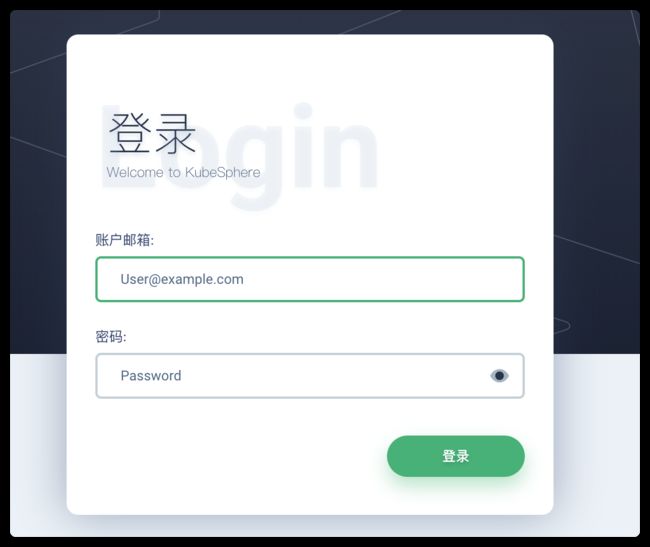
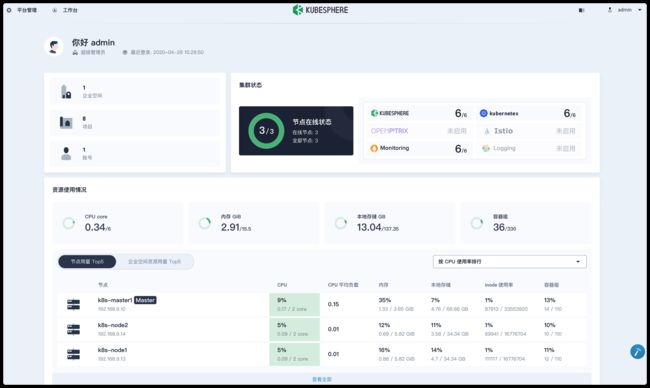
登陆后的首界面
- apiGroups: [""]