n.71 可视化影像数据(ros2)rviz
1.创建工作区
ros2 pkg create my_package --build-type ament_cmake --dependencies rclcpp
然后创建一个launch文件夹,内部导入simulation.launch.py的launch.py启动文件
# Copyright 2019 Louise Poubel
#
# Licensed under the Apache License, Version 2.0 (the "License");
# you may not use this file except in compliance with the License.
# You may obtain a copy of the License at
#
#     http://www.apache.org/licenses/LICENSE-2.0
#
# Unless required by applicable law or agreed to in writing, software
# distributed under the License is distributed on an "AS IS" BASIS,
# WITHOUT WARRANTIES OR CONDITIONS OF ANY KIND, either express or implied.
# See the License for the specific language governing permissions and
# limitations under the License.

"""Launch Gazebo with a world that has Dolly, as well as the follow node."""

import os

from ament_index_python.packages import get_package_share_directory
from launch import LaunchDescription
from launch.actions import DeclareLaunchArgument
from launch.actions import IncludeLaunchDescription
from launch.conditions import IfCondition
from launch.launch_description_sources import PythonLaunchDescriptionSource
from launch.substitutions import LaunchConfiguration
from launch_ros.actions import Node
from launch.substitutions import ThisLaunchFileDir


def generate_launch_description():

    pkg_gazebo_ros = get_package_share_directory('gazebo_ros')
    pkg_dolly_gazebo = get_package_share_directory('dolly_gazebo')
    pkg_my_package = get_package_share_directory('my_package')

    # Gazebo launch
    gazebo = IncludeLaunchDescription(
        PythonLaunchDescriptionSource(
            os.path.join(pkg_gazebo_ros, 'launch', 'gazebo.launch.py'),
        )
    )

    # Follow node
    follow = Node(
        package='dolly_follow',
        executable='dolly_follow',
        output='screen',
        remappings=[
            ('cmd_vel', '/dolly/cmd_vel'),
            ('laser_scan', '/dolly/laser_scan')
        ]
    )

    # RViz
    rviz = Node(
        package='rviz2',
        executable='rviz2',
        condition=IfCondition(LaunchConfiguration('rviz'))
    )

    return LaunchDescription([
        DeclareLaunchArgument(
          'world',
          default_value=[os.path.join(pkg_dolly_gazebo, 'worlds', 'dolly_empty.world'), ''],
          description='SDF world file'),
          DeclareLaunchArgument('rviz', default_value='true',
                              description='Open RViz.'),

        gazebo,
        follow,
        rviz

    ])
2.分析.launch.py代码
1.导入launch文件的包,默认就是这些。
import os

from ament_index_python.packages import get_package_share_directory
from launch import LaunchDescription
from launch.actions import DeclareLaunchArgument
from launch.actions import IncludeLaunchDescription
from launch.conditions import IfCondition
from launch.launch_description_sources import PythonLaunchDescriptionSource
from launch.substitutions import LaunchConfiguration
from launch_ros.actions import Node
from launch.substitutions import ThisLaunchFileDir
2.要启动的部分
def generate_launch_description():
...
return LaunchDescription([    ])
3.导入要启动部分的文件夹路径
    pkg_gazebo_ros = get_package_share_directory('gazebo_ros')
    pkg_dolly_gazebo = get_package_share_directory('dolly_gazebo')
    pkg_my_package = get_package_share_directory('my_package')
4.添加gazebo的默认程序的节点
    # Gazebo launch
    gazebo = IncludeLaunchDescription(
        PythonLaunchDescriptionSource(
            os.path.join(pkg_gazebo_ros, 'launch', 'gazebo.launch.py'),
        )
    )
5.添加主要的程序部分的节点
    # Follow node
    follow = Node(
        package='dolly_follow',
        executable='dolly_follow',
        output='screen',
        remappings=[
            ('cmd_vel', '/dolly/cmd_vel'),
            ('laser_scan', '/dolly/laser_scan')
        ]
    )
6.·添加rviz部分的节点
    # RViz
    rviz = Node(
        package='rviz2',
        executable='rviz2',
        condition=IfCondition(LaunchConfiguration('rviz'))
    )
conditoin代表条件
7.
DeclareLaunchArgument(
          'world',
          default_value=[os.path.join(pkg_dolly_gazebo, 'worlds', 'dolly_empty.world'), ''],
          description='SDF world file')
代表设定的启动时候的参数
两个设定参数的函数:
1.LaunchConfiguration: is local to the launch file and scoped.
2.DeclareLaunchArgument: allows you to expose the argument outside of your launch file. Allowing them to be listed, set, or marked as required when a user launches it from the command line (using ros2 launch) or when including it from another launch file (using IncludeLaunchDescription).
补充:
A LaunchConfiguration cannot be required to be set when launching or including and it is not possible to set it when launching from the command line. You can set a LaunchConfiguration before including another launch file, but an argument is better if you want it to be reused.
参考:https://answers.ros.org/question/322874/ros2-what-is-different-between-declarelaunchargument-and-launchconfiguration/
这里,给’world’添加了两个参数,一个是default_value(从本launch文件外添加),另一个是description
然后启动这个world文件,因为return LaunchDescription
8.
          DeclareLaunchArgument('rviz', default_value='true',
                              description='Open RViz.')
这里同样,给’rviz’添加了参数
-
 gazebo,
 follow,
 rviz
运行这三部分。
3.修改cmakelists
添加以下部分,只是编译launch.py文件的话,以下足够!牢记!!
install(DIRECTORY
  launch
  DESTINATION share/${PROJECT_NAME}/
)
4.编译即可
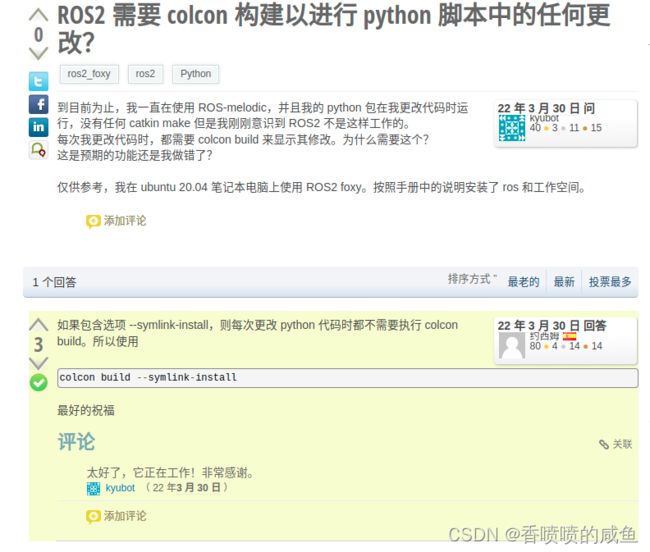
只是更改python文件,再进行编译的时候使用colcon build --symlink-install 即可

5.添加主要项目部分

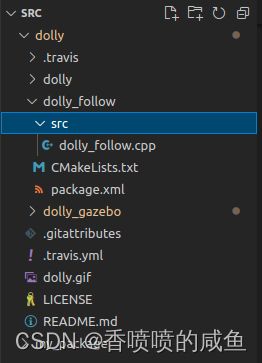
添加了dolly。
修改CMakeLists(My_package中的)
添加:
find_package(ament_cmake REQUIRED)
find_package(geometry_msgs REQUIRED)
find_package(rclcpp REQUIRED)
find_package(sensor_msgs REQUIRED)
add_executable(dolly_follow src/dolly_follow.cpp)
ament_target_dependencies(dolly_follow
“rclcpp”
“geometry_msgs”
“sensor_msgs”)
install(TARGETS
dolly_follow
DESTINATION lib/${PROJECT_NAME}
)
编译即可
编译完之后,尝试启动
ros2 launch my_package simulation.launch.py
结果报错:
找了半天错误也没找到,反正就是gzclient出了问题。
然后在.bashrc里面添加 source /usr/share/gazebo/setup.sh一下,结果就好了

6开始搞rviz
6.1增添TF

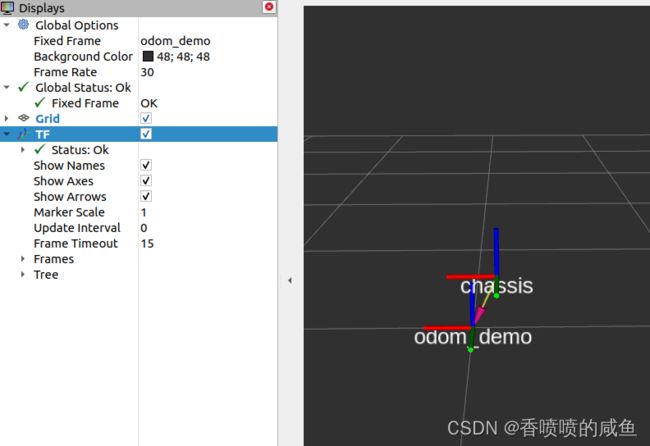
增添TF后,TF相当于物体坐标,odom是世界的固定坐标,chassis则是自己创建的机器人的坐标,用这个坐标来模拟机器人。(不要忘记调换Fixed Frame)
在这里选择odom_demo 就是指以它为地图的中心坐标

