用封面预测书的价格【图像回归】
今天,我将介绍计算机视觉的深度学习应用,用封面简单地估算一本书的价格。 我没有看到很多关于图像回归的文章,所以我为你们写这篇文章。
距离我上一篇文章已经过去很长时间了,我不得不承认,作为一名数据科学家,我用于副业或写文章的时间更少了(或者,也许这只是我的懒惰)。
如果你对本文旁边的编码感兴趣,请查看此 GitHub。
在线工具推荐: Three.js AI纹理开发包 - YOLO合成数据生成器 - GLTF/GLB在线编辑 - 3D模型格式在线转换 - 可编程3D场景编辑器
1、数据
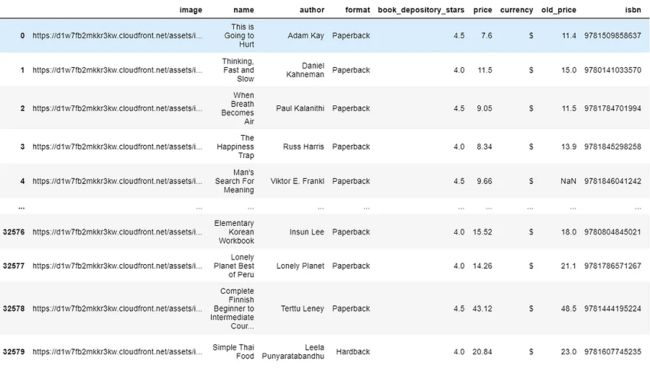
本文使用的数据可以从此处提供的 Kaggle 数据集下载。 它包含来自 BookDepository 网站的书籍特征数据,但我们将主要使用书籍封面图像来训练深度学习模型。 现在让我们看看图书数据是什么样的。
import pandas as pd
df= pd.read_csv('main_dataset.csv')
df
数据的形状为 (32581, 11),但在本文中,我们将仅关注“图像”和“价格”字段给出的书籍封面图像数据和价格标签(不是旧价格)。 如果仔细查看加载的数据,我们会发现除了“图像”列中给出的图像 URL 之外,我们没有图像数据。 原因是图像数据是非结构化数据,不能与其他数据采用相同的格式。
抛开这些原因不谈,我如何访问这种格式的图像数据? 我需要创建一个函数来从这些 URL 中获取图像并将它们全部加载到文件夹图像中。
2、加载并查看图片
from matplotlib import pyplot as plt
import numpy as np
import urllib
import cv2
def show_image_from_url(image_url):
"""
  Fetches image online from the image_url and plots it as it is using matplotlib's pyplot's image show
  """
response = urllib.request.urlopen(image_url)
  image = np.asarray(bytearray(response.read()), dtype="uint8")
  image_bgr = cv2.imdecode(image, cv2.IMREAD_COLOR)
  image_rgb = cv2.cvtColor(image_bgr, cv2.COLOR_BGR2RGB)
  plt.imshow(image_rgb), plt.axis('off')
上面的函数将从图像 URL 获取图像,并使用 matplotlib 和 OpenCV 库显示图像。 让我们看看该函数是如何工作的:
plt.figure()
show_image_from_url(df['image'].loc[10])
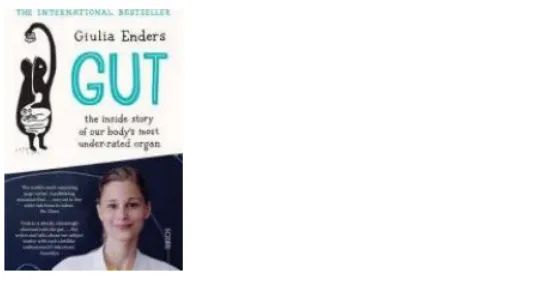
我们得到了Michael Mosley 撰写的 The Clever Guts Diet 一书的封面。 现在你看到我们可以显示给定 URL 中的图像,是时候获取图像并将其加载到你的计算机以将其放入深度学习中了。
3、图像预处理
下面是一个相当长的函数,因为它不仅加载图像,还进行图像预处理—转换为灰度、裁剪和调整图像大小。 所有这些预处理都是为了让覆盖数据更加一致,适合即将到来的深度学习:
def image_processing(image_url):
"""Converts the URL of any image to an array of size 100x1
    The array represents an OpenCV grayscale version of the original image
    The image will get cropped along the biggest red contour (4 line polygon) tagged on the original image (if any)
    """
#Download from image url and import it as a numpy array
    response = urllib.request.urlopen(image_url)
    image = np.asarray(bytearray(response.read()), dtype="uint8")
#Read the numpy arrays as color images in OpenCV
    image_bgr = cv2.imdecode(image, cv2.IMREAD_COLOR)
#Convert to HSV for creating a mask
    image_hsv = cv2.cvtColor(image_bgr, cv2.COLOR_BGR2HSV)
#Convert to grayscale that will actually be used for training, instead of color image
    image_gray = cv2.cvtColor(image_bgr, cv2.COLOR_BGR2GRAY)
#Create a mask that detects the red rectangular tags present in each image
    mask = cv2.inRange(image_hsv, (0,255,255), (0,255,255))
#Get the coordinates of the red rectangle in the image,
    #But take entire image if mask fails to detect the red rectangle
    if len(np.where(mask != 0)[0]) != 0:
        y1 = min(np.where(mask != 0)[0])
        y2 = max(np.where(mask != 0)[0])
    else:
        y1 = 0
        y2 = len(mask)
if len(np.where(mask != 0)[1]) != 0:
        x1 = min(np.where(mask != 0)[1])
        x2 = max(np.where(mask != 0)[1])
    else:
        x1 = 0
        x2 = len(mask[0])
#Crop the grayscle image along those coordinates
    image_cropped = image_gray[y1:y2, x1:x2]
    if image_cropped.size ==0:
        print(image_url)
        return image_cropped
    else:
    #Resize the image to 100x100 pixels size
        image_100x100 = cv2.resize(image_cropped, (100, 100))
#Save image as in form of array of 10000x1
        image_arr = image_100x100.flatten()
return image_arr
预处理的阶段包括:
- 灰度化:灰度表示经常用于提取描述符而不是直接对彩色图像进行操作的主要原因是灰度简化了算法并降低了计算要求。 大多数时候,HSV 格式中的颜色并不重要,灰度可以轻松完成相同的工作。
- 裁剪:图像裁剪是一种常见的照片处理过程,它通过删除不需要的区域来改善整体构图。 显然,图像的角落并不是人类感知图像的焦点,我们只关注中心。 书的封面一角并没有对其书的价格留下任何解释力,而且大部分都是相同的。
- 调整大小:为了促进小批量学习,我们需要给定批次内的图像具有固定的形状。 这就是为什么需要初始调整大小的原因。 我们首先将所有图像的大小调整为 (300 x 300) 形状,然后学习它们在 (150 x 150) 分辨率下的最佳表示。 调整大小并不能以任何方式帮助我们改进模型,这只是数据通过神经网络的方式,需要相同的结构。
4、加载数据
现在我们将该函数应用于图像 URL 列以获取图像数据。 请注意,这将花费你一两个小时来加载整个数据集。 如果想快速工作,你可以加载至少 2000 个 URL,这将花费大约 20 到 30 分钟。
from tqdm import tqdm
for url in tqdm(df['image'].tolist()[:]): # 3000 urls is enough
    image_list.append(image_processing(url))
请注意,你的图像不再是 PNG 或 JPEG。 现在它是 NumPy 对象中具有灰度的像素向量。 这就是你需要在深度学习模型中传递的内容。
X = np.array(image_list)
np.save('processed_100x100_image.npy',X/255,allow_pickle=True)
book_array = np.load('processed_100x100_image.npy',allow_pickle=True)
现在,加载数据并将其保存在 image_list 中,它只是存储在你的代码中,这是不好的做法,因为每次想要再次获取这些数据时,都必须浪费 30 分钟。 所以这里需要将那些处理后的图像数据保存到本地计算机中。
5、清理不同尺寸的图像和价格标签
要将数据传递到深度学习模型中,所有数据都需要具有相同的维度,即 100x100。 但是,当我查看处理后的图像 NumPy 数组时,我发现存在一些错误,即某些图像与其他图像的尺寸不同,因此我们需要在训练模型之前删除这些图像。
#remove non 10000 dimension out of the numpy array
X =[]
exclude =[]
for i in range(len(book_array)):
    if book_array[i].shape == (10000,):
        X.append(book_array[i])
    else:
        exclude.append(i)
X =np.array(X)
#also remove from the dataframe
df.drop(df.index[exclude],inplace=True)
在这里,我删除了与 100x100 尺寸不同的数据,并从数据框中删除了这些数据,因为我们需要使用价格标签数据,而我们不希望有任何复杂的数据映射或不匹配。
import re
df['price'] = df.price.apply(lambda x :re.sub("[^0-9.]",'',x)).apply(float)
价格标签中会有非数字值,如“$”、“dollars”等,不适用于运行深度模型。 我将使用正则表达式仅保留数字。
6、预处理后的图像示例
执行如下代码随机选择两张预处理后的图片并显示:
np.random.seed(17)
for i in np.random.randint(0, len(book_array), 2):
    plt.figure()
    plt.imshow(book_array[i].reshape(100, 100), cmap='gray'), plt.axis('off')
7、卷积神经网络
为了估算这本书的价格,在这项任务中,我将使用卷积神经网络或 CNN,它是针对涉及图像数据作为输入的任何类型的预测问题最有效的深度学习模型之一。
简而言之,CNN 算法会将图像简化为更易于处理的形式,而不会丢失对于获得良好预测至关重要的特征。
from tensorflow.keras.utils import to_categorical
from tensorflow.keras.models import Sequential
from tensorflow.keras.layers import Conv2D, MaxPool2D, BatchNormalization
from tensorflow.keras.layers import Activation, Dropout, Flatten, Dense
from tensorflow.keras.losses import categorical_crossentropy
from tensorflow.keras.optimizers import Adam
from tensorflow.keras.callbacks import ModelCheckpoint
from tensorflow.keras.models import load_model
#Define a Convolutional Neural Network Model
model = Sequential()
model.add(Conv2D(filters = 16, kernel_size = (3, 3), activation='relu',
                 input_shape = input_shape))
model.add(BatchNormalization())
model.add(Conv2D(filters = 16, kernel_size = (3, 3), activation='relu'))
model.add(BatchNormalization())
model.add(MaxPool2D(strides=(2,2)))
model.add(Dropout(0.25))
model.add(Conv2D(filters = 32, kernel_size = (3, 3), activation='relu'))
model.add(BatchNormalization())
model.add(Conv2D(filters = 32, kernel_size = (3, 3), activation='relu'))
model.add(BatchNormalization())
model.add(MaxPool2D(strides=(2,2)))
model.add(Dropout(0.25))
model.add(Flatten())
model.add(Dense(512, activation='relu'))
model.add(Dropout(0.25))
model.add(Dense(1024, activation='relu'))
model.add(Dropout(0.4))
#model.add(Dense(n_classes, activation='softmax'))
model.add(Dense(1, activation='relu'))
learning_rate = 0.001
model.compile(loss = 'mse',
              optimizer = Adam(learning_rate))
model.summary()
Model: "sequential_1"
_________________________________________________________________
Layer (type)                 Output Shape              Param #
=================================================================
conv2d_4 (Conv2D)            (None, 98, 98, 16)        160
_________________________________________________________________
batch_normalization_4 (Batch (None, 98, 98, 16)        64
_________________________________________________________________
conv2d_5 (Conv2D)            (None, 96, 96, 16)        2320
_________________________________________________________________
batch_normalization_5 (Batch (None, 96, 96, 16)        64
_________________________________________________________________
max_pooling2d_2 (MaxPooling2 (None, 48, 48, 16)        0
_________________________________________________________________
dropout_4 (Dropout)          (None, 48, 48, 16)        0
_________________________________________________________________
conv2d_6 (Conv2D)            (None, 46, 46, 32)        4640
_________________________________________________________________
batch_normalization_6 (Batch (None, 46, 46, 32)        128
_________________________________________________________________
conv2d_7 (Conv2D)            (None, 44, 44, 32)        9248
_________________________________________________________________
batch_normalization_7 (Batch (None, 44, 44, 32)        128
_________________________________________________________________
max_pooling2d_3 (MaxPooling2 (None, 22, 22, 32)        0
_________________________________________________________________
dropout_5 (Dropout)          (None, 22, 22, 32)        0
_________________________________________________________________
flatten_1 (Flatten)          (None, 15488)             0
_________________________________________________________________
dense_3 (Dense)              (None, 512)               7930368
_________________________________________________________________
dropout_6 (Dropout)          (None, 512)               0
_________________________________________________________________
dense_4 (Dense)              (None, 1024)              525312
_________________________________________________________________
dropout_7 (Dropout)          (None, 1024)              0
_________________________________________________________________
dense_5 (Dense)              (None, 1)                 1025
=================================================================
Total params: 8,473,457
Trainable params: 8,473,265
Non-trainable params: 192
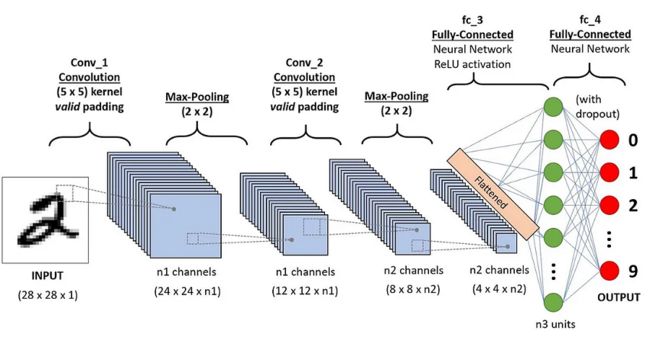
我们将创建一个具有四个卷积层和过滤器 [16,16,32,32] 的 CNN 模型,然后该架构师将池化特征图转换为单个列,并传递到全连接层。
save_at = "model_regression.hdf5"
save_best2 = ModelCheckpoint (save_at, monitor='val_accuracy', verbose=0, save_best_only=True, save_weights_only=False, mode='max')
#set up the x, y for training
Y = np.array(df.price.tolist())
X_test = X[30000:,]
Y_test = Y[30000:,]
X_train, X_val, Y_train, Y_val = train_test_split(X[:30000,], Y[:30000,], test_size=0.15, random_state=13)
img_rows, img_cols = 100, 100
input_shape = (img_rows, img_cols, 1)
X_train = X_train.reshape(X_train.shape[0], img_rows, img_cols, 1)
X_test = X_test.reshape(X_test.shape[0], img_rows, img_cols, 1)
X_val = X_val.reshape(X_val.shape[0], img_rows, img_cols, 1)
前三行是设置训练完成后保存模型的参数。 剩下的就是为训练集和测试集设置目标或价格为 y。 现在我们正在使用 15 个 epoch 和 batch_size 为 100 来训练模型。如果你的计算机有足够的资源,请继续输入与 batch_size 一样多的数据,然后运行以下代码:
history = model.fit( X_train, Y_train,
                    epochs = 15, batch_size = 100,
                    callbacks=[save_best2], verbose=1,
                   validation_data = (X_val, Y_price_val))
在这里,你可以看到模型正在过度拟合,绿线或验证损失约为 200,而红线或训练损失则越来越低。 当我将模型设置为保存最低的验证损失时,我们的模型性能将在第七个epoch保存。
plt.figure(figsize=(6, 5))
# training loss
plt.plot(history.history['loss'], color='r')
#validation loss
plt.plot(history.history['val_loss'], color='g')
plt.show()
让我们看看模型结果是什么:
Y_pred = np.round(model.predict(X_test))
np.random.seed(23)
for rand_num in np.random.randint(0, len(Y_test), 10):
    plt.figure()
    plt.imshow(X_test[rand_num].reshape(100, 100),cmap='gray'), plt.axis('off')
    if np.where(Y_pred[rand_num] < 10)[0].sum() == np.where(Y_test[rand_num] <10)[0].sum():
        plt.title(str(Y_pred[rand_num]) +' dollars', color='g')
    else :
        plt.title(str(Y_pred[rand_num]) +' dollars', color='r')
8、进一步的工作
我我们构建了一个基于封面的书籍价格预测器,希望你也可以将其应用于其他应用程序。 请注意,该模型仍然需要针对过度拟合进行调整,以使其能够很好地适应现实世界。 你可以采取一下错误来解决 CNN 中的过度拟合问题。
- 添加更多数据
- 使用数据增强
- 使用泛化良好的架构
- 添加正则化(主要是dropout,L1/L2正则化也是可以的)
- 降低架构复杂性。
原文链接:用封面预测书价 - BimAnt


