nginx子域名配置
介绍 (Introduction)
Node.js is an open-source, cross-platform, JavaScript runtime environment that executes JavaScript code outside a web browser. Node.js is built on open-source V8 JavaScript engine for easily building fast and scalable network applications. Node.js uses an event-driven, non-blocking I/O model that makes it lightweight and efficient, perfect for data-intensive real-time applications that run across distributed devices.
Node.js 是一个开放源代码,跨平台JavaScript运行时环境,可在Web浏览器外部执行JavaScript代码。 Node.js构建在开源V8 JavaScript引擎上 ,可轻松构建快速且可扩展的网络应用程序。 Node.js使用事件驱动的非阻塞I / O模型,使其轻巧高效,非常适合跨分布式设备运行的数据密集型实时应用程序。
NGINX is open-source software for web serving, reverse proxying, caching, load balancing, media streaming, and more. In addition to its HTTP server capabilities, NGINX can also function as a proxy server for email (IMAP, POP3, and SMTP) and a reverse proxy and load balancer for HTTP, TCP, and UDP servers.
NGINX是用于Web服务,反向代理,缓存,负载平衡,媒体流等的开源软件。 除了HTTP服务器功能之外,NGINX还可以充当电子邮件的代理服务器(IMAP,POP3和SMTP)以及HTTP,TCP和UDP服务器的反向代理和负载平衡器。
AWS is a platform that offers flexible, reliable, scalable, easy-to-use and cost-effective cloud computing solutions and is offered by Amazon. The platform is developed with a combination of infrastructure as a service (IaaS), platform as a service (PaaS) and packaged software as a service (SaaS) offerings.
AWS 是一个平台,由亚马逊提供,可提供灵活,可靠,可扩展,易于使用且具有成本效益的云计算解决方案。 该平台是结合基础架构即服务(IaaS),平台即服务(PaaS)和打包软件即服务(SaaS)产品的组合而开发的。
EC2 or Elastic Compute Cloud is a web service that provides secure, resizable compute capacity in the cloud. Amazon EC2’s simple web service interface allows you to obtain and configure capacity with minimal friction. It provides you with complete control of your computing resources and lets you run on Amazon’s proven computing environment.
EC2 或Elastic Compute Cloud是一项Web服务,可在云中提供安全的,可调整大小的计算能力。 Amazon EC2的简单Web服务界面使您能够以最小的摩擦获得和配置容量。 它为您提供了对计算资源的完全控制,并允许您在Amazon成熟的计算环境中运行。
Cloudflare is an American web-infrastructure and website-security company, providing content-delivery-network services, DDoS mitigation, Internet security, and distributed domain-name-server services.
云耀斑 是一家美国的网络基础设施和网站安全公司,提供内容交付网络服务,DDoS缓解,互联网安全和分布式域名服务器服务。
Git is a distributed version control system for tracking changes in source code during software development.
Git是一个分布式版本控制系统,用于在软件开发过程中跟踪源代码的更改。
我们将要实施的 (What we are going to implement)
- Create an AWS account 创建一个AWS账户
- Launch an Ubuntu EC2 instance 启动Ubuntu EC2实例
- SSH into our instance SSH进入我们的实例
- Install Node.js and Git 安装Node.js和Git
- Clone repository from GitHub 从GitHub克隆存储库
- Run the node.js app 运行node.js应用
- Open different ports for the node instances 打开节点实例的不同端口
- Make the app running using PM2 使用PM2使应用程序运行
- Configure Nginx for single and multiple node.js apps 为单个和多个node.js应用程序配置Nginx
- Configure Nginx to autostart whenever instance will be rebooted 将Nginx配置为每当实例重启时自动启动
- Purchase a domain from Godaddy, Namecheap, etc. 从Godaddy,Namecheap等购买域名。
- Configure domain name for our server 为我们的服务器配置域名
- Configure subdomains for our server 为我们的服务器配置子域
- Setup SSL with Cloudflare 使用Cloudflare设置SSL
创建一个AWS账户 (Create an AWS Account)
We are using AWS EC2 server for hosting our multiple node.js apps. So, It is must to have an AWS account. Let’s start and create if you are not having one. For new users, there is an offer of 750 hours free per month up to a year. You must have a credit/debit card before start registering.
我们正在使用AWS EC2服务器托管我们的多个node.js应用程序 。 因此,必须拥有一个AWS账户。 如果您没有一个,让我们开始创建。 对于新用户, 每年最多提供750个小时的免费服务 。 开始注册之前,您必须具有信用卡/借记卡。
Note: If you are already having an AWS account then you can skip this step and just login to your instance.
注意:如果您已经拥有一个AWS账户,则可以跳过此步骤,仅登录到您的实例。
Open AWS and Click on Create an AWS account.
打开AWS 然后单击Create a AWS account 。
Fill all the required fields and click on Continue.
填写所有必填字段,然后单击继续。
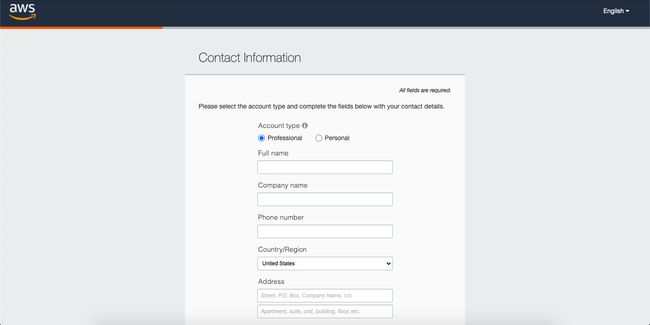
3. Fill out all the contact information.
3.填写所有联系信息。
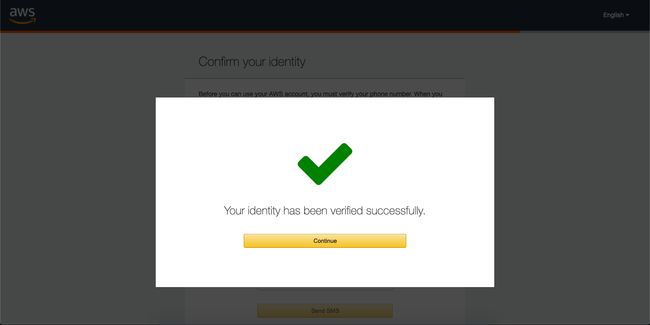
4. After this, you’ll be asked for your Credit/Debit card details. Fill them correctly and AWS will verify your card by making a deducting a little amount.
4.之后,系统会要求您提供信用卡/借记卡详细信息。 正确填写它们,AWS会扣除一些费用来验证您的卡。
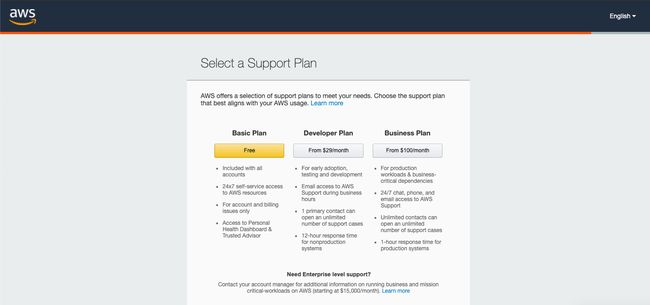
5. After this, you will be asked to choose a support plan. Choose a basic plan which is free or choose another one if you want extra features.
5.之后,将要求您选择一个支持计划。 选择一个免费的基本计划 ,如果需要其他功能,请选择另一个计划 。
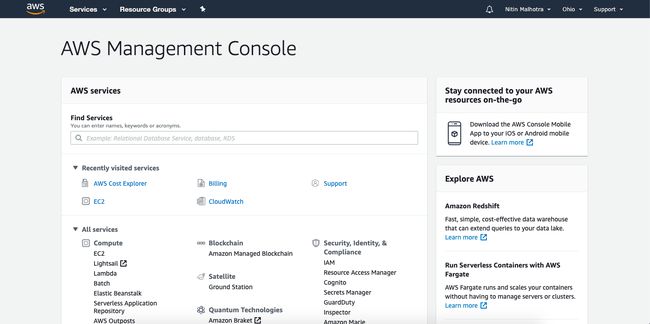
6. Now you’ve successfully created your account. Now simply log in to the AWS console.
6.现在,您已经成功创建了您的帐户。 现在,只需登录到AWS控制台 。
启动Ubuntu EC2实例 (Launch an Ubuntu EC2 instance)
Now to host our node.js apps we need an EC2 virtual machine or instance. So let’s get started to make our first EC2 instance up.
现在要托管我们的node.js应用程序,我们需要一个EC2虚拟机或实例 。 因此,让我们开始构建第一个EC2实例。
Log in to AWS and click on the Sign in to the Console. Open your AWS console.
登录到AWS并单击“ 登录到控制台” 。 打开您的AWS控制台。
2. Click on EC2 in the All Services section.
2.单击“所有服务”部分中的EC2 。
3. You will see a screen like below. Where all the currently running instances can be shown. Now click on the Running instances.
3.您将看到如下屏幕。 可以显示所有当前正在运行的实例的位置。 现在单击“正在运行的实例” 。
Note: Right now I am having no instances running so it is displaying 0 there.
注意:目前我没有任何实例在运行,因此该实例显示为0。

4. After clicking on Running Instances you’ll see a Launch Instance button there.
4.点击后 运行实例时,您将在其中看到启动实例按钮。

5. Now, click on the Launch Instance button. After clicking you will see a page like this which shows the type of OS with the config you want in your machine e.i. We are going to use a Ubuntu Server 20.04 LTS 64-bit (x86).
5.现在,单击启动实例按钮。 单击后,您将看到一个类似这样的页面,其中显示了您要在计算机中使用所需配置的操作系统类型ei我们将使用Ubuntu Server 20.04 LTS 64位(x86) 。

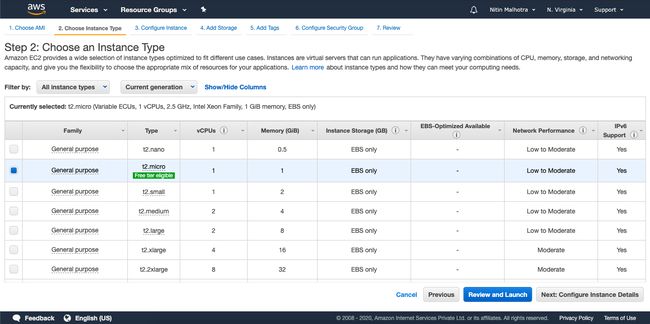
6. Now, click on Select button and on the next screen you’ll be asked to select an instance type. We are going to use t2.micro as it is eligible for availing free tier. Click on Review and Launch.
6.现在,单击“ 选择”按钮,然后在下一个屏幕上将要求您选择实例类型。 我们将使用t2.micro,因为它可以使用免费套餐 。 单击查看并启动 。
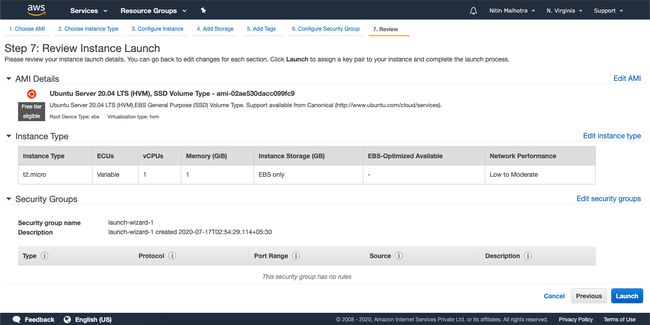
After clicking, all the information of the instance will appear.
单击后,将显示该实例的所有信息。
7. Now, click on Launch. A popup will appear asking for a key. Basically, these keys will allow you to SSH into your instance ( will discuss in next step). You can choose existing key pairs if you have already one created before else you can create a new.
7.现在,单击启动 。 将会出现一个弹出窗口,要求您输入密钥。 基本上,这些密钥将使您可以SSH进入实例(将在下一步中讨论)。 如果已经创建了一个密钥对,则可以选择现有的密钥对,否则可以创建一个新的密钥对。

Click on the dropdown displaying Choose an existing pair and click on Create a new key pair. Enter a key pair name. After writing the name click on Download key pair in the popup and store it on your PC where you can access it easily later on. Now Launch Instances will get enabled.
单击显示“选择现有对”的下拉列表,然后单击“ 创建新密钥对” 。 输入密钥对名称。 输入名称后,在弹出窗口中单击“ 下载密钥对” ,然后将其存储在您的PC上,以后可以轻松访问它。 现在,启动实例将被启用。
Note: Keep your key in a secure place and don’t share your key with someone else not working with you on this.
注意:请将您的钥匙放在安全的地方,不要与其他未与您合作的人共享您的钥匙。
Your key must not be publicly viewable for SSH to work. Use the below command if needed. Always provide a correct path for the key. In below example, I am in the same directory in which my pen file or my key is present.
您的密钥不得公开可见,SSH才能正常工作。 如果需要,请使用以下命令。 始终为钥匙提供正确的路径。 在下面的示例中,我位于笔文件或密钥所在的目录中。
chmod 400 path-for-key-hereFor Example:chmod 400 ./node-key.pem8. Click on Launch Instances wait for few seconds and you’re done when this screen appears.
8.单击启动实例等待几秒钟,当此屏幕出现时,您完成操作。
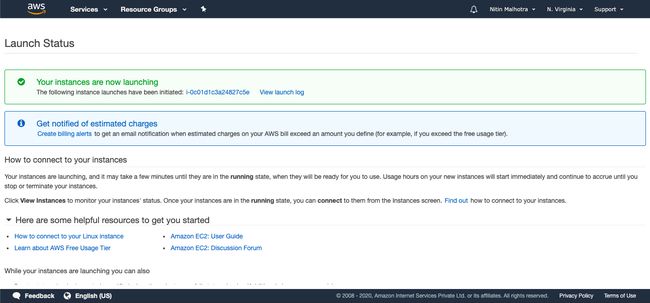
9. Now click on the instance id ( In my case i-0c01d1c3a24827c5e ) which appears in the green block above. You will be redirected to the instances page and now you can see your instance is up and running.
9.现在,单击实例ID(在我的情况下为i-0c01d1c3a24827c5e ),该实例ID显示在上方的绿色块中。 您将被重定向到实例页面,现在您可以看到实例已启动并正在运行 。

Hurray!! You started an AWS machine ( virtual machine ).
欢呼!! 您启动了一个AWS机器(虚拟机)。
SSH进入我们的实例 (SSH into our instance)
SSH means Secure Shell. The purpose of doing SSH to our instance is we want to access our server through a secure manner which you can access by using your terminal/cmd or using other Softwares like Putty. Now, depending upon your Operating System you can access your server in different manners.
SSH表示安全外壳。 对我们的实例执行SSH的目的是我们希望通过一种安全的方式访问我们的服务器,您可以使用终端/ cmd或使用其他软件(例如Putty)来访问它。 现在,根据您的操作系统,您可以以不同的方式访问服务器。
For Windows You can use Putty, etc.
对于Windows,您可以使用Putty等。
For Mac / Linux
对于Mac / Linux
- Open your terminal 打开你的终端
- Go to AWS EC2 instances section and choose any instance. 转到AWS EC2实例部分,然后选择任何实例。

- Copy the Public IP and write the below command in your terminal with your instance public IP which you have copied. 复制公共IP,并使用已复制的实例公共IP在您的终端中写入以下命令。
Note: Please make sure your private key location is correct in your local PC. Which you have downloaded in the previous step. In below example, I am in the same directory in which the node-key.pem is present.
注意:请确保您的私钥位置在本地PC中正确。 您已在上一步中下载了该文件。 在下面的示例中,我位于存在node-key.pem的目录中。