一、背景
对于已经存在的iOS项目,以模块化引入,OC与RN混编怎么做呢?
我们可以利用cocopods来集成,直接使用pod install就可以让其他同事也快速集成。
由于RN用npx react-native init NewProject 命令创建的新项目,外层是RN的代码,里面iOS文件夹下才是我们的工程代码,这样显得很杂乱,所以我的想法是在同级目录下创建两个文件夹iOSCode和RNCode,一个放原生的代码,另外一个放RN代码,这样会比较清晰。
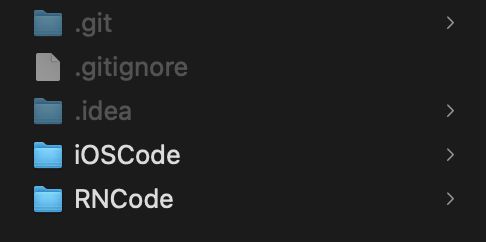
目录结构
二、操作
1、环境
"react": "16.13.1",
"react-native": "0.63.4",
2、ruby脚本
pod工具就是通过ruby语言编写的,所以我们可以插入ruby脚本来做一些自动化的操作。 在iOS工程目录下创建ruby脚本文件 Podfile_ReactNative.rb
# 定义一个函数,在 Podfile文件中调用此函数即可
def installReactNativeSdk()

    # 设置 react_native_pods.rb 文件路径
    node_mudle_pod_file = "../RNCode/node_modules/react-native/scripts/react_native_pods.rb"

    # 判断该文件是否存在,如果已经存在,表示RN环境已经配置,如果没有存在表示RN环境还未集成到项目
    if File.exist?(node_mudle_pod_file)
        Pod::UI.puts "\nReactNative 环境已存在!\n\n"
        # 修改路径
        # changePath(node_mudle_pod_file)
    else
        Pod::UI.puts "ReactNative 环境不存在,准备下载···"
        # 判断是否安装 node环境
        if system "node -v > /dev/null"
            # 切换目录到../RNCode/
            if Dir.chdir("../RNCode/")
                # 使用 yarn 或 npm 下载依赖
                if system "yarn install || npm install"
                    Pod::UI.puts "ReactNative 环境安装成功!\n\n"
                    # 修改路径
                    changePath(node_mudle_pod_file)
                else
                    Pod::UI.puts "ReactNative 环境安装失败!请安装yarn,在命令行执行:npm install -g yarn"
                    Kernel.exit(false)
                end
            else
                Pod::UI.puts "不存在RNCode文件夹"
                Kernel.exit(false)
            end
        else
            #如果没有安装,提示自行安装node环境
            Pod::UI.puts "环境下载失败!请先安装node环境,详细见:https://reactnative.cn/docs/environment-setup"
            Kernel.exit(false)
        end
    end
end

# 这个函数将 react_native_pods.rb 文件中 ../node_modules 目录改为当前目录 ./RNCode/node_modules
def changePath(node_mudle_pod_file)
    configString = ""
    File.open(node_mudle_pod_file, "r+") {|f|
        configString = f.read.gsub(/..\/node_modules/,"../RNCode/node_modules")
    }
    File.open(node_mudle_pod_file,"w"){|f|
        f.write configString
    }
end
3、Podfile文件
# Uncomment the next line to define a global platform for your project

# 设置下载源
source 'https://github.com/CocoaPods/Specs.git'
# 导入我们自定义的脚本
require_relative './Podfile_ReactNative'
# 执行我们编写的RN环境检测代码
installReactNativeSdk()
# 设置RN配置 依赖,这里需要注意,不要使用 ../node_modules/,而是../RNCode/node_modules/
require_relative '../RNCode/node_modules/react-native/scripts/react_native_pods'

platform :ios, '10.0'

target 'iOSCode' do
  # Comment the next line if you don't want to use dynamic frameworks
  use_frameworks!

  # Pods for iOSCode

  pod 'Masonry'

  # 设置RN Path 依赖
  use_react_native!(:path => "../RNCode/node_modules/react-native")

end
4、package.json
node所有的依赖配置为 package.json文件控制,依赖全部下载在 node_modules目录下,所以我们在RNCode目录下创建package.json文件
{
  "name": "iOSCode",
  "version": "0.0.1",
  "private": true,
  "scripts": {
    "android": "react-native run-android",
    "ios": "react-native run-ios",
    "start": "react-native start",
    "test": "jest",
    "lint": "eslint ."
  },
  "dependencies": {
    "react": "16.13.1",
    "react-native": "0.63.4",
  },
  "devDependencies": {
    "@babel/core": "^7.14.8",
    "@babel/runtime": "^7.14.8",
    "@react-native-community/eslint-config": "^3.0.0",
    "babel-jest": "^27.0.6",
    "eslint": "^7.31.0",
    "jest": "^27.0.6",
    "metro-react-native-babel-preset": "^0.66.2",
    "react-test-renderer": "16.13.1"
  },
  "jest": {
    "preset": "react-native"
  }
}
5、最后我们执行pod install即可
➜  iOSRNTest git:(main) ✗ pod install
ReactNative 环境不存在,准备下载···
yarn install v1.22.10
warning ../../../package.json: No license field
[1/4]   Resolving packages...
三、文件过滤
这里需要注意的是,node_modules目录为RN依赖的资源,没必要提交到git工程,可以在.gitignore文件中过滤掉。
目前我们项目通过这中方式快速集成RN,RN的模块直接在对应的位置通过 RCTRootView展示,其他开发者不太需要关心RN的配置,只要会执行 pod install即可!
四、iOS代码部分
如果想在iOS原生页面跳转RN页面怎么做呢?
我们需要封装几个基类,防止每次访问的时候都会重新加载,出现页面的空白
KGRNManager.h
//
//  KGRNManager.h
//  iOSCode
//
//  Created by jm on 2021/7/28.
//

#import
#import

NS_ASSUME_NONNULL_BEGIN

@interface KGRNManager : NSObject

+ (instancetype)shareInstance;

// 全局唯一的bridge
@property (nonatomic, readonly, strong) RCTBridge *bridge;

@end

NS_ASSUME_NONNULL_END
KGRNManager.m
//
//  KGRNManager.m
//  iOSCode
//
//  Created by jm on 2021/7/28.
//

#import "KGRNManager.h"
#import

#import "RCTPushy.h"

@interface KGRNManager ()

@end

@implementation KGRNManager

static KGRNManager *_instance = nil;
+ (instancetype)shareInstance{
    if (_instance == nil) {
        _instance = [[self alloc] init];
    }
    return _instance;
}

+ (instancetype)allocWithZone:(struct _NSZone *)zone{
    if (_instance == nil) {
        static dispatch_once_t onceToken;
        dispatch_once(&onceToken, ^{
            _instance = [super allocWithZone:zone];
        });
    }
    return _instance;
}

-(instancetype)init{
    if (self = [super init]) {
        _bridge = [[RCTBridge alloc] initWithDelegate:self launchOptions:nil];
    }
    return self;
}

#pragma mark - RCTBridgeDelegate
- (NSURL *)sourceURLForBridge:(RCTBridge *)bridge {
# if DEBUG
    //模拟器
   // return [NSURL URLWithString:@"http://localhost:8081/index.bundle?platform=ios"];
//    return [NSURL URLWithString:@"http://192.168.2.47:8081/index.bundle?platform=ios"];

  //真机,真机和电脑处于同一ip地址
  return [[RCTBundleURLProvider sharedSettings] jsBundleURLForBundleRoot:@"main" fallbackResource:nil];
# else
    return [[NSBundle mainBundle] URLForResource:@"index" withExtension:@"jsbundle"];
#endif
}

@end
KGRNBaseVC.h
//
//  KGRNBaseVC.h
//  iOSCode
//
//  Created by jm on 2021/7/28.
//

#import

NS_ASSUME_NONNULL_BEGIN

@interface KGRNBaseVC : UIViewController

/**
 传递到React Native的参数
 */
@property (nonatomic, strong) NSDictionary * initialProperty;

/**
 React Native界面名称
 */
@property (nonatomic, copy) NSString * pageName;

+ (instancetype)RNPageWithName:(NSString*)pageName initialProperty:(NSDictionary*)initialProperty;

- (instancetype)initWithPageName:(NSString*)pageName initialProperty:(NSDictionary*)initialProperty;

@end

NS_ASSUME_NONNULL_END
KGRNBaseVC.m
//
//  KGRNBaseVC.m
//  iOSCode
//
//  Created by jm on 2021/7/28.
//

#import "KGRNBaseVC.h"
#import
#import "KGRNManager.h"

@interface KGRNBaseVC ()

@end

@implementation KGRNBaseVC

+ (instancetype)RNPageWithName:(NSString*)pageName initialProperty:(NSDictionary*)initialProperty {
    KGRNBaseVC *vc = [[KGRNBaseVC alloc] initWithPageName:pageName initialProperty:initialProperty];
    return vc;
}

- (instancetype)initWithPageName:(NSString*)pageName initialProperty:(NSDictionary*)initialProperty {
    if (self = [super init]) {
        self.pageName = pageName;
        self.initialProperty = initialProperty;
    }
    return self;
}

//- (void)viewWillAppear:(BOOL)animated{
//    [super viewWillAppear:animated];
//    [self.navigationController setNavigationBarHidden:YES];
//}
//
//- (void)viewWillDisappear:(BOOL)animated{
//    [super viewWillDisappear:animated];
//    [self.navigationController setNavigationBarHidden:NO];
//}

-(void)viewDidLoad {
    [super viewDidLoad];
    [[NSNotificationCenter defaultCenter] addObserver:self selector:@selector(navagateBack) name:@"KGModuleNavigateBack" object:nil];

    RCTRootView *rootView = [[RCTRootView alloc] initWithBridge:[KGRNManager shareInstance].bridge
                                                     moduleName:self.pageName
                                              initialProperties:self.initialProperty];
    self.view = rootView;
}

- (void)navagateBack {
    [self.navigationController popViewControllerAnimated:YES];
}

- (void)dealloc {
    [[NSNotificationCenter defaultCenter] removeObserver:self];
}


@end
当我们需要在原生页面跳转到RN页面的时候,可以创建一个KGRNBaseVC控制器push进入
//  ViewController.m
//  iOSCode
//
//  Created by jm on 2021/7/27.
//

#import "ViewController.h"
#import
#import "KGRNBaseVC.h"
#import

@interface ViewController ()

@end

@implementation ViewController

- (void)viewDidLoad {
    [super viewDidLoad];

    [self prepareUI];
}

- (void)prepareUI {
    self.title = @"React-Native";
    self.view.backgroundColor = [UIColor whiteColor];

    UIButton *btn1 = [[UIButton alloc] init];
    [btn1 addTarget:self action:@selector(btn1Action) forControlEvents:UIControlEventTouchUpInside];
    [btn1 setTitle:@"视图1" forState:UIControlStateNormal];
    [btn1 setBackgroundColor:[UIColor grayColor]];
    [self.view addSubview:btn1];

    CGFloat gap = KGScreenZoom(10);
    CGFloat width = (KGScreenW - gap)/ 4.0;
    [btn1 mas_makeConstraints:^(MASConstraintMaker *make) {
        make.top.equalTo(self.view.mas_top).offset(KGNaviBarH + gap);
        make.left.equalTo(self.view.mas_left).offset(gap);
        make.width.mas_equalTo(width);
    }];
}

- (void)btn1Action {
    NSDictionary *dic = @{
        @"scores" : @[
          @{
            @"name" : @"Alex",
            @"value": @"AAAAAA"
           },
          @{
            @"name" : @"Joel",
            @"value": @"10"
          }
        ]
    };
    KGRNBaseVC *aVC = [[KGRNBaseVC alloc] initWithPageName:@"AView" initialProperty:dic];
    [self.navigationController pushViewController:aVC animated:YES];
}

@end