Next+React+Antd-mobile的简单搭建使用
前言
最近公司需要使用 Next 结合 React 、 Antd-Mobile 开发服务端渲染的H5,于是就看了些文档搭建一个简单地环境记录下来。
Next文档
一、搭建基础环境
1. 使用 yarn 或者 npm 初始化一个文件夹
yarn init
OR
npm init
2. 安装要使用的包
package.json 整体配置
{
  "name": "next-react-demo",
  "version": "1.0.0",
  "main": "index.js",
  "license": "MIT",
  "scripts": {
    "dev": "next -p 3001",
    "build": "next build",
    "start": "next start"
  },
  "dependencies": {
    "@babel/plugin-proposal-class-properties": "^7.7.0",
    "@babel/plugin-proposal-decorators": "^7.7.0",
    "@zeit/next-less": "^1.0.1",
    "antd-mobile": "^2.3.1",
    "babel-plugin-import": "^1.12.2",
    "babel-plugin-module-resolver": "^3.2.0",
    "less": "^3.10.3",
    "next": "^9.1.3",
    "react": "^16.11.0",
    "react-dom": "^16.11.0"
  }
}
运行 yarn 或 npm install 进行安装
3. 新建 pages/index.js 文件,写入以下代码运行测试
export default () => <div>Welcome to next.js!</div>
运行 npm run dev 命令并打开 http://localhost:3000。 如果你想使用其他端口,可运行 npm run dev – -p <设置端口号>。
在浏览器可看到如下结果:
[外链图片转存失败,源站可能有防盗链机制,建议将图片保存下来直接上传(img-6PK1S5M9-1585804373496)(http://60.205.204.237:8080/images/2019/11/12/TIM20191112190005.png)]
二、加入antd-mobile和less
1. 增加 next 配置文件
根目录下新建 next.config.js 并加入以下配置
const withLess = require('@zeit/next-less')
module.exports = withLess({
    cssModules: true,
    cssLoaderOptions: {
        importaLoaders: 1,
        localIdentName: "[local]___[hash:base64:5]",
    },
    lessLoaderOptions: {
        javascriptEnabled: true,
    },
    webpack(config, options) {
        return config
    }
})
2. 增加 babel 文件配置
根目录下新建 .babelrc 文件并加入以下配置
{
    "presets": [
        "next/babel"
    ],
    "plugins": [
        // ES6 语法转换
        ["@babel/plugin-proposal-decorators", { "legacy": true }],
        ["@babel/plugin-proposal-class-properties", { "loose": true }],
        // Alias
        ["module-resolver",{"root": ["./"],"alias": {"styles": "./styles", "@": "./pages"}}],
        // 引入Antd-Mobile
        ["import",{"libraryName": "ant-mobile","libraryDirectory":"lib","style": true}]
    ]
}
3. 在pages下新建_document.js文件用来自定义Document,并且在头部加入我们Antd-mobile的css
之前一直搭好之后一直没有样式,找了很久才发觉还没有因为 Antd-Mobile 的样式文件,于是就使用了自定义 Document ,在其中引入 Css 。也可以使用其他方案去引用相应的 less OR sass 文件。
import Document, { Head, Main, NextScript } from 'next/document'

export default class extends Document {
  render() {
    return (
      <html >
        <Head>
          <meta name="format-detection" content="telephone=no, email=no" />
          <meta name="viewport" content="width=device-width,height=device-height, user-scalable=no,initial-scale=1, minimum-scale=1, maximum-scale=1,target-densitydpi=device-dpi" />
          <link href="https://cdn.bootcss.com/antd-mobile/2.1.1/antd-mobile.css" rel="stylesheet" />
        </Head>
        <body >
          <Main />
          <NextScript />
        </body>
      </html>
    )
  }
}
新建 styles/style.less 文件,写入以下代码。这里测试下我们配置的 less 有没有生效
@h1-color: aqua;
h1{
    color: @h1-color;
}
修改 index 文件如下
import React, { Fragment } from 'react';
import { Button , WingBlank , WhiteSpace} from 'antd-mobile';
import Head from 'next/head';
import "../styles/style.less";
const Home = () => (
<Fragment>
<Fragment>
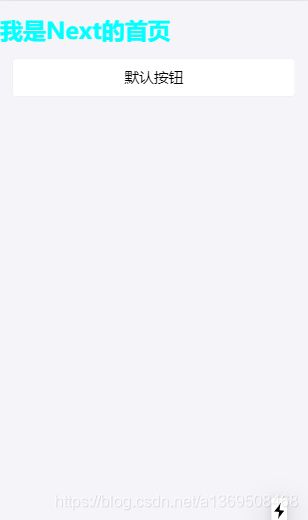
<h1>我是Next的首页</h1>
<WingBlank>
<Button>默认按钮</Button><WhiteSpace />
</WingBlank>
</Fragment>
</Fragment>
);
export default Home;
配置完成后可看到以下效果:
总结
这篇文章还是比较小白的,按照所有步骤做的话基本是没什么问题的,剩下的就是慢慢去优化项目结构来适配自己的项目。