如何使用websocket+node.js实现pc后台与小程序端实时通信
如何使用websocket+node.js实现pc后台与小程序端实时通信
- 一、使用node.js创建一个服务器
- 二、pc后台连接ws
- 三、小程序端连接ws
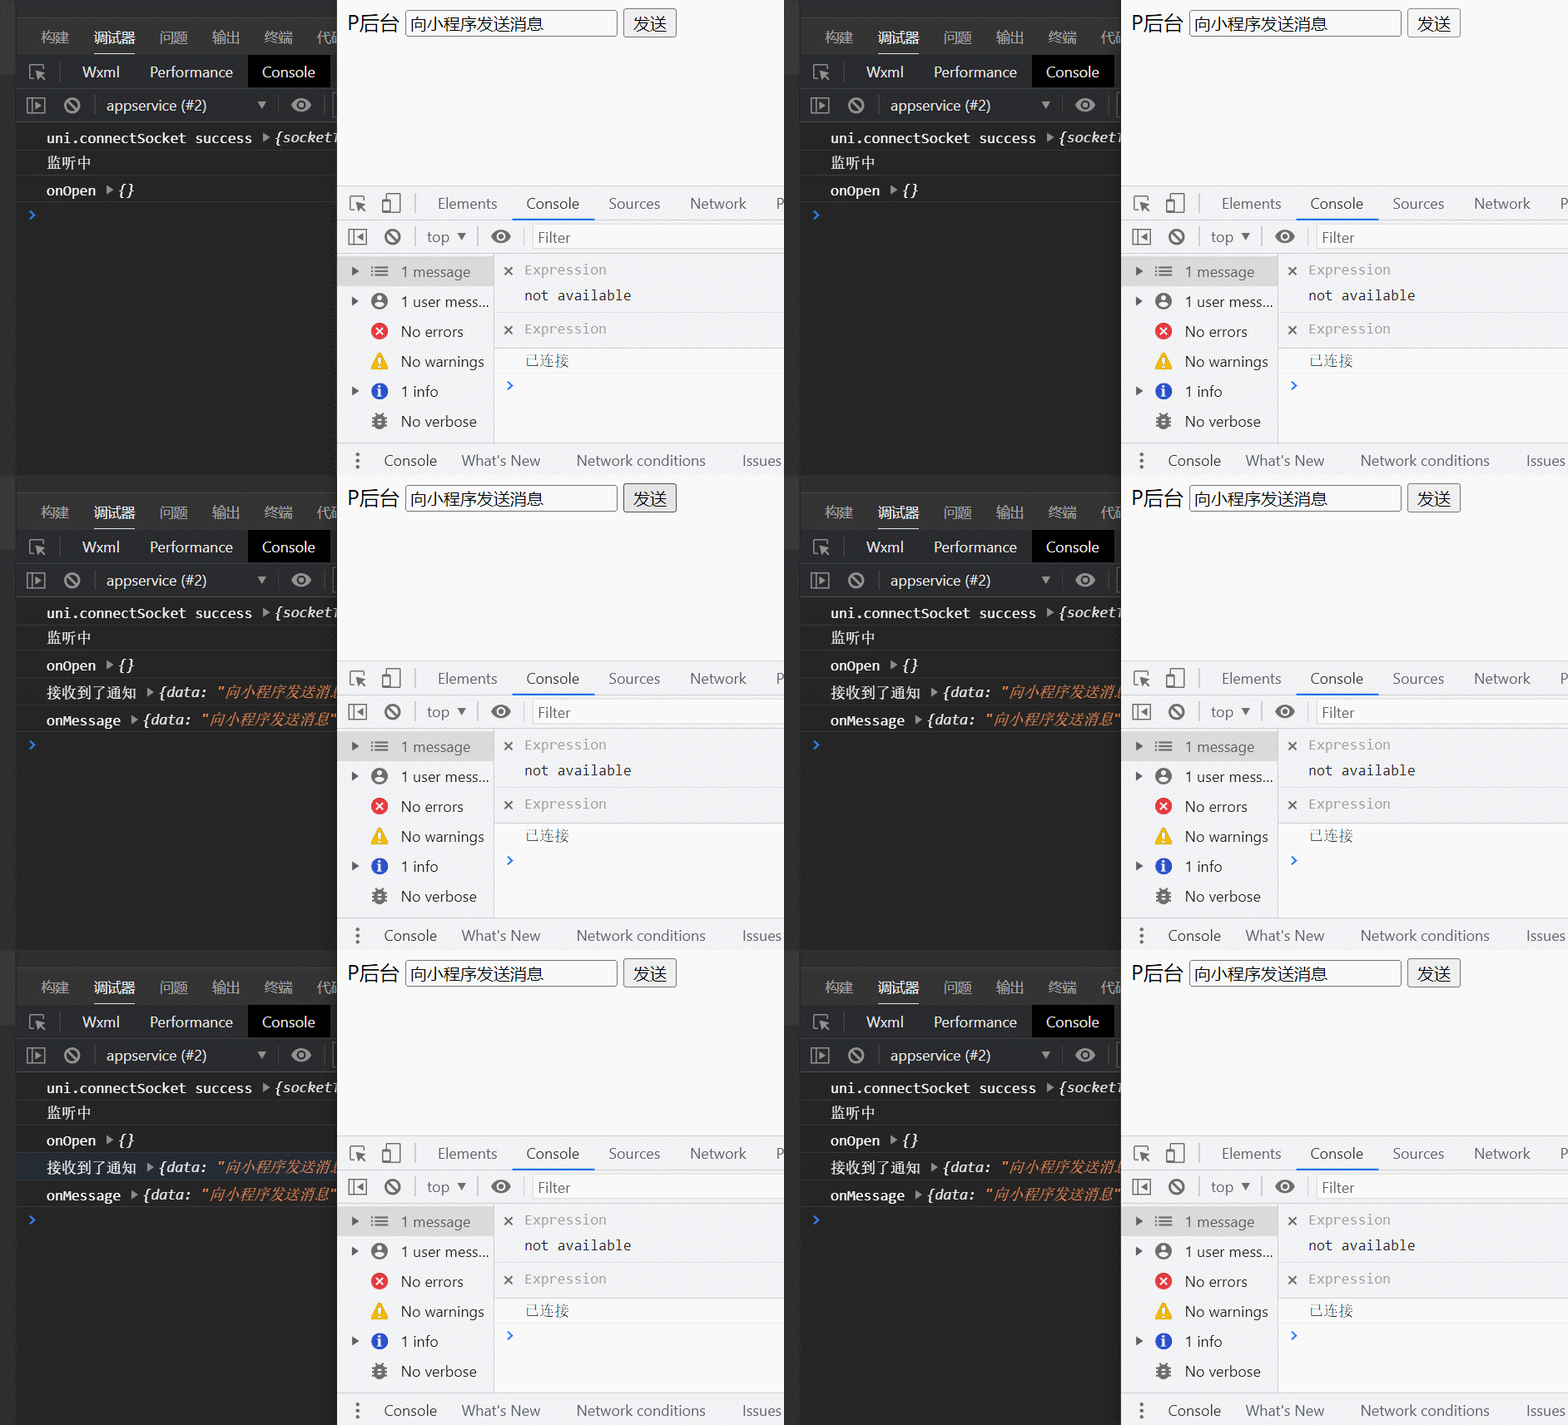
- 四、实现效果
实现功能:实现pc后台与小程序端互发通信能够实时检测到
一、使用node.js创建一个服务器
1.安装ws依赖
npm i ws
2.创建index.js
const WebSocket = require('ws')

const wss = new WebSocket.Server({ port: 8888 })
const wsList = {}
console.log('服务器启动')
wss.on('connection', (ws) => {
  ws.on('message', (message) => {
    const result = JSON.parse(message)
    console.log('接收到的结果', result)
    // 页面初始化的时候,使用wsList将ws进行缓存
    if (result.message === 'init') {
      wsList[result.name] = ws
    } else {
      // 根据name的值来给指定的客户端发送信息
      const ws = wsList[result.name]
      ws.send(result.message)
    }
  })

  ws.on('close', () => {
    Object.keys(wsList).forEach((item) => {
      // 当websoket关闭的时候,要清空对应的ws
      if (wsList[item].readyState !== 1) {
        delete wsList[item]
      }
    })
  })
})
3.打开终端,启动服务
node index.js
二、pc后台连接ws
DOCTYPE html>
<html lang="en">
  <head>
    <meta charset="UTF-8" />
    <meta http-equiv="X-UA-Compatible" content="IE=edge" />
    <meta name="viewport" content="width=device-width, initial-scale=1.0" />
    <title>Documenttitle>
  head>
  <body>
      <span>P后台span>
    div>
    <input type="text" id="input" />
    <button id="button">发送button>

    <script>
      var ws = new WebSocket(`ws://localhost:8888`)
      //连接ws
      ws.onopen = function () {
        ws.send(JSON.stringify({ name: 'PC', message: 'init' }))
        console.log('已连接')
      }
      //接收
      ws.onmessage = async function (mes) {
        console.log('pc接收到的消息', mes)
      }
      let Btn = document.getElementById('button')
      //发送事件
      Btn.onclick = function () {
        let ipt = document.querySelector('#input')
        let obj = {
          name: 'WX',
          message: ipt.value,
        }
        //需转成字符串
        ws.send(JSON.stringify(obj))
      }
    script>
  body>
html>
三、小程序端连接ws
这里是手动点击连接按钮,发起的websocket连接,可自行更改到其他合适的地方连接websocket
1.创建两个按钮,连接按钮,发送按钮
<view @click="connect()">连接view>
<view @click="sendSocket()">发送view>
2.定义事件,连接ws
//发送ws
sendSocket() {
	console.log('发送wx')
	uni.sendSocketMessage({
		data: JSON.stringify({
			name: 'PC',
			message: 'wx'
		})
	})
},
//连接ws
connect() {
	if (this.connected || this.connecting) {
		uni.showModal({
			content: '正在连接或者已经连接,请勿重复连接',
			showCancel: false,
		})
		return
	}
	this.connecting = true
	uni.showLoading({
		title: '连接中...',
	})
	uni.connectSocket({
		url: 'ws://localhost:8888',
		success(res) {
			// 这里是接口调用成功的回调,不是连接成功的回调,请注意
			console.log('uni.connectSocket success', res)
		},
		fail(err) {
			// 这里是接口调用失败的回调,不是连接失败的回调,请注意
			console.log('uni.connectSocket fail', err)
		},
	})
	//监听WebSocket连接打开事件
	uni.onSocketOpen((res) => {
		console.log('监听中')
		if (this.pageVisible) {
			this.connecting = false
			this.connected = true
			uni.hideLoading()

			uni.showToast({
				icon: 'none',
				title: '连接成功',
			})
			console.log('onOpen', res)
			uni.sendSocketMessage({
				data: JSON.stringify({
					name: 'WX',
					message: 'init'
				})
			})
		}
	})
	uni.onSocketError((err) => {
		console.log('onError', err)
		if (this.pageVisible) {
			this.connecting = false
			this.connected = false
			uni.hideLoading()

			uni.showModal({
				content: '连接失败,可能是websocket服务不可用,请稍后再试',
				showCancel: false,
			})

		}
	})
	uni.onSocketMessage((res) => {
		console.log('接收到了通知', res)
		if (this.pageVisible) {
			this.msg = res.data
			console.log('onMessage', res)
		}
	})
	uni.onSocketClose((res) => {
		if (this.pageVisible) {
			this.connected = false
			this.msg = ''
			console.log('onClose', res)
		}
	})
},
