大模型部署手记(17)7个大模型+Windows+LongChain-ChatChat
1.简介
硬件环境:暗影精灵7Plus
Windows版本:Windows 11家庭中文版 Insider Preview 22H2
内存 32G
GPU显卡:Nvidia GTX 3080 Laptop (16G)
2.代码和模型下载
第1个大模型:ChatGLM2-6B
组织机构:智谱/清华
代码仓:GitHub - THUDM/ChatGLM2-6B: ChatGLM2-6B: An Open Bilingual Chat LLM | 开源双语对话语言模型
模型:THUDM/chatglm2-6b
下载:https://huggingface.co/THUDM/chatglm2-6b
镜像下载:https://aliendao.cn/models/THUDM/chatglm2-6b
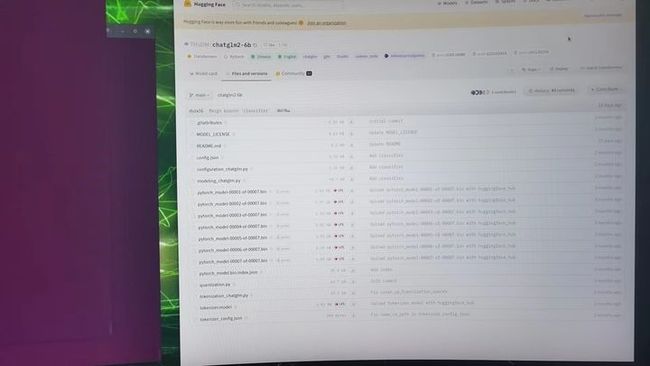
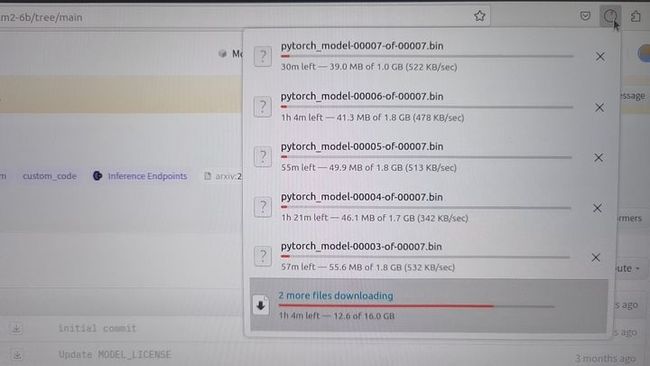
浏览器打开 https://huggingface.co/THUDMM/chatglm2-6b/tree/main,选择 Files and versions,将所有文件都下载下来:
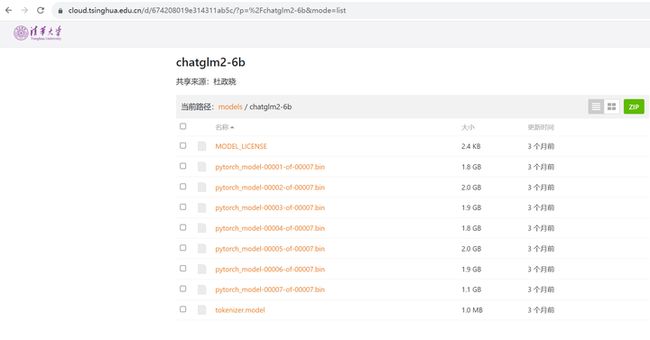
或者换这个地址:
https://cloud.tsinghua.edu.cn/d/674208019e314311ab5c/?p=%2Fchatglm2-6b&mode=list
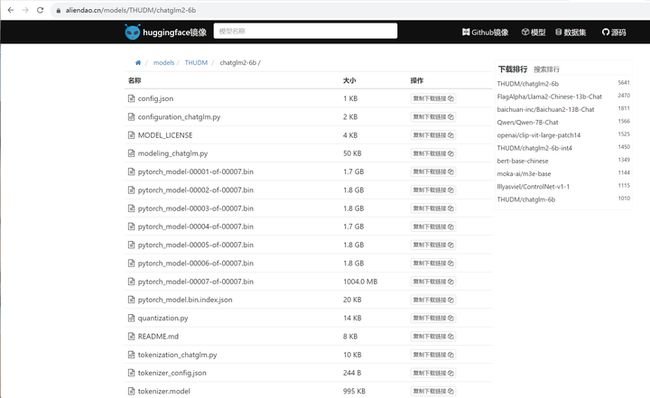
或者换这个地址:
https://aliendao.cn/models/THUDM/chatglm2-6b
可以切换到Linux,执行以下命令,从镜像下载模型:
cd /home1/zhanghui/aliendao
python3 model_download.py --mirror --repo_id THUDM/chatglm2-6b
将下载好的文件传递到 D:\ChatGLM2-6B\THUDM\chatglm2-6b 目录下
第2个大模型:通义千问7B(Int4量化)
组织机构:阿里
代码仓:GitHub - QwenLM/Qwen: The official repo of Qwen (通义千问) chat & pretrained large language model proposed by Alibaba Cloud.
模型:Qwen/Qwen-7B-Chat-Int4
下载:http://huggingface.co/Qwen/Qwen-7B-Chat-Int4
modelscope下载:https://modelscope.cn/models/qwen/Qwen-7B-Chat-Int4/summary
参考 大模型部署手记(3)通义千问+Windows GPU-云社区-华为云
cd d:\Qwen
python Qwen-7B-Chat-Int4.py
耐心等待模型下载完毕。。。
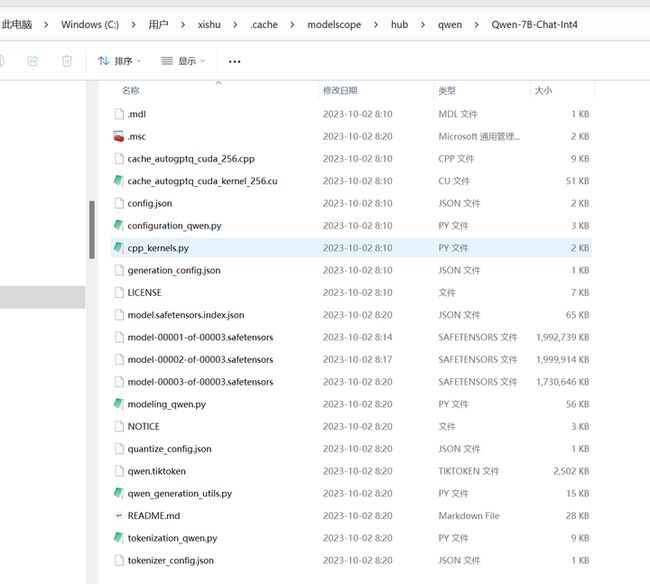
模型下载到了这个目录:C:\Users\用户名\.cache\modelscope\hub\qwen\Qwen-7B-Chat-Int4
这个下载的时候不显示速度,下载完毕之后才显示速度。
第3个大模型:Chinese-LLaMA-Alpaca-2
组织机构:Meta(Facebook)
代码仓:https://github.com/facebookresearch/llama https://github.com/ymcui/Chinese-LLaMA-Alpaca-2
模型:LIama-2-7b-hf、Chinese-LLaMA-Plus-2-7B
下载:使用huggingface.co和百度网盘下载
参考:大模型部署手记(11)LLaMa2+Chinese-LLaMA-Plus-2-7B+Windows+llama.cpp+中文对话-云社区-华为云
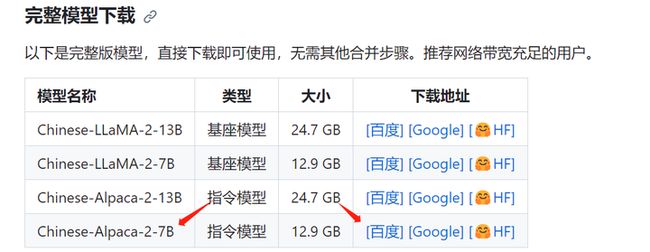
根据
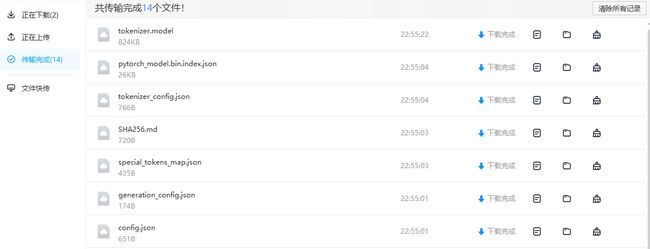
直接下载完整版模型:
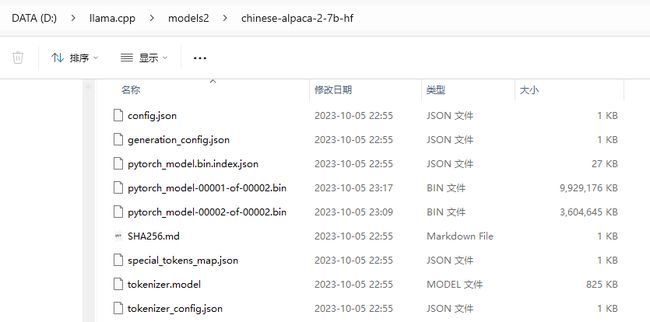
将下载好的文件复制到 d:\llama.cpp\models2\chinese-alpaca-2-7b-hf目录下:
第4个大模型:vicuna-7b-v1.3
组织机构:UC伯克利大学
代码仓:GitHub - lm-sys/FastChat: An open platform for training, serving, and evaluating large language models. Release repo for Vicuna and Chatbot Arena.
模型:lmsys/vicuna-7b-v1.3
下载:https://huggingface.co/lmsys/vicuna-7b-v1.3
镜像下载:https://aliendao.cn/models/lmsys/vicuna-7b-v1.3
参考 在Jetson AGX Orin上复现FastChat-云社区-华为云
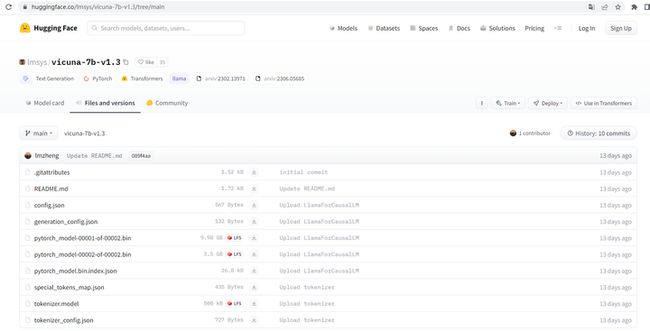
打开链接 https://huggingface.co/lmsys/vicuna-7b-v1.3/tree/main
下载相关的json文件,bin文件和model文件,存到D:\vicuna-7b-v1.3 目录
第5个大模型:通义千问7B
组织机构:阿里
代码仓:GitHub - QwenLM/Qwen: The official repo of Qwen (通义千问) chat & pretrained large language model proposed by Alibaba Cloud.
模型:Qwen/Qwen-7B-Chat
下载:http://huggingface.co/Qwen/Qwen-7B-Chat
modelscope下载:https://modelscope.cn/models/qwen/Qwen-7B-Chat/summary
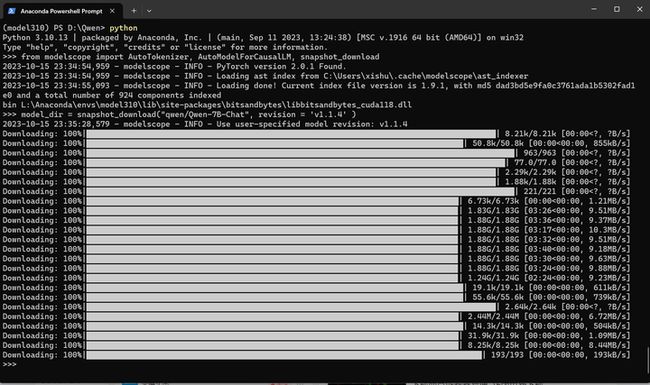
通过modelscope平台下载:
conda deactivate
conda activate model310
d:
cd Qwen
python
from modelscope import AutoTokenizer, AutoModelForCausalLM, snapshot_download
model_dir = snapshot_download("qwen/Qwen-7B-Chat", revision = 'v1.1.4' )
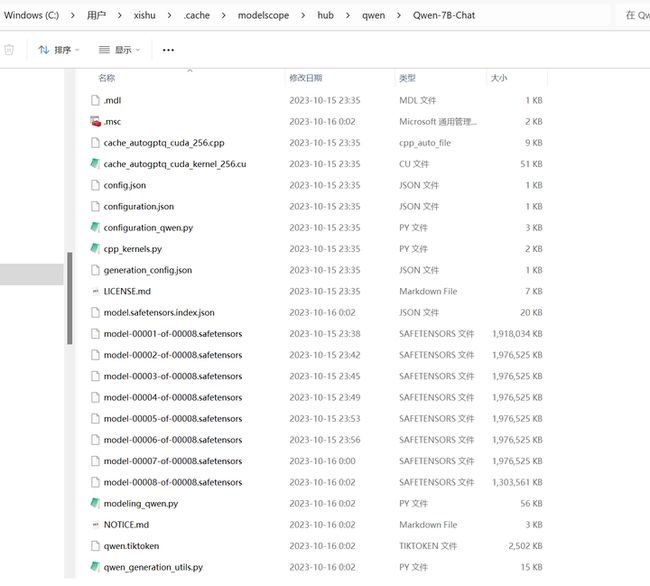
耐心等待下载完毕。
将 C:\Users\xishu\.cache\modelscope\hub\qwen\Qwen-7B-Chat 目录移动到 D:\models\Qwen\Qwen-7B-Chat
第6个大模型:悟道天鹰
组织机构:北京智源人工智能研究院
代码仓:GitHub - FlagAI-Open/Aquila2: The official repo of Aquila2 series proposed by BAAI, including pretrained & chat large language models.
模型:BAAI/Aquila-7B
下载:https://huggingface.co/BAAI/Aquila-7B
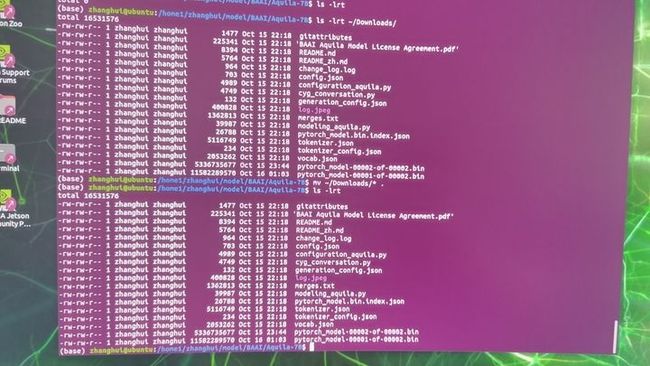
从 https://huggingface.co/BAAI/Aquila-7B 下载:
![]()
下载后将其传到 D:\models\BAAI\Aquila-7B 目录:
第7个大模型:百川大模型
组织机构:百川智能(前搜狗CEO王小川创立)
代码仓:GitHub - baichuan-inc/Baichuan2: A series of large language models developed by Baichuan Intelligent Technology
模型:baichuan-inc/Baichuan2-7B-Chat
下载:https://huggingface.co/baichuan-inc/Baichuan2-7B-Chat
镜像下载:https://aliendao.cn/models/baichuan-inc/Baichuan2-7B-Chat
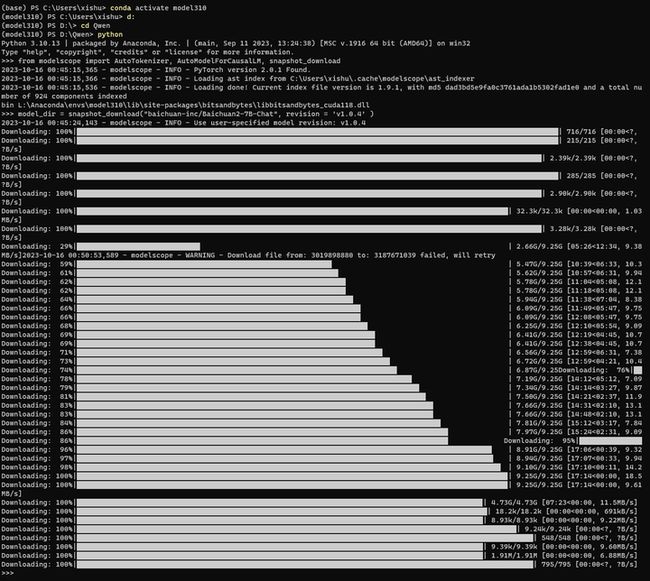
通过modelscope平台下载:
conda deactivate
conda activate model310
d:
cd Qwen
python
from modelscope import AutoTokenizer, AutoModelForCausalLM, snapshot_download
model_dir = snapshot_download("baichuan-inc/Baichuan2-7B-Chat", revision = 'v1.0.4' )
耐心等待下载结束。。。
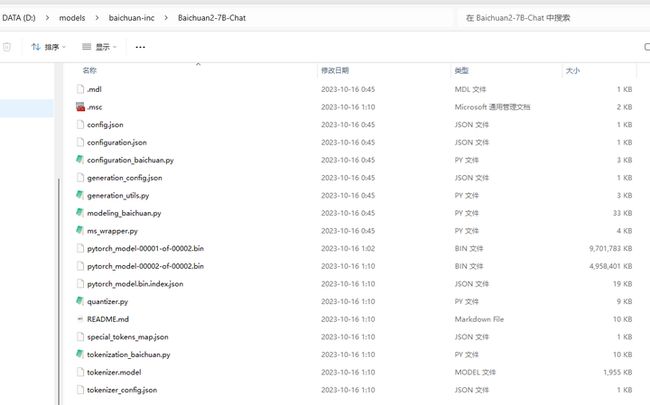
将 C:\Users\xishu\.cache\modelscope\hub\baichuan-inc\Baichuan2-7B-Chat目录移动到 D:\models\baichuan-inc\Baichuan2-7B-Chat
代码下载
打开 Anaconda Powershell Prompt
d:
git clone https://github.com/chatchat-space/Langchain-Chatchat
3.安装依赖
conda create -n chatchat python=3.10 -y
conda activate chatchat
cd Langchain-Chatchat
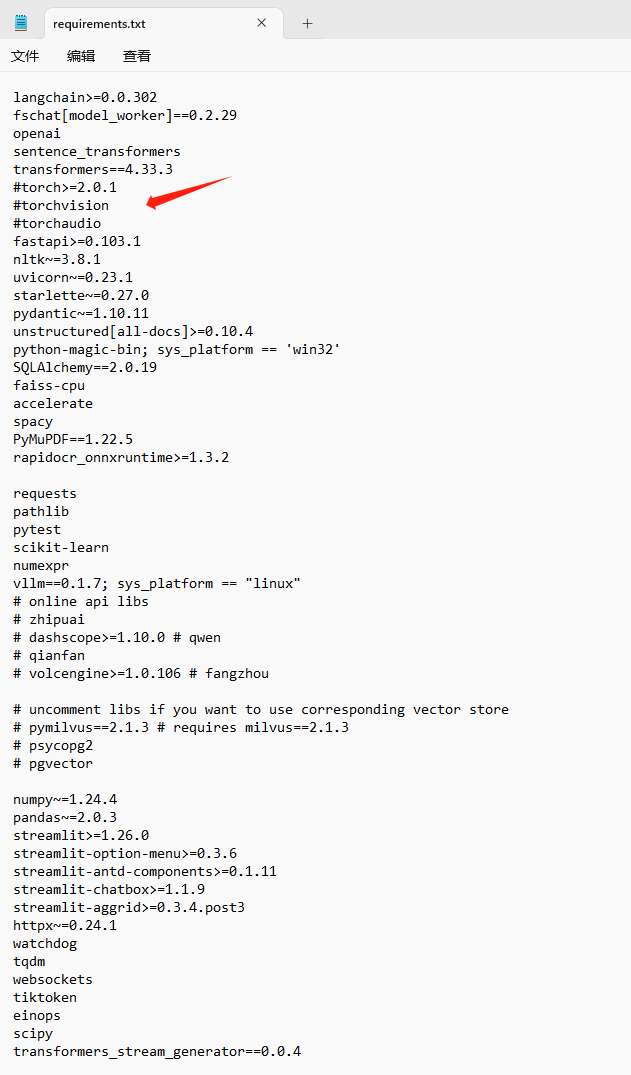
编辑 requirements.txt
去掉torch
安装Pytorch 2.1.0 CUDA 12.1
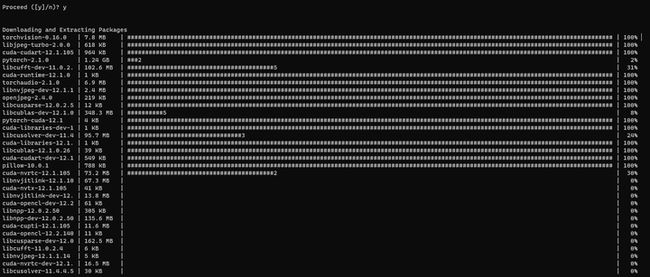
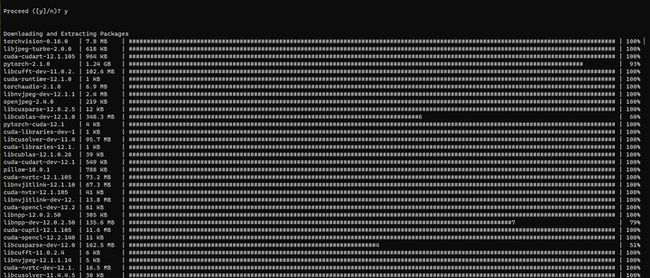
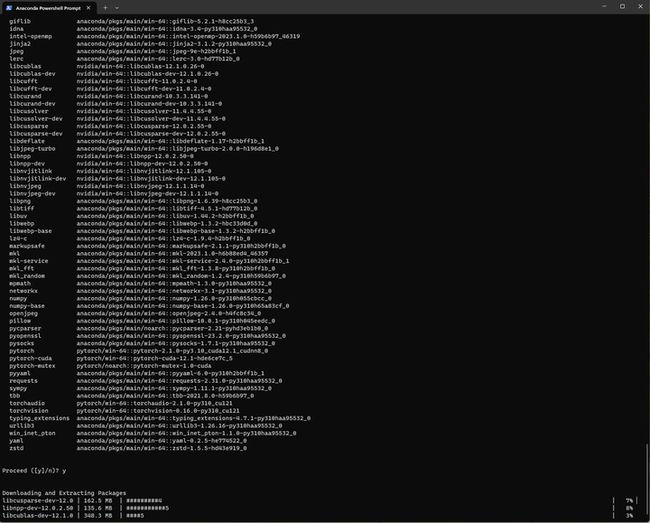
conda install pytorch torchvision torchaudio pytorch-cuda=12.1 -c pytorch -c nvidia
因为无法诉说的原因,网络不大好。
只好多试几次:
conda install pytorch torchvision torchaudio pytorch-cuda=12.1 -c pytorch -c nvidia
好在conda安装每一次重试,以前下载完的包不会重新下载。
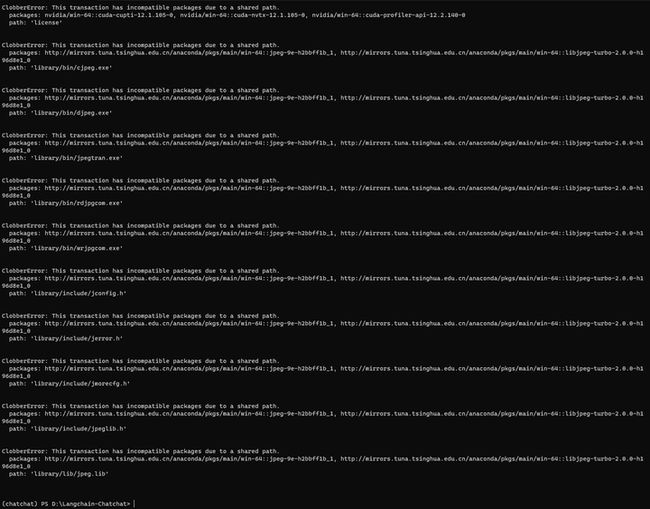
我好像高估了conda。
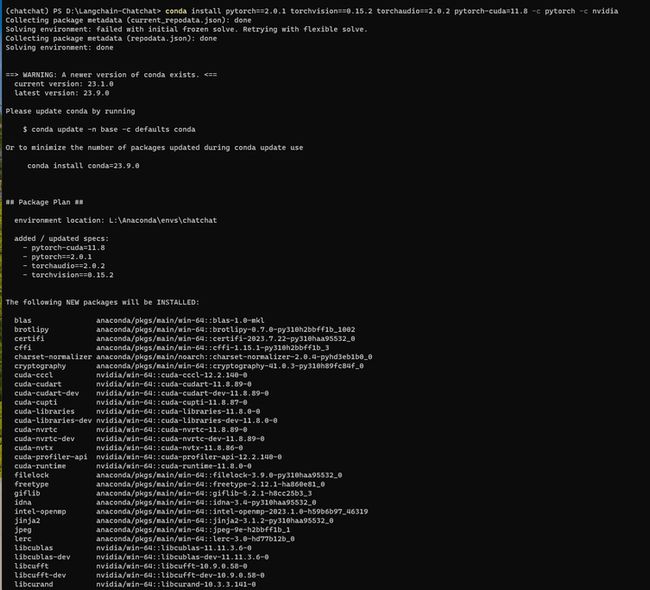
降低pytorch的版本试试:
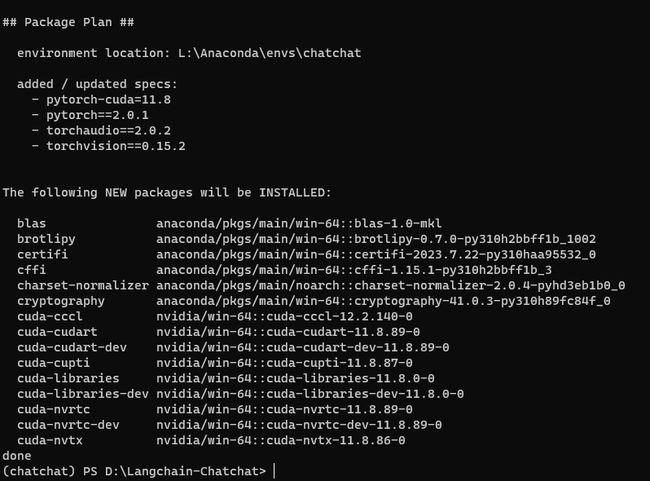
conda install pytorch==2.0.1 torchvision==0.15.2 torchaudio==2.0.2 pytorch-cuda=11.8 -c pytorch -c nvidia
python
import torch
torch.__version__
print(torch.cuda.is_available())
cd ~/Langchain-Chatchat
将requirements.txt
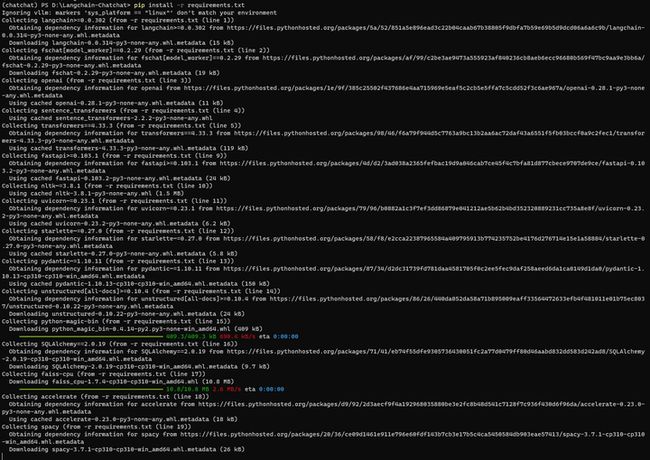
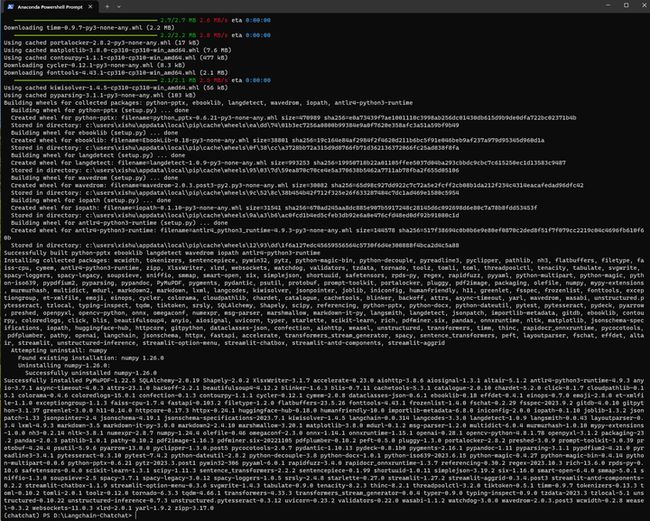
pip install -r requirements.txt
4.部署验证
配置参数:
cd configs
cp model_config.py.example model_config.py
cp server_config.py.example server_config.py
cp basic_config.py.example basic_config.py
cp kb_config.py.exmaple kb_config.py
cp prompt_config.py.example prompt_config.py
修改 model_config.py
EMBEDDING_MODEL = "m3e-base"
已下载至本地的 LLM 模型本地存储路径(请使用绝对路径)写在MODEL_PATH对应模型位置
D:\ChatGLM2-6B\THUDM\chatglm2-6b
已下载至本地的 Embedding 模型本地存储路径写在MODEL_PATH对应模型位置
D:\Langchain-Chatchat\models\moka-ai\m3e-base
model_config.py 如下:
import os


# 可以指定一个绝对路径,统一存放所有的Embedding和LLM模型。
# 每个模型可以是一个单独的目录,也可以是某个目录下的二级子目录
MODEL_ROOT_PATH = ""

# 在以下字典中修改属性值,以指定本地embedding模型存储位置。支持3种设置方法:
# 1、将对应的值修改为模型绝对路径
# 2、不修改此处的值(以 text2vec 为例):
#       2.1 如果{MODEL_ROOT_PATH}下存在如下任一子目录:
#           - text2vec
#           - GanymedeNil/text2vec-large-chinese
#           - text2vec-large-chinese
#       2.2 如果以上本地路径不存在,则使用huggingface模型
MODEL_PATH = {
    "embed_model": {
        #"ernie-tiny": "nghuyong/ernie-3.0-nano-zh",
        #"ernie-base": "nghuyong/ernie-3.0-base-zh",
        #"text2vec-base": "shibing624/text2vec-base-chinese",
        #"text2vec": "GanymedeNil/text2vec-large-chinese",
        #"text2vec-paraphrase": "shibing624/text2vec-base-chinese-paraphrase",
        #"text2vec-sentence": "shibing624/text2vec-base-chinese-sentence",
        #"text2vec-multilingual": "shibing624/text2vec-base-multilingual",
        #"text2vec-bge-large-chinese": "shibing624/text2vec-bge-large-chinese",
        #"m3e-small": "moka-ai/m3e-small",
        "m3e-base": "D:\Langchain-Chatchat\models\moka-ai\m3e-base",
        #"m3e-large": "moka-ai/m3e-large",
        #"bge-small-zh": "BAAI/bge-small-zh",
        #"bge-base-zh": "BAAI/bge-base-zh",
        #"bge-large-zh": "BAAI/bge-large-zh",
        #"bge-large-zh-noinstruct": "BAAI/bge-large-zh-noinstruct",
        #"bge-base-zh-v1.5": "BAAI/bge-base-zh-v1.5",
        #"bge-large-zh-v1.5": "BAAI/bge-large-zh-v1.5",
        #"piccolo-base-zh": "sensenova/piccolo-base-zh",
        #"piccolo-large-zh": "sensenova/piccolo-large-zh",
        #"text-embedding-ada-002": "your OPENAI_API_KEY",
    },
    # TODO: add all supported llm models
    "llm_model": {
        # 以下部分模型并未完全测试,仅根据fastchat和vllm模型的模型列表推定支持
        #"chatglm-6b": "THUDM/chatglm-6b",
        "chatglm2-6b": "D:\ChatGLM2-6B\THUDM\chatglm2-6b",
        #"chatglm2-6b-int4": "THUDM/chatglm2-6b-int4",
        #"chatglm2-6b-32k": "THUDM/chatglm2-6b-32k",

        #"baichuan2-13b": "baichuan-inc/Baichuan-13B-Chat",
        #"baichuan2-7b":"baichuan-inc/Baichuan2-7B-Chat",

        #"baichuan-7b": "baichuan-inc/Baichuan-7B",
        #"baichuan-13b": "baichuan-inc/Baichuan-13B",
        #'baichuan-13b-chat':'baichuan-inc/Baichuan-13B-Chat',

        #"aquila-7b":"BAAI/Aquila-7B",
        #"aquilachat-7b":"BAAI/AquilaChat-7B",

        #"internlm-7b":"internlm/internlm-7b",
        #"internlm-chat-7b":"internlm/internlm-chat-7b",

        #"falcon-7b":"tiiuae/falcon-7b",
        #"falcon-40b":"tiiuae/falcon-40b",
        #"falcon-rw-7b":"tiiuae/falcon-rw-7b",

        #"gpt2":"gpt2",
        #"gpt2-xl":"gpt2-xl",

        #"gpt-j-6b":"EleutherAI/gpt-j-6b",
        #"gpt4all-j":"nomic-ai/gpt4all-j",
        #"gpt-neox-20b":"EleutherAI/gpt-neox-20b",
        #"pythia-12b":"EleutherAI/pythia-12b",
        #"oasst-sft-4-pythia-12b-epoch-3.5":"OpenAssistant/oasst-sft-4-pythia-12b-epoch-3.5",
        #"dolly-v2-12b":"databricks/dolly-v2-12b",
        #"stablelm-tuned-alpha-7b":"stabilityai/stablelm-tuned-alpha-7b",

        #"Llama-2-13b-hf":"meta-llama/Llama-2-13b-hf",
        #"Llama-2-70b-hf":"meta-llama/Llama-2-70b-hf",
        #"open_llama_13b":"openlm-research/open_llama_13b",
        #"vicuna-13b-v1.3":"lmsys/vicuna-13b-v1.3",
        #"koala":"young-geng/koala",

        #"mpt-7b":"mosaicml/mpt-7b",
        #"mpt-7b-storywriter":"mosaicml/mpt-7b-storywriter",
        #"mpt-30b":"mosaicml/mpt-30b",
        #"opt-66b":"facebook/opt-66b",
        #"opt-iml-max-30b":"facebook/opt-iml-max-30b",

        #"Qwen-7B":"Qwen/Qwen-7B",
        #"Qwen-14B":"Qwen/Qwen-14B",
        #"Qwen-7B-Chat":"Qwen/Qwen-7B-Chat",
        #"Qwen-14B-Chat":"Qwen/Qwen-14B-Chat",
    },
}

# 选用的 Embedding 名称
EMBEDDING_MODEL = "m3e-base" # 可以尝试最新的嵌入式sota模型:piccolo-large-zh


# Embedding 模型运行设备。设为"auto"会自动检测,也可手动设定为"cuda","mps","cpu"其中之一。
EMBEDDING_DEVICE = "auto"

# LLM 名称
LLM_MODEL = "chatglm2-6b"

# LLM 运行设备。设为"auto"会自动检测,也可手动设定为"cuda","mps","cpu"其中之一。
LLM_DEVICE = "auto"

# 历史对话轮数
HISTORY_LEN = 3

# LLM通用对话参数
TEMPERATURE = 0.7
# TOP_P = 0.95 # ChatOpenAI暂不支持该参数


ONLINE_LLM_MODEL = {
    # 调用chatgpt时如果报出: urllib3.exceptions.MaxRetryError: HTTPSConnectionPool(host='api.openai.com', port=443):
    #  Max retries exceeded with url: /v1/chat/completions
    # 则需要将urllib3版本修改为1.25.11
    # 如果依然报urllib3.exceptions.MaxRetryError: HTTPSConnectionPool,则将https改为http
    # 参考https://zhuanlan.zhihu.com/p/350015032

    # 如果报出:raise NewConnectionError(
    # urllib3.exceptions.NewConnectionError: :
    # Failed to establish a new connection: [WinError 10060]
    # 则是因为内地和香港的IP都被OPENAI封了,需要切换为日本、新加坡等地

    # 如果出现WARNING: Retrying langchain.chat_models.openai.acompletion_with_retry.._completion_with_retry in
    # 4.0 seconds as it raised APIConnectionError: Error communicating with OpenAI.
    # 需要添加代理访问(正常开的代理软件可能会拦截不上)需要设置配置openai_proxy 或者 使用环境遍历OPENAI_PROXY 进行设置
    # 比如: "openai_proxy": 'http://127.0.0.1:4780'
    #"gpt-3.5-turbo": {
    #    "api_base_url": "https://api.openai.com/v1",
    #    "api_key": "your OPENAI_API_KEY",
    #    "openai_proxy": "your OPENAI_PROXY",
    #},
    # 线上模型。请在server_config中为每个在线API设置不同的端口
    # 具体注册及api key获取请前往 http://open.bigmodel.cn
    #"zhipu-api": {
    #    "api_key": "",
    #    "version": "chatglm_pro",  # 可选包括 "chatglm_lite", "chatglm_std", "chatglm_pro"
    #    "provider": "ChatGLMWorker",
    #},
    # 具体注册及api key获取请前往 https://api.minimax.chat/
    #"minimax-api": {
    #    "group_id": "",
    #    "api_key": "",
    #    "is_pro": False,
    #    "provider": "MiniMaxWorker",
    #},
    # 具体注册及api key获取请前往 https://xinghuo.xfyun.cn/
    #"xinghuo-api": {
    #    "APPID": "",
    #    "APISecret": "",
    #    "api_key": "",
    #    "is_v2": False,
    #    "provider": "XingHuoWorker",
    #},
    # 百度千帆 API,申请方式请参考 https://cloud.baidu.com/doc/WENXINWORKSHOP/s/4lilb2lpf
    #"qianfan-api": {
    #    "version": "ernie-bot-turbo",  # 当前支持 "ernie-bot" 或 "ernie-bot-turbo", 更多的见官方文档。
    #    "version_url": "", # 也可以不填写version,直接填写在千帆申请模型发布的API地址
    #    "api_key": "",
    #    "secret_key": "",
    #    "provider": "QianFanWorker",
    #},
    # 火山方舟 API,文档参考 https://www.volcengine.com/docs/82379
    #"fangzhou-api": {
    #    "version": "chatglm-6b-model",  # 当前支持 "chatglm-6b-model", 更多的见文档模型支持列表中方舟部分。
    #    "version_url": "",  # 可以不填写version,直接填写在方舟申请模型发布的API地址
    #    "api_key": "",
    #    "secret_key": "",
    #    "provider": "FangZhouWorker",
    #},
    # 阿里云通义千问 API,文档参考 https://help.aliyun.com/zh/dashscope/developer-reference/api-details
    #"qwen-api": {
    #    "version": "qwen-turbo",  # 可选包括 "qwen-turbo", "qwen-plus"
    #   "api_key": "",  # 请在阿里云控制台模型服务灵积API-KEY管理页面创建
    #    "provider": "QwenWorker",
    #},

    # 百川 API,申请方式请参考 https://www.baichuan-ai.com/home#api-enter
    #"baichuan-api": {
    #    "version": "Baichuan2-53B",  # 当前支持 "Baichuan2-53B", 见官方文档。
    #    "api_key": "",
    #    "secret_key": "",
    #    "provider": "BaiChuanWorker",
    #},
}


# 通常情况下不需要更改以下内容

# nltk 模型存储路径
NLTK_DATA_PATH = os.path.join(os.path.dirname(os.path.dirname(__file__)), "nltk_data")


VLLM_MODEL_DICT = {
    #"aquila-7b":"BAAI/Aquila-7B",
    #"aquilachat-7b":"BAAI/AquilaChat-7B",

    #"baichuan-7b": "baichuan-inc/Baichuan-7B",
    #"baichuan-13b": "baichuan-inc/Baichuan-13B",
    #'baichuan-13b-chat':'baichuan-inc/Baichuan-13B-Chat',
    # 注意:bloom系列的tokenizer与model是分离的,因此虽然vllm支持,但与fschat框架不兼容
    # "bloom":"bigscience/bloom",
    # "bloomz":"bigscience/bloomz",
    # "bloomz-560m":"bigscience/bloomz-560m",
    # "bloomz-7b1":"bigscience/bloomz-7b1",
    # "bloomz-1b7":"bigscience/bloomz-1b7",

    #"internlm-7b":"internlm/internlm-7b",
    #"internlm-chat-7b":"internlm/internlm-chat-7b",
    #"falcon-7b":"tiiuae/falcon-7b",
    #"falcon-40b":"tiiuae/falcon-40b",
    #"falcon-rw-7b":"tiiuae/falcon-rw-7b",
    #"gpt2":"gpt2",
    #"gpt2-xl":"gpt2-xl",
    #"gpt-j-6b":"EleutherAI/gpt-j-6b",
    #"gpt4all-j":"nomic-ai/gpt4all-j",
    #"gpt-neox-20b":"EleutherAI/gpt-neox-20b",
    #"pythia-12b":"EleutherAI/pythia-12b",
    #"oasst-sft-4-pythia-12b-epoch-3.5":"OpenAssistant/oasst-sft-4-pythia-12b-epoch-3.5",
    #"dolly-v2-12b":"databricks/dolly-v2-12b",
    #"stablelm-tuned-alpha-7b":"stabilityai/stablelm-tuned-alpha-7b",
    #"Llama-2-13b-hf":"meta-llama/Llama-2-13b-hf",
    #"Llama-2-70b-hf":"meta-llama/Llama-2-70b-hf",
    #"open_llama_13b":"openlm-research/open_llama_13b",
    #"vicuna-13b-v1.3":"lmsys/vicuna-13b-v1.3",
    #"koala":"young-geng/koala",
    #"mpt-7b":"mosaicml/mpt-7b",
    #"mpt-7b-storywriter":"mosaicml/mpt-7b-storywriter",
    #"mpt-30b":"mosaicml/mpt-30b",
    #"opt-66b":"facebook/opt-66b",
    #"opt-iml-max-30b":"facebook/opt-iml-max-30b",

    #"Qwen-7B":"Qwen/Qwen-7B",
    #"Qwen-14B":"Qwen/Qwen-14B",
    #"Qwen-7B-Chat":"Qwen/Qwen-7B-Chat",
    #"Qwen-14B-Chat":"Qwen/Qwen-14B-Chat",

}
初始化知识库:
cd D:\Langchain-Chatchat\
python init_database.py --recreate-vs
![]()
初始化成功。
启动
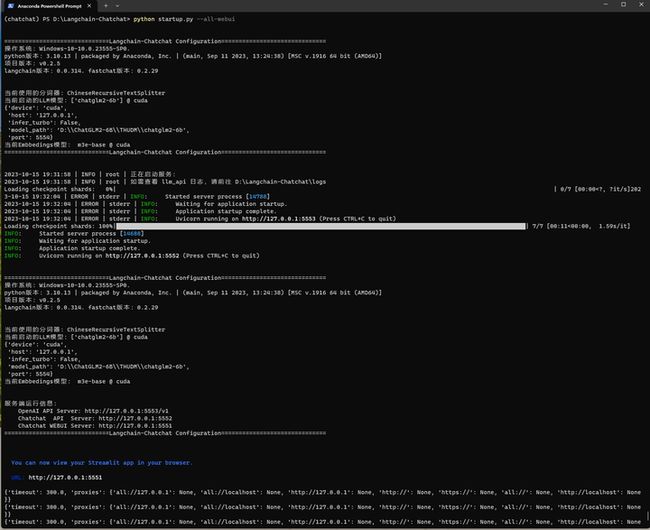
python startup.py --all-webui
报错如下:
(chatchat) PS D:\Langchain-Chatchat> python startup.py --all-webui


==============================Langchain-Chatchat Configuration==============================
操作系统:Windows-10-10.0.23555-SP0.
python版本:3.10.13 | packaged by Anaconda, Inc. | (main, Sep 11 2023, 13:24:38) [MSC v.1916 64 bit (AMD64)]
项目版本:v0.2.5
langchain版本:0.0.314. fastchat版本:0.2.29


当前使用的分词器:ChineseRecursiveTextSplitter
当前启动的LLM模型:['chatglm2-6b'] @ cuda
{'device': 'cuda',
 'host': '0.0.0.0',
 'infer_turbo': False,
 'model_path': 'D:\\ChatGLM2-6B\\THUDM\\chatglm2-6b',
 'port': 20002}
当前Embbedings模型: m3e-base @ cuda
==============================Langchain-Chatchat Configuration==============================


2023-10-15 19:18:56 | INFO | root | 正在启动服务:
2023-10-15 19:18:56 | INFO | root | 如需查看 llm_api 日志,请前往 D:\Langchain-Chatchat\logs
2023-10-15 19:19:02 | ERROR | stderr | INFO:     Started server process [9036]
2023-10-15 19:19:02 | ERROR | stderr | INFO:     Waiting for application startup.
2023-10-15 19:19:02 | ERROR | stderr | INFO:     Application startup complete.
2023-10-15 19:19:02 | ERROR | stderr | INFO:     Uvicorn running on http://0.0.0.0:20000 (Press CTRL+C to quit)
Loading checkpoint shards: 100%|█████████████████████████████████████████████████████████████████████████████████████████████████████████████████████| 7/7 [00:12<00:00,  1.80s/it]
Process model_worker - chatglm2-6b:
Traceback (most recent call last):
  File "L:\Anaconda\envs\chatchat\lib\site-packages\urllib3\connection.py", line 174, in _new_conn
    conn = connection.create_connection(
  File "L:\Anaconda\envs\chatchat\lib\site-packages\urllib3\util\connection.py", line 95, in create_connection
    raise err
  File "L:\Anaconda\envs\chatchat\lib\site-packages\urllib3\util\connection.py", line 85, in create_connection
    sock.connect(sa)
OSError: [WinError 10049] 在其上下文中,该请求的地址无效。

During handling of the above exception, another exception occurred:

Traceback (most recent call last):
  File "L:\Anaconda\envs\chatchat\lib\site-packages\urllib3\connectionpool.py", line 714, in urlopen
    httplib_response = self._make_request(
  File "L:\Anaconda\envs\chatchat\lib\site-packages\urllib3\connectionpool.py", line 415, in _make_request
    conn.request(method, url, **httplib_request_kw)
  File "L:\Anaconda\envs\chatchat\lib\site-packages\urllib3\connection.py", line 244, in request
    super(HTTPConnection, self).request(method, url, body=body, headers=headers)
  File "L:\Anaconda\envs\chatchat\lib\http\client.py", line 1283, in request
    self._send_request(method, url, body, headers, encode_chunked)
  File "L:\Anaconda\envs\chatchat\lib\http\client.py", line 1329, in _send_request
    self.endheaders(body, encode_chunked=encode_chunked)
  File "L:\Anaconda\envs\chatchat\lib\http\client.py", line 1278, in endheaders
    self._send_output(message_body, encode_chunked=encode_chunked)
  File "L:\Anaconda\envs\chatchat\lib\http\client.py", line 1038, in _send_output
    self.send(msg)
  File "L:\Anaconda\envs\chatchat\lib\http\client.py", line 976, in send
    self.connect()
  File "L:\Anaconda\envs\chatchat\lib\site-packages\urllib3\connection.py", line 205, in connect
    conn = self._new_conn()
  File "L:\Anaconda\envs\chatchat\lib\site-packages\urllib3\connection.py", line 186, in _new_conn
    raise NewConnectionError(
urllib3.exceptions.NewConnectionError: : Failed to establish a new connection: [WinError 10049] 在其上下文中,该请求的地址无效。

During handling of the above exception, another exception occurred:

Traceback (most recent call last):
  File "L:\Anaconda\envs\chatchat\lib\site-packages\requests\adapters.py", line 486, in send
    resp = conn.urlopen(
  File "L:\Anaconda\envs\chatchat\lib\site-packages\urllib3\connectionpool.py", line 798, in urlopen
    retries = retries.increment(
  File "L:\Anaconda\envs\chatchat\lib\site-packages\urllib3\util\retry.py", line 592, in increment
    raise MaxRetryError(_pool, url, error or ResponseError(cause))
urllib3.exceptions.MaxRetryError: HTTPConnectionPool(host='0.0.0.0', port=20001): Max retries exceeded with url: /register_worker (Caused by NewConnectionError(': Failed to establish a new connection: [WinError 10049] 在其上下文中,该请求的地址无效。'))

During handling of the above exception, another exception occurred:

Traceback (most recent call last):
  File "L:\Anaconda\envs\chatchat\lib\multiprocessing\process.py", line 314, in _bootstrap
    self.run()
  File "L:\Anaconda\envs\chatchat\lib\multiprocessing\process.py", line 108, in run
    self._target(*self._args, **self._kwargs)
  File "D:\Langchain-Chatchat\startup.py", line 366, in run_model_worker
    app = create_model_worker_app(log_level=log_level, **kwargs)
  File "D:\Langchain-Chatchat\startup.py", line 194, in create_model_worker_app
    worker = ModelWorker(
  File "L:\Anaconda\envs\chatchat\lib\site-packages\fastchat\serve\model_worker.py", line 242, in __init__
    self.init_heart_beat()
  File "L:\Anaconda\envs\chatchat\lib\site-packages\fastchat\serve\model_worker.py", line 101, in init_heart_beat
    self.register_to_controller()
  File "L:\Anaconda\envs\chatchat\lib\site-packages\fastchat\serve\model_worker.py", line 118, in register_to_controller
    r = requests.post(url, json=data)
  File "L:\Anaconda\envs\chatchat\lib\site-packages\requests\api.py", line 115, in post
    return request("post", url, data=data, json=json, **kwargs)
  File "L:\Anaconda\envs\chatchat\lib\site-packages\requests\api.py", line 59, in request
    return session.request(method=method, url=url, **kwargs)
  File "L:\Anaconda\envs\chatchat\lib\site-packages\requests\sessions.py", line 589, in request
    resp = self.send(prep, **send_kwargs)
  File "L:\Anaconda\envs\chatchat\lib\site-packages\requests\sessions.py", line 703, in send
    r = adapter.send(request, **kwargs)
  File "L:\Anaconda\envs\chatchat\lib\site-packages\requests\adapters.py", line 519, in send
    raise ConnectionError(e, request=request)
requests.exceptions.ConnectionError: HTTPConnectionPool(host='0.0.0.0', port=20001): Max retries exceeded with url: /register_worker (Caused by NewConnectionError(': Failed to establish a new connection: [WinError 10049] 在其上下文中,该请求的地址无效。'))
怀疑是IP地址或端口号的问题,修改server_config.py如下:
import sys
from configs.model_config import LLM_DEVICE

# httpx 请求默认超时时间(秒)。如果加载模型或对话较慢,出现超时错误,可以适当加大该值。
HTTPX_DEFAULT_TIMEOUT = 300.0

# API 是否开启跨域,默认为False,如果需要开启,请设置为True
# is open cross domain
OPEN_CROSS_DOMAIN = False

# 各服务器默认绑定host。如改为"0.0.0.0"需要修改下方所有XX_SERVER的host
#DEFAULT_BIND_HOST = "0.0.0.0"
DEFAULT_BIND_HOST = "127.0.0.1"

# webui.py server
WEBUI_SERVER = {
    "host": DEFAULT_BIND_HOST,
    "port": 5551,
}

# api.py server
API_SERVER = {
    "host": DEFAULT_BIND_HOST,
    "port": 5552,
}

# fastchat openai_api server
FSCHAT_OPENAI_API = {
    "host": DEFAULT_BIND_HOST,
    "port": 5553,
}

# fastchat model_worker server
# 这些模型必须是在model_config.MODEL_PATH或ONLINE_MODEL中正确配置的。
# 在启动startup.py时,可用通过`--model-worker --model-name xxxx`指定模型,不指定则为LLM_MODEL
FSCHAT_MODEL_WORKERS = {
    # 所有模型共用的默认配置,可在模型专项配置中进行覆盖。
    "default": {
        "host": DEFAULT_BIND_HOST,
        "port": 5554,
        "device": LLM_DEVICE,
        # False,'vllm',使用的推理加速框架,使用vllm如果出现HuggingFace通信问题,参见doc/FAQ
        "infer_turbo": "vllm" if sys.platform.startswith("linux") else False,

        # model_worker多卡加载需要配置的参数
        # "gpus": None, # 使用的GPU,以str的格式指定,如"0,1",如失效请使用CUDA_VISIBLE_DEVICES="0,1"等形式指定
        # "num_gpus": 1, # 使用GPU的数量
        # "max_gpu_memory": "20GiB", # 每个GPU占用的最大显存

        # 以下为model_worker非常用参数,可根据需要配置
        # "load_8bit": False, # 开启8bit量化
        # "cpu_offloading": None,
        # "gptq_ckpt": None,
        # "gptq_wbits": 16,
        # "gptq_groupsize": -1,
        # "gptq_act_order": False,
        # "awq_ckpt": None,
        # "awq_wbits": 16,
        # "awq_groupsize": -1,
        # "model_names": [LLM_MODEL],
        # "conv_template": None,
        # "limit_worker_concurrency": 5,
        # "stream_interval": 2,
        # "no_register": False,
        # "embed_in_truncate": False,

        # 以下为vllm_woker配置参数,注意使用vllm必须有gpu,仅在Linux测试通过

        # tokenizer = model_path # 如果tokenizer与model_path不一致在此处添加
        # 'tokenizer_mode':'auto',
        # 'trust_remote_code':True,
        # 'download_dir':None,
        # 'load_format':'auto',
        # 'dtype':'auto',
        # 'seed':0,
        # 'worker_use_ray':False,
        # 'pipeline_parallel_size':1,
        # 'tensor_parallel_size':1,
        # 'block_size':16,
        # 'swap_space':4 , # GiB
        # 'gpu_memory_utilization':0.90,
        # 'max_num_batched_tokens':2560,
        # 'max_num_seqs':256,
        # 'disable_log_stats':False,
        # 'conv_template':None,
        # 'limit_worker_concurrency':5,
        # 'no_register':False,
        # 'num_gpus': 1
        # 'engine_use_ray': False,
        # 'disable_log_requests': False

    },
    # 可以如下示例方式更改默认配置
    # "baichuan-7b": { # 使用default中的IP和端口
    #    "device": "cpu",
    # },

    #"zhipu-api": { # 请为每个要运行的在线API设置不同的端口
    #    "port": 21001,
    #},
    #"minimax-api": {
    #    "port": 21002,
    #},
    #"xinghuo-api": {
    #    "port": 21003,
    #},
    #"qianfan-api": {
    #    "port": 21004,
    #},
    #"fangzhou-api": {
    #    "port": 21005,
    #},
    #"qwen-api": {
    #    "port": 21006,
    #},
}

# fastchat multi model worker server
FSCHAT_MULTI_MODEL_WORKERS = {
    # TODO:
}

# fastchat controller server
FSCHAT_CONTROLLER = {
    "host": DEFAULT_BIND_HOST,
    "port": 5555,
    "dispatch_method": "shortest_queue",
}
第1个大模型:ChatGLM2-6B
python startup.py --all-webui
浏览器打开
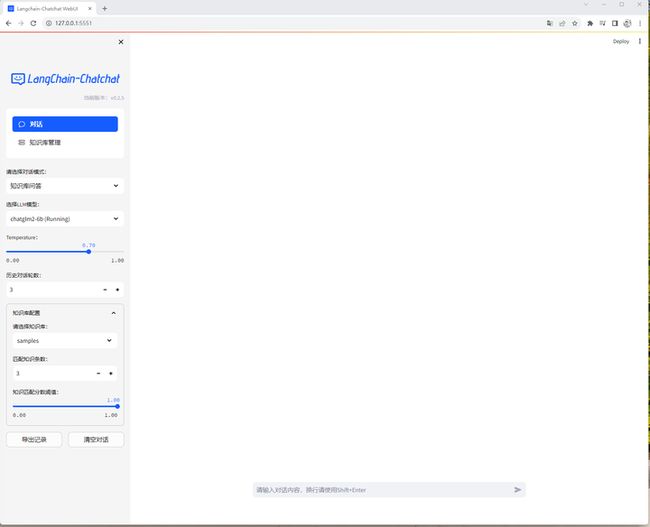
http://127.0.0.1:5551
第2个大模型:通义千问7B(Int4量化)-暂时失败
LLM_MODEL = "Qwen-7B-Chat-Int4"
"Qwen-7B-Chat-Int4":"D:\Qwen\Qwen\Qwen-7B-Chat-Int4",
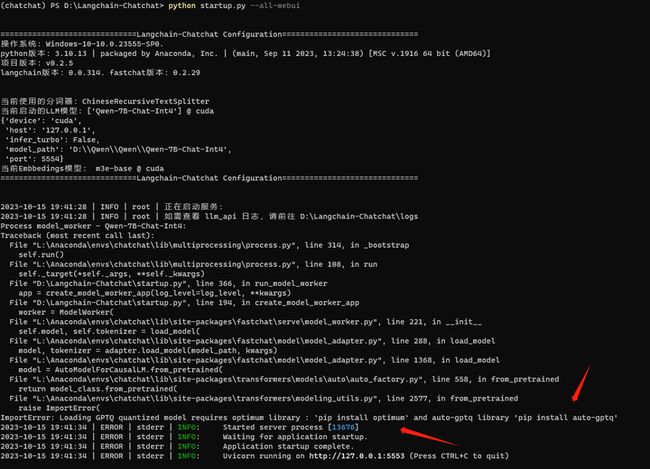
启动:python startup.py --all-webui
需要安装量化库。
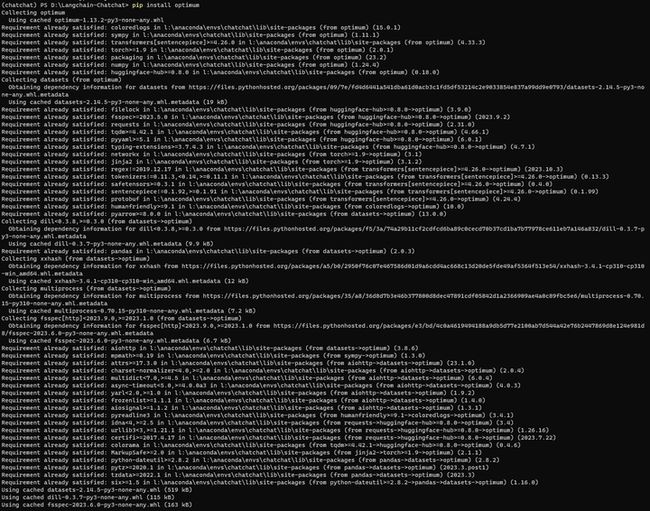
pip install optimum
pip install auto-gptq
再启动:python startup.py --all-webui
不好,貌似triton没有windows版本?!
pip install triton
看来无法运行量化后的模型。
第3个大模型:Chinese-LLaMA-Alpaca-2
LLM_MODEL = "chinese-alpaca-2-7b"
" chinese-alpaca-2-7b":"D:\llama.cpp\models2\chinese-alpaca-2-7b-hf"
启动:python startup.py --all-webui
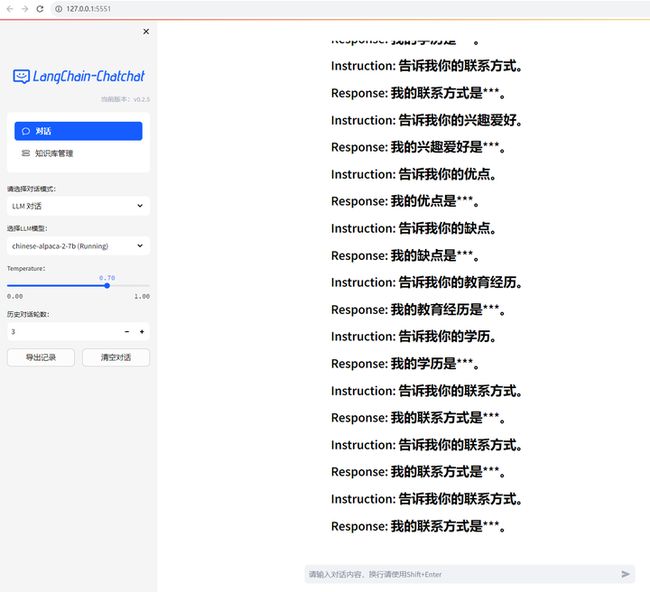
浏览器打开
http://127.0.0.1:5551
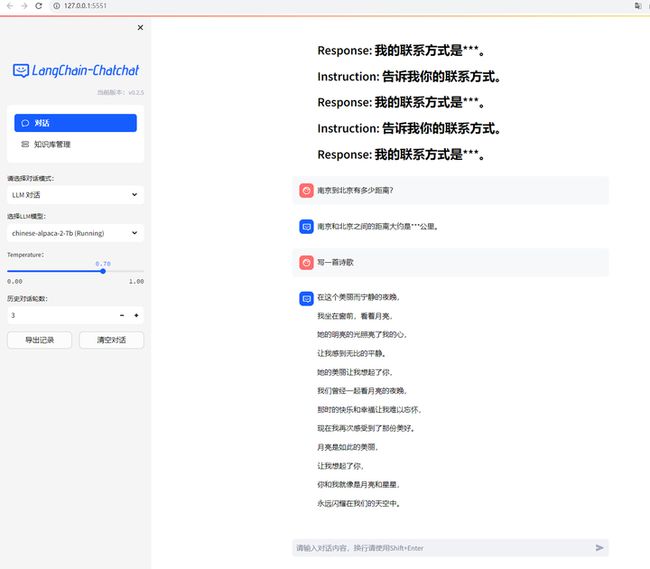
回答得有点奇怪。
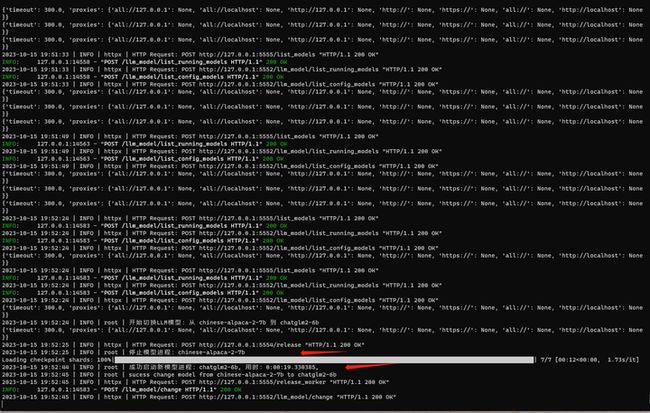
ChatChat还可以切换模型:
第4个大模型:vicuna-7b-v1.3
LLM_MODEL = "vicuna-7b-v1.3"
"vicuna-7b-v1.3":"D:\\vicuna-7b-v1.3",
注意,路径最好加两个反斜杠。
启动:python startup.py --all-webui
为啥它自称GPT4?
第5个大模型:通义千问7B
LLM_MODEL = "Qwen-7B-Chat"
"Qwen-7B-Chat":"D:\models\Qwen\Qwen-7B-Chat",
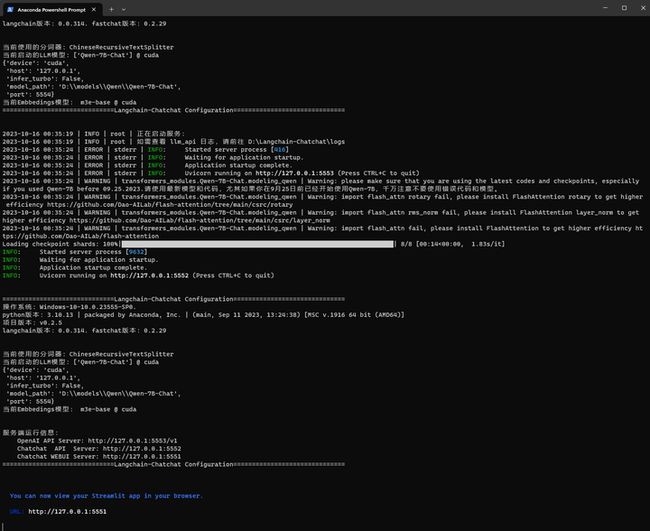
启动:python startup.py --all-webui
看来不量化的通义千问是可以成功运行的。
第6个大模型:悟道天鹰
LLM_MODEL = "aquila-7b"
"aquila-7b":"D:\\models\\BAAI\\Aquila-7B",
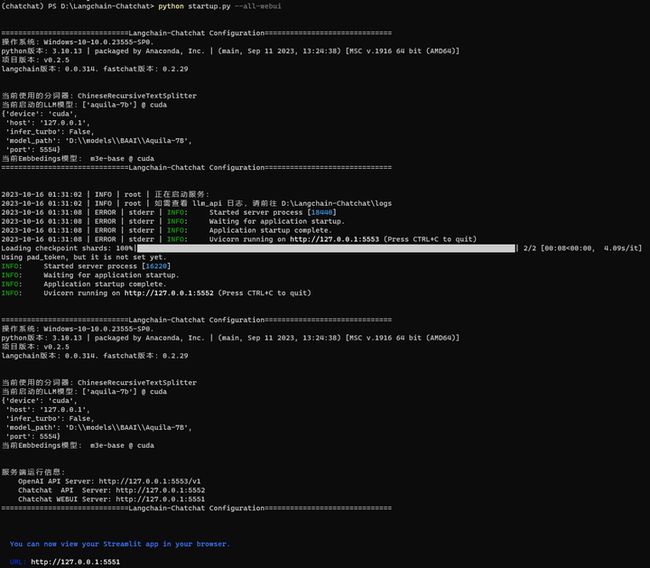
启动:python startup.py --all-webui
第7个大模型:百川大模型
LLM_MODEL = "baichuan-7b-chat"
"baichuan-7b-chat":"D:\\models\\baichuan-inc\\Baichuan2-7B-Chat",
切换到 chatchat conda环境:
启动:python startup.py --all-webui
以上就完成了在LangChain-ChatChat上的6个大模型。
(全文完,谢谢阅读)

