springboot项目基本配置
接口入口日志
参数校验
业务逻辑执行
异常捕获-统一异常处理
统一数据返回体
接口返回日志
使用的是springboot2.x版本。
Mybatisplus
官网地址:https://baomidou.com/
导入依赖
		<dependency>
			<groupId>com.baomidougroupId>
			<artifactId>mybatis-plus-boot-starterartifactId>
			<version>3.5.2version>
		dependency>
xml路径配置
mybatisplus默认的路径是:classpath*:/mapper/**/*.xml。
这个路径表示在classpath下寻找mapper目录及其所有子目录下的所有xml文件
根据自己的xml位置去选择是否配置,否则不用配置,使用默认路径即可。
classpath包括两个路径,第一个是src/main/resources,第二个是src/main/java。
classpath*会递归查询类路径的子目录,classpath则不会。
** 表示递归地匹配任意多个子目录。
所以mybatisplus默认会递归查询类路径下的mapper包中所有子目录的xml文件。
需要注意的是,一般情况下我们会把mapper包放在另一个文件夹中,这个时候默认的路径就会找不到xml,需要将路径改成

xml文件模板
DOCTYPE mapper PUBLIC "-//mybatis.org//DTD Mapper 3.0//EN" "http://mybatis.org/dtd/mybatis-3-mapper.dtd">
<mapper namespace="com.example.mapper.StudentMapper">
mapper>
mapper标签的namespace用来给xml指定关联的mapper接口
Invalid bound statement (not found)的坑
很多人都碰过这个问题。
第一种:打的文件包taget里没有xml
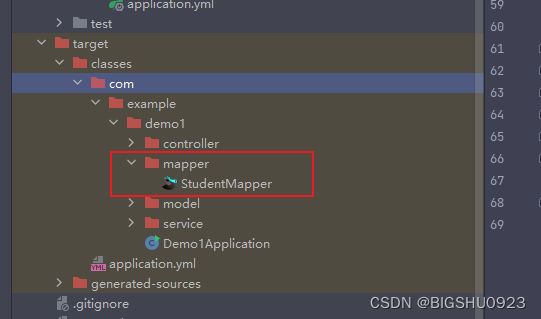
在pom文件的build标签下指定打包的资源
		<resources>
			<resource>
				<directory>src/main/javadirectory>
				<includes>
					<include>**/*.xmlinclude>
				includes>
				<filtering>truefiltering>
			resource>
			<resource>
				<directory>src/main/resourcesdirectory>
				<includes>
					<include>**/*.*include>
				includes>
			resource>
		resources>
然后用maven的clean把原来的target包删掉,再用下面的install重新打包

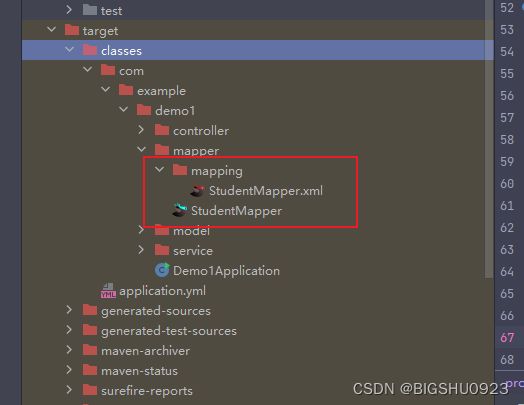
在新的target中看到了xml
第二种:配置的xml路径有问题。
统一数据返回体
@Data
@NoArgsConstructor
public class ResponseResult<T> {
    private Integer code;
    private String message;
    private T data;

    private static <T> ResponseResult<T> buildResponse(Integer code, String message, T data){
        ResponseResult<T> response = new ResponseResult<>();
        response.setCode(code);
        response.setMessage(message);
        response.setData(data);
        return response;
    }

    public static <T> ResponseResult<T> success(T data){
        return buildResponse(ResponseEnum.SUCCESS.getCode(), ResponseEnum.SUCCESS.getMsg(), data);
    }

    public static <T> ResponseResult<T> success(Integer code, String message, T data){
        return buildResponse(code, message, data);
    }

    public static <T> ResponseResult<T> error(){
        return buildResponse(ResponseEnum.SERVICE_ERROR.getCode(), ResponseEnum.SERVICE_ERROR.getMsg(), null);
    }

    public static <T> ResponseResult<T> error(Integer code, String message, T data){
        return buildResponse(code, message, data);
    }


}
@Getter
@AllArgsConstructor
public enum ResponseEnum {
    /**
     * 响应的枚举类
     */
    SUCCESS(200, "响应成功"),
    SERVICE_ERROR(500, "服务端响应异常");

    private final Integer code;

    private final String msg;
}
统一异常处理
在这里可以通过@ExceptionHandler处理指定的异常
@Slf4j
@RestControllerAdvice(basePackages = "com.zou.metabox")
public class ExceptionControllerAdvice {

    /**
     * 处理验证异常的方法
     */
    @ExceptionHandler(value = MethodArgumentNotValidException.class)
    public ResponseResult<Map<String,String>> handlerValidExecption(MethodArgumentNotValidException e){
        Map<String,String> map = new HashMap<>();
        e.getFieldErrors().forEach(fieldError-> map.put(fieldError.getField(),fieldError.getDefaultMessage()));
        return ResponseResult.error(BusinessCodeEnum.VALID_EXCEPTION.getCode(), BusinessCodeEnum.VALID_EXCEPTION.getMsg(), map);
    }

    /**
     * 系统其他的异常处理
     */
    @ExceptionHandler(Throwable.class)
    public ResponseResult<String> handlerExecption(Throwable throwable){
        log.error("错误信息:",throwable);
        return ResponseResult.error(BusinessCodeEnum.UNKNOW_EXCEPTION.getCode(), BusinessCodeEnum.UNKNOW_EXCEPTION.getMsg(), throwable.getMessage());
    }

	 /**
     * 指定异常去处理,这里处理了自己定义的异常
     */
    @ExceptionHandler(value = MyException.class)
    public ResponseResult<Map<String, String>> handlerMyException(MyException e){
        return ResponseResult.error(BusinessCodeEnum.MYEXCEPTION.getCode(), BusinessCodeEnum.MYEXCEPTION.getMsg(), null);
    }
}

日志
设置日志级别
在application.yml中设置
logging:
  level:
    root: INFO
    com.zou.metabox.mapper: DEBUG
AOP日志
使用aop做日志记录,记录输入的参数名及参数值,并且记录接口响应结果。
package com.zou.metabox.common.aspect;

import lombok.extern.slf4j.Slf4j;
import org.aspectj.lang.JoinPoint;
import org.aspectj.lang.annotation.*;
import org.aspectj.lang.reflect.MethodSignature;
import org.springframework.stereotype.Component;

import java.util.HashMap;
import java.util.Map;
import java.util.stream.IntStream;

/**
 * @author BIGSHU0923
 * @description com.zou.metabox 中Controller层的的日志切面
 * @since 7/30/2023  5:32 PM
 */
@Aspect
@Component
@Slf4j
public class LoggingAspect {
    /**
     * com.zou.metabox.controller 包中公共方法的切入点
     */
    @Pointcut("execution(public * com.zou.metabox.controller.*.*(..))")
    public void loggingPointcut(){
        // 暂不用处理
    }

	/**
	 * 此方法用于在日志中记录请求和返回信息。
	 *
	 * @param pjp ProceedingJoinPoint对象,用于执行目标方法
	 * @return 目标方法的返回结果
	 * @throws Throwable 抛出异常时,将它传递给调用方
	 */
	@Around("loggingPointcut()")
    public Object around(ProceedingJoinPoint pjp) throws Throwable {
        // 获取类名
        String className = pjp.getTarget().getClass().getTypeName();
        // 获取方法名
        String methodName = pjp.getSignature().getName();
        // 获取参数名
        String[] parameterNames = ((MethodSignature) pjp.getSignature()).getParameterNames();

        Object result = null;
        // 获取参数值
        Object[] args = pjp.getArgs();

        // 获取请求
        HttpServletRequest request = ((ServletRequestAttributes) RequestContextHolder.getRequestAttributes()).getRequest();
        // 获取请求的url
        String url = request.getRequestURL().toString();

        // 请求参数,以参数名和值为键值对
        Map<String, Object> paramMap = new HashMap<>();
        IntStream.range(0, parameterNames.length).forEach(i -> paramMap.put(parameterNames[i], args[i]));

        // header参数
        Enumeration<String> headerNames = request.getHeaderNames();
        Map<String, Object> headerMap = new HashMap<>();
        while (headerNames.hasMoreElements()) {
            String headerName = headerNames.nextElement();
            String headerValue = request.getHeader(headerName);
            headerMap.put(headerName, headerValue);
        }

        // 打印请求参数,记录起始时间
        long start = System.currentTimeMillis();
//        log.info("请求| 请求接口:{} | 类名:{} | 方法:{} | header参数:{} | 参数:{} | 请求时间:{}", url, className, methodName, headerMap, paramMap, LocalDateTime.now());
        log.info("请求| 请求接口:{} | 类名:{} | 方法:{} | 参数:{} | 请求时间:{}", url, className, methodName, paramMap, LocalDateTime.now());
        try {
            result = pjp.proceed();
        } catch (Exception e) {
            log.error("返回| 处理时间:{} 毫秒 | 返回结果 :{}", (System.currentTimeMillis() - start), "failed");
            throw e;
        }

        // 获取执行完的时间 打印返回报文
        log.info("返回| 处理时间:{} 毫秒 | 返回结果 :{}", (System.currentTimeMillis() - start), "success");
        return result;
    }
}
接口请求的结果
![]()
Springboot事务
单数据源
配置单数据源
spring:
  datasource:
    url: jdbc:mysql://localhost:3306/xinyan
    port: 3306
    username: root
    password: root
使用事务
代码:
下面这代码会更新,但是传入的id>5时,会抛出个异常,如果没有加事务,则不会回滚。
    public void testRollback(Long id) {
        MyRecord myRecord = new MyRecord();
        myRecord.setId(id);
        myRecord.setRecord("66666");
        myRecordMapper.updateRecord(myRecord);
        if(id > 5){
            int a = 10/0;
        }
    }
使用事务前,使用事务后。
    @Transactional(rollbackFor = Exception.class)
    public void testRollback(Long id) {
        MyRecord myRecord = new MyRecord();
        myRecord.setId(id);
        myRecord.setRecord("66666");
        myRecordMapper.updateRecord(myRecord);
        if(id > 5){
            int a = 10/0;
        }
    }
如果抛异常后,会回滚更改。
多数据源
引入依赖
		<dependency>
			<groupId>com.baomidougroupId>
			<artifactId>dynamic-datasource-spring-boot-starterartifactId>
			<version>3.4.1version>
		dependency>
配置多数据源
spring:
  datasource:
    dynamic:
      primary: master
      strict: true
      lazy: true
      datasource:
        master:
          url: jdbc:mysql://localhost:3306/xinyan
          username: root
          password: root
          driver-class-name: com.mysql.cj.jdbc.Driver
        slave:
          url: jdbc:mysql://localhost:3306/metabox
          username: root
          password: root
          driver-class-name: com.mysql.cj.jdbc.Driver
使用事务
    @DSTransactional
//    @Transactional(rollbackFor = Exception.class)
    @DS("slave")
    public void testRollback2(Integer id){
        Student student = new Student();
        student.setId(id);
        student.setAge(100);
        studentMapper.updateStudent(student);
        if(id == 3){
            int a = 10/0;
        }
    }
多数据源,所以使用@DSTransactional才有用,使用@Transactional(rollbackFor = Exception.class)没用