VIS工作流 - PlantCV
1.基本概念
PlantCV由模块化功能组成,可以快速方便地对其进行排列(或重新排列)和调整。 工作流不需要是线性的(通常不是线性的)。 有关更多详细信息,请参见下面的工作流程示例。 全局变量“调试”允许用户打印出结果图像。 调试具有三种模式:无,“绘图”或“打印”。 如果设置为“打印”,则该功能会将图像打印到文件中;或者,如果使用Jupyter笔记本,则可以将调试设置为“绘制”,以将图像绘制到屏幕上。 调试模式允许用户在将工作流部署到整个数据集之前,对单个测试图像和小型测试集上的每个步骤进行可视化和优化。
工作流
- 通过将调试设置为“打印”(如果使用Jupyter笔记本,则为“绘图”)来优化单个图像上的工作流程。
- 在小型测试集上运行工作流程(理想情况下可以跨越时间和/或治疗)。
手动检查测试集后,重新优化“问题图像”上的工作流程。 - 使用并行化脚本在测试集上部署优化的工作流。
运行工作流程
要在单个VIS图像上运行VIS工作流,需要两个输入:
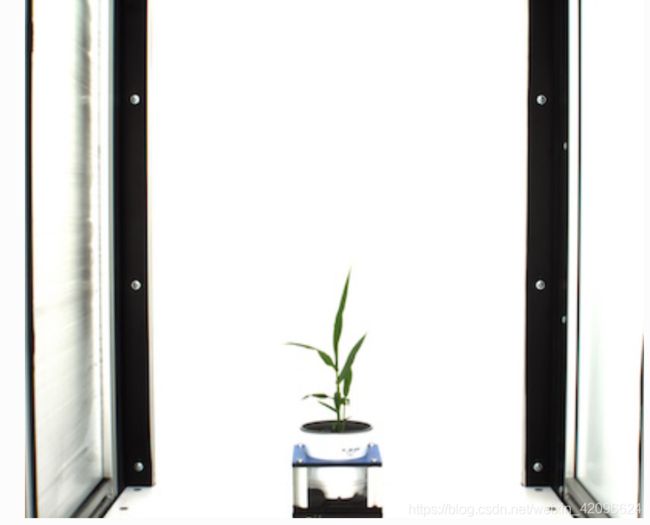
1. 图像:无论使用哪种类型的VIS相机(高通量平台,数码相机,手机相机),都可以处理图像。 如果图像光线充足并且没有与植物材料颜色相似的背景,则可以进行图像处理调整。
2. 输出目录:如果将调试模式设置为“打印”,则将生成每个步骤的输出图像,否则将生成约4个最终输出图像。
可供选择的输入参数有:
结果文件:将结果打印到的文件
写入图像标志:用于写出图像的标志,否则不打印任何结果图像(以节省时间)。
调试标志:在每个步骤打印图像
感兴趣区域:用户可以输入自己的二进制感兴趣区域或图像蒙版(请确保它与您的图像大小相同,否则会出现问题)。
2. VIS工作流案例
- 工作流程从导入必要的程序包和定义用户输入开始。
import os
import argparse
from plantcv import plantcv as pcv
def options():
parser = argparse.ArgumentParser(description=“Imaging processing with opencv”)
parser.add_argument("-i", “–image”, help=“Input image file.”, required=True)
parser.add_argument("-o", “–outdir”, help=“Output directory for image files.”, required=False)
parser.add_argument("-r","–result", help=“result file.”, required= False )
parser.add_argument("-w","–writeimg", help=“write out images.”, default=False, action=“store_true”)
parser.add_argument("-D", “–debug”, help=“can be set to ‘print’ or None (or ‘plot’ if in jupyter) prints intermediate images.”, default=None)
args = parser.parse_args()
return args
- 定义工作流的“主要/可自定义”部分。
def main():
# Get options
args = options()
pcv.params.debug=args.debug #set debug mode
pcv.params.debug_outdir=args.outdir #set output directory# Read image (readimage mode defaults to native but if image is RGBA then specify mode=‘rgb’)
# Inputs:
# filename - Image file to be read in
# mode - Return mode of image; either ‘native’ (default), ‘rgb’, ‘gray’, ‘envi’, or ‘csv’
img, path, filename = pcv.readimage(filename=args.image, mode=‘rgb’)
- 在某些工作流程中(尤其是使用高通量表型系统捕获的工作流程,其中背景是可预测的),我们首先将背景设置为阈值。 在这个特定的工作流程中,我们对背景进行了一些预遮罩。 目的是在不损失任何信息的情况下,尽可能多地去除背景。 为了对图像执行二进制阈值,您需要选择颜色通道H,S,V,L,A,B,R,G,B之一。 在这里,我们将RGB图像转换为HSV色彩空间,然后提取“ s”或饱和度通道,但是可以根据用户需要选择任何通道。 如果某些植物丢失或不可见,则可以合并阈值通道(后续步骤)。
s = pcv.rgb2gray_hsv(rgb_img=img, channel=‘s’)
- 接下来,饱和通道被阈值化。 该阈值可以位于图像中的浅色或深色物体上。
s_thresh = pcv.threshold.binary(gray_img=s, threshold=85, max_value=255, object_type=‘light’)
提示:此步骤通常是一个步骤,需要根据相机系统的照明和配置进行调整。
- 同样,根据照明情况,可以去除更多/更少的背景。 中值模糊可用于消除噪声。
s_mblur = pcv.median_blur(gray_img=s_thresh, ksize=5)
s_cnt = pcv.median_blur(gray_img=s_thresh, ksize=5)
提示:应该尽量少使用填充和中值模糊类型步骤。 根据植物类型(尤其是带有经常弯曲的细叶的草),您可能会失去过于粗糙的植物材料。
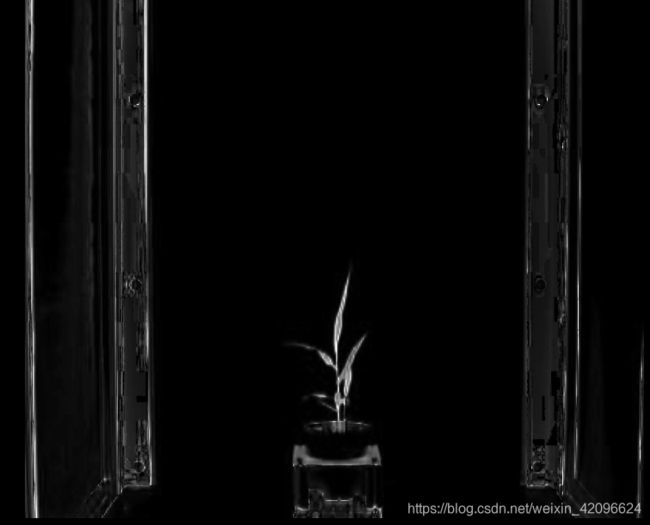
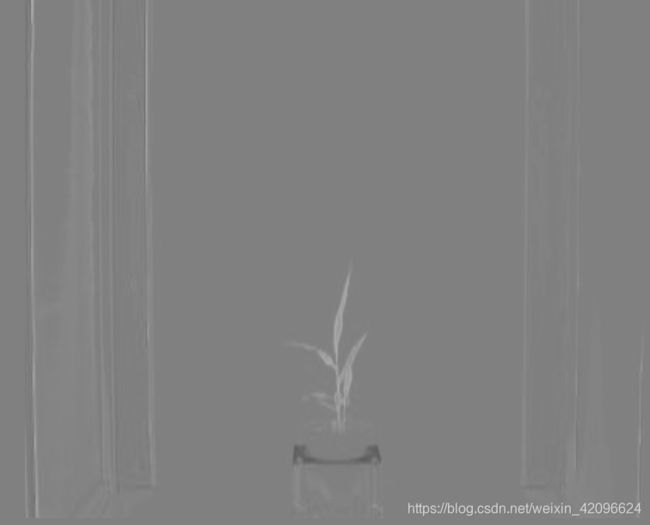
- 这一步是工作流程的分支。 原始图像从RGB图像转换为LAB颜色空间,然后提取蓝黄色通道。 该图像再次被设置为阈值,并且在此工作流程中不需要可选的填充步骤。
b = pcv.rgb2gray_lab(rgb_img=img, channel=‘b’)
#Threshold the blue image
b_thresh = pcv.threshold.binary(gray_img=b, threshold=160, max_value=255,
object_type=‘light’)
b_cnt = pcv.threshold.binary(gray_img=b, threshold=160, max_value=255,
object_type=‘light’)
LAB:L表示亮度、A为红到绿的彩色空间、B为从黄到蓝的彩色空间。
- 将第5步和第6步中的二进制图像与逻辑或函数连接起来。
bs = pcv.logical_or(bin_img1=s_mblur, bin_img2=b_cnt)
- 接下来,在原始图像上应用上一步处理后的二进制图像作为图像蒙版。 该遮罩的目的是通过简单的阈值排除尽可能多的背景而不会遗漏植物材料。
masked = pcv.apply_mask(rgb_img=img, mask=bs, mask_color=‘white’)
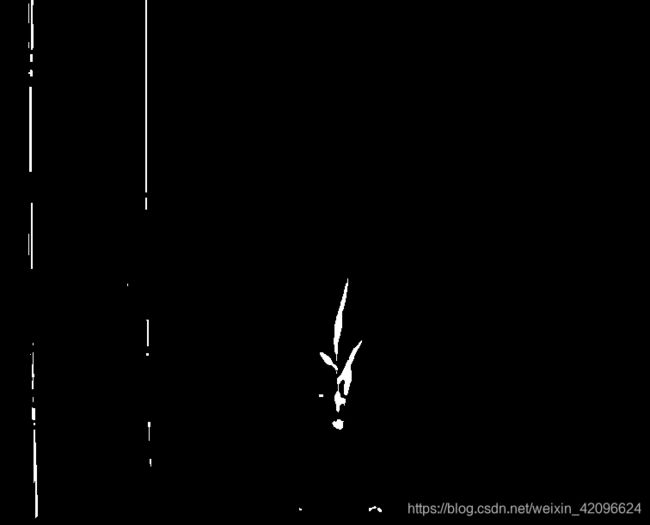
- 现在,我们将重点关注在第9步中蒙版图像中捕获植物。提取蒙版的绿色-品红色和蓝色-黄色通道。 然后将两个通道设置为阈值以捕获植物的不同部分,并将三个图像连接在一起。 小物体被填充。 生成的二进制图像用于掩盖步骤6中的掩盖图像。
#Convert RGB to LAB and extract the Green-Magenta and Blue-Yellow channels
masked_a = pcv.rgb2gray_lab(rgb_img=masked, channel=‘a’)
masked_b = pcv.rgb2gray_lab(rgb_img=masked, channel=‘b’)
#Threshold the green-magenta and blue images
maskeda_thresh = pcv.threshold.binary(gray_img=masked_a, threshold=115,
max_value=255, object_type=‘dark’)
maskeda_thresh1 = pcv.threshold.binary(gray_img=masked_a, threshold=135,
max_value=255, object_type=‘light’)
maskedb_thresh = pcv.threshold.binary(gray_img=masked_b, threshold=128,
max_value=255, object_type=‘light’)
#Join the thresholded saturation and blue-yellow images (OR)
ab1 = pcv.logical_or(bin_img1=maskeda_thresh, bin_img2=maskedb_thresh)
ab = pcv.logical_or(bin_img1=maskeda_thresh1, bin_img2=ab1)
#Fill small objects
#Inputs:
#bin_img - Binary image data
#size - Minimum object area size in pixels (must be an integer), and smaller objects will be filled
ab_fill = pcv.fill(bin_img=ab, size=200)
#Apply mask (for VIS images, mask_color=white)
masked2 = pcv.apply_mask(rgb_img=masked, mask=ab_fill, mask_color=‘white’)
所使用的样本图像具有非常绿色的叶子,但是经常(尤其是在进行压力处理的情况下)有发黄的叶子,发红的叶子或坏死区域。 不同的阈值通道捕获植物的不同区域,然后合并为先前被遮罩的图像的遮罩。


- 现在,我们需要识别图像中的对象(在OpenCV中称为轮廓)。
id_objects, obj_hierarchy = pcv.find_objects(masked2, ab_fill)
在这里,从图10的图像中识别出对象(紫色)。即使对象内的空间也被着色,但是具有不同的层次结构值。
- 接下来定义一个感兴趣的矩形区域(可以动态生成)。
roi1, roi_hierarchy= pcv.roi.rectangle(img=masked2, x=100, y=100, h=200, w=200)
- 定义了感兴趣的区域后,您可以决定使所有内容与感兴趣的区域重叠,或将对象切割为感兴趣的区域的形状。
roi_objects, hierarchy3, kept_mask, obj_area = pcv.roi_objects(img=img, roi_contour=roi1,
roi_hierarchy=roi_hierarchy,
object_contour=id_objects,
obj_hierarchy=obj_hierarchy,
roi_type=‘partial’)
- 现在,隔离的对象都应该是植物材料。 构成植物的对象可能不止一个,因为有时叶子会扭曲,使它们在图像中显示为单独的对象。 因此,为了使形状分析正确执行,需要使用合并对象功能将植物对象合并为一个对象。
obj, mask = pcv.object_composition(img=img, contours=roi_objects, hierarchy=hierarchy3)
- 下一步是分析植物对象的特征,例如水平高度,形状或颜色。
############### Analysis ################
outfile = False
if args.writeimg == True:
outfile = os.path.join(args.outdir, filename)
#Find shape properties, output shape image (optional)
#Inputs:
#img - RGB or grayscale image data
#obj- Single or grouped contour object
#mask - Binary image mask to use as mask for moments analysis
shape_img = pcv.analyze_object(img=img, obj=obj, mask=mask)
#Shape properties relative to user boundary line (optional)
#Inputs:
#img - RGB or grayscale image data
#obj - Single or grouped contour object
#mask - Binary mask of selected contours
#line_position - Position of boundary line (a value of 0 would draw a line
#through the bottom of the image)
boundary_img1 = pcv.analyze_bound_horizontal(img=img, obj=obj, mask=mask,
line_position=1680)
#Determine color properties: Histograms, Color Slices, output color analyzed histogram (optional)
#Inputs:
# rgb_img - RGB image data
# mask - Binary mask of selected contours
# hist_plot_type - None (default), ‘all’, ‘rgb’, ‘lab’, or ‘hsv’
# This is the data to be printed to the SVG histogram file
color_histogram = pcv.analyze_color(rgb_img=img, mask=mask, hist_plot_type=‘all’)
#Pseudocolor the grayscale image
#Inputs:
# gray_img - Grayscale image data
# obj - Single or grouped contour object (optional), if provided the pseudocolored image gets
# cropped down to the region of interest.
# mask - Binary mask (optional)
# background - Background color/type. Options are “image” (gray_img, default), “white”, or “black”. A mask
# must be supplied.
# cmap - Colormap
# min_value - Minimum value for range of interest
# max_value - Maximum value for range of interest
# dpi - Dots per inch for image if printed out (optional, if dpi=None then the default is set to 100 dpi).
# axes - If False then the title, x-axis, and y-axis won’t be displayed (default axes=True).
# colorbar - If False then the colorbar won’t be displayed (default colorbar=True)
pseudocolored_img = pcv.visualize.pseudocolor(gray_img=s, mask=mask, cmap=‘jet’)
# Write shape and color data to results file
pcv.print_results(filename=args.result)
if name == ‘main’:
main()
3. python参考代码
import os
import argparse
from plantcv import plantcv as pcv

def options():
    parser = argparse.ArgumentParser(description="Imaging processing with opencv")
    parser.add_argument("-i", "--image", help="Input image file.", required=True)
    parser.add_argument("-o", "--outdir", help="Output directory for image files.", required=False)
    parser.add_argument("-r", "--result", help="result file.", required=False)
    parser.add_argument("-w", "--writeimg", help="write out images.", default=False, action="store_true")
    parser.add_argument("-D", "--debug",
                        help="can be set to 'print' or None (or 'plot' if in jupyter) prints intermediate images.",
                        default=None)
    args = parser.parse_args()
    return args


#### Start of the Main/Customizable portion of the workflow.

### Main workflow
def main():
    # Get options
    args = options()

    pcv.params.debug=args.debug #设置debug模式
    pcv.params.debug_outdir=args.outdir #set output directory

    # Read image (readimage mode defaults to native but if image is RGBA then specify mode='rgb')
    # Inputs:
    #   filename - Image file to be read in
    #   mode - Return mode of image; either 'native' (default), 'rgb', 'gray', 'envi', or 'csv'
    img, path, filename = pcv.readimage(filename=args.image, mode='rgb')


    # Convert RGB to HSV and extract the saturation channel


    # Inputs:
    #   rgb_image - RGB image data
    #   channel - Split by 'h' (hue), 's' (saturation), or 'v' (value) channel
    s = pcv.rgb2gray_hsv(rgb_img=img, channel='s')

    # Threshold the saturation image

    # Inputs:
    #   gray_img - Grayscale image data
    #   threshold- Threshold value (between 0-255)
    #   max_value - Value to apply above threshold (255 = white)
    #   object_type - 'light' (default) or 'dark'. If the object is lighter than the
    #                 background then standard threshold is done. If the object is
    #                 darker than the background then inverse thresholding is done.
    s_thresh = pcv.threshold.binary(gray_img=s, threshold=85, max_value=255, object_type='light')

 # Median Blur
    # Inputs:
    #   gray_img - Grayscale image data
    #   ksize - Kernel size (integer or tuple), (ksize, ksize) box if integer input,
    #           (n, m) box if tuple input
    s_mblur = pcv.median_blur(gray_img=s_thresh, ksize=5)

    s_cnt = pcv.median_blur(gray_img=s_thresh, ksize=5)

    # Convert RGB to LAB and extract the Blue channel

    # Input:
    #   rgb_img - RGB image data
    #   channel- Split by 'l' (lightness), 'a' (green-magenta), or 'b' (blue-yellow) channel
    b = pcv.rgb2gray_lab(rgb_img=img, channel='b')

    # Threshold the blue image
    b_thresh = pcv.threshold.binary(gray_img=b, threshold=160, max_value=255,
                                    object_type='light')

    b_cnt = pcv.threshold.binary(gray_img=b, threshold=160, max_value=255,
                                 object_type='light')

    # Fill small objects (optional)
    # b_fill = pcv.fill(b_thresh, 10)

    # Join the thresholded saturation and blue-yellow images

    # Inputs:
    #   bin_img1 - Binary image data to be compared to bin_img2
    #   bin_img2 - Binary image data to be compared to bin_img1
    bs = pcv.logical_or(bin_img1=s_mblur, bin_img2=b_cnt)

    # Apply Mask (for VIS images, mask_color=white)

    # Inputs:
    #   rgb_img - RGB image data
    #   mask - Binary mask image data
    #   mask_color - 'white' or 'black'
    masked = pcv.apply_mask(img=img, mask=bs, mask_color='white')

    # Convert RGB to LAB and extract the Green-Magenta and Blue-Yellow channels
    masked_a = pcv.rgb2gray_lab(rgb_img=masked, channel='a')

    masked_b = pcv.rgb2gray_lab(rgb_img=masked, channel='b')

    # Threshold the green-magenta and blue images
    maskeda_thresh = pcv.threshold.binary(gray_img=masked_a, threshold=115,
                                          max_value=255, object_type='dark')

    maskeda_thresh1 = pcv.threshold.binary(gray_img=masked_a, threshold=135,
                                           max_value=255, object_type='light')

    maskedb_thresh = pcv.threshold.binary(gray_img=masked_b, threshold=128,
                                          max_value=255, object_type='light')

    # Join the thresholded saturation and blue-yellow images (OR)
    ab1 = pcv.logical_or(bin_img1=maskeda_thresh, bin_img2=maskedb_thresh)

    ab = pcv.logical_or(bin_img1=maskeda_thresh1, bin_img2=ab1)

    # Fill small objects
    # Inputs:
    #   bin_img - Binary image data
    #   size - Minimum object area size in pixels (must be an integer), and smaller objects will be filled
    ab_fill = pcv.fill(bin_img=ab, size=200)

    # Apply mask (for VIS images, mask_color=white)
    masked2 = pcv.apply_mask(img=masked, mask=ab_fill, mask_color='white')

    # Identify objects
    id_objects, obj_hierarchy = pcv.find_objects(masked2, ab_fill)

    # Define ROI

    # Inputs:
    #   img - RGB or grayscale image to plot the ROI on
    #   x - The x-coordinate of the upper left corner of the rectangle
    #   y - The y-coordinate of the upper left corner of the rectangle
    #   h - The height of the rectangle
    #   w - The width of the rectangle
    roi1, roi_hierarchy = pcv.roi.rectangle(img=masked2, x=100, y=100, h=200, w=200)

    # Decide which objects to keep
    # Inputs:
    #    img            = img to display kept objects
    #    roi_contour    = contour of roi, output from any ROI function
    #    roi_hierarchy  = contour of roi, output from any ROI function
    #    object_contour = contours of objects, output from pcv.find_objects function
    #    obj_hierarchy  = hierarchy of objects, output from pcv.find_objects function
    #    roi_type       = 'partial' (default, for partially inside), 'cutto', or
    #    'largest' (keep only largest contour)
    roi_objects, hierarchy3, kept_mask, obj_area = pcv.roi_objects(img=img, roi_contour=roi1,
                                                                   roi_hierarchy=roi_hierarchy,
                                                                   object_contour=id_objects,
                                                                   obj_hierarchy=obj_hierarchy,
                                                                   roi_type='partial')
    pcv.print_image(hierarchy3, 'image/test1.png')


    # Inputs:
    #   img - RGB or grayscale image data for plotting
    #   contours - Contour list
    #   hierarchy - Contour hierarchy array
    obj, mask = pcv.object_composition(img=img, contours=roi_objects, hierarchy=hierarchy3)

    ############### Analysis ################

    outfile = False
    if args.writeimg == True:
        outfile = os.path.join(args.outdir, filename)

    # Find shape properties, output shape image (optional)

    # Inputs:
    #   img - RGB or grayscale image data
    #   obj- Single or grouped contour object
    #   mask - Binary image mask to use as mask for moments analysis
    shape_img = pcv.analyze_object(img=img, obj=obj, mask=mask)

    # Shape properties relative to user boundary line (optional)

    # Inputs:
    #   img - RGB or grayscale image data
    #   obj - Single or grouped contour object
    #   mask - Binary mask of selected contours
    #   line_position - Position of boundary line (a value of 0 would draw a line
    #                   through the bottom of the image)
    boundary_img1 = pcv.analyze_bound_horizontal(img=img, obj=obj, mask=mask,
                                                 line_position=1680)

    # Determine color properties: Histograms, Color Slices, output color analyzed histogram (optional)

    # Inputs:
    #   rgb_img - RGB image data
    #   mask - Binary mask of selected contours
    #   hist_plot_type - None (default), 'all', 'rgb', 'lab', or 'hsv'
    #                    This is the data to be printed to the SVG histogram file
    color_histogram = pcv.analyze_color(rgb_img=img, mask=mask, hist_plot_type='all')

    # Pseudocolor the grayscale image

    # Inputs:
    #     gray_img - Grayscale image data
    #     obj - Single or grouped contour object (optional), if provided the pseudocolored image gets
    #           cropped down to the region of interest.
    #     mask - Binary mask (optional)
    #     background - Background color/type. Options are "image" (gray_img, default), "white", or "black". A mask
    #                  must be supplied.
    #     cmap - Colormap
    #     min_value - Minimum value for range of interest
    #     max_value - Maximum value for range of interest
    #     dpi - Dots per inch for image if printed out (optional, if dpi=None then the default is set to 100 dpi).
    #     axes - If False then the title, x-axis, and y-axis won't be displayed (default axes=True).
    #     colorbar - If False then the colorbar won't be displayed (default colorbar=True)
    pseudocolored_img = pcv.visualize.pseudocolor(gray_img=s, mask=mask, cmap='jet')

    # Write shape and color data to results file
    pcv.print_results(filename=args.result)


if __name__ == '__main__':
    main()
注意:执行之前要设置好参数:
-i ./image/test.png -o .image/output-images -r results.txt -w -D 'print’
翻译自https://plantcv.readthedocs.io/en/stable/vis_tutorial/


