云原生 | K8S集群helm部署apisix3.1
一.安装helm,添加apisix 仓库
1.当前环境是内网,内网环境手动下载安装
下载地址:https://github.com/kubernetes/helm/releases
tar -zxvf helm-v3.10.2-linux-amd64.tar.gz
mv linux-amd64/helm /usr/local/bin/helm
2.执行helm version命令验证:
目前只能查看到客户端的版本,服务器还没有安装
[root@k8s-master-1 ~]# helm version
version.BuildInfo{Version:"v3.10.2", GitCommit:"50f003e5ee8704ec937a756c646870227d7c8b58", GitTreeState:"clean", GoVersion:"go1.18.8"}
3.添加apisix 仓库
[root@k8s-master-1 kubernetes]#helm repo add apisix https://charts.apiseven.com
[root@k8s-master-1 kubernetes]# helm repo list
NAME      URL
apisix    https://charts.apiseven.com
[root@k8s-master-1 kubernetes]# helm search repo apisix
NAME                                CHART VERSION    APP VERSION    DESCRIPTION
apisix/apisix                       1.1.1            3.1.1          A Helm chart for Apache APISIX v3
apisix/apisix-dashboard             0.8.0            3.0.0          A Helm chart for Apache APISIX Dashboard
apisix/apisix-ingress-controller    0.11.3           1.6.0          Apache APISIX Ingress Controller for Kubernetes
二.创建apisix所需namespces
[root@k8s-master-1 kubernetes]# kubectl create ns monitoring
namespace/monitoring created
[root@k8s-master-1 kubernetes]# kubectl create ns ingress-apisix
namespace/ingress-apisix created
三.安装apisix
1.安装apisix,dashboard,controller,直接执行以下命令
helm install apisix apisix/apisix --set gateway.type=LoadBalancer --set ingress-controller.enabled=true --namespace ingress-apisix --set dashboard.enabled=true --set ingress-controller.config.apisix.serviceNamespace=ingress-apisix --set ingress-controller.config.kubernetes.apisixRouteVersion="apisix.apache.org/v2beta3" --set apisix.timezone=Asia/Shanghai --set apisix.serviceMonitor.enabled=true --set apisix.serviceMonitor.namespace=monitoring2.安装完成后,依次执行以下命令
export SERVICE_IP=$(kubectl get svc --namespace ingress-apisix apisix-gateway --template "{{ range (index .status.loadBalancer.ingress 0) }}{{.}}{{ end }}")echo http://$SERVICE_IP:803.查看部署ingress-apisix相关资源
a.查看ns
[root@k8s-master-1 kubernetes]# kubectl get ns
NAME                              STATUS   AGE
ingress-apisix                    Active   94s
monitoring                        Active   107s
b.查看pvc是否已绑定
[root@k8s-master-1 kubernetes]# kubectl get pvc -n ingress-apisix
NAME                 STATUS   VOLUME                                     CAPACITY   ACCESS MODES   STORAGECLASS   AGE
data-apisix-etcd-0   Bound    pvc-6372690f-23ac-48d3-965a-b1eb98c40a0d   8Gi        RWO            nfs-storage    71s
data-apisix-etcd-1   Bound    pvc-173bd000-f46f-46dd-8b7b-05e9e48ecef8   8Gi        RWO            nfs-storage    71s
data-apisix-etcd-2   Bound    pvc-19294e17-b334-4504-8c81-2b2781ccb5a2   8Gi        RWO            nfs-storage    71s
c.查看apisix的pod是否启动
[root@k8s-master-1 kubernetes]# kubectl get pod -n ingress-apisix
NAME                                         READY   STATUS    RESTARTS   AGE
apisix-597d87c7df-q7rjq                      1/1     Running   0          2m32s
apisix-dashboard-5ddf5698df-wb8ww            1/1     Running   3          2m32s
apisix-etcd-0                                1/1     Running   0          2m32s
apisix-etcd-1                                1/1     Running   0          2m32s
apisix-etcd-2                                1/1     Running   0          2m32s
apisix-ingress-controller-65bd744948-v2krz   1/1     Running   0          2m32s
d.查看svc
[root@k8s-master-1 kubernetes]# kubectl get svc -n ingress-apisix
NAME                        TYPE           CLUSTER-IP      EXTERNAL-IP   PORT(S)             AGE
apisix-admin                ClusterIP      10.98.90.35             9180/TCP            2m37s
apisix-dashboard            ClusterIP      10.99.84.250            80/TCP              2m38s
apisix-etcd                 ClusterIP      10.110.154.14           2379/TCP,2380/TCP   2m37s
apisix-etcd-headless        ClusterIP      None                    2379/TCP,2380/TCP   2m38s
apisix-gateway              LoadBalancer   10.105.24.159        80:31885/TCP        2m38s
apisix-ingress-controller   ClusterIP      10.100.218.33           80/TCP              2m37s
e.修改apisix-dashboard端口号为:32150和apisix-gateway端口号为:30022
[root@k8s-master-1 kubernetes]# kubectl patch svc apisix-dashboard -p '{"spec":{"type":"NodePort"}}' -n  ingress-apisix
service/apisix-dashboard patched

[root@k8s-master-1 kubernetes]# kubectl edit svc  apisix-dashboard -n ingress-apisix
service/apisix-dashboard edited
[root@k8s-master-1 kubernetes]# kubectl edit svc  apisix-gateway  -n ingress-apisix
service/apisix-gateway edited
四.修改apisix的configmap
开启public-api 插件
开启jwt-auth认证(任意pod 中执行)
安装nginx,查看是否启动
[root@k8s-master-1 kubernetes]# kubectl get pod
NAME                                      READY   STATUS    RESTARTS   AGE
nfs-client-provisioner-688fcbdd54-lpxkw   1/1     Running   90         16h
nginx-6799fc88d8-kfx7t                    1/1     Running   0          4m15s

开启public-api 插件
kubectl edit cm/apisix -n ingress-apisix  添加”- public-api” 如下并重启apisix
- proxy-rewrite
- public-api

开启jwt-auth认证(任意pod 中执行)
   curl -X PUT 'http://apisix-admin.ingress-apisix:9180/apisix/admin/routes/get-jwt-sign-route' \
    -H 'X-API-KEY: edd1c9f034335f136f87ad84b625c8f1' \
    -H 'Content-Type: application/json' \
    -d '{
    "uri": "/get-jwt-sign",
    "plugins": {
        "public-api": {
            "uri": "/apisix/plugin/jwt/sign"
        },
        "key-auth": {}
    }
}'
五.修改访问设置
[root@openresty ~]# cd /usr/local/nginx/conf/vhost
[root@openresty ~]# vim gw-newmmptes443.conf
upstream #访问域名 {

server #nodeip:端口号;
#check interval=3000 rise=2 fall=5 timeout=1000 type=http;
#check_http_send "HEAD / HTTP/1.0\r\n\r\n";
#check_http_expect_alive http_2xx http_3xx;
#session_sticky;

keepalive 6000;

    }

server
{
    listen #端口号;
    server_name #访问域名;

    rewrite ^(.*) https://$server_name$ request_uri permanent;

}


server {

    listen 443 ssl;
    server_name  #访问域名;
    access_log        /usr/local/openresty/nginx/logs/gw-mmptest.access.log;
    root html;
    index index.html index.htm;
    ssl_certificate      /root/ssl/myj/214828708690016.pem;
    ssl_certificate_key  /root/ssl/myj/214828708690016.key;
    ssl_session_cache shared:SSL:20m;
    ssl_session_timeout 10m;
    ssl_protocols TLSv1 TLSv1.1 TLSv1.2 SSLv3;
    ssl_prefer_server_ciphers on;
#   ssl_ciphers 'ECDH+AESGCM:ECDH+AES256:ECDH+AES128:DH+3DES:!ADH:!AECDH:!MD5';
#    ssl_ciphers ECDHE-RSA-AES128-GCM-SHA256:ECDHE:ECDH:AES:HIGH:!NULL:!aNULL:!MD5:!ADH:!RC4;
#    ssl_ciphers "EECDH+AESGCM:EDH+AESGCM:ECDHE-RSA-AES128-GCM-SHA256:AES256+EECDH:DHE-RSA-AES128-GCM-SHA256:AES256+EDH:ECDHE-RSA-AES256-GCM-SHA384:DHE-RSA-AES256-GCM-SHA384:ECDHE-RSA-AES256-SHA384:ECDHE-RSA-AES128-SHA256:ECDHE-RSA-AES256-SHA:ECDHE-RSA-AES128-SHA:DHE-RSA-AES256-SHA256:DHE-RSA-AES128-SHA256:DHE-RSA-AES256-SHA:DHE-RSA-AES128-SHA:ECDHE-RSA-DES-CBC3-SHA:EDH-RSA-DES-CBC3-SHA:AES256-GCM-SHA384:AES128-GCM-SHA256:AES256-SHA256:AES128-SHA256:AES256-SHA:AES128-SHA:DES-CBC3-SHA:HIGH:!aNULL:!eNULL:!EXPORT:!DES:!MD5:!PSK:!RC4";
   ssl_ciphers  "ECDHE-ECDSA-CHACHA20-POLY1305:ECDHE-RSA-CHACHA20-POLY1305:ECDHE-ECDSA-AES128-GCM-SHA256:ECDHE-RSA-AES128-GCM-SHA256:ECDHE-ECDSA-AES256-GCM-SHA384:ECDHE-RSA-AES256-GCM-SHA384:!DHE-RSA-AES128-GCM-SHA256:!DHE-RSA-AES256-GCM-SHA384:ECDHE-ECDSA-AES128-SHA256:ECDHE-RSA-AES128-SHA256:ECDHE-ECDSA-AES128-SHA:ECDHE-RSA-AES256-SHA384:ECDHE-RSA-AES128-SHA:ECDHE-ECDSA-AES256-SHA384:ECDHE-ECDSA-AES256-SHA:ECDHE-RSA-AES256-SHA:!DHE-RSA-AES128-SHA256:!DHE-RSA-AES128-SHA:!DHE-RSA-AES256-SHA256:!DHE-RSA-AES256-SHA:ECDHE-ECDSA-DES-CBC3-SHA:ECDHE-RSA-DES-CBC3-SHA:!EDH-RSA-DES-CBC3-SHA:AES128-GCM-SHA256:AES256-GCM-SHA384:AES128-SHA256:AES256-SHA256:AES128-SHA:AES256-SHA:DES-CBC3-SHA:!DSS";

 location / {
   root html;
   index  index.html index.htm;
   proxy_set_header Host $host;
   proxy_set_header X-Real-IP $remote_addr;
   proxy_set_header X-Forwarded-For $proxy_add_x_forwarded_for;
   proxy_pass http://#访问域名;

   proxy_connect_timeout 6000s;
   proxy_send_timeout 6000s;
   proxy_read_timeout 6000s;
   proxy_buffer_size 64k;
   proxy_buffers   4 64k;
   proxy_busy_buffers_size 128k;
   proxy_temp_file_write_size 128k;


   proxy_http_version 1.1;
   proxy_set_header Connection "";

   }


   error_page  404   /50x.html;
   error_page   500 502 503 504  /50x.html;
   location = /50x.html {
      root   html;
 }
 }
1.重启服务
[root@openresty vhost]# nginx -s reload 2.查看端口号
[root@openresty vhost]# netstat -tnlp六.dashboard 默认 账号和密码是 admin admin
访问方式
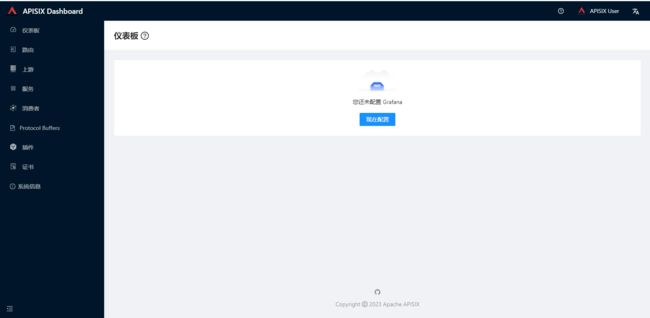
http://ip:32150
七.添加测试路由进行测试
1.生成默认路由配置文件
vim apisix-default-route.yamlkind: ApisixRoute
metadata:
name: default-route
namespace: default
spec:
http:
- backends:
- serviceName: httpbin
servicePort: 80
match:
hosts:
- #解析到外网的域名
paths:
- /httpbin*
- /spec.json
name: httpbin-route
plugins:
- config:
regex_uri:
- ^/httpbin(/|$)(.*)
- /$2
enable: true
name: proxy-rewrite
2.生成测试pod
httpbin.yamlapiVersion: apps/v1
kind: Deployment
metadata:
annotations:
labels:
app: httpbin
name: httpbin
namespace: default
spec:
replicas: 1
selector:
matchLabels:
app: httpbin
template:
metadata:
labels:
app: httpbin
spec:
containers:
- image: kennethreitz/httpbin
imagePullPolicy: Always
name: httpbin
dnsPolicy: ClusterFirst
restartPolicy: Always
---
apiVersion: v1
kind: Service
metadata:
labels:
app: httpbin
name: httpbin
namespace: default
spec:
ports:
- port: 80
protocol: TCP
targetPort: 80
selector:
app: httpbin
sessionAffinity: None
type: ClusterIP3.执行apisix-default-route.yaml和httpbin.yaml
[root@k8s-master-1 apisix-httpbin]# kubectl apply -f apisix-default-route.yaml
Warning: apisix.apache.org/v2beta3 ApisixRoute is deprecated; use apisix.apache.org/v2 ApisixRoute
apisixroute.apisix.apache.org/default-route created
[root@k8s-master-1 apisix-httpbin]# kubectl apply -f httpbin.yaml
deployment.apps/httpbin created
service/httpbin created
4.查看pod是否启动
[root@k8s-master-1 apisix-httpbin]# kubectl get pod
NAME                                      READY   STATUS    RESTARTS   AGE
httpbin-849ccf48fc-rhppx                  1/1     Running   0          77s
nfs-client-provisioner-688fcbdd54-lpxkw   1/1     Running   346        2d16h
nginx-6799fc88d8-kfx7t                    1/1     Running   0          47h
5.查看路由相关信息
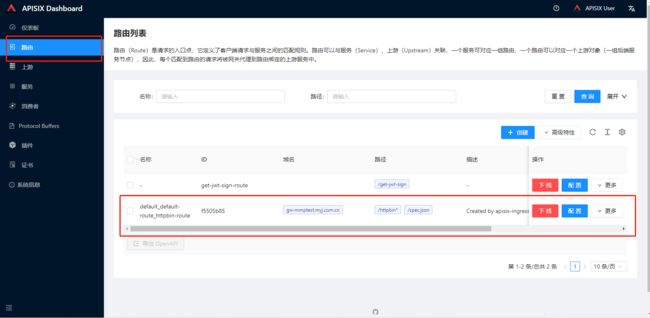
[root@k8s-master-1 apisix-httpbin]# kubectl  get ar
NAME            HOSTS                       URIS                         AGE
default-route   ["gw-mmptest.myj.com.cn"]   ["/httpbin*","/spec.json"]   104s


