【不使用vue-cli脚手架 搭建Vue2.0项目环境】
一、初始化
npm init -y
二、安装依赖
2.1生产环境依赖
npm install vue vue-router -S
2.2开发环境依赖
npm install babel-loader babel-core vue-loader node-sass sass-loader css-loader style-loader webpack webpack-cli webpack-dev-server html-webpack-plugin vue-template-compiler -D
一些依赖的作用:
babel-core的作用是把 js 代码分析成 ast ,方便各个插件分析语法进行相应的处理。有些新语法在低版本 js 中是不存在的,如箭头函数,rest 参数,函数默认值等,这种语言层面的不兼容只能通过将代码转为 ast,分析其语法后再转为低版本 js。首先安装 babel-core。
babel-loader作用:使用babel-loader处理js文件,会将es5以上的语法进行转义(无法转义es6 API) babel-loader必须和babel-core结合使用,babel-core封装了babel-loader需要用到的api
css-loader是帮助webpack打包处理css文件的工具
html-webpack-plugin
- 为html文件中引入的外部资源如
script、link动态添加每次compile后的hash,防止引用缓存的外部文件问题- 可以生成创建html入口文件,比如单页面可以生成一个html文件入口,配置N个
html-webpack-plugin可以生成N个页面入口
node-sass允许用户以令人难以置信的速度将.scss文件本地编译为css,并通过连接中间件自动编译。Sass是一种预处理器脚本语言,可以解释或编译成层叠样式表(CSS)
sass-loader就是为了转换和编译scss文件 node-sass是核心插件
style-loader是将css-loader打包好的css代码以六、在根目录创建并配置webpack.config.js文件
//webpack 是一个用于现代 JavaScript应用程序的静态模块打包工具。当 webpack处理应用程序时,
//它会在内部构建一个依赖图(dependency graph),此依赖图对应映射到项目所需的每个模块,并生成一个或多个 bundle。
// loader 用于转换某些类型的模块,而插件则可以用于执行范围更广的任务。包括:打包优化,资源管理,注入环境变量。
//想要使用一个插件,你只需要 require() 它,然后把它添加到 plugins 数组中。
//多数插件可以通过选项(option)自定义。你也可以在一个配置文件中因为不同目的而多次使用同一个插件,这时需要通过使用 new 操作符来创建一个插件实例。
const path = require('path')
const webpack = require('webpack')
const HtmlWebpackPlugin = require('html-webpack-plugin')
const { VueLoaderPlugin } = require('vue-loader')
const config = {
  //入口文件 入口起点(entry point)指示webpack应该使用哪个模块,来作为构建其内部 依赖图(dependency graph) 的开始。
  //进入入口起点后,webpack 会找出有哪些模块和库是入口起点(直接和间接)依赖的。
  entry: path.join(__dirname, 'src/main.js'),
  //输出文件 output 属性告诉 webpack 在哪里输出它所创建的 bundle,以及如何命名这些文件。
  output: {
    filename: 'bundle.js',//filename: 配置输出文件名,可添加路径配置(例子中js/)
    path: path.join(__dirname, 'dist')//path: 文件的输出路径,必须是绝对地址
  },
  //通过选择 development(生产模式), production(开发模式)或 none 之中的一个,来设置 mode 参数,你可以启用 webpack 内置在相应环境下的优化。
  //其默认值为 production。
  mode: 'development', // 设置mode,
  module: {
    rules: [
      {
        test: /\.vue$/,//test 属性,识别出哪些文件会被转换。
        use: 'vue-loader',// use 属性,定义出在进行转换时,应该使用哪个 loader。
      },
      {
        test: /\.css$/,
        use: ['style-loader', 'css-loader']
      },
      {
        test: /\.scss$/,
        use: ['style-loader', 'css-loader', 'sass-loader']
      },
    ]
  },
  plugins: [
    new VueLoaderPlugin(),
    //生成html页面并导入bundle.js,如果配置了filename则以项目中filename指定的html为模版
    new HtmlWebpackPlugin({
      filename: 'index.html',
      template: 'index.html',
      inject: true,
    })
  ]
}
module.exports = config
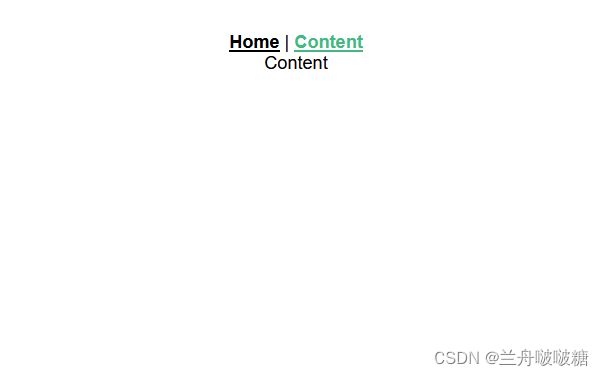
最后npm run dev 页面效果为
-----------------------------------------分割线-------------------------------------------------
接下来是添加vuex axios element-ui等
七、vuex
7.1安装vuex
npm install vuex7.2使用vuex
在main.js中注入vuex
import Vuex from 'vuex'
import store from "./store";

new Vue({
  el: '#app',
  router,
  store,
  render: h => h(App)
})
一个完整的项目示例
(转载于:https://blog.csdn.net/Ed7zgeE9X/article/details/112165249)
index.html
<html>
  <head>
    <meta charset="utf-8" />
    <meta http-equiv="X-UA-Compatible" content="IE=edge,chrome=1" />
    <meta name="viewport"
    content="width=device-width, initial-scale=1.0, maximum-scale=1.0">
    <title>Vuex Example - Jump Start Vue.jstitle>
    <link rel="stylesheet" type="text/css"
    href="https://cdnjs.cloudflare.com/ajax/libs/semantic-ui/2.3.1/semantic.min.css">
    <style type="text/css">
      body {
        background-color: #FFFFFF;
      }
      .ui.menu .item img.logo {
        margin-right: 1.5em;
      }
      .main.container {
        margin-top: 7em;
      }
    style>
  head>
  <body>
    <div id="app">div>
  body>
html>
App.vue
src/store/index.js
import Vue from "vue";
import Vuex from "vuex";
import axios from "axios";
Vue.use(Vuex);
export default new Vuex.Store({
  state: {
    users: [],
    selectedUserId: null,
    isFetching: false
  },
  mutations: {
    setUsers(state, { users }) {
      state.users = users;
    },
    setSelectedUser(state, id) {
      state.selectedUserId = id;
    },
    setIsFetching(state, bool) {
      state.isFetching = bool;
    }
  },
  getters: {
    selectedUser: state =>
      state.users.find(user => user.login.uuid === state.selectedUserId)
  },
  actions: {
    fetchUsers({ commit }) {
      commit("setIsFetching", true);
      return axios
        .get("https://randomuser.me/api/?nat=gb,us,au&results=5&seed=abc")
        .then(res => {
          setTimeout(() => {
            commit("setIsFetching", false);
            commit("setUsers", { users: res.data.results });
          }, 2500);
        })
        .catch(error => {
          commit("setIsFetching", false);
          console.error(error);
        });
    }
  }
});
src/views/Home.vue
<template>
  <div class="ui main text container">
    <h1 class="ui header">Vuex 数据管理</h1>
    <p>This is a basic Vuex example app, to demo the concepts learned in the
    ➥accompanying chapter.</p>
    <p>Go to <router-link to="/about">About</router-link></p>
  </div>
</template>
<script>
export default {
  name: "home"
}
</script>
src/views/About.vue
<template>
  <div class="ui main text container">
    <h1 class="ui header">About</h1>
    <div class="ui active inverted dimmer" v-if="isFetching">
      <div class="ui text loader">Loading</div>
    </div>
    <ul v-else>
      <li v-for="(user, index) in users" :key="index">
        <router-link :to="{ name: 'about', params: { id: user.login.uuid }}">
          {{ user.name.title }} {{ user.name.first }} {{ user.name.last }}
        </router-link>
      </li>
    </ul>
  </div>
</template>
<script>
import { mapState } from "vuex";
export default {
  name: "About",
  computed: {
    ...mapState([
      'isFetching',
      'users'
    ])
  }
}
</script>
<style>
  li {
    text-transform: capitalize;
  }
</style>
src/views/demo.vue
<template>
  <div class="ui main text container" v-if="selectedUser">
    <div class="ui items">
      <div class="item">
        <div class="image">
          <img :src="selectedUser.picture.large">
        </div>
        <div class="content">
          <a class="header">{{ fullName }}</a>
          <div class="meta">
            <span>{{ selectedUser.email }}</span>
          </div>
          <div class="description">
            <p>{{ selectedUser.location.street }}, {{ selectedUser.location.city }},
            {{ selectedUser.location.state }}, {{ selectedUser.location.postcode }}
            </p>
          </div>
          <div class="extra">
            {{ selectedUser.phone }}<br />
            {{ selectedUser.cell }}
          </div>
        </div>
      </div>
    </div>
  </div>
</template>
<script>
import { mapGetters, mapMutations } from "vuex";
export default {
  name: "Users",
  computed: {
    ...mapGetters(["selectedUser"]),
    fullName() {
      return `${this.selectedUser.name.first} ${this.selectedUser.name.last}`;
    }
  },
  methods: {
    ...mapMutations(["setSelectedUser"])
  },
  created() {
    const userId = this.$route.params.id;
    this.setSelectedUser(userId);
  }
};
</script>
<style scoped>
  a.header, p {
    text-transform: capitalize;
  }
</style>
src/router/index.js
import Vue from "vue";
import Router from "vue-router";
import Home from "./views/Home.vue";
import About from "./views/About.vue";
import Demo from "./views/Demo.vue";
Vue.use(Router);
export default new Router({
  mode: "history",
  linkActiveClass: "active",
  routes: [
    {
      path: "/",
      name: "home",
      component: Home
    },
    {
      name: "about",
      path: "/about",
      component: About
    },
    {
      name: "demo",
      path: "/about/:id",
      component: Demo
    }
  ]
});
八、axios
8.1安装axios
npm install axios -S在main.js 中引入
import axios from 'axios'九、引入element-ui
9.1全局引入
npm install element-ui -S在main.js中写入
import Vue from 'vue';
import ElementUI from 'element-ui';
import 'element-ui/lib/theme-chalk/index.css';
import App from './App.vue';

Vue.use(ElementUI);

new Vue({
  el: '#app',
  render: h => h(App)
});
9.2按需引入
npm install element-ui -S
npm install babel-plugin-component -D
在根目录中创建文件.babelrc
{
  "presets": [["es2015", { "modules": false }]],
  "plugins": [
    [
      "component",
      {
        "libraryName": "element-ui",
        "styleLibraryName": "theme-chalk"
      }
    ]
  ]
}
在main.js中引入
import Vue from 'vue';
import 'element-ui/lib/theme-chalk/index.css'
import { Button, Card } from 'element-ui'
import App from './App.vue';

Vue.use(Button)
Vue.use(Card)


new Vue({
  el: '#app',
  render: h => h(App)
});


 Jump Start Vue.js