Myeclipse下搭建Spring Boot+Mybatis
1.进入命令行,切换到目标文件夹下,注意:此步不用创建项目的文件夹。
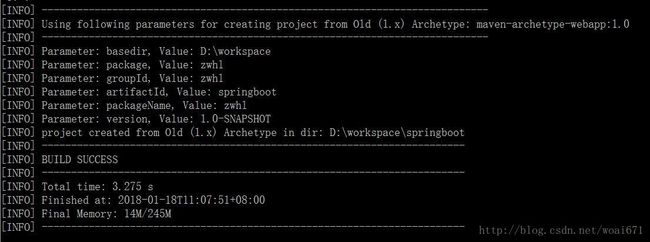
2. 在命令行输入:mvn archetype:generate -DgroupId=公司名或公司域名 -DartifactId=项目名称 -DarchetypeArtifactId=maven-archetype-webapp -DinteractivMode=false -DarchetypeCatalog=internal,出现下图说明创建成功,文件夹内会出现项目文件夹
3.在springboot(项目名称,对应-DartifactId)\src\main下创建“java”文件夹。
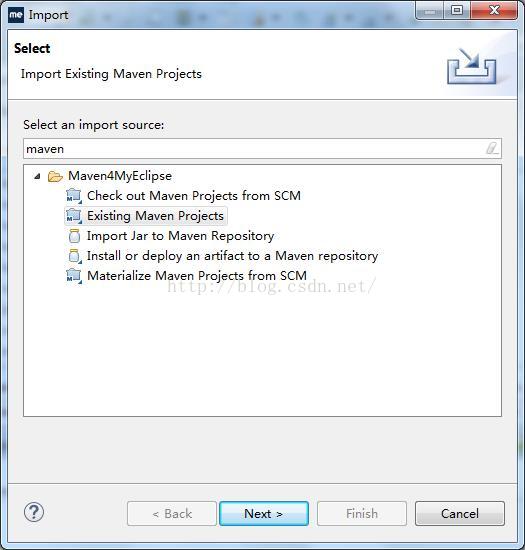
4.运行Myeclipse,点击菜单栏File-》Import-》,选择“Existing Maven Projects”
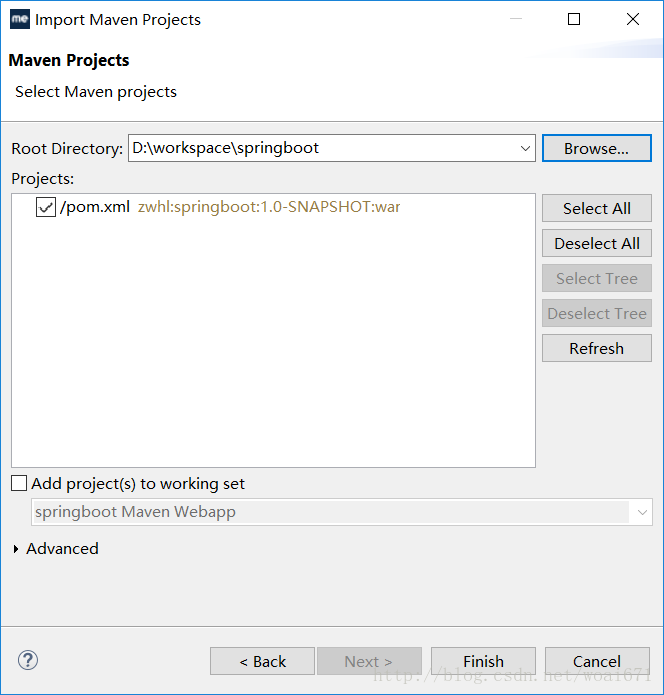
点击“Finish”
5.对项目名称点右键-》Properties-》Java Build Path,选择Libraries选项卡:
a.Add Library -》JRE System Library,添加系统的JRE版本,这里用的是Spring 4.X,需要使用1.6以上的JRE版本。
b.Add Library -》MyEclipse Server Library,选择系统中安装的Tomcat8
6.双击pom.xml, 点击pom.xml选项卡,修改如下:
  4.0.0
  zwhl
  springboot
  war
  1.0-SNAPSHOT
  springboot Maven Webapp
  http://maven.apache.org

	org.springframework.boot
	spring-boot-starter-parent
	1.5.9.RELEASE


	UTF-8
	UTF-8
	1.8


		org.springframework.boot
		spring-boot-starter


	    org.mybatis.spring.boot
	    mybatis-spring-boot-starter
	    1.3.1


		org.springframework.boot
		spring-boot-devtools
		true


        org.springframework.boot
        spring-boot-starter-web


		org.springframework.boot
		spring-boot-starter-test
		test


        org.springframework.boot
        spring-boot-starter-jdbc


       org.springframework.boot
       spring-boot-starter-tomcat
       provided


		log4j-over-slf4j
		org.slf4j


		org.springframework.boot
		spring-boot-starter-tomcat


         mysql
         mysql-connector-java
         5.1.42


    springboot
注意:如果采用默认方式对着Application点击右键Run as Java Application启动(该方式访问无需加项目名,直接http://127.0.0.1:8080/home),则不需加exclusions节点中的内容。
7.在src/main下创建包“com.Application",并在该包下创建Application.java:
package com.controller;

import java.util.List;

import org.springframework.beans.factory.annotation.Autowired;
import org.springframework.web.bind.annotation.RequestMapping;
import org.springframework.web.bind.annotation.ResponseBody;
import org.springframework.web.bind.annotation.RestController;

import com.model.User;
import com.service.UserService;

@RestController
public class CenterController {

	@RequestMapping("/home")
    String home() {
        return "Hello World!this ChilrenStudy";
    }

	@Autowired
    private UserService userService;

    @RequestMapping("/list1")
    @ResponseBody
    public List list1(){
    	System.out.print("ok");
    	List userList=userService.queryList();
    	return userList;
    }
}
8.在src/main/resources下创建“application.properties”:
mybatis.mapper-locations=classpath:mybatis/*.xml
mybatis.type-aliases-package=com.model

#mysql
spring.datasource.url=jdbc:mysql://127.0.0.1:3306/数据库名称
spring.datasource.username=root
spring.datasource.password=密码
spring.datasource.driver-class-name=com.mysql.jdbc.Driver
9.在src/main下创建包“com.model",并在该包下创建User.java:
package com.model;

public class User {

	private Integer id;
    private String name;

	public Integer getId() {
		return id;
	}
	public void setId(Integer id) {
		this.id = id;
	}
	public String getName() {
		return name;
	}
	public void setName(String name) {
		this.name = name;
	}
}
10.在src/main下创建包“com.dao",并在该包下创建UserMapper.java:
package com.dao;

import java.util.List;

import com.model.User;

public interface UserMapper {
	List queryList();
}
11.在src/main下创建包“com.service",并在该包下创建UserService.java:
package com.service;

import java.util.List;

import org.springframework.beans.factory.annotation.Autowired;
import org.springframework.stereotype.Service;

import com.dao.UserMapper;
import com.model.User;

@Service
public class UserService {

	@Autowired
    private UserMapper userMapper;

	public List queryList() {
        return userMapper.queryList();
    }
}
12.在src/main下创建包“com.controller",并在该包下创建CenterController.java:
package com.controller;

import java.util.List;

import org.springframework.beans.factory.annotation.Autowired;
import org.springframework.web.bind.annotation.RequestMapping;
import org.springframework.web.bind.annotation.ResponseBody;
import org.springframework.web.bind.annotation.RestController;

import com.model.User;
import com.service.UserService;

@RestController
public class CenterController {

	@RequestMapping("/home")
    String home() {
        return "Hello World!this CenterController";
    }

	@Autowired
    private UserService userService;

    @RequestMapping("/list1")
    @ResponseBody
    public List list1(){
    	System.out.print("ok");
    	List userList=userService.queryList();
    	return userList;
    }
}
13.在src/main/resources下创建文件夹“mybatis”,并在该文件夹下创建UserMapper.xml:、
15.将该项目发布至Tomcat,启动后按照http://127.0.0.1:8080/项目名称/访问即可。本例中写了
http://127.0.0.1:8080/springboot/list1和http://127.0.0.1:8080/springboot/home,访问正常显示即表明搭建成功!