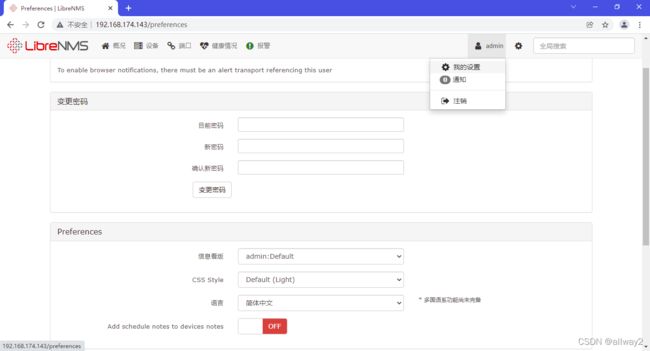
如何在 CentOS Stream 8上安装 LibreNMS
LibreNMS是一个基于PHP,MySQL和SNMP的开源自动发现网络监控工具。
LibreNMS包括对各种网络硬件和操作系统的支持,包括瞻博网络,思科,Linux,Foundry,FreeBSD,Brocade,HP,Windows等等。它是"Observium"监控工具的分支。
LibreNMS的特点
LibreNMS监控工具的主要功能是:
- 具有自动发现功能 - 它将使用CDP,FDP,LLDP,OSPF,BGP,SNMP和ARP自动发现您的整个网络
- API 访问– LibreNMS 提供了一个完整的 API 来管理、绘制和检索安装中的数据。
- 自动更新- 使用LibreNMS,您可以通过新功能和错误修复自动保持最新状态。
- 可自定义的警报- 高度灵活的警报系统,通过电子邮件,IRC,松弛等进行通知。
- 通过随网络增长的水平扩展支持分布式轮询
- 计费系统– 根据使用情况或传输量轻松生成网络上端口的带宽账单。
- Android和iOS应用程序- 有一个原生的iPhone / Android应用程序可用,提供核心功能。
- 多种身份验证方法:MySQL,HTTP,LDAP,Radius,Active Directory
- 集成支持NfSen,收集,吸烟, RANCID,氧化
请按照以下步骤在RHEL / CentOS 8上安装和配置LibreNMS。在开始此安装之前,请确保您已在 RHEL / CentOS 8 上安装了 EPEL 存储库。
步骤 1:安装所需的依赖项
我们始终使用应用程序所需的依赖项开始安装。使用下面的指南将 EPEL 存储库添加到 RHEL / CentOS 8。
如何在 RHEL / CentOS 8 上安装 EPEL 存储库
打开终端并运行以下命令以安装所需的依赖项。
dnf -y install yum-utils
dnf -y install zip unzip git cronie wget fping net-snmp net-snmp-utils  jwhois mtr rrdtool  nmap
步骤2:安装PHP和Apache
安装Apache Web服务器,PHP和LibreNMS所需的扩展。
yum install @httpd @php php-{cli,common,curl,gd,mbstring,mysqlnd,process,snmp,xml,zip}启动 Apache 和 PHP FPM 服务。
systemctl enable --now php-fpm httpd检查服务状态。
systemctl status php-fpm httpd

● php-fpm.service - The PHP FastCGI Process Manager
    Loaded: loaded (/usr/lib/systemd/system/php-fpm.service; enabled; vendor preset: disabled)
    Active: active (running) since Sat 2018-12-29 11:30:09 EAT; 9s ago
  Main PID: 353 (php-fpm)
    Status: "Ready to handle connections"
     Tasks: 6 (limit: 11510)
    Memory: 25.2M
    CGroup: /system.slice/php-fpm.service
            ├─353 php-fpm: master process (/etc/php-fpm.conf)
            ├─359 php-fpm: pool www
            ├─360 php-fpm: pool www
            ├─361 php-fpm: pool www
            ├─362 php-fpm: pool www
            └─363 php-fpm: pool www
 Dec 29 11:30:09 rhel8.local systemd[1]: Starting The PHP FastCGI Process Manager…
 Dec 29 11:30:09 rhel8.local systemd[1]: Started The PHP FastCGI Process Manager.
 ● httpd.service - The Apache HTTP Server
    Loaded: loaded (/usr/lib/systemd/system/httpd.service; enabled; vendor preset: disabled)
   Drop-In: /usr/lib/systemd/system/httpd.service.d
            └─php-fpm.conf
    Active: active (running) since Sat 2018-12-29 11:30:10 EAT; 8s ago
      Docs: man:httpd.service(8)
  Main PID: 365 (httpd)
    Status: "Started, listening on: port 443, port 80"
     Tasks: 213 (limit: 11510)
    Memory: 33.4M
    CGroup: /system.slice/httpd.service
            ├─365 /usr/sbin/httpd -DFOREGROUND
            ├─367 /usr/sbin/httpd -DFOREGROUND
            ├─368 /usr/sbin/httpd -DFOREGROUND
            ├─369 /usr/sbin/httpd -DFOREGROUND
            └─370 /usr/sbin/httpd -DFOREGROUND
 Dec 29 11:30:10 rhel8.local systemd[1]: Starting The Apache HTTP Server…
 Dec 29 11:30:10 rhel8.local httpd[365]: Server configured, listening on: port 443, port 80
 Dec 29 11:30:10 rhel8.local systemd[1]: Started The Apache HTTP Server.
验证 PHP 版本和加载的模块。
php -v
PHP 7.2.24 (cli) (built: Oct 22 2019 08:28:36) ( NTS )
Copyright (c) 1997-2018 The PHP Group
Zend Engine v3.2.0, Copyright (c) 1998-2018 Zend Technologies

php -m
在文件中设置 PHP 时区。/etc/php.ini
grep date.timezone /etc/php.ini

date.timezone = Asia/Shanghai
允许防火墙上的 http 和 https 端口。
firewall-cmd --add-service={http,https} --permanent
firewall-cmd --reload
裁判:
如何在RHEL 8上安装带有mod_ssl和mod_http2的Apache
如何在RHEL / CentOS 8上安装PHP
步骤 3:安装和配置数据库服务器
使用以下指南在RHEL / CentOS 8上安装MariaDB数据库服务器。
您可以选择使用MySQL或MariaDB数据库服务器。如果您没有安装任何一个,下面的指南应该会有所帮助。
如何在RHEL 8 / CentOS 8上安装MariaDB
如何在RHEL 8 / CentOS 8上安装MySQL 8.0
安装数据库服务器后,为 LibreNMS 监控工具创建数据库和用户。
mysql -u root -p
CREATE DATABASE librenms CHARACTER SET utf8 COLLATE utf8_unicode_ci;
CREATE USER 'librenms'@'localhost' IDENTIFIED BY 'StrongDBPassword';
GRANT ALL PRIVILEGES ON librenms.* TO 'librenms'@'localhost';
FLUSH PRIVILEGES;
exit
编辑文件并在该部分中添加以下行:my.cnf[mysqld]
vi /etc/my.cnf.d/mysql-server.cnf在该部分中,请添加:[mysqld]
innodb_file_per_table=1
lower_case_table_names=0
重新启动 mariadb 服务
systemctl enable mysqld
systemctl restart mysqld
服务状态应显示"正在运行"。
systemctl status mysqld

● mysqld.service - MySQL 8.0 database server
   Loaded: loaded (/usr/lib/systemd/system/mysqld.service; enabled; vendor preset: disabled)
   Active: active (running) since Sat 2021-12-18 01:40:53 EST; 37s ago
  Process: 36068 ExecStopPost=/usr/libexec/mysql-wait-stop (code=exited, status=0/SUCCESS)
  Process: 36202 ExecStartPost=/usr/libexec/mysql-check-upgrade (code=exited, status=0/SUCCESS)
  Process: 36119 ExecStartPre=/usr/libexec/mysql-prepare-db-dir mysqld.service (code=exited, status=0/SUCCESS)
  Process: 36095 ExecStartPre=/usr/libexec/mysql-check-socket (code=exited, status=0/SUCCESS)
 Main PID: 36156 (mysqld)
   Status: "Server is operational"
    Tasks: 38 (limit: 23373)
   Memory: 357.4M
   CGroup: /system.slice/mysqld.service
           mq36156 /usr/libexec/mysqld --basedir=/usr

12月 18 01:40:52 localhost.localdomain systemd[1]: mysqld.service: Succeeded.
12月 18 01:40:52 localhost.localdomain systemd[1]: Stopped MySQL 8.0 database server.
12月 18 01:40:52 localhost.localdomain systemd[1]: Starting MySQL 8.0 database server...
12月 18 01:40:53 localhost.localdomain systemd[1]: Started MySQL 8.0 database server.
第4步:在RHEL / CentOS 8上安装和配置LibreNMS
添加 librenms 用户
useradd librenms -d /opt/librenms -M -r
usermod -a -G librenms apache
来自Github的Clone LibreNMS项目
cd /opt
git clone https://github.com/librenms/librenms.git
chown librenms:librenms -R /opt/librenms
安装 PHP 依赖项
su - librenms
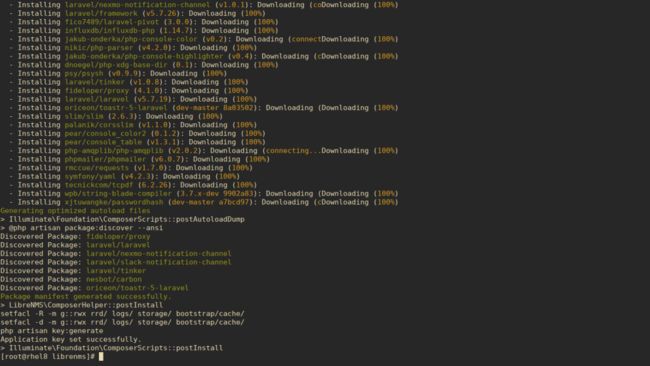
./scripts/composer_wrapper.php install --no-dev
成功安装的输出应类似于以下内容:
复制并配置 SNMP 配置模板:
cp /opt/librenms/snmpd.conf.example /etc/snmp/snmpd.conf
vi /etc/snmp/snmpd.conf通过替换来设置社区字符串RANDOMSTRINGGOESHERE
com2sec readonly default MyInternalNetwork下载分发版本标识符脚本
curl -o /usr/bin/distro https://raw.githubusercontent.com/librenms/librenms-agent/master/snmp/distro
chmod +x /usr/bin/distro然后启动并启用服务snmpd
systemctl enable snmpd
systemctl restart snmpd
systemctl status snmpd
配置 Apache
为 LibreNMS 创建一个新的 Apache 配置文件。
vi /etc/httpd/conf.d/librenms.conf
添加以下配置,根据需要进行编辑:ServerName
  DocumentRoot /opt/librenms/html/
  ServerName  librenms.example.com

  AllowEncodedSlashes NoDecode

    Require all granted
    AllowOverride All
    Options FollowSymLinks MultiViews
配置 SELinux 策略
允许 Apache 在 上提供文件/opt/librenms/html/
semanage fcontext -a -t httpd_sys_content_t '/opt/librenms/logs(/.*)?'
semanage fcontext -a -t httpd_sys_rw_content_t '/opt/librenms/logs(/.*)?'
restorecon -RFvv /opt/librenms/logs/
semanage fcontext -a -t httpd_sys_content_t '/opt/librenms/rrd(/.*)?'
semanage fcontext -a -t httpd_sys_rw_content_t '/opt/librenms/rrd(/.*)?'
restorecon -RFvv /opt/librenms/rrd/
semanage fcontext -a -t httpd_sys_content_t '/opt/librenms/storage(/.*)?'
semanage fcontext -a -t httpd_sys_rw_content_t '/opt/librenms/storage(/.*)?'
restorecon -RFvv /opt/librenms/storage/
semanage fcontext -a -t httpd_sys_content_t '/opt/librenms/bootstrap/cache(/.*)?'
semanage fcontext -a -t httpd_sys_rw_content_t '/opt/librenms/bootstrap/cache(/.*)?'
restorecon -RFvv /opt/librenms/bootstrap/cache/
setsebool -P httpd_can_sendmail=1
允许平
使用以下内容创建文件。http_fping.tt
module http_fping 1.0;

require {
type httpd_t;
class capability net_raw;
class rawip_socket { getopt create setopt write read };
}

#============= httpd_t ==============
allow httpd_t self:capability net_raw;
allow httpd_t self:rawip_socket { getopt create setopt write read };
然后运行这些命令
checkmodule -M -m -o http_fping.mod http_fping.tt
semodule_package -o http_fping.pp -m http_fping.mod
semodule -i http_fping.pp
如果一切正常,请重新启动 httpd 服务
systemctl restart httpd配置 cron 作业
cp /opt/librenms/librenms.nonroot.cron /etc/cron.d/librenms复制日志旋转配置
LibreNMS 将日志保存在 .随着时间的推移,它们会变大并旋转出来。/opt/librenms/logs
要轮换旧日志,您可以使用提供的 logrotate 配置文件:
cp /opt/librenms/misc/librenms.logrotate /etc/logrotate.d/librenms设置适当的权限
chown -R librenms:librenms /opt/librenms
setfacl -d -m g::rwx /opt/librenms/logs
setfacl -d -m g::rwx /opt/librenms/rrd /opt/librenms/logs /opt/librenms/bootstrap/cache/ /opt/librenms/storage/
setfacl -R -m g::rwx /opt/librenms/rrd /opt/librenms/logs /opt/librenms/bootstrap/cache/ /opt/librenms/storage/
启动 LibreNMS Web Installer
在 Web 浏览器上打开http://librenms.example.com/install.php以完成安装。
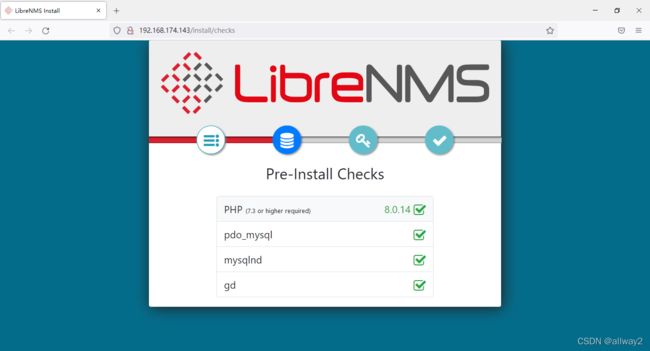 确认所有通过,然后单击"下一阶段"
Pre-Install Checks
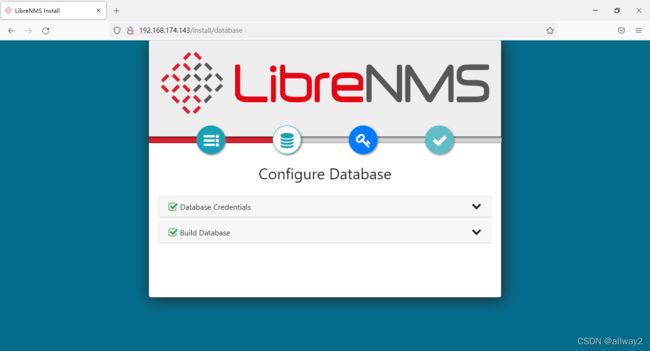
2.按照之前创建的配置数据库凭据。它将开始导入数据库架构并填充数据。
3.在下一页上,系统将要求你配置管理员用户帐户。
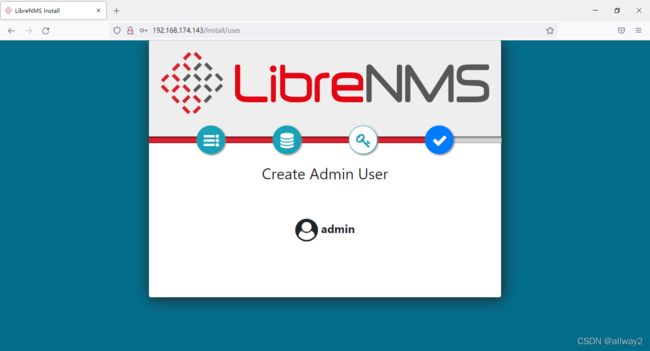
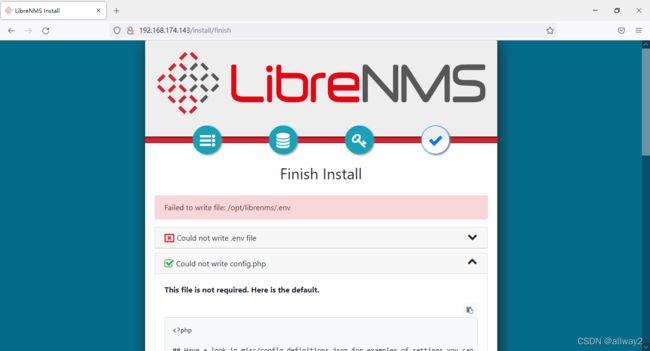
4.接下来是配置文件的生成,如果创建失败,您可能需要使用给定的内容手动创建文件。文件路径应为/opt/librenms/config.php
/opt/librenms/.env
APP_KEY=base64:Z51B/JxHT+PjQ7fXqphkBF6aogGXueZsBM3Et7Wcdw0=

DB_HOST=localhost
DB_DATABASE=librenms
DB_USERNAME=librenms
DB_PASSWORD=StrongDBPassword

#APP_URL=
NODE_ID=61bd87a183b4f
VAPID_PUBLIC_KEY=BBuOQggcYIK8TdlY4BmGHkelGocw7N9MbR46pl7sLySdvrevGqqejJIn1W3nyTr4lmG-xAtB2T9xNLVg4REkFJs
VAPID_PRIVATE_KEY=nnPs-5tEX-doyQTF8qsaXvNx9NRz5qaoPvdK025ozC4
将文件的所有权更改为 librenms 用户:
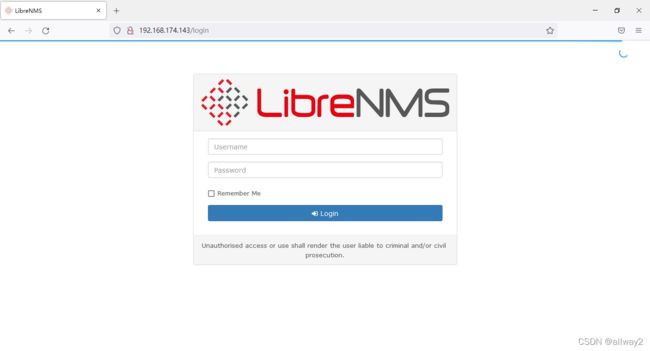
sudo chown librenms:librenms /opt/librenms/config.php5.单击"完成安装"按钮以完成LibreNMS安装。您应该会看到一个管理员登录页面。登录并选择Validate Installation
以librenms用户运行validate.php验证配置,并修复问题。
# su - librenms[librenms@bogon ~]$ ./validate.php# pip3 install python-dotenv
# pip3 install -r /opt/librenms/requirements.txt