selenium java安装运行
目录
1.安装
2.java maven依赖
3.入门
4.centos安装selenium
4.1 安装firefox
4.2安装xvfb
4.3 安装geckodriver
附录A 浏览器无头模式
附录B firefox Profile
附录C 绕过selenium检测
1.安装
大概需要的准备工作:
a.java环境(jdk、编译器eclipse或idea),我已安装,后面不会涉及
b.浏览器(火狐浏览器、selenium火狐浏览器的驱动程序)
c.selenium提供的java类库(maven依赖)
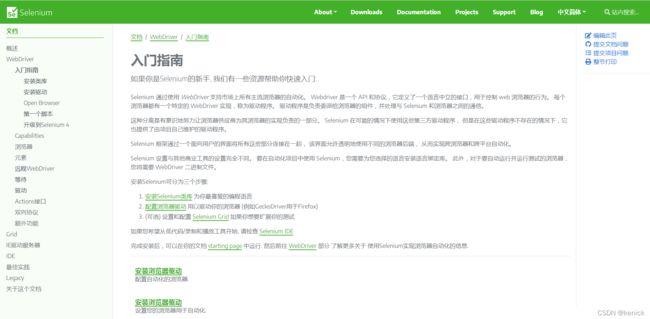
入门请先参考入门指南 | Selenium。
火狐浏览器和selenium对应关系详见Supported platforms — Firefox Source Docs documentation,官网建议使用最新版本火狐和geckodriver,个人感觉geckodriver(0.29.1)-Selenium(3.11)-Firefox(60)更好,如果懒得麻烦,可以使用已安装火狐,等不兼容再替换 。
火狐浏览器所有版本下载地址:Directory Listing: /pub/firefox/releases/
selenium火狐浏览器驱动程序下载地址:https://github.com/mozilla/geckodriver/releases,本次下载geckodriver-v0.29.1-win64.zip。
2.java maven依赖
			io.github.bonigarcia
			webdrivermanager
			5.0.3


			org.seleniumhq.selenium
			selenium-java
			3.141.59


			org.seleniumhq.selenium
			selenium-api
			3.141.59
java运行驱动程序,像下面不报错表明前面安装成功。
    public static void main(String[] args) {
        // 指定火狐浏览器安装位置
        System.setProperty("webdriver.firefox.bin","D:\\Firefox\\firefox.exe");
        // 指定selenium 火狐浏览器驱动程序位置
        System.setProperty("webdriver.gecko.driver", "E:\\develop\\selenium\\firefox\\geckodriver.exe");
        WebDriver driver = new FirefoxDriver();
    }
3.入门
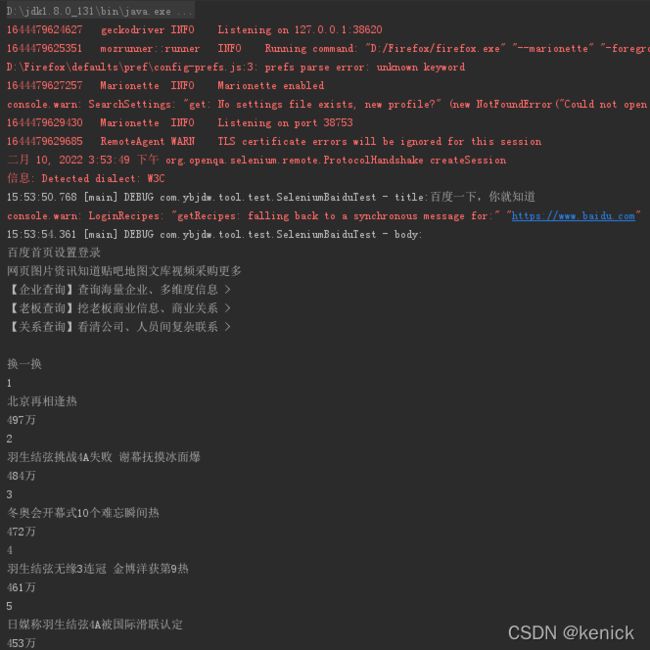
selenium打开浏览器,百度搜索【衣脉合成】,并获取body内容。
package com.ybjdw.tool.test;

import org.openqa.selenium.By;
import org.openqa.selenium.WebDriver;
import org.openqa.selenium.WebElement;
import org.openqa.selenium.firefox.FirefoxDriver;
import org.openqa.selenium.firefox.FirefoxOptions;
import org.slf4j.Logger;
import org.slf4j.LoggerFactory;

import java.util.concurrent.TimeUnit;

/**
 * author: zhanggw
 * 创建时间:  2022/2/10
 */
public class SeleniumBaiduTest {

    private static final Logger logger = LoggerFactory.getLogger(SeleniumBaiduTest.class);

    public static void main(String[] args) throws Exception{
        // 指定火狐浏览器安装位置
        System.setProperty("webdriver.firefox.bin","D:\\Firefox\\firefox.exe");
        // 指定selenium 火狐浏览器驱动程序位置
        System.setProperty("webdriver.gecko.driver", "E:\\develop\\selenium\\firefox\\geckodriver.exe");

        // 获取火狐浏览器驱动对象
        FirefoxOptions firefoxOptions = new FirefoxOptions();
        firefoxOptions.setHeadless(true);
        firefoxOptions.addArguments("--no-sandbox");
        firefoxOptions.addArguments("--disable-gpu");
        firefoxOptions.addArguments("--disable-dev-shm-usage");
        WebDriver driver = new FirefoxDriver(firefoxOptions);

        // 打开网址
        driver.get("https://www.baidu.com/");

        // 网络如果有点慢,等待500毫秒
        driver.manage().timeouts().implicitlyWait(500, TimeUnit.MICROSECONDS);

        // 获取网页标题
        String title = driver.getTitle();
        logger.debug("title:{}", title); // title:百度一下,你就知道

        // 找到搜索文本框,并输入【衣脉合成】
        WebElement searchBox = driver.findElement(By.id("kw"));
        searchBox.sendKeys("衣脉合成");

        // 找到搜索点击按钮,并点击
        WebElement searchButton = driver.findElement(By.id("su"));
        searchButton.click();

        // 等待搜索结果,时间尽量长点,页面要加载很多内容
        driver.manage().timeouts().implicitlyWait(3000, TimeUnit.MICROSECONDS);

        // 获取搜索body内容
        WebElement body = driver.findElement(By.tagName("body"));
        logger.debug("body:{}", body.getText());

        // 退出浏览器
        driver.quit();
    }

}
4.centos安装selenium
需安装软件:firefox、geckodriver;如果linux未安装桌面则需要安装xvfb。
4.1 安装firefox
yum install firefoxfirefox 安装完后的目录在 /usr/bin 下(当前安装的是最新版本)。
[root@localhost bin]# cd /usr/local/bin/
[root@localhost bin]# firefox -version
Running without a11y support!
Mozilla Firefox 91.5.0esr
运行firefox访问百度,看是否正常,我的centos7最初未安装桌面,通过安装xvfb后才正常的,安装xvfb查看后面。
离线安装,先在Directory Listing: /pub/firefox/releases/ 找到对应版本的链接,如91.5.0esr版本的链接为 http://ftp.mozilla.org/pub/firefox/releases/91.5.0esr/linux-x86_64/zh-CN/firefox-91.5.0esr.tar.bz2。
wget http://ftp.mozilla.org/pub/firefox/releases/91.5.0esr/linux-x86_64/zh-CN/firefox-91.5.0esr.tar.bz2

mkdir install
mv firefox-91.5.0esr.tar.bz2  install/
tar -xjvf firefox-91.5.0esr.tar.bz2
mv firefox /usr/local/
cd /usr/local/firefox/
./firefox -version
4.2安装xvfb
安装虚拟桌面 xvfb
yum install xorg-x11-server-Xvfb bzip gtk3

touch /etc/init.d/xvfb
vi /etc/init.d/xvfb
vi之后写入下面内容,然后按esc输入 wq!保存并退出。
#!/bin/bash
#
# /etc/rc.d/init.d/xvfbd
#
# chkconfig: 345 95 28
# description: Starts/Stops X Virtual Framebuffer server
# processname: Xvfb
#

. /etc/init.d/functions

[ "${NETWORKING}" = "no" ] && exit 0

PROG="Xvfb"
PROG_OPTIONS=":7 -ac -screen 0 1024x768x24"
PROG_OUTPUT="/tmp/Xvfb.out"

case "$1" in
    start)
        echo -n "Starting : X Virtual Frame Buffer "
        $PROG $PROG_OPTIONS>>$PROG_OUTPUT 2>&1 &
        disown -ar
        /bin/usleep 500000
        status Xvfb & >/dev/null && echo_success || echo_failure
        RETVAL=$?
        if [ $RETVAL -eq 0 ]; then
            /bin/touch /var/lock/subsys/Xvfb
            /sbin/pidof -o  %PPID -x Xvfb > /var/run/Xvfb.pid
        fi
        echo
        ;;
    stop)
        echo -n "Shutting down : X Virtual Frame Buffer"
        killproc $PROG
        RETVAL=$?
        [ $RETVAL -eq 0 ] && /bin/rm -f /var/lock/subsys/Xvfb /var/run/Xvfb.pid
        echo
        ;;
    restart|reload)
        $0 stop
        $0 start
        RETVAL=$?
        ;;
    status)
        status Xvfb
        RETVAL=$?
        ;;
    *)
     echo $"Usage: $0 (start|stop|restart|reload|status)"
     exit 1
esac

exit $RETVAL
赋予xvfb权限。
cd /etc/init.d/
chmod 777 ./ xvfb
vi /etc/profile
vi之后在最后面写入下面内容
export DISPLAY=:7启动xvfb。
[root@localhost init.d]# cd /etc/init.d
[root@localhost init.d]# ./xvfb start
[root@localhost init.d]# ./xvfb status
Xvfb (pid  11518) 正在运行...
测试firefox 是否可以无界面方式启动。
[root@iZwz982lz6444cwmn40t61Z firefox]# ./firefox -headless http://www.baidu.com
*** You are running in headless mode.
[GFX1-]: glxtest: libEGL initialize failed
[GFX1-]: glxtest: GLX extension missing
[GFX1-]: glxtest: libEGL initialize failed
[GFX1-]: RenderCompositorSWGL failed mapping default framebuffer, no dt
注意:最好不用使用yum安装,有些机器上会出现莫名问题;上图中出现的几个failed没关系。
4.3 安装geckodriver
安装firefox 驱动:geckodriver,找到firefox对应版本(我的firefox91版本,可以用v0.29.1),从官网https://github.com/mozilla/geckodriver/releases下载后上传到服务器。
tar -zxvf geckodriver-v0.29.1-linux64.tar.gz
mv geckodriver /usr/local/bin
附录A 浏览器无头模式
linux无桌面模式下运行selenium,只需设置浏览器为无头模式即可;windows下也可以这样设置,个人感觉运行快一点。
firefoxOptions.setHeadless(true);
附录B firefox Profile
每次运行时,指定火狐浏览器的profile,可以使用已经记住的一些操作(如不再弹出是否设置为默认浏览器、保存浏览器用户名密码等等),使用selenium运行编写的代码时,可以使环境保持一致。
方法详见:Steps to Configure Firefox profile for Selenium Webdriver | Tools QA;目前使用windows和linux的profile文件夹可以共用,也就是说可以在windows上使用同版本的firefox进行一些操作后,再将windows下的profile复制到linux环境中,在每次运行selenium时指定profile,核心代码如下(注意自定义的profile权限问题,最好跟当前运行程序权限一样):
    private WebDriver getWebDriver(String profileName) {
        try{
            // 指定火狐浏览器安装位置
            System.setProperty("webdriver.firefox.bin", firefoxBin);
            // 指定selenium 火狐浏览器驱动程序位置
            System.setProperty("webdriver.gecko.driver", driverPath);

            // 获取火狐浏览器驱动对象
            FirefoxOptions firefoxOptions = new FirefoxOptions();
            firefoxOptions.setHeadless(true);
            firefoxOptions.addArguments("--no-sandbox");
            firefoxOptions.addArguments("--disable-gpu");
            firefoxOptions.addArguments("--disable-dev-shm-usage");

            if(StringUtils.isNotBlank(profileName)){
                String profilePath = firefoxProfileHome + File.separator + profileName;
                logger.debug("profilePath:{}", profilePath);
                File profileFile = new File(profilePath);
                if(!profileFile.exists()){
                    logger.error("profilePath:{}不存在或权限不足!", profilePath);
                }else{
                    FirefoxProfile profile = new FirefoxProfile(profileFile);
                    firefoxOptions.setProfile(profile);
                }
            }
            return new FirefoxDriver(firefoxOptions);
        }catch (Exception e){
            logger.error("获取webDriver异常!", e);
        }
        return null;
    }
附录C 绕过selenium检测
1.需要火狐浏览器88版本一下,我使用的是87版本。
2.java代码设置
    FirefoxProfile profile = new FirefoxProfile(profileFile);
    profile.setPreference("dom.webdriver.enabled", false);
    firefoxOptions.setProfile(profile);


