Linux之anaconda3安装及使用
一、anaconda3介绍
Anaconda指的是一个开源的Python发行版本,其包含了conda、Python等180多个科学包及其依赖项。因为包含了大量的科学包,Anaconda 的下载文件比较大(约 531 MB),如果只需要某些包,或者需要节省带宽或存储空间,也可以使用Miniconda这个较小的发行版(仅包含conda和 Python)。
二、anaconda3安装
1、下载安装程序
登录官网https://repo.anaconda.com/archive/查找最新版本,当前最新版本为Anaconda3-2020.11,本示例使用linux环境安装演示,下载最新版本Anaconda3-2020.11-Linux-x86_64。
[root@test1 opt]# wget https://repo.anaconda.com/archive/Anaconda3-2020.11-Linux-x86_64.sh
2、MD5校验安装包
使用MD5SUM命令验证下载的软件包的MD5校验值与官网一致。

[root@test1 opt]# md5sum Anaconda3-2020.11-Linux-x86_64.sh
4cd48ef23a075e8555a8b6d0a8c4bae2 Anaconda3-2020.11-Linux-x86_64.sh
3、程序安装
1)、给下载文件添加执行权限
[root@test1 opt]# chmod u+x Anaconda3-2020.11-Linux-x86_64.sh
2)、执行安装脚本
[root@test1 opt]# bash Anaconda3-2020.11-Linux-x86_64.sh
Welcome to Anaconda3 2020.11
In order to continue the installation process, please review the license
agreement.
Please, press ENTER to continue
>>>
3)、接受licence
Do you accept the license terms? [yes|no]
[no] >>> yes
4)、指定软件安装路径
Anaconda3 will now be installed into this location:
/root/anaconda3
\ - Press ENTER to confirm the location
\ - Press CTRL-C to abort the installation
\ - Or specify a different location below
[/root/anaconda3] >>> /home/anaconda3
PREFIX=/home/anaconda3
Unpacking payload …
#默认路径/root/anaconda3,考虑磁盘空间问题,建议自定义安装路径。
5)、初始化anaconda3
Preparing transaction: done
Executing transaction: done
installation finished.
Do you wish the installer to initialize Anaconda3
by running conda init? [yes|no]
[no] >>> yes
6)、安装完成
4、添加环境变量
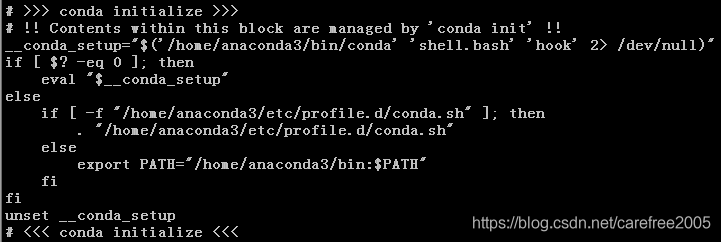
将安装anaconda3安装路径的bin目录添加到系统环境变量,实际上在初始化的时候已经自动添加了环境变量,我们需要使用如下命令使环境变量生效。
三、anaconda3使用示例
1、使用conda info查看虚拟环境列表
*为正在使用的虚拟环境
(base) [root@test1 opt]# conda info -e
# conda environments:
#
base * /home/anaconda3
2、使用conda create创建虚拟环境
使用“conda create -n 环境名字 python=版本号”创建虚拟环境,版本号默认为最新版本,例如python=3则安装3.x.x最新版本,python=3.7则安装当前最新版3.7.9。
(base) [root@test1 opt]# conda create -n test python=3.7
…
Proceed ([y]/n)? y
…
Preparing transaction: done
Verifying transaction: done
Executing transaction: done
#
# To activate this environment, use
#
# $ conda activate test
#
# To deactivate an active environment, use
#
# $ conda deactivate
3、使用conda activate激活虚拟环境
使用“conda activate 环境名字”或者“source activate 环境名字”激活虚拟环境
(base) [root@test1 opt]# conda activate test
(test) [root@test1 opt]#
4、使用conda deactivate退出虚拟环境
(test) [root@test1 wuhs]# conda deactivate
(base) [root@test1 wuhs]#
5、使用conda remove删除虚拟环境
使用“conda remove -n 环境名字 --all”删除虚拟环境
(base) [root@test1 wuhs]# conda remove -n test --all
Proceed ([y]/n)? y #此处按照提示输入y即可完成删除
6、重命名虚拟环境
可以通过create和remove命令组合操作重命名虚拟环境
conda create -n 新环境名字 --clone 老环境名字
conda remove -n 老环境名字 --all
(base) [root@test1 wuhs]# conda create -n flasP --clone test
Source: /home/anaconda3/envs/test
Destination: /home/anaconda3/envs/flasP
Packages: 20
Files: 0
Preparing transaction: done
Verifying transaction: done
Executing transaction: done
#
# To activate this environment, use
#
# $ conda activate flasP
#
# To deactivate an active environment, use
#
# $ conda deactivate
删除操作同第5步。
7、查看虚拟环境安装的包
(base) [root@test1 wuhs]# conda list -n test
# packages in environment at /home/anaconda3/envs/test:
#
# Name Version Build Channel
_libgcc_mutex 0.1 main
ca-certificates 2020.12.8 h06a4308_0
certifi 2020.12.5 py39h06a4308_0
ld_impl_linux-64 2.33.1 h53a641e_7
libedit 3.1.20191231 h14c3975_1
libffi 3.3 he6710b0_2
libgcc-ng 9.1.0 hdf63c60_0
libstdcxx-ng 9.1.0 hdf63c60_0
ncurses 6.2 he6710b0_1
openssl 1.1.1i h27cfd23_0
pip 20.3.3 py39h06a4308_0
python 3.9.1 hdb3f193_2
readline 8.0 h7b6447c_0
setuptools 51.1.2 py39h06a4308_4
sqlite 3.33.0 h62c20be_0
tk 8.6.10 hbc83047_0
tzdata 2020d h14c3975_0
wheel 0.36.2 pyhd3eb1b0_0
xz 5.2.5 h7b6447c_0
zlib 1.2.11 h7b6447c_3
8、删除依赖
conda clean -p 包名 #删除没有用的包
conda clean -t #删除缓存包
conda clean -y -all #删除所有的安装包及cache
9、第三方包的使用
conda install 包名 #安装包
(flasP) [root@test1 python_apps]# conda install Flask==1.1.2
conda remove 包名 #删除包
(flasP) [root@test1 python_apps]# conda remove Flask==1.1.2
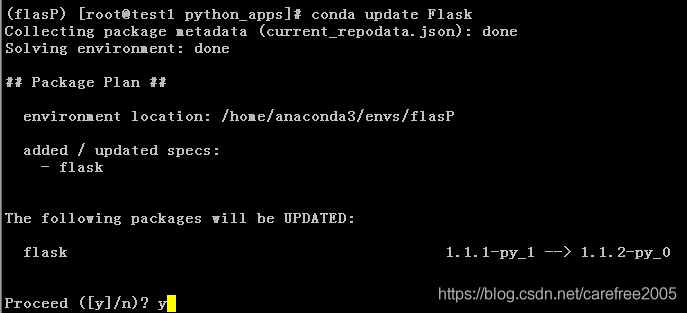
conda update 包名 #更新
按照requirements.txt文件安装所需的包
(flasP) [root@test1 python_apps]# pip3 install -r requirements.txt
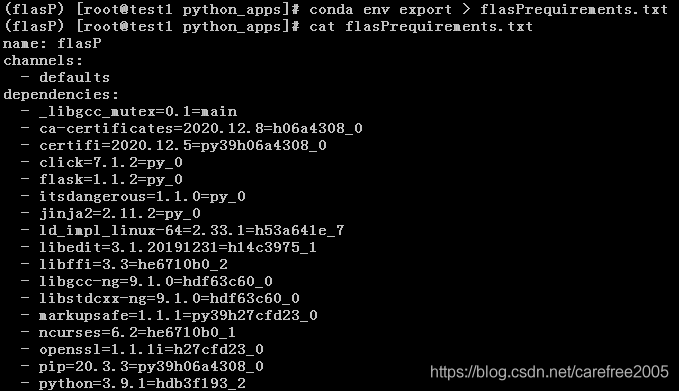
10、导出当前环境的包信息
conda env export > environment.yaml
conda env export > requirements.txt

11、根据文件要求创建虚拟环境
conda env create -f=/path/to/requirements.txt -n deathstar
(flasP) [root@test1 python_apps]# conda env create -f requirements.txt -n flashP
四、帮助文档说明
1、使用conda --help获取命令帮助
2、按照层级提示使用–help获取帮助
(flasP) [root@test1 python_apps]# conda env --help
(flasP) [root@test1 python_apps]# conda env create --help


