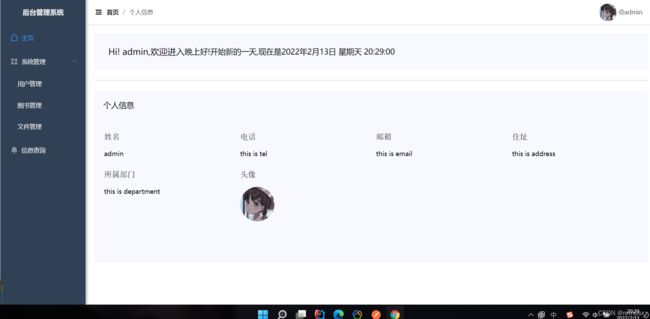
vue+springboot个人主页上传文件或头像
在个人信息页面展示图片或修改图片
前端主页
利用element的el-upload组件
![点击修改图片]()
图片样式在这统一设置,若尺寸太大可能上传为null而无法显示(人麻了)
.logo{
 margin: 0 auto;
  height: 5rem;
  min-width: 2.2rem;
  vertical-align: top;
 border-radius: 50%;
}action属性即为要上传的路径
/file/upload为后端写的上传文件的接口
 @PostMapping("/upload")
    public String upload(@RequestParam MultipartFile file) throws IOException
    {
        //获取文件名
        String originalFilename = file.getOriginalFilename();
        //获取文件后缀
        String type = FileUtil.extName(originalFilename);
        //获取大小
        long size = file.getSize();
        //先存储到磁盘
        File fileUpload = new File(fileUploadPath);
        //判断是否创建,若未创建则新建一个文件目录
        if (!fileUpload.exists())
        {
            fileUpload.mkdirs();
        }
        //定义一个唯一的文件标识码
        String fid= IdUtil.simpleUUID();
        String fileFid=fid + StrUtil.DOT+type;
        //图片完整路径
        File upload = new File(fileUploadPath+fileFid );
        String url;
        String md5;
        file.transferTo(upload);
        //加密
        md5=SecureUtil.md5(upload);
        //进行遍历
        Files dbFile=getFileByMd5(md5);
        //当上传已有的图片时
        //若不为空,则将原有的图片url赋予,并删除之前已有的,节省磁盘空间
            if(dbFile!=null)
            {
                url=dbFile.getUrl();
                upload.delete();
            }
            else {
                url="http://localhost:9090/file/"+fileFid;
            }
        Files saveFile=new Files();
        saveFile.setName(originalFilename);
        saveFile.setSize(size/1024);
        saveFile.setType(type);
        saveFile.setUrl(url);
        saveFile.setMd5(md5);
        fileMapper.insert(saveFile);
        return url;
    }
文件路径默认本地的磁盘,可在application.properties写上
files.upload.path=D:/stspring/file/
通过@value注解引入
@Value("${files.upload.path}")
private String fileUploadPath;handleAvatarSuccess为成功的回调函数(上传成功的逻辑在里面写)
 handleAvatarSuccess(res)
    {
      this.avatarUrl=res;
     //后端传入前台的数据转化为js对象
      this.username=JSON.parse(localStorage.getItem("user")).username;
      console.log(res);
     //这里调用后端接口查询此用户的整条数据
      request.get("/admin/update",{
        params:{
          avatar:this.avatarUrl,
          username:this.username,
        }
      }).then(res=>{
        //触发refreshAva方法进行同步更新头像
        this.$emit("refreshAva")
        console.log(res);
      })
    }
JSON.parse() 方法将数据转换为 JavaScript 对象,例如
这样完成了JSON格式=>js对象,使用时的格式为res.avatar(对象.属性)
之后在created周期函数(页面创建时渲染data和methods)写上
created() {
    this.avatarUrl=JSON.parse(localStorage.getItem("user")).avatar;
    this.username=JSON.parse(localStorage.getItem("user")).username;
    //通过username查询更新后的整条数据
    request.get("/admin/select", {
      params:{
        username:this.username
      }
    }).then(res=>{
      console.log("这是更新后的用户信息")
      console.log(res)
      this.avatarUrl=res.avatar;//赋值更新
    })
效果
保持同步更新,这里的同步更新同样采用子组件=>父组件=>子组件,即Message.vue=>Home.vue=>Header.vue
Home.vue
//传入子组件
Message.vue
 //触发refreshAva方法进行同步更新头像
this.$emit("refreshAva")
Header.vue
    //请求到的数据赋值即可
 this.avatar=res.avatar;
效果
另外文件上传不限制类型,可以上传一些奇奇怪怪的东西


