HarmonyOS实战—基础项目创建与运行
Harmony OS 1 DevEco Studio 任务说明 两种FA的UI开发框架 开发准备 创建和运行Hello World 使用Java语言开发 使用Js语言开发
文章目录
- Harmony OS 1 DevEco Studio 任务说明 两种FA的UI开发框架 开发准备 创建和运行Hello World 使用Java语言开发 使用Js语言开发
-
- DevEco Studio
- 任务说明
- 两种FA的UI开发框架
- 开发准备
- 创建和运行Hello World
- 使用Java语言开发
-
- 创建工程
- 编写第一个界面
- 编写第二个界面
- 实现页面跳转
- 使用Js语言开发
-
- 创建工程
- 编写第一个页面
- 创建另一个页面
- 实现页面跳转
学习一个新的东西有一个比较不错的方法,那就是看文档,快速上手
在一个东西没有上手之前,有一些东西确实不好理解,所以在我看了一会 开发基础知识 后决定从 快速上手 开始
官方文档:https://developer.harmonyos.com/cn/docs/documentation/doc-guides/start-overview-0000000000029602
DevEco Studio
这是Harmony OS官方推荐的一个IDEA
下载地址https://developer.harmonyos.com/cn/develop/deveco-studio#download
下载安装,打开后迎面扑来一股熟悉的味道
嘶,看着怎么这么眼熟呢
仔细一看,原来这个DevEco Studio也是 Powered by IntelliJ®Platform
好的这些都是题外话,继续下一步
任务说明
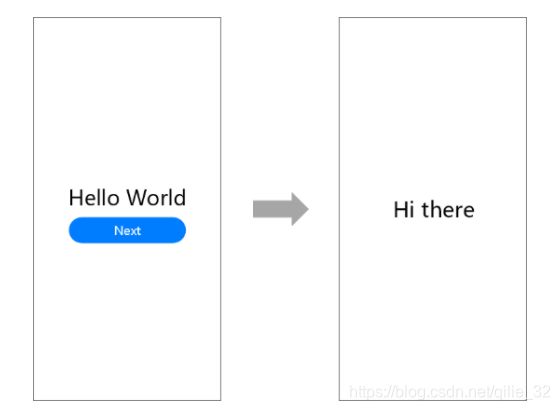
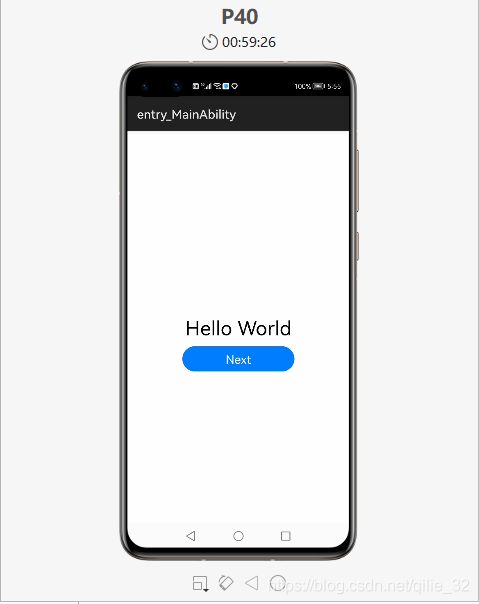
构建一个简单的具有页面跳转功能的应用(如下图预览器]运行效果所示),熟悉HarmonyOS应用开发流程
两种FA的UI开发框架
文中说到
HarmonyOS提供了两种FA(Feature Ability)的UI开发框架:Java UI框架和JS UI框架。
- Java UI框架提供了细粒度的UI编程接口,UI元素更丰富,使应用开发更加灵活。
- JS UI框架提供了相对高层的UI描述,使应用开发更加简单。
以及还给出了表格格式的对比
| 比较项 | Java UI框架 | JS UI框架 |
|---|---|---|
| 语言生态 | Java | JS |
| 接口方式 | 命令式 | 声明式 |
| 执行方式 | 开发者处理,基于API驱动的UI变更 | 框架层处理,基于数据驱动的UI自动变更 |
| 系统支持性 | 只有大型系统支持 | 覆盖平台更广,轻量系统、小型系统、标准系统、大型系统都支持 |
| 相对优势 | UI元素更丰富,开发更灵活 | 轻量化,开发更简便 |
开发准备
显然我们下载完毕DevEco后,还需要一定的环境配置,这里就不深入描述
官方环境配置:https://developer.harmonyos.com/cn/docs/documentation/doc-guides/environment_config-0000001052902427
创建和运行Hello World
一个Hello world工程不仅仅能够学习到基础的知识,还可以检验工程环境的可靠性
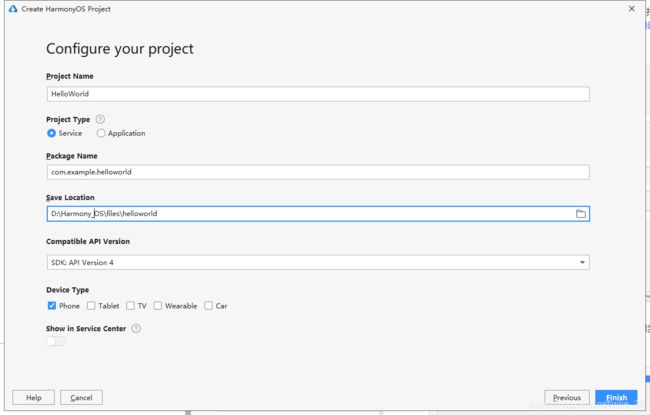
值得注意的是,这个路径上不能有空格
终于到了激动人心的运行时刻
- 点击工具->Device Manager
-
弹出一个浏览器窗口,让你登陆华为开发者联盟账号,如果没有实名认证的话,就还需要实名认证,实名认证后,退到主界面,点击右上角的头像进行退出以及重登
-
此时主界面就出现了一只P40手机的模样
-
点击上面的构建按钮
- 等待片刻后
运行成功!
使用Java语言开发
创建工程
-
点击新建HarmoryOS工程
-
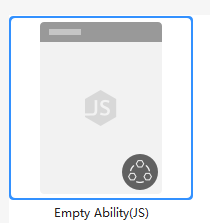
选择java模板,点击下一步
编写第一个界面
在Java UI框架中,提供了两种编写布局的方式:在XML中声明UI布局和在代码中创建布局
为了熟悉两种方式,我们先通过在XML中声明UI布局完成第一个页面,再用在代码中创建布局完成第二个页面
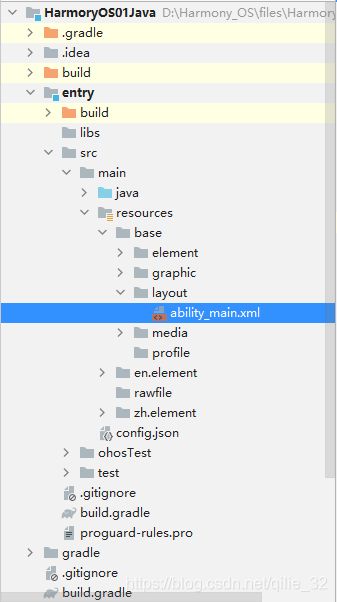
- 打开
entry > src > main > resources > base > layout > ability_main.xml
-
再打开
entry > src > main > resources > base > element > string.json关于取值为string类型的文本属性,可以直接设置文本字串,也可以引用string资源,由于Harmony OS官方推荐文本属性通过引用string资源来获取,所以我们也试着使用一下引用string资源方法
我们在string数组中添加一个对象
{ "name": "button_next", "value": "Next" } -
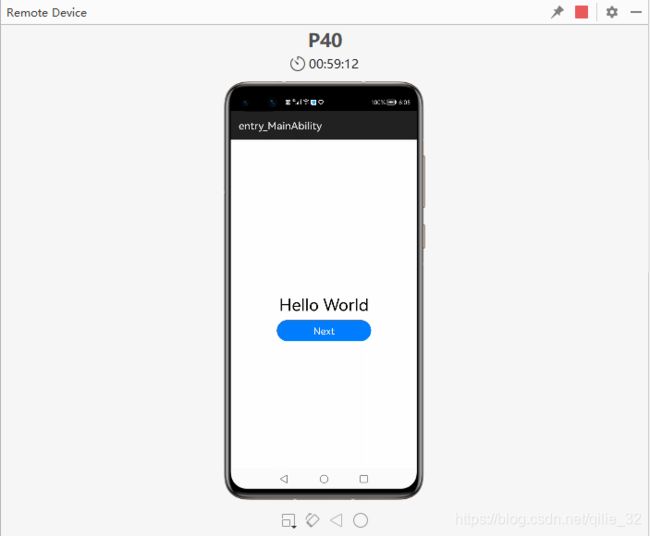
第一个页面内有一个文本和一个按钮,使用DependentLayout布局,通过Text和Button组件来实现,其中vp和fp分别表示虚拟像素和字体像素。本次示例展示两个组件的显示文本分别采用直接设置文本字串、引用string资源(推荐使用)的方式。
具体为什么用这个布局我也不明白,可以在官方文档中
开发 > UI > Java UI框架 > 常用布局开发指导中查阅到相关信息,里面有许多形形色色的布局,也是值得研究的一方面ability_main.xml
<DependentLayout xmlns:ohos="http://schemas.huawei.com/res/ohos" ohos:width="match_parent" ohos:height="match_parent"> <Text ohos:id="$+id:text" ohos:width="match_content" ohos:height="match_content" ohos:text="Hello World" ohos:text_color="#000000" ohos:text_size="32fp" ohos:center_in_parent="true"/> <Button ohos:id="$+id:button" ohos:width="match_content" ohos:height="match_content" ohos:text="$string:button_Next" ohos:text_size="19fp" ohos:text_color="#FFFFFF" ohos:top_padding="8vp" ohos:bottom_padding="8vp" ohos:right_padding="70vp" ohos:left_padding="70vp" ohos:center_in_parent="true" ohos:below="$id:text" ohos:margin="10vp"/> DependentLayout> -
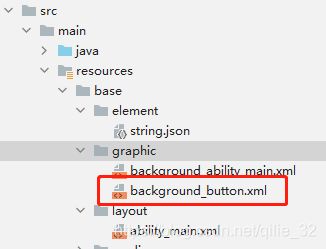
按钮的背景是蓝色胶囊样式,可以通过graphic目录下的XML文件来设置。
右键点击“graphic”文件夹,选择“新建 > Graphic Resource File”,命名为“background_button”
<shape
    xmlns:ohos="http://schemas.huawei.com/res/ohos"
    ohos:shape="rectangle">
    <corners
        ohos:radius="100"/>
    <solid
        ohos:color="#007DFF"/>
shape>
-
在“ability_main.xml”文件中,使用**background_element="$graphic:background_button"**的方式引用“background_button.xml”文件
<DependentLayout xmlns:ohos="http://schemas.huawei.com/res/ohos" ohos:width="match_parent" ohos:height="match_parent"> <Text ohos:id="$+id:text" ohos:width="match_content" ohos:height="match_content" ohos:text="Hello World" ohos:text_color="#000000" ohos:text_size="32fp" ohos:center_in_parent="true"/> <Button ohos:id="$+id:button" ohos:width="match_content" ohos:height="match_content" ohos:text="$string:button_Next" ohos:text_size="19fp" ohos:text_color="#FFFFFF" ohos:top_padding="8vp" ohos:bottom_padding="8vp" ohos:right_padding="70vp" ohos:left_padding="70vp" ohos:center_in_parent="true" ohos:below="$id:text" ohos:margin="10vp" ohos:background_element="$graphic:background_button"/> DependentLayout> -
文档中提到,需要在Java代码中加载XML布局,即在
entry > src > main > java > com.example.harmonyos01java> slice > MainAbilitySlice.java中,给onStart方法尾部添加super.setUIContent(ResourceTable.Layout_ability_main);然而我这行代码是自动生成的
-
运行模拟器结果
编写第二个界面
这次我们使用在代码中创建布局的方式来完成
在entry > src > main > java > com.example.harmonyos01java> slice 下新建java类 SecondAbilitySlice
package com.example.harmoryos01java.slice;

import ohos.aafwk.ability.AbilitySlice;
import ohos.aafwk.content.Intent;
import ohos.agp.colors.RgbColor;
import ohos.agp.components.DependentLayout;
import ohos.agp.components.Text;
import ohos.agp.components.element.ShapeElement;
import ohos.agp.utils.Color;
import ohos.agp.components.DependentLayout.LayoutConfig;

public class SecondAbilitySlice extends AbilitySlice {
    @Override
    public void onStart(Intent intent) {
        super.onStart(intent);

        // 声明布局
        DependentLayout myLayout = new DependentLayout(this);

        // 设置布局宽高
        myLayout.setWidth(LayoutConfig.MATCH_PARENT);
        myLayout.setHeight(LayoutConfig.MATCH_PARENT);

        // 设置布局背景为白色
        ShapeElement background = new ShapeElement();
        background.setRgbColor(new RgbColor(255, 255, 255));
        myLayout.setBackground(background);

        // 创建一个文本
        Text text = new Text(this);
        text.setText("Hi there");
        text.setWidth(LayoutConfig.MATCH_PARENT);
        text.setTextSize(100);
        text.setTextColor(Color.BLACK);

        // 设置文本的布局
        DependentLayout.LayoutConfig textConfig = new DependentLayout.LayoutConfig(LayoutConfig.MATCH_CONTENT, LayoutConfig.MATCH_CONTENT);
        textConfig.addRule(LayoutConfig.CENTER_IN_PARENT);
        text.setLayoutConfig(textConfig);
        myLayout.addComponent(text);
        super.setUIContent(myLayout);
    }
}
感觉上还是xml形式方便一些,这个代码形式让我梦回swing图形界面开发
实现页面跳转
-
打开第一个页面的“MainAbilitySlice.java”文件,添加按钮的响应逻辑,实现点击按钮跳转到下一页
package com.example.harmoryos01java.slice; import com.example.harmoryos01java.ResourceTable; import ohos.aafwk.ability.AbilitySlice; import ohos.aafwk.content.Intent; import ohos.agp.components.Button; public class MainAbilitySlice extends AbilitySlice { @Override public void onStart(Intent intent) { super.onStart(intent); super.setUIContent(ResourceTable.Layout_ability_main); Button button = (Button) findComponentById(ResourceTable.Id_button); // 点击按钮跳转至第二个页面 button.setClickedListener(listener -> present(new SecondAbilitySlice(), new Intent())); } @Override public void onActive() { super.onActive(); } @Override public void onForeground(Intent intent) { super.onForeground(intent); } } -
再次运行项目,效果如图:
使用Js语言开发
创建工程
编写第一个页面
-
打开
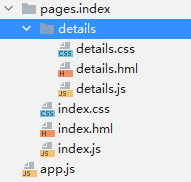
entry > src > main > js > default > pages.index > index.hml<div class="container"> <text class="text"> {{title}} text> <button class="button" type="capsule" value="Next" onclick="launch">button> div> -
打开
entry > src > main > js > default > pages.index > index.jsexport default { data: { title: "Hello world" } } -
打开
entry > src > main > js > default > pages.index > index.css/* index.css */ .container { flex-direction: column; /* 设置容器内的项目纵向排列 */ justify-content: center; /* 设置项目位于容器主轴的中心 */ align-items: center; /* 项目在交叉轴居中 */ } /* 对class="text"的组件设置样式 */ .text{ font-size: 36px; } /* 对class="button"的组件设置样式 */ .button { width: 60%; height: 50px; background-color: #007dff; font-size: 24px; text-color: white; margin-top: 20px; } -
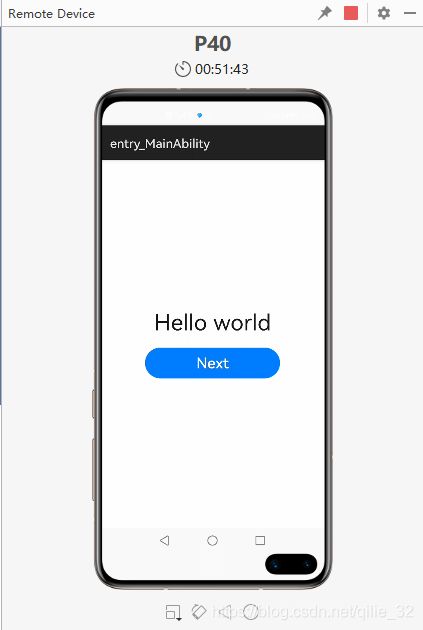
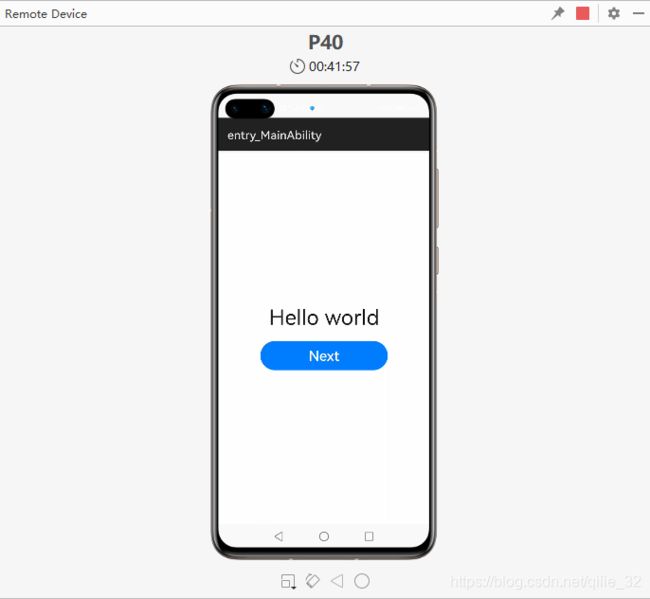
运行结果
创建另一个页面
-
在
entry > src > main > js > default > pages.index下右击新建 > JS Page,点击完成
-
打开"details.hml"文件,添加一个文本
<div class="container"> <text class="text"> Hi there text> div> -
打开"details.css"文件,添加部分样式
/* details.css */
.container {
    flex-direction: column;
    justify-content: center;
    align-items: center;
}
.text {
    font-size: 36px;
    text-align: center;
}
实现页面跳转
修改第一个界面的index.js
import router from '@system.router';
export default {
    data: {
        title: "Hello world"
    },
    launch() {
        router.push ({
            uri:'pages/index/details/details', // 指定要跳转的页面
        })
    }
}
效果如下
【本文正在参与“有奖征文 | HarmonyOS征文大赛”活动】


