简单的使用SpringBoot整合SpringSecurity
spring-security简介
Spring-Security是针对Spring项目的安全框架,也是Spring-Boot底层安全模块默认的技术类型,他可以实现强大的Web安全控制,对于安全控制,提供身份验证,授权和针对常见攻击的保护。它具有对保护命令式和反应式应用程序保护的一流支持,是保护基于Spring的应用程序的事实标准。我们仅需要引入spring-boot-start-security模块,进行少量的配置,即可实现强大的安全管理!
Spring-Security的两个主要目标是“认证”和“授权”(访问控制)
-
认证 (你是谁)
-
授权 (你能干什么)
-
攻击防护 (防止伪造身份)
其核心就是一组过滤器链,项目启动后将会自动配置。最核心的就是 Basic Authentication Filter 用来认证用户的身份,一个在spring security中一种过滤器处理一种认证方式。

使用SpringSecurity
目录结构

- SecurityController
@Controller
public class SecurityController {
    @RequestMapping({"/","/index"})
    public String Hello(){
        return "index";
    }
    @RequestMapping("/toLogin")
    public String toLogin(){
        return "views/login";
    }
    @RequestMapping("/admin/test")
    public String admin(){
        return "views/admin/admin";
    }
    @RequestMapping("/user/test")
    public String user(){
        return "views/user/user";
    }
}
1. 导入依赖并启动项目
新建一个带web的SpringBoot项目,然后再pom.xml配置文件中导入依赖,这边不需要指定版本号,security的版本会跟随springboot的版本
<dependency>
    <groupId>org.springframework.bootgroupId>
    <artifactId>spring-boot-starter-securityartifactId>
dependency>
启动主启动类就能看到一个SpringSecurity默认的登录页面,默认的登录名是user,密码在输出在控制台上面

SpringSecurity默认登录页面在DefaultLoginPageGeneratingFilter类里面的generateLoginPageHtml产生的

2. 自定义登录页
自定义登录页首先我们要创建一个类来继承WebSecurityConfigureAdapter类,并且实现他的configure(HttpSecurity http)设置一些跟网页请求相关的设置,在类的上面添加@EnableWebSecurity启动web安全注解
这个方面在设置参数的时候可以使用链式编程,在后面添加 . 就能不断的进行配置,我们用http下面的formLogin下面的方法来设置我们的登录页
@EnableWebSecurity
public class SecurityConfig extends WebSecurityConfigurerAdapter {
    @Override
    protected void configure(HttpSecurity http) throws Exception {
        http.csrf().disable(); //关闭csrf,默认是开启的,开启后会导致我们的登录被拦截,导致登录失败
        http.formLogin()
                .loginPage("/toLogin") //设置默认登录页
                .usernameParameter("username") //设置从前端提交过来的用户名参数
                .passwordParameter("password") //设置从前端提交过来的密码参数
                .defaultSuccessUrl("/index") //设置默认登录页面,会跳转到登录前的路径
//                .successForwardUrl("/index") //登录成功后页面,无论前面为什么请求,都会跳转到这个路径
                .failureForwardUrl("/toLogin") //设置登录失败后的请求
                .loginProcessingUrl("/login"); //设置登录请求路径
    }
}
- 启动项目访问

3. 用户授权
在网页中有些特定的页面只能有对应的权限才能访问,比如说要开通vip才能查看相应的页面,还有就是看视频的时候只有vip才能跳过广告等等,不同的请求可以设置不同的访问权限
在之前的自定义登录页面前加入代码
//antMatchers括号里面可以输入多个请求路径,用逗号隔开
http.authorizeRequests() //设置访问请求的权限
        .antMatchers("/") //默认首页允许所有用户都可以访问,不登录也能访问
            .permitAll()
        .antMatchers("/admin/*") //admin下面的页面只有拥有admin角色的用户才能访问
            .hasRole("admin")
        .antMatchers("/user/*") //user下面的页面只有拥有user角色的用户才能访问
            .hasRole("user");
- 启动项目可以访问index.html,所有人都可以访问,但是下面的admin和user的测试页面在没有登录的情况下无法访问,会直接跳转到登录页面
4. 用户认证
用户认证是用户在登录的时候验证用户的用户名和密码并赋予他们相应的权限,从数据库中查看全部用户的信息,然后将所有的用户信息进行认证,然后登录用户就能获得相应的权限去访问相应的页面。
这里没有进行连接数据库,如果正常开发需要连接数据库,通过数据库查找到用户的信息进行认证并赋予权限 (注:在进行密码验证的时候不能使用明文密码验证,不安全,所以需要进行加密)
@Override
protected void configure(AuthenticationManagerBuilder auth) throws Exception {
    //使用BCryptPasswordEncoder对密码进行加密
    auth.inMemoryAuthentication().passwordEncoder(new BCryptPasswordEncoder())
            .withUser("zhu") //给zhu用户添加admin和user权限
                .password(new BCryptPasswordEncoder().encode("123456")).roles("admin","user")
            .and()
            .withUser("admin") //给admin用户添加admin权限
                .password(new BCryptPasswordEncoder().encode("123456")).roles("admin")
            .and()
            .withUser("user") //给user用户添加user权限
                .password(new BCryptPasswordEncoder().encode("123456")).roles("user");
}
- 启动项目,我们用admin账户进行登录,分别访问admin测试用户和user测试用户的结果

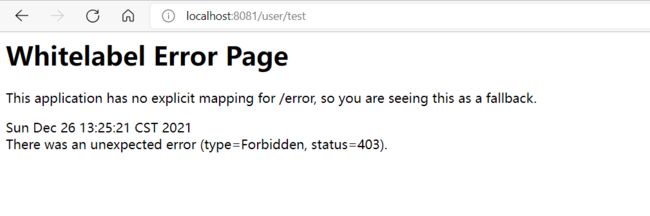
可以看到我们访问admin测试页面是可以的,但是访问user测试页面显示我们没有权限,说明测试是正确的。用user用户和zhu用户登录也能看到对应的效果
5. 注销以及按钮显示
注销就是将用户的信息从网站的cookie中删除,并且该用户没有了权限。注销操作也不需要我们来做,我们只需要定义一个a标签,然后链接的路径设置为’ /logout ',SpringSecurity就会自动帮我们完成注销
//注销用户,注销成功后跳转到/请求
http.logout().logoutSuccessUrl("/");
<a th:href="@{/logout}">注销a>
- 但是我们在实际的开发中,如果用户没有登录,我们就显示登录按钮,如果用户登录了,我们就显示
' 用户名, '欢迎你以及注销按钮,并且不同角色登录显示出来的功能模块也不一样,我们可以使用Thymeleaf标签来完成
在html的头部添加xmlns:sec="http://www.thymeleaf.org/thymeleaf-extras-springsecurity5",通过sec标签来完成对应的显示
<h1>首页h1>
<div id="container">
    <div>

        <a sec:authorize="!isAuthenticated()" th:href="@{/toLogin}">
            登录
        a>
        <span sec:authorize="isAuthenticated()">
            <span sec:authentication="name">span>用户,欢迎你
        span>

        <a sec:authorize="isAuthenticated()" th:href="@{/logout}">
            注销
        a>
    div>
    <div>

        <a sec:authorize="hasRole('admin')" th:href="@{/admin/test}">
            admin测试页面
        a>
        <a sec:authorize="hasRole('user')" th:href="@{/user/test}">
            user测试页面
        a>
    div>
div>
- 我们启动项目之后,访问index.html,在我们默认没有登录的情况下,只有登录按钮

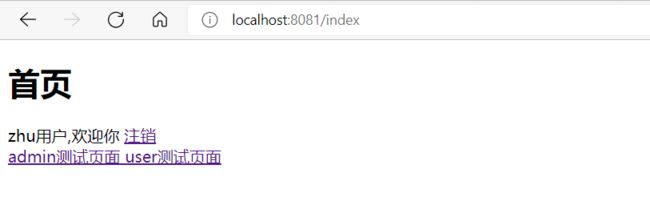
- 接着我们用admin用户登录一下,可以看到首页下面显示了’ admin用户,欢迎你 '和注销按钮以及对应的模块。登录user用户显示的界面功能模块跟admin相反

- 注销后我们用zhu用户登录查看,发现两个功能模块都能显示
6. 记住我
在网页的登录界面中,通过会有一个记住我的功能,他的目的就是将我们的用户长时间的保存在cookie中,避免短时间内用户进行登录
实现记住我功能很简单,去http中开启记住我的功能
//开启记住我功能,设置保存时间为一天
http.rememberMe().tokenValiditySeconds(60*60*24).rememberMeParameter("rememberMe");
- 接着只需要在前端添加一个复选框,然后将name与后端的rememberMeParameter中的参数一致即可
<input type="checkbox" name="rememberMe">记住我<br>
7. 放行静态资源
在项目的开发中,我们通常会把静态资源放在static里面,比如说我这里的css包下面有一个main.css,我们要对它进行放行,我们只需要重写config方法,然后通过antMatchers对对应的静态资源进行放行

@Override
public void configure(WebSecurity web) throws Exception {
    web.ignoring().antMatchers("/css/**");
}
这里就是简单的进行SpringSecurity与SpringBoot整合,更加详细的过程与内容还是请参考官方文档:Spring Security,之后也会再分享点SpringSecurity的使用,感谢您的观看!!!