gitlab的使用
前面我们已经知道Git人人都是中心,那他们怎么交互数据呢?
• 使用GitHub或者码云等公共代码仓库
• 使用GitLab私有仓库
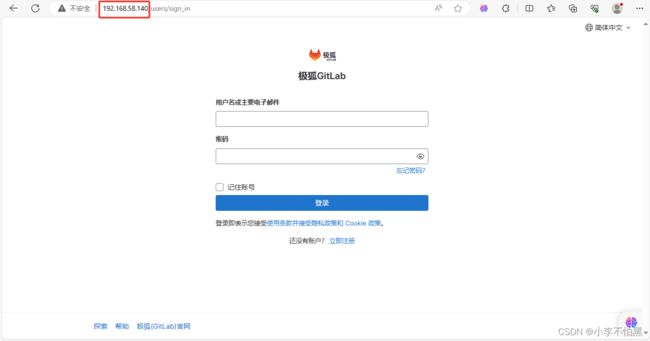
准备一台服务器:192.168.58.140
关闭防火墙和selinux
[root@gitlab ~]# setenforce 0 && systemctl stop firewalld1 安装配置gitlab
安装
# 安装依赖,并启动ssh、防火墙开启相应端口、postfix
[root@gitlab ~]# yum install -y curl policycoreutils-python openssh-server perl

# 安装完成后会直接启动
[root@gitlab ~]# yum install gitlab-jh-16.0.3-jh.0.el7.x86_64.rpm
初始化
# 以下两种方法都可以配置访问地址,第一种需要在yum安装前配置
[root@gitlab ~]# export EXTERNAL_URL='http://192.168.249.156'
或
[root@gitlab ~]# vim /etc/gitlab/gitlab.rb
external_url 'http://192.168.58.140'

[root@gitlab ~]# gitlab-ctl reconfigure
状态
[root@gitlab ~]#  gitlab-ctl status
run: gitaly: (pid 4491) 48s; run: log: (pid 4087) 279s
run: gitlab-monitor: (pid 4539) 44s; run: log: (pid 4251) 207s
run: gitlab-workhorse: (pid 4501) 47s; run: log: (pid 4099) 273s
run: logrotate: (pid 4125) 265s; run: log: (pid 4124) 265s
run: nginx: (pid 4112) 271s; run: log: (pid 4111) 271s
run: node-exporter: (pid 4175) 243s; run: log: (pid 4174) 243s
run: postgres-exporter: (pid 4528) 45s; run: log: (pid 4223) 219s
run: postgresql: (pid 3933) 343s; run: log: (pid 3932) 343s
run: prometheus: (pid 4514) 46s; run: log: (pid 4156) 259s
run: redis: (pid 3876) 355s; run: log: (pid 3875) 355s
run: redis-exporter: (pid 4186) 237s; run: log: (pid 4185) 237s
run: sidekiq: (pid 4078) 281s; run: log: (pid 4077) 281s
run: unicorn: (pid 4047) 287s; run: log: (pid 4046) 287s
检查端口
[root@gitlib ~]# ss -nplt | grep 80
LISTEN     0      1024   127.0.0.1:8080                     *:*                   users:(("ruby",pid=86908,fd=18),("ruby",pid=86904,fd=18),("ruby",pid=84236,fd=18))
LISTEN     0      511          *:80                       *:*                   users:(("nginx",pid=84729,fd=7),("nginx",pid=84728,fd=7),("nginx",pid=84727,fd=7),("nginx",pid=84726,fd=7),("nginx",pid=84725,fd=7))
LISTEN     0      128    127.0.0.1:8082                     *:*                   users:(("ruby",pid=84442,fd=10))
LISTEN     0      128    127.0.0.1:8092                     *:*                   users:(("ruby",pid=84440,fd=21))
LISTEN     0      511          *:8060                     *:*                   users:(("nginx",pid=84729,fd=8),("nginx",pid=84728,fd=8),("nginx",pid=84727,fd=8),("nginx",pid=84726,fd=8),("nginx",pid=84725,fd=8))
2 使用浏览器访问,进行web界面操作
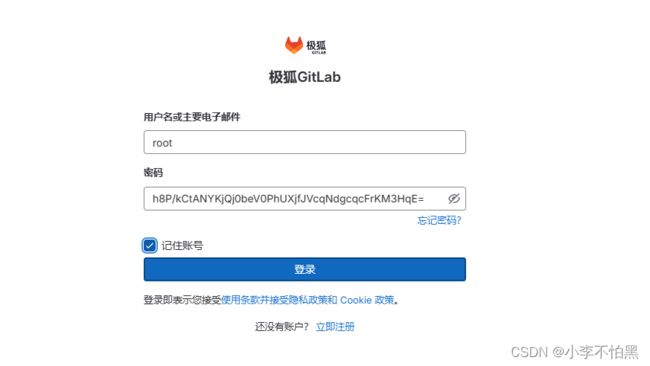
用户名:root 密码:需要在
[root@gitlib ~]# grep Password:  /etc/gitlab/initial_root_password

Password: h8P/kCtANYKjQj0beV0PhUXjfJVcqNdgcqcFrKM3HqE=
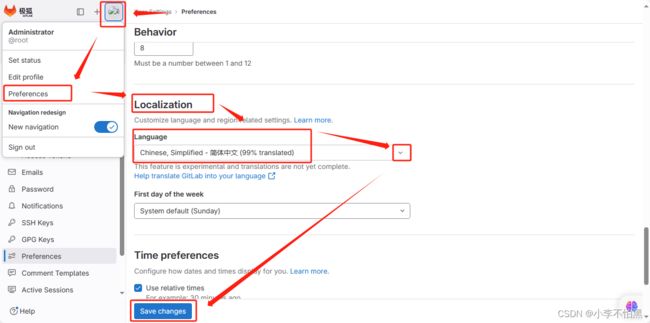
先修改为中文
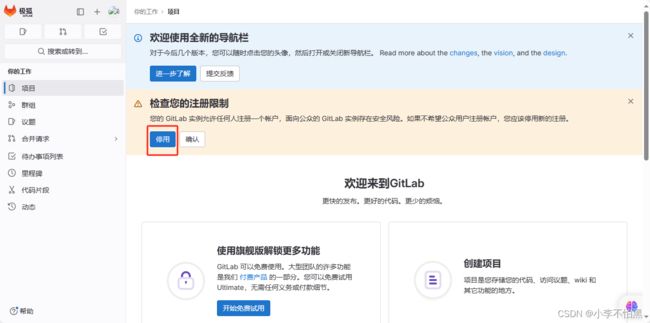
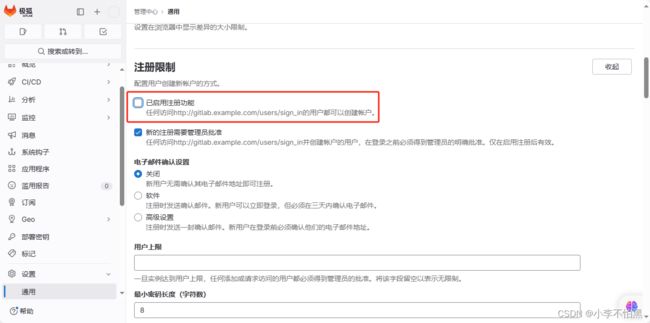
停用注册限制:
修改root用户密码
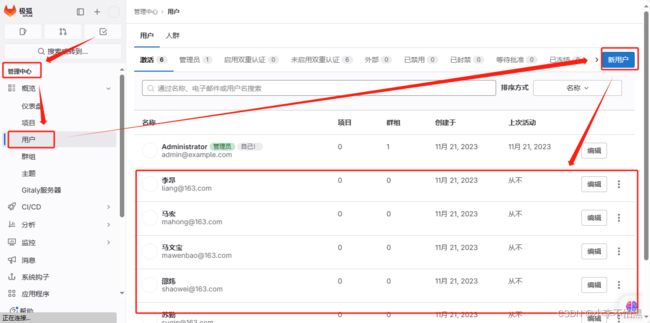
创建用户
为用户设置密码
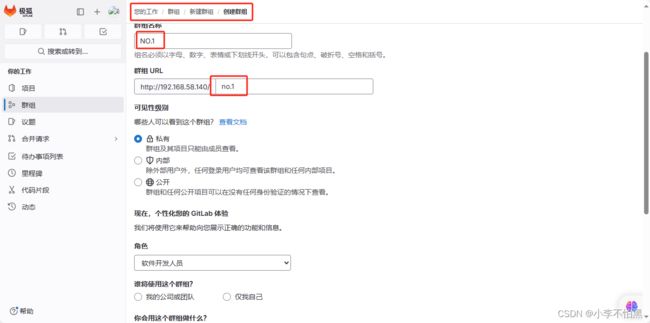
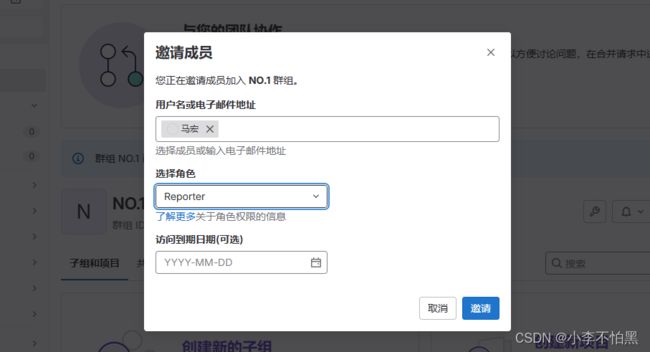
创建群组
使用管理员用户 mawenbao 登录
第一次登录之后需要修改密码,并将字体该为中文。
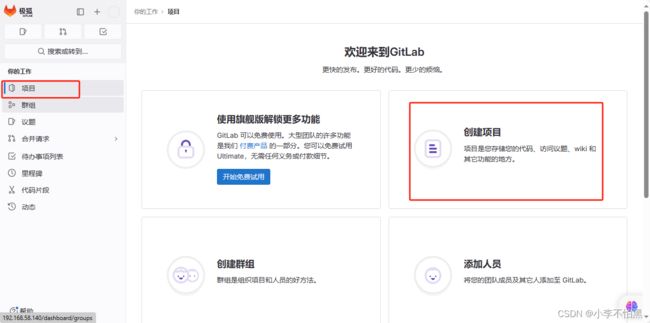
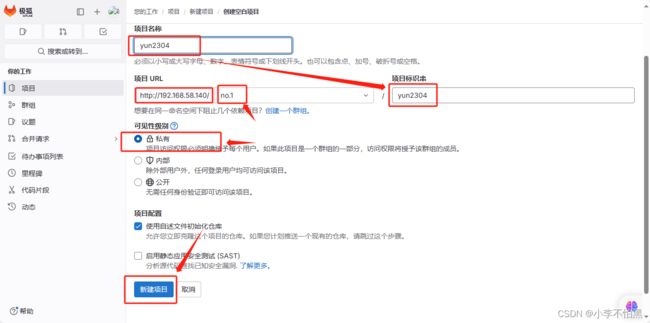
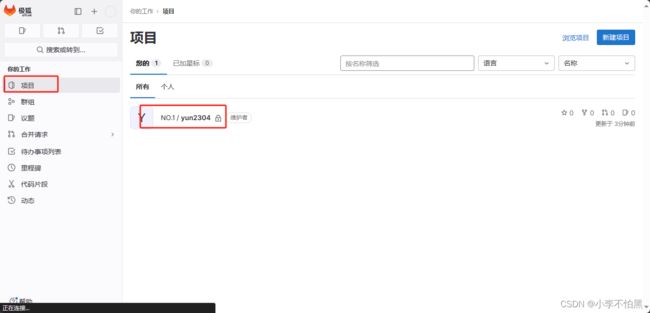
创建项目
使用维护者 shaowei 用户登录
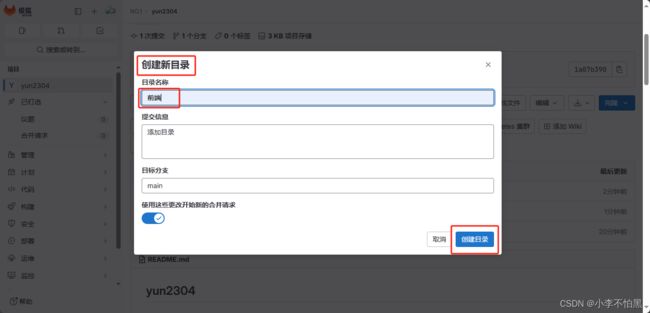
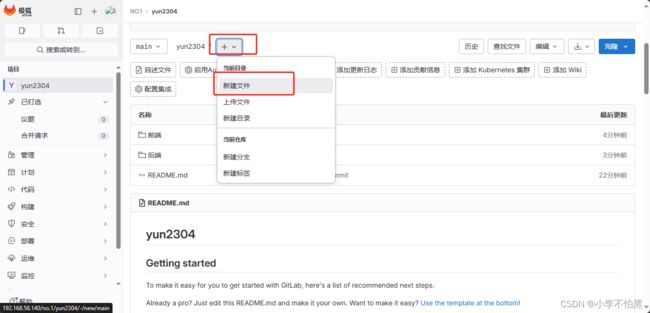
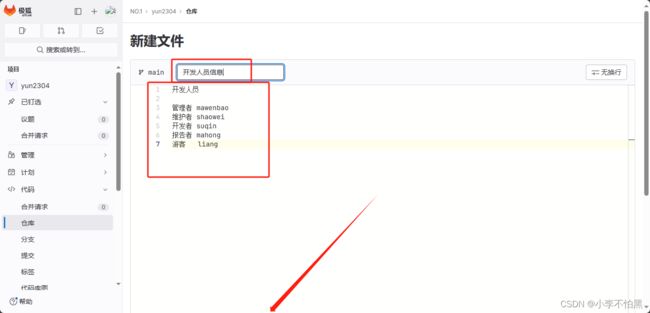
新建文件
编辑后记得点击下方 提交更改
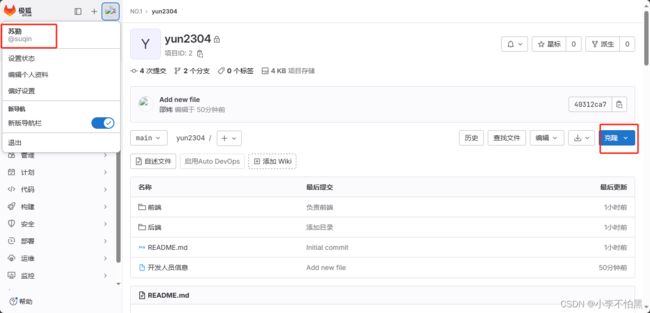
使用开发者 suqin 用户登录
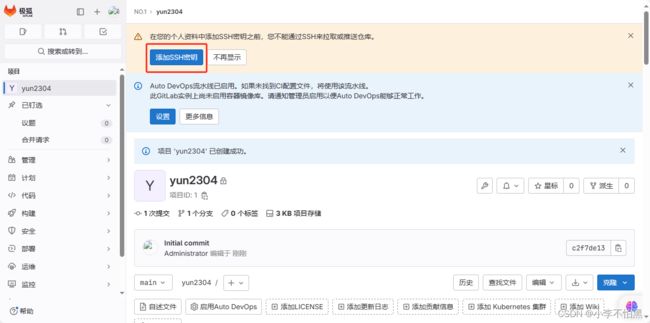
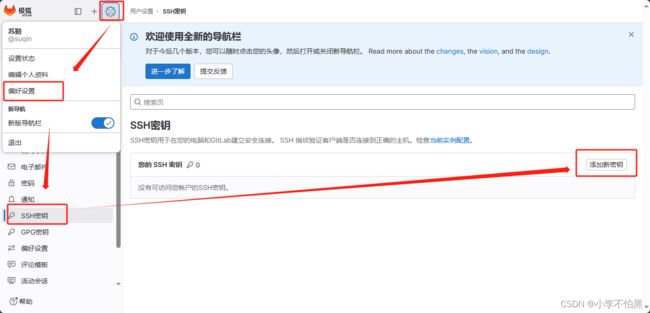
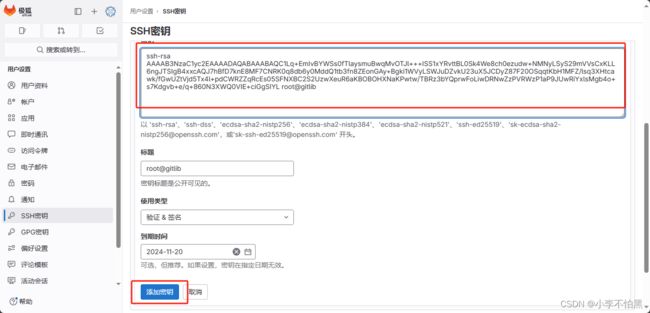
设置ssh密钥
或者点下方路径去设置ssh密钥
在服务器端生成密钥
[root@gitlib ~]# ssh-keygen
Generating public/private rsa key pair.
Enter file in which to save the key (/root/.ssh/id_rsa):
Enter passphrase (empty for no passphrase):
Enter same passphrase again:
Your identification has been saved in /root/.ssh/id_rsa.
Your public key has been saved in /root/.ssh/id_rsa.pub.
The key fingerprint is:
SHA256:94351BjM0KX4HjjsdAQ3Yt/CI+jSYM4d8gdFbra9l3E root@gitlib
The key's randomart image is:
+---[RSA 2048]----+
|           .* o .|
|           = O = |
|        + + B O .|
|       + B * @ o |
|        S * B O.E|
|         o = B *+|
|            = *.o|
|             o . |
|              .  |
+----[SHA256]-----+

[root@gitlib ~]# cat .ssh/id_rsa.pub
ssh-rsa AAAAB3NzaC1yc2EAAAADAQABAAABAQC1Lq+EmIvBYWSs0fTlaysmuBwqMvOTJl+++ISS1xYRvttBL0Sk4We8ch0ezudw+NMNyLSyS29mVVsCxKLL6ngJTSIgB4xxcAQJ7hBfD7knE8MF7CNRK0q8db6y0MddQ1tb3fn8ZEonGAy+Bgki1WVyLSWJuDZvkU23uX5JCDyZ87F20OSqqtKbH1MFZ/lsq3XHtcawk/fGwUZtVjd5Tx4l+pdCWRZZqRcEs05SFNXBC2S2UzwXeuR6aKBOBOHXNaKPwtw/TBRz3bYQprwFoLiwDRNwZzPVRWzP1aP9JUwRiYxlsMgb4o+s7Kdgvb+e/q+860N3XWQ0VIE+ciGgSIYL root@gitlib
[root@gitlib ~]#
将公钥内容复制粘贴到浏览器端,并点击 添加密钥
拉取代码
先在服务器端设置url
[root@gitlib ~]# vim /etc/gitlab/gitlab.rb +32
external_url 'http://192.168.58.140'
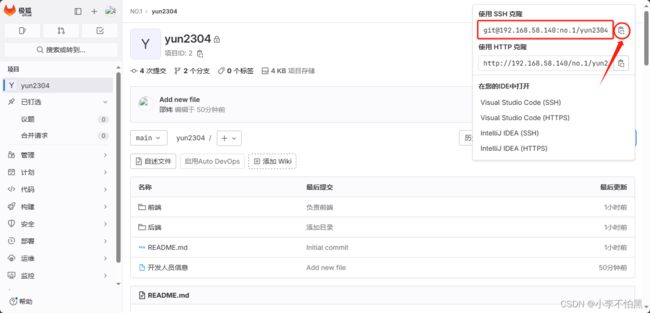
浏览器端刷新,并执行下述操作
服务器端操作
克隆yun2304 项目到服务器上
[root@gitlib ~]# git clone [email protected]:no.1/yun2304.git
正克隆到 'yun2304'...
The authenticity of host '192.168.58.140 (192.168.58.140)' can't be established.
ECDSA key fingerprint is SHA256:8cCuU4k7z9yHbqNeV4J/rQwabYVdWpmkctS4gJNVsfo.
ECDSA key fingerprint is MD5:49:b8:73:02:22:e6:73:9d:26:16:16:4e:f8:92:78:c5.
Are you sure you want to continue connecting (yes/no)? yes
Warning: Permanently added '192.168.58.140' (ECDSA) to the list of known hosts.
remote: Enumerating objects: 16, done.
remote: Counting objects: 100% (16/16), done.
remote: Compressing objects: 100% (12/12), done.
remote: Total 16 (delta 3), reused 0 (delta 0), pack-reused 0
接收对象中: 100% (16/16), done.
处理 delta 中: 100% (3/3), done.

[root@gitlib ~]# ll
总用量 1403432
-rw-------. 1 root root       1257 10月 23 18:00 anaconda-ks.cfg
-rw-rw-rw-. 1 root root 1437100022 11月 17 16:35 gitlab-jh-16.5.2-jh.0.el7.x86_64.rpm
-r--------. 1 root root       1691 10月 13 09:27 ip_fixed.sh
drwxr-xr-x. 3 root root         59 11月  1 22:15 shell
-rwxr-xr-x. 1 root root       1208 10月 30 12:49 yum-server.sh
drwxr-xr-x. 5 root root         89 11月 21 16:47 yun2304      #所克隆的文件
进入yun2304中操作
[root@gitlib yun2304]# git branch
* main
[root@gitlib yun2304]# git config --global user.name "suqin"
[root@gitlib yun2304]# git config --global user.email "[email protected]"
[root@gitlib yun2304]# git config --global color.ui true

[root@gitlib yun2304]# mv 前端/ web_code
[root@gitlib yun2304]# mv 后端/ java_code

[root@gitlib yun2304]# git branch suqin
[root@gitlib yun2304]# git checkout suqin
D       "\345\211\215\347\253\257/.gitkeep"
D       "\345\220\216\347\253\257/.gitkeep"
切换到分支 'suqin'
[root@gitlib yun2304]# ls
java_code  README.md  web_code  开发人员信息

[root@gitlib yun2304]# vim web_code/test.txt
这是前端代码

[root@gitlib yun2304]# git add *

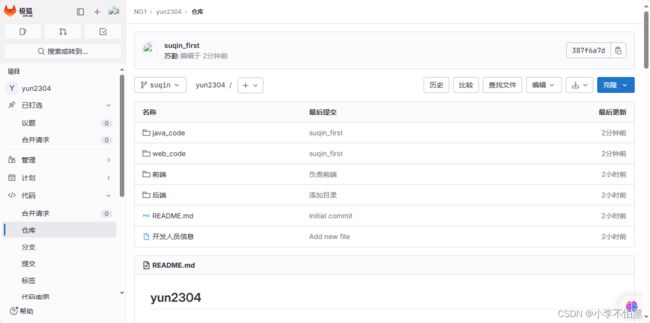
[root@gitlib yun2304]# git commit -m "suqin_first"
[suqin 387f6a7] suqin_first
 3 files changed, 1 insertion(+)
 create mode 100644 java_code/.gitkeep
 create mode 100644 web_code/.gitkeep
 create mode 100644 web_code/test.txt
[root@gitlib yun2304]# git push origin suqin
Counting objects: 5, done.
Delta compression using up to 4 threads.
Compressing objects: 100% (3/3), done.
Writing objects: 100% (4/4), 379 bytes | 0 bytes/s, done.
Total 4 (delta 1), reused 0 (delta 0)
remote:
remote: To create a merge request for suqin, visit:
remote:   http://192.168.58.140/no.1/yun2304/-/merge_requests/new?merge_request%5Bsource_branch%5D=suqin
remote:
To [email protected]:no.1/yun2304.git
 * [new branch]      suqin -> suqin
[root@gitlib yun2304]#
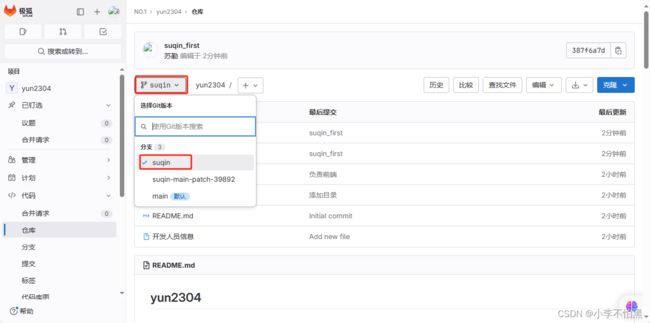
浏览器刷新查看
修改文件内容并推送
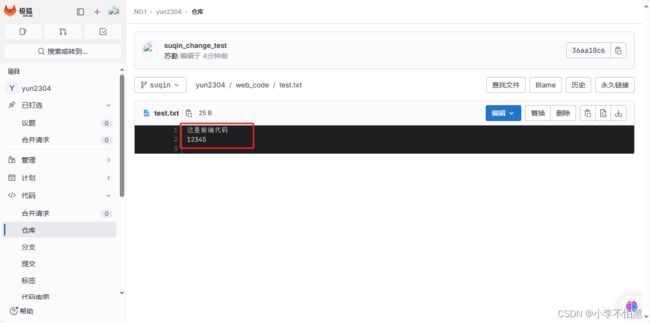
[root@gitlib yun2304]# echo "12345" >>  web_code/test.txt
[root@gitlib yun2304]# git add web_code/test.txt
[root@gitlib yun2304]# git status
# 位于分支 suqin
# 要提交的变更:
#   (使用 "git reset HEAD ..." 撤出暂存区)
#
#       修改:      web_code/test.txt
#
# 尚未暂存以备提交的变更:
#   (使用 "git add/rm ..." 更新要提交的内容)
#   (使用 "git checkout -- ..." 丢弃工作区的改动)
#
#       删除:      "\345\211\215\347\253\257/.gitkeep"
#       删除:      "\345\220\216\347\253\257/.gitkeep"
#
[root@gitlib yun2304]# git commit -m "suqin_change_test"
[suqin 36aa10c] suqin_change_test
 1 file changed, 1 insertion(+)
[root@gitlib yun2304]# git push origin suqin
Counting objects: 7, done.
Delta compression using up to 4 threads.
Compressing objects: 100% (3/3), done.
Writing objects: 100% (4/4), 356 bytes | 0 bytes/s, done.
Total 4 (delta 1), reused 0 (delta 0)
remote:
remote: To create a merge request for suqin, visit:
remote:   http://192.168.58.140/no.1/yun2304/-/merge_requests/new?merge_request%5Bsource_branch%5D=suqin
remote:
To [email protected]:no.1/yun2304.git
   387f6a7..36aa10c  suqin -> suqin
[root@gitlib yun2304]#
浏览器查看
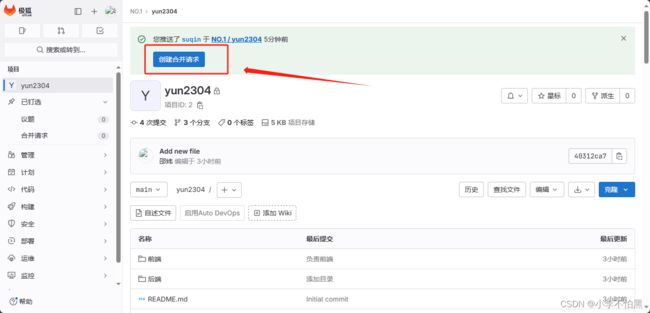
创建合并请求
填写完成记得点击 创建 合并请求
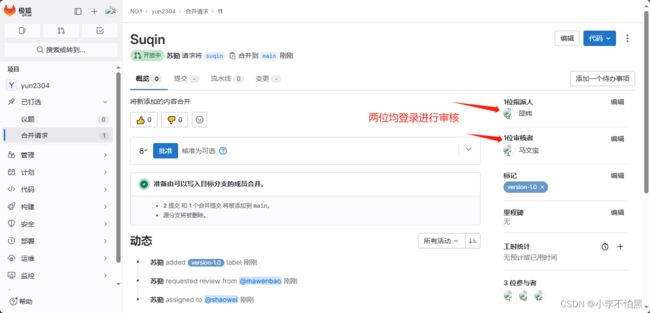
登录管理员 mawenbao 进行审核
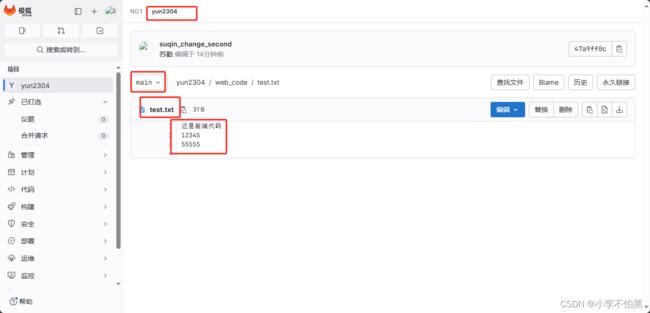
点击 项目-合并请求-点击合并
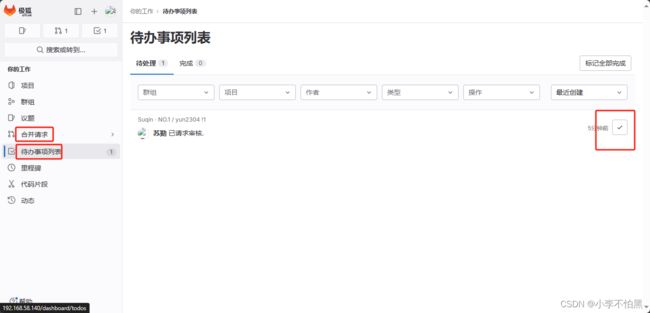
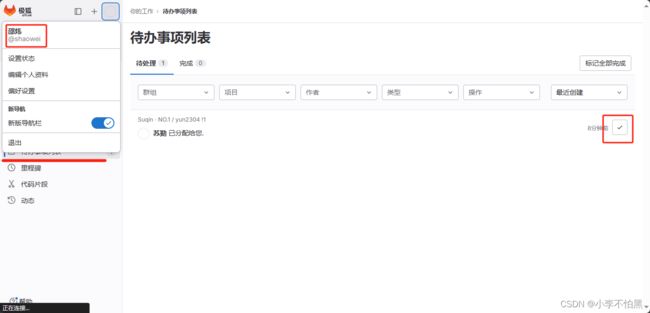
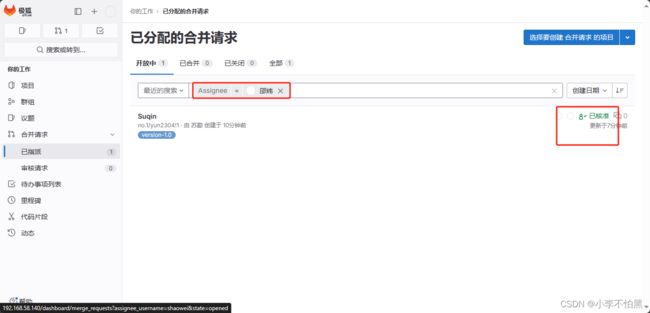
登录运维人员shaowei 进行处理
3 Gitlab 备份与恢复
1、查看系统版本和软件版本
[root@gitlib ~]# cat /etc/redhat-release
CentOS Linux release 7.9.2009 (Core)

[root@gitlib ~]# cat /opt/gitlab/embedded/service/gitlab-rails/VERSION
16.5.2-jh
2、数据备份
打开/etc/gitlab/gitlab.rb配置文件,查看一个和备份相关的配置项:
[root@gitlib ~]# vim /etc/gitlab/gitlab.rb

gitlab_rails['backup_path'] = "/data/gitlab/backups"
该项定义了默认备份出文件的路径,可以通过修改该配置,并执行 **gitlab-ctl reconfigure 或者 gitlab-ctl restart** 重启服务生效。
执行备份命令进行备份
[root@gitlib ~]# /opt/gitlab/bin/gitlab-rake gitlab:backup:create
2023-11-21 12:06:04 UTC -- Dumping database ...
Dumping PostgreSQL database gitlabhq_production ... [DONE]
····
2023-11-21 12:06:26 UTC -- Backup 1700568364_2023_11_21_16.5.2-jh is done.
2023-11-21 12:06:26 UTC -- Deleting backup and restore PID file ... done
也可以添加到 crontab 中定时执行:
0 2 * * * /opt/gitlab/bin/gitlab-rake gitlab:backup:create可以到/data/gitlab/backups找到备份包,解压查看,会发现备份的还是比较全面的,数据库、repositories、build、upload等分类还是比较清晰的。
设置备份保留时常,防止每天执行备份,肯定有目录被爆满的风险,打开/etc/gitlab/gitlab.rb配置文件,找到如下配置:
gitlab_rails['backup_keep_time'] = 604800
设置备份保留7天(7360024=604800),秒为单位,如果想增大或减小,可以直接在该处配置,并通过gitlab-ctl restart 重启服务生效。
备份完成,会在备份目录中生成一个当天日期的tar包。
3、测试数据恢复
(1) 安装部署 gitlab server
具体步骤参见上面:gitlab server 搭建过程
(2) 恢复 gitlab
打开/etc/gitlab/gitlab.rb配置文件,查看一个和备份相关的配置项:
gitlab_rails['backup_path'] = "/data/gitlab/backups"修改该配置,定义了默认备份出文件的路径,并执行 gitlab-ctl reconfigure 或者 gitlab-ctl restart 重启服务生效。
恢复前需要先停掉数据连接服务:
[root@gitlab ~]# gitlab-ctl stop unicorn
[root@gitlab ~]# gitlab-ctl stop sidekiq
如果是台新搭建的主机,不需要操作,理论上不停这两个服务也可以。停这两个服务是为了保证数据一致性。将老服务器的数据删除,然后进行备份恢复
[root@gitlib yun2304]# rm -rf *
[root@gitlib yun2304]# cd /data/gitlab/backups
[root@gitlib backups]# chmod 777 1700568364_2023_11_21_16.5.2-jh_gitlab_backup.tar

#执行下面的命令进行恢复:后面再输入两次yes就完成恢复了。
[root@gitlib backups]# gitlab-rake gitlab:backup:restore BACKUP=1700568364_2023_11_21_16.5.2-jh_gitlab_backup.tar
恢复完成后,启动刚刚的两个服务,或者重启所有服务,再打开浏览器进行访问,发现数据和之前的一致:
[root@gitlab backups]# gitlab-ctl start unicorn
[root@gitlab backups]# gitlab-ctl start sidekiq
或
[root@gitlab backups]# gitlab-ctl restart
注意:若两台服务器通过备份文件恢复gitlab必须保证两台主机的gitlab版本一致,否则会提示版本不匹配
4 邮箱配置
[root@gitlab ]# vim /etc/gitlab/gitlab.rb
gitlab_rails['smtp_enable'] = true
gitlab_rails['smtp_address'] = "smtp.163.com"
gitlab_rails['smtp_port'] = 465
gitlab_rails['smtp_user_name'] = "[email protected]"
gitlab_rails['smtp_password'] = "UWYNCPQOBQFCDLIW"
gitlab_rails['smtp_domain'] = "smtp.163.com"
gitlab_rails['smtp_authentication'] = "login"
gitlab_rails['smtp_enable_starttls_auto'] = false
gitlab_rails['smtp_tls'] = true
gitlab_rails['smtp_pool'] = false
gitlab_rails['gitlab_email_from'] = '[email protected]'

[root@gitlab ]# gitlab-ctl reconfigure