Windows安装Kafka
Windows安装Kafka
提示:可以在windows下使用kafka
文章目录
- Windows安装Kafka
- 前言
- 一、安装zookeeper
-
- 1.下载安装包
- 2.解压和配置
- 3.运行zookeeper
- 二、安装kafka
-
- 1.下载安装包
- 2.解压和配置
- 3.运行kafka服务
- 4.kafka客户端连接
- 4.kafka常用命令
- 三、Kafka的Java客户端-生产者
- 四、Kafka的Java客户端-消费者
- 五、Springboot中使用Kafka
-
- 消息生产者
- 消息消费者
前言
提示:安装kafka必须要安装jdk , ZooKeeper
一、安装zookeeper
1.下载安装包
http://zookeeper.apache.org/releases.html#download
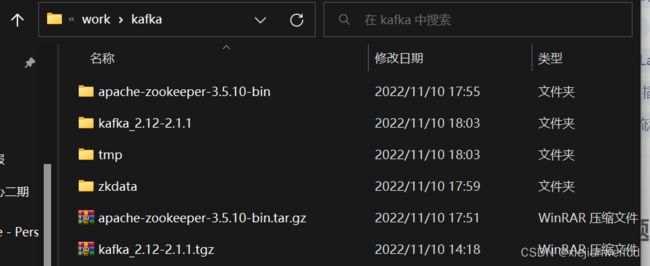
2.解压和配置

将“zoo_sample.cfg”重命名为“zoo.cfg”

配置如下
# The number of milliseconds of each tick
tickTime=2000
# The number of ticks that the initial
# synchronization phase can take
initLimit=10
# The number of ticks that can pass between
# sending a request and getting an acknowledgement
syncLimit=5
# the directory where the snapshot is stored.
# do not use /tmp for storage, /tmp here is just
# example sakes.
dataDir=D:/soft/work/kafka/zkdata
# the port at which the clients will connect
clientPort=2181
# the maximum number of client connections.
# increase this if you need to handle more clients
#maxClientCnxns=60
#
# Be sure to read the maintenance section of the
# administrator guide before turning on autopurge.
#
# http://zookeeper.apache.org/doc/current/zookeeperAdmin.html#sc_maintenance
#
# The number of snapshots to retain in dataDir
#autopurge.snapRetainCount=3
# Purge task interval in hours
# Set to "0" to disable auto purge feature
#autopurge.purgeInterval=1
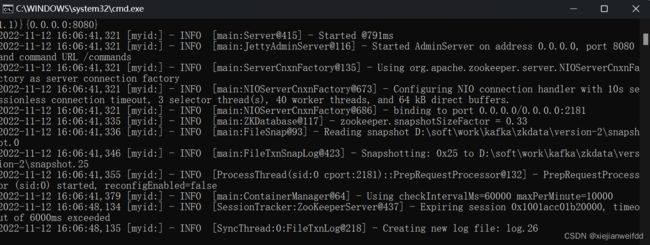
3.运行zookeeper
二、安装kafka
1.下载安装包
http://kafka.apache.org/downloads
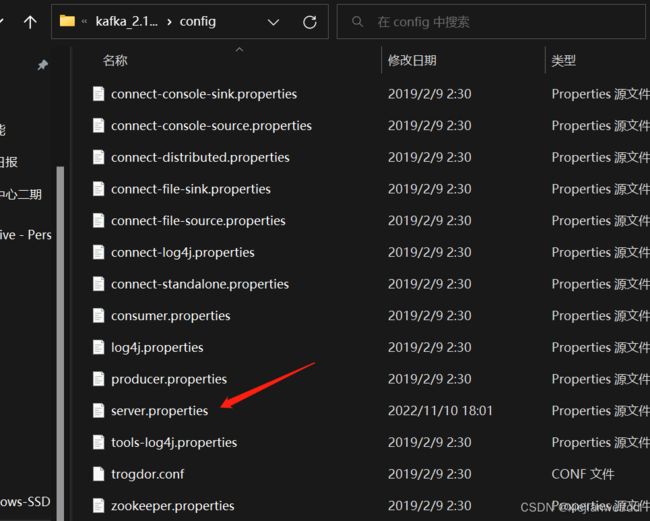
2.解压和配置
broker.id=0
# 在客户端连接的时候使用,如果要是用ip连接这里就要配置成id 列如: listeners=PLAINTEXT://172.20.11.1:9092
listeners=PLAINTEXT://localhost:9092
log.dirs=D:/soft/work/kafka/tmp/kafka-logs
zookeeper.connect=localhost:2181
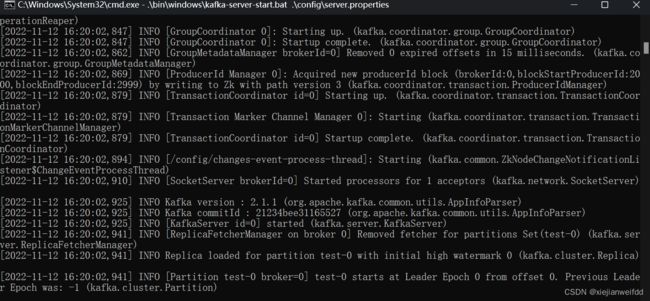
3.运行kafka服务
.\bin\windows\kafka-server-start.bat .\config\server.properties
4.kafka客户端连接
.\bin\windows\kafka-topics.bat --create --zookeeper localhost:2181 --replication-factor 1 --partitions 1 --topic mytest
4.kafka常用命令
# 查看主题输入:
.\bin\windows\kafka-topics.bat --list --zookeeper localhost:2181

# 创建消费者
.\bin\windows\kafka-console-consumer.bat --bootstrap-server localhost:9092 --topic mytest --from-beginning
三、Kafka的Java客户端-生产者
- 引入依赖
<dependency>
    <groupId>org.apache.kafka</groupId>
    <artifactId>kafka-clients</artifactId>
    <version>2.4.1</version>
</dependency>
- 客户端
#### //消息的发送方
public class MyProducer {

private final static String TOPIC_NAME = "my-replicated-topic";

public static void main(String[] args) throws ExecutionException,InterruptedException {
Properties props = new Properties();
props.put(ProducerConfig.BOOTSTRAP_SERVERS_CONFIG,"localhost:9092");
//把发送的key从字符串序列化为字节数组
props.put(ProducerConfig.KEY_SERIALIZER_CLASS_CONFIG,StringSerializer.class.getName());
//把发送消息value从字符串序列化为字节数组
props.put(ProducerConfig.VALUE_SERIALIZER_CLASS_CONFIG,StringSerializer.class.getName());

Producer<String, String> producer = new KafkaProducer<String,String>(props);

Order order = new Order((long) i, i);
ProducerRecord<String, String> producerRecord = new ProducerRecord<String, String>(TOPIC_NAME, order.getOrderId().toString(), JSON.toJSONString(order));
RecordMetadata metadata = producer.send(producerRecord).get();
//=====阻塞=======
System.out.println("同步方式发送消息结果:" + "topic-" +metadata.topic() + "|partition-"+ metadata.partition() + "|offset-" +metadata.offset());
四、Kafka的Java客户端-消费者
public class MyConsumer {
private final static String TOPIC_NAME = "my-replicated-topic";
private final static String CONSUMER_GROUP_NAME = "testGroup";

public static void main(String[] args) {
Properties props = new Properties();
props.put(ConsumerConfig.BOOTSTRAP_SERVERS_CONFIG,"localhost:9092");
// 消费分组名
props.put(ConsumerConfig.GROUP_ID_CONFIG, CONSUMER_GROUP_NAME);
props.put(ConsumerConfig.KEY_DESERIALIZER_CLASS_CONFIG,StringDeserializer.class.getName());
props.put(ConsumerConfig.VALUE_DESERIALIZER_CLASS_CONFIG,StringDeserializer.class.getName());
//创建一个消费者的客户端
KafkaConsumer<String, String> consumer = new KafkaConsumer<String,String>(props);
// 消费者订阅主题列表
consumer.subscribe(Arrays.asList(TOPIC_NAME));

while (true) {
/*
* poll() API 是拉取消息的⻓轮询
*/
ConsumerRecords<String, String> records =consumer.poll(Duration.ofMillis( 1000 ));
for (ConsumerRecord<String, String> record : records) {
System.out.printf("收到消息:partition = %d,offset = %d, key =%s, value = %s%n", record.partition(),record.offset(), record.key(), record.value());
            }
        }
    }
}
五、Springboot中使用Kafka
- 引入依赖
<dependency>
    <groupId>org.springframework.kafka</groupId>
    <artifactId>spring-kafka</artifactId>
</dependency>
配置文件
server:
    port: 8080
spring:
    kafka:
        bootstrap-servers: localhost:9092
        producer: # 生产者
            retries: 3 # 设置大于 0 的值,则客户端会将发送失败的记录重新发送
            batch-size: 16384
            buffer-memory: 33554432
            acks: 1
            # 指定消息key和消息体的编解码方式
            key-serializer: org.apache.kafka.common.serialization.StringSerializer
            value-serializer: org.apache.kafka.common.serialization.StringSerializer
        consumer:
            group-id: default-group
            enable-auto-commit: false
            auto-offset-reset: earliest
            key-deserializer: org.apache.kafka.common.serialization.StringDeserializer
            value-deserializer: org.apache.kafka.common.serialization.StringDeserializer
            max-poll-records: 500
        listener:
        # 当每一条记录被消费者监听器(ListenerConsumer)处理之后提交
        # RECORD
        # 当每一批poll()的数据被消费者监听器(ListenerConsumer)处理之后提交
        # BATCH
        # 当每一批poll()的数据被消费者监听器(ListenerConsumer)处理之后,距离上次提交时间大于TIME时提交
        # TIME
        # 当每一批poll()的数据被消费者监听器(ListenerConsumer)处理之后,被处理record数量大于等于COUNT时提交
        # COUNT
        # TIME | COUNT 有一个条件满足时提交
        # COUNT_TIME
        # 当每一批poll()的数据被消费者监听器(ListenerConsumer)处理之后, 手动调用Acknowledgment.acknowledge()后提交
        # MANUAL
        # 手动调用Acknowledgment.acknowledge()后立即提交,一般使用这种
        # MANUAL_IMMEDIATE
            ack-mode: MANUAL_IMMEDIATE
    redis:
        host: 172.16.253.21
消息生产者
@RestController
public class KafkaController {
    private final static String TOPIC_NAME = "my-replicated-topic";
    @Autowired
    private KafkaTemplate<String, String> kafkaTemplate;
    @RequestMapping("/send")
    public void send() {
        kafkaTemplate.send(TOPIC_NAME, 0 , "key", "this is a msg");
    }
}
消息消费者
置消费组,消费指定topic
@KafkaListener(topics = "my-replicated-topic",groupId = "MyGroup1")
public void listenGroup(ConsumerRecord<String, String> record,Acknowledgment ack) {
  String value = record.value();
  System.out.println(value);
  System.out.println(record);
  //手动提交offset
  ack.acknowledge();
}
设置消费组、多topic、指定分区、指定偏移量消费及设置消费者个数。
@KafkaListener(groupId = "testGroup", topicPartitions = {
@TopicPartition(topic = "topic1", partitions = {"0", "1"}),
@TopicPartition(topic = "topic2", partitions = "0",partitionOffsets = @PartitionOffset(partition = "1",initialOffset = "100"))}
,concurrency = "3")//concurrency就是同组下的消费者个数,就是并发消费数,建议小于等于分区总数
public void listenGroup(ConsumerRecord<String, String> record,Acknowledgment ack) {
    String value = record.value();
    System.out.println(value);
    System.out.println(record);
    //手动提交offset
    ack.acknowledge();
}


