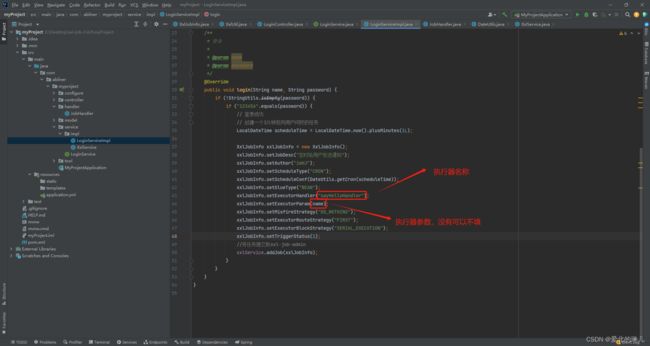
springboot整合xxl-job,通过代码进行调度中心注册开启任务等
背景:由于工作需要,当用户在登录时自动触发定时任务。而不需要我们手动到调度中心管理页面去创建任务。
工程介绍:分为两个项目,第一个是调度中心的项目(xxl-job-admin)。第二个是我们自己的项目(myProject)。
步骤如下:
调度中心操作步骤
1.下载xxl-job的源码
点击进入xxl-job项目官网地址
源码下载地址-github
源码下载地址-gitee
1.1、gitee为例,下载2.4.0版本。
1.2、下载代码压缩包
1.3、下载完成,解压压缩包目录展示
1.4、数据库建表,打开doc文件夹,里面有sql文件。到数据库执行就可以创建xxl-job项目所需要的表了。
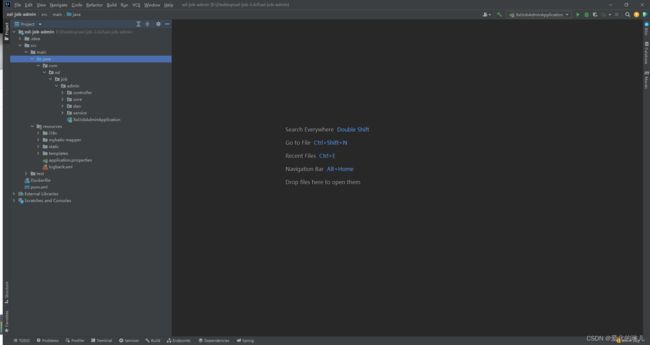
1.5、打开xxl-job-admin项目(我这里使用的是idea工具)
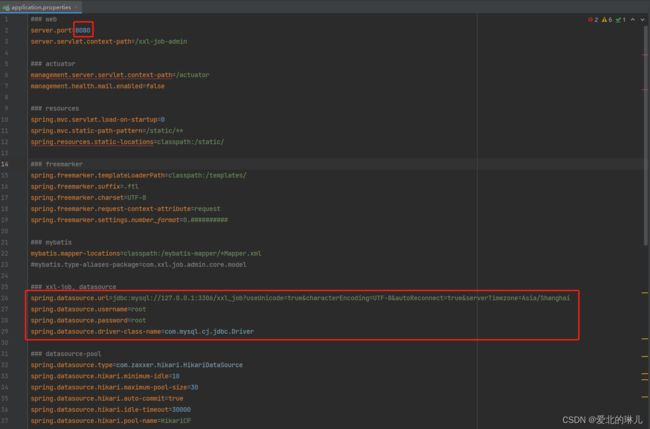
1.6、更新配置(主要两个配置:1.端口默认8080(也可以自定义)2.数据库配置))。报红地方不影响代码运行,可以不用管。
1.7、启动项目访问调度中心,访问地址:http://localhost:8080/xxl-job-admin,默认用户名:admin,默认密码:123456
a.启动日志:
b.登录页面:
c.登录进入首页
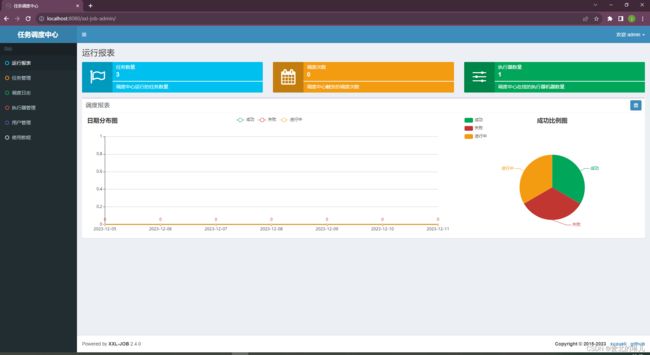
进入到以上页面就说明调度中心启动没有问题了,接下来就是改造调度中心为我们所用。
1.8、改造项目
1.8.0、任务组控制器添加新接口用于查找执行器(执行器的意思是,执行任务时用哪个执行器执行,必须要指定)。
a.进入JobGroupController,添加以下代码
代码如下:
	@RequestMapping("/loadByAppName")
    @ResponseBody
    @PermissionLimit(limit = false)
    public ReturnT<XxlJobGroup> loadByAppName(String param) {

        LoadByAppNameParam loadByAppNameParam = GsonTool.fromJson(param, LoadByAppNameParam.class);
        String appName = loadByAppNameParam.getAppName();
        XxlJobGroup jobGroup = xxlJobGroupDao.loadByAppName(appName);

        try {
            if (null != jobGroup) {
                return new ReturnT<XxlJobGroup>(jobGroup);
            } else {
                return new ReturnT<XxlJobGroup>(ReturnT.FAIL_CODE, null);
            }
        } catch (Exception e) {
            e.printStackTrace();
        }
        return null;
    }
注:@PermissionLimit(limit = false)注解的含义是跳过登录验证
b.进入XxlJobGroupDao文件添加如下代码
XxlJobGroup loadByAppName(@Param("name") String name);
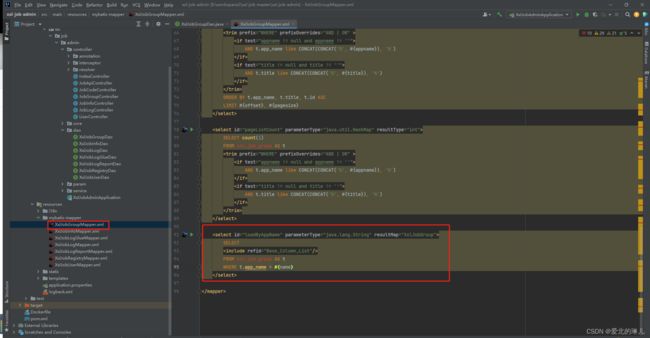
c.进入XxlJobGroupMapper.xml文件添加如下代码
<select id="loadByAppName" parameterType="java.lang.String" resultMap="XxlJobGroup">
		SELECT
		<include refid="Base_Column_List"/>
		FROM xxl_job_group AS t
		WHERE t.app_name = #{name}
	</select>
d.LoadByAppNameParam.java文件是我自定义文件,用来接受appName参数的,后面会讲到。
代码如下:
public class LoadByAppNameParam {

    private String appName;

    public String getAppName() {
        return appName;
    }

    public void setAppName(String appName) {
        this.appName = appName;
    }

}
e.测试,我在调度管理中创建了一个默认执行器,用postman调用接口测试,查看返回数据。注意:后面我还是用xxl-job自带的执行器来演示

我设置的本地ip地址,不填的话默认是当前主机的ip

postman测试接口,查找名为“xxl-job-executor-sample”的执行器。

1.8.1、在JobInfoController.java中添加两个接口
@RequestMapping("/addJob")
    @ResponseBody
    @PermissionLimit(limit = false)
    public ReturnT<String> addJob(String param) {
        System.out.println(param);
        XxlJobInfo xxlJobInfo = GsonTool.fromJson(param, XxlJobInfo.class);
        return xxlJobService.add(xxlJobInfo);
    }

    @RequestMapping("/removeJob")
    @ResponseBody
    @PermissionLimit(limit = false)
    public ReturnT<String> removeJob(String id) {
        return xxlJobService.remove(Integer.parseInt(id));
    }
这两个接口后面在代码里测试这里就不再演示了。
我们自己项目的操作步骤
1.创建SpringBoot工程(SpringBoot版本2.5.6,jdk版本为1.8,xxl-job-core依赖为2.4.0,lombok插件有使用到,hutool工具包5.5.0,阿里巴巴fastjson)
pom文件如下:
<?xml version="1.0" encoding="UTF-8"?>
<project xmlns="http://maven.apache.org/POM/4.0.0" xmlns:xsi="http://www.w3.org/2001/XMLSchema-instance"
         xsi:schemaLocation="http://maven.apache.org/POM/4.0.0 https://maven.apache.org/xsd/maven-4.0.0.xsd">
    <modelVersion>4.0.0</modelVersion>
    <parent>
        <groupId>org.springframework.boot</groupId>
        <artifactId>spring-boot-starter-parent</artifactId>
        <version>2.5.6</version>
        <relativePath/> <!-- lookup parent from repository -->
    </parent>
    <groupId>com.abliner</groupId>
    <artifactId>myProject</artifactId>
    <version>0.0.1-SNAPSHOT</version>
    <name>myProject</name>
    <description>myProject</description>
    <properties>
        <java.version>8</java.version>
    </properties>
    <dependencies>
        <dependency>
            <groupId>org.springframework.boot</groupId>
            <artifactId>spring-boot-starter-web</artifactId>
        </dependency>

        <dependency>
            <groupId>org.springframework.boot</groupId>
            <artifactId>spring-boot-starter-test</artifactId>
            <scope>test</scope>
        </dependency>
        <!-- xxl-job-core依赖 -->
        <!-- https://mvnrepository.com/artifact/com.xuxueli/xxl-job-core -->
        <dependency>
            <groupId>com.xuxueli</groupId>
            <artifactId>xxl-job-core</artifactId>
            <version>2.3.0</version>
        </dependency>
        <!-- lombok -->
        <dependency>
            <groupId>org.projectlombok</groupId>
            <artifactId>lombok</artifactId>
            <optional>true</optional>
        </dependency>
        <!-- hutool工具依赖 -->
        <dependency>
            <groupId>cn.hutool</groupId>
            <artifactId>hutool-json</artifactId>
            <version>5.5.0</version>
        </dependency>
        <!-- JSON转换工具 -->
        <dependency>
            <groupId>com.alibaba</groupId>
            <artifactId>fastjson</artifactId>
            <version>1.2.11</version>
        </dependency>
    </dependencies>

    <build>
        <plugins>
            <plugin>
                <groupId>org.springframework.boot</groupId>
                <artifactId>spring-boot-maven-plugin</artifactId>
            </plugin>
        </plugins>
    </build>

</project>
1.0、配置文件application.yml(配置文件默认是application.properties,我喜欢另一种风格所以改成了application.yml。指定启动端口为:8081)
server:
  port: 8081

# Xxl-Job分布式定时任务调度中心
xxl:
  job:
    ### 执行器通讯TOKEN [选填]:非空时启用;
    accessToken: default_token
    admin:
      ### 调度中心部署根地址 [选填]:如调度中心集群部署存在多个地址则用逗号分隔。执行器将会使用该地址进行"执行器心跳注册"和"任务结果回调";为空则关闭自动注册;
      addresses: http://127.0.0.1:8080/xxl-job-admin
    executor:
      ### 执行器注册 [选填]:优先使用该配置作为注册地址,为空时使用内嵌服务 ”IP:PORT“ 作为注册地址。从而更灵活的支持容器类型执行器动态IP和动态映射端口问题。
      address:
      ### 执行器AppName [选填]:执行器心跳注册分组依据;为空则关闭自动注册
      appname: xxl-job-executor-sample
      ### 执行器IP [选填]:默认为空表示自动获取IP,多网卡时可手动设置指定IP,该IP不会绑定Host仅作为通讯实用;地址信息用于 "执行器注册" 和 "调度中心请求并触发任务";
      ip:
      ### 执行器端口号 [选填]:小于等于0则自动获取;默认端口为9999,单机部署多个执行器时,注意要配置不同执行器端口;
      port: 9999
      ### 执行器运行日志文件存储磁盘路径 [选填] :需要对该路径拥有读写权限;为空则使用默认路径;
      logpath: /data/applogs/xxl-job/jobhandler
      ### 执行器日志文件保存天数 [选填] : 过期日志自动清理, 限制值大于等于3时生效; 否则, 如-1, 关闭自动清理功能;
      logretentiondays: 30
注意:配置调度中心的地址addresses,我这里用的默认的地址:http://127.0.0.1:8080/xxl-job-admin,如调度中心端口更改,那么我们自己项目里的端口也需要更新。accessToken也是一样,要与调度中心配置保持一致。
1.1、创建配置
1.1.0、创建xxl的配置(没有目录的新建目录,我这里新建了configure和xxl两个目录)
注意:XxlJobConfig.java中忘记加“@Configuration注解”,导致调度中心注册失败,日志提示如下图:

完整代码如下:
package com.abliner.myproject.configure.xxl;

import com.xxl.job.core.executor.impl.XxlJobSpringExecutor;
import org.slf4j.Logger;
import org.slf4j.LoggerFactory;
import org.springframework.beans.factory.annotation.Value;
import org.springframework.context.annotation.Bean;

/**
 * @author
 * @date 2023/12/11 14:58
 * @describe
 */
 @Configuration
public class XxlJobConfig {
    private Logger logger = LoggerFactory.getLogger(XxlJobConfig.class);

    @Value("${xxl.job.admin.addresses}")
    private String adminAddresses;

    @Value("${xxl.job.accessToken}")
    private String accessToken;

    @Value("${xxl.job.executor.appname}")
    private String appname;

    @Value("${xxl.job.executor.address}")
    private String address;

    @Value("${xxl.job.executor.ip}")
    private String ip;

    @Value("${xxl.job.executor.port}")
    private int port;

    @Value("${xxl.job.executor.logpath}")
    private String logPath;

    @Value("${xxl.job.executor.logretentiondays}")
    private int logRetentionDays;


    @Bean
    public XxlJobSpringExecutor xxlJobExecutor() {
        logger.info(">>>>>>>>>>> xxl-job config init.");
        XxlJobSpringExecutor xxlJobSpringExecutor = new XxlJobSpringExecutor();
        xxlJobSpringExecutor.setAdminAddresses(adminAddresses);
        xxlJobSpringExecutor.setAppname(appname);
        xxlJobSpringExecutor.setAddress(address);
        xxlJobSpringExecutor.setIp(ip);
        xxlJobSpringExecutor.setPort(port);
        xxlJobSpringExecutor.setAccessToken(accessToken);
        xxlJobSpringExecutor.setLogPath(logPath);
        xxlJobSpringExecutor.setLogRetentionDays(logRetentionDays);

        return xxlJobSpringExecutor;
    }

    /**
     * 针对多网卡、容器内部署等情况,可借助 "spring-cloud-commons" 提供的 "InetUtils" 组件灵活定制注册IP;
     *
     *      1、引入依赖:
     *
     *             org.springframework.cloud
     *             spring-cloud-commons
     *             ${version}
     *
     *
     *      2、配置文件,或者容器启动变量
     *          spring.cloud.inetutils.preferred-networks: 'xxx.xxx.xxx.'
     *
     *      3、获取IP
     *          String ip_ = inetUtils.findFirstNonLoopbackHostInfo().getIpAddress();
     */


}
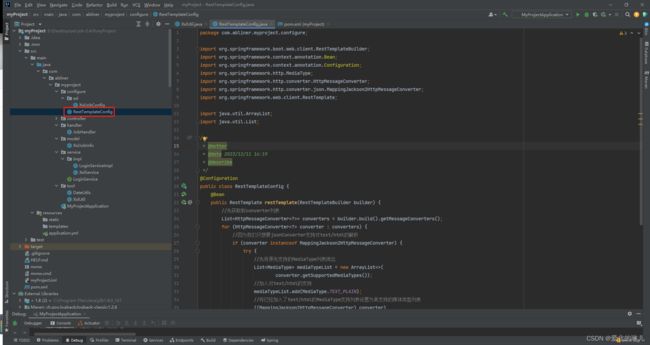
1.1.1、创建RestTemplateConfig.java用于网络请求的配置
package com.abliner.myproject.configure;

import org.springframework.boot.web.client.RestTemplateBuilder;
import org.springframework.context.annotation.Bean;
import org.springframework.context.annotation.Configuration;
import org.springframework.http.MediaType;
import org.springframework.http.converter.HttpMessageConverter;
import org.springframework.http.converter.json.MappingJackson2HttpMessageConverter;
import org.springframework.web.client.RestTemplate;

import java.util.ArrayList;
import java.util.List;

/**
 * @author
 * @date 2023/12/11 16:19
 * @describe
 */
@Configuration
public class RestTemplateConfig {
    @Bean
    public RestTemplate restTemplate(RestTemplateBuilder builder) {
        //先获取到converter列表
        List<HttpMessageConverter<?>> converters = builder.build().getMessageConverters();
        for (HttpMessageConverter<?> converter : converters) {
            //因为我们只想要jsonConverter支持对text/html的解析
            if (converter instanceof MappingJackson2HttpMessageConverter) {
                try {
                    //先将原先支持的MediaType列表拷出
                    List<MediaType> mediaTypeList = new ArrayList<>(
                            converter.getSupportedMediaTypes());
                    //加入对text/html的支持
                    mediaTypeList.add(MediaType.TEXT_PLAIN);
                    //将已经加入了text/html的MediaType支持列表设置为其支持的媒体类型列表
                    ((MappingJackson2HttpMessageConverter) converter)
                            .setSupportedMediaTypes(mediaTypeList);
                } catch (Exception e) {
                    e.printStackTrace();
                }
            }
        }
        return builder.build();
    }
}
1.2、创建XxlJobInfo.java(没有目录的新建目录,我这里新建了model目录。这个对象后面会使用到)
package com.abliner.myproject.model;

import java.util.Date;

/**
 * @author
 * @date 2023/12/11 15:14
 * @describe
 */
public class XxlJobInfo {

    private int id;				// 主键ID

    private int jobGroup;		// 执行器主键ID
    private String jobDesc;

    private Date addTime;
    private Date updateTime;

    private String author;		// 负责人
    private String alarmEmail;	// 报警邮件

    private String scheduleType;			// 调度类型
    private String scheduleConf;			// 调度配置,值含义取决于调度类型
    private String misfireStrategy;			// 调度过期策略

    private String executorRouteStrategy;	// 执行器路由策略
    private String executorHandler;		    // 执行器,任务Handler名称
    private String executorParam;		    // 执行器,任务参数
    private String executorBlockStrategy;	// 阻塞处理策略
    private int executorTimeout;     		// 任务执行超时时间,单位秒
    private int executorFailRetryCount;		// 失败重试次数

    private String glueType;		// GLUE类型	#com.xxl.job.core.glue.GlueTypeEnum
    private String glueSource;		// GLUE源代码
    private String glueRemark;		// GLUE备注
    private Date glueUpdatetime;	// GLUE更新时间

    private String childJobId;		// 子任务ID,多个逗号分隔

    private int triggerStatus;		// 调度状态:0-停止,1-运行
    private long triggerLastTime;	// 上次调度时间
    private long triggerNextTime;	// 下次调度时间


    public int getId() {
        return id;
    }

    public void setId(int id) {
        this.id = id;
    }

    public int getJobGroup() {
        return jobGroup;
    }

    public void setJobGroup(int jobGroup) {
        this.jobGroup = jobGroup;
    }

    public String getJobDesc() {
        return jobDesc;
    }

    public void setJobDesc(String jobDesc) {
        this.jobDesc = jobDesc;
    }

    public Date getAddTime() {
        return addTime;
    }

    public void setAddTime(Date addTime) {
        this.addTime = addTime;
    }

    public Date getUpdateTime() {
        return updateTime;
    }

    public void setUpdateTime(Date updateTime) {
        this.updateTime = updateTime;
    }

    public String getAuthor() {
        return author;
    }

    public void setAuthor(String author) {
        this.author = author;
    }

    public String getAlarmEmail() {
        return alarmEmail;
    }

    public void setAlarmEmail(String alarmEmail) {
        this.alarmEmail = alarmEmail;
    }

    public String getScheduleType() {
        return scheduleType;
    }

    public void setScheduleType(String scheduleType) {
        this.scheduleType = scheduleType;
    }

    public String getScheduleConf() {
        return scheduleConf;
    }

    public void setScheduleConf(String scheduleConf) {
        this.scheduleConf = scheduleConf;
    }

    public String getMisfireStrategy() {
        return misfireStrategy;
    }

    public void setMisfireStrategy(String misfireStrategy) {
        this.misfireStrategy = misfireStrategy;
    }

    public String getExecutorRouteStrategy() {
        return executorRouteStrategy;
    }

    public void setExecutorRouteStrategy(String executorRouteStrategy) {
        this.executorRouteStrategy = executorRouteStrategy;
    }

    public String getExecutorHandler() {
        return executorHandler;
    }

    public void setExecutorHandler(String executorHandler) {
        this.executorHandler = executorHandler;
    }

    public String getExecutorParam() {
        return executorParam;
    }

    public void setExecutorParam(String executorParam) {
        this.executorParam = executorParam;
    }

    public String getExecutorBlockStrategy() {
        return executorBlockStrategy;
    }

    public void setExecutorBlockStrategy(String executorBlockStrategy) {
        this.executorBlockStrategy = executorBlockStrategy;
    }

    public int getExecutorTimeout() {
        return executorTimeout;
    }

    public void setExecutorTimeout(int executorTimeout) {
        this.executorTimeout = executorTimeout;
    }

    public int getExecutorFailRetryCount() {
        return executorFailRetryCount;
    }

    public void setExecutorFailRetryCount(int executorFailRetryCount) {
        this.executorFailRetryCount = executorFailRetryCount;
    }

    public String getGlueType() {
        return glueType;
    }

    public void setGlueType(String glueType) {
        this.glueType = glueType;
    }

    public String getGlueSource() {
        return glueSource;
    }

    public void setGlueSource(String glueSource) {
        this.glueSource = glueSource;
    }

    public String getGlueRemark() {
        return glueRemark;
    }

    public void setGlueRemark(String glueRemark) {
        this.glueRemark = glueRemark;
    }

    public Date getGlueUpdatetime() {
        return glueUpdatetime;
    }

    public void setGlueUpdatetime(Date glueUpdatetime) {
        this.glueUpdatetime = glueUpdatetime;
    }

    public String getChildJobId() {
        return childJobId;
    }

    public void setChildJobId(String childJobId) {
        this.childJobId = childJobId;
    }

    public int getTriggerStatus() {
        return triggerStatus;
    }

    public void setTriggerStatus(int triggerStatus) {
        this.triggerStatus = triggerStatus;
    }

    public long getTriggerLastTime() {
        return triggerLastTime;
    }

    public void setTriggerLastTime(long triggerLastTime) {
        this.triggerLastTime = triggerLastTime;
    }

    public long getTriggerNextTime() {
        return triggerNextTime;
    }

    public void setTriggerNextTime(long triggerNextTime) {
        this.triggerNextTime = triggerNextTime;
    }
}
1.3、添加XxlUtil.java工具类,我们要远程调用调度中心需要用到(我这里新建了tool目录)
package com.abliner.myproject.tool;

import cn.hutool.json.JSONUtil;
import com.abliner.myproject.model.XxlJobInfo;
import com.alibaba.fastjson.JSON;
import com.alibaba.fastjson.JSONObject;
import lombok.RequiredArgsConstructor;
import org.springframework.beans.factory.annotation.Value;
import org.springframework.http.HttpEntity;
import org.springframework.http.HttpHeaders;
import org.springframework.http.MediaType;
import org.springframework.http.ResponseEntity;
import org.springframework.stereotype.Component;
import org.springframework.util.LinkedMultiValueMap;
import org.springframework.util.MultiValueMap;
import org.springframework.web.client.RestTemplate;

import java.util.HashMap;
import java.util.Map;

/**
 * @author
 * @date 2023/12/11 15:22
 * @describe
 */
@Component
@RequiredArgsConstructor
public class XxlUtil {

    @Value("${xxl.job.admin.addresses}")
    private String xxlJobAdminAddress;

    private final RestTemplate restTemplate;

    // xxl-job各种请求地址
    private static final String ADD_INFO_URL = "/jobinfo/addJob";
    private static final String REMOVE_INFO_URL = "/jobinfo/removeJob";
    private static final String GET_GROUP_ID = "/jobgroup/loadByAppName";

    /**
     * 添加任务
     *
     * @param xxlJobInfo
     * @param appName
     * @return
     */
    public String addJob(XxlJobInfo xxlJobInfo, String appName) {
        //组装参数
        Map<String, Object> params = new HashMap<>();
        params.put("appName", appName);
        String json = JSONUtil.toJsonStr(params);
        //调用xxl-job接口添加任务
        String result = doPost(xxlJobAdminAddress + GET_GROUP_ID, json);

        //获取执行器的id
        JSONObject jsonObject = JSON.parseObject(result);
        Map<String, Object> map = (Map<String, Object>) jsonObject.get("content");
        Integer groupId = (Integer) map.get("id");


        xxlJobInfo.setJobGroup(groupId);
        String xxlJobInfoJson = JSONUtil.toJsonStr(xxlJobInfo);
        //添加这个job
        return doPost(xxlJobAdminAddress + ADD_INFO_URL, xxlJobInfoJson);
    }

    // 删除job
    public String removeJob(long jobId) {
        MultiValueMap<String, String> map = new LinkedMultiValueMap<String, String>();
        map.add("id", String.valueOf(jobId));
        return doPostWithFormData(xxlJobAdminAddress + REMOVE_INFO_URL, map);
    }

    /**
     * 远程调用
     *
     * @param url
     * @param json
     */
    private String doPost(String url, String json) {
        HttpHeaders headers = new HttpHeaders();
        headers.setContentType(MediaType.APPLICATION_FORM_URLENCODED);
        MultiValueMap<String, String> map = new LinkedMultiValueMap<String, String>();
        map.add("param", json);
        HttpEntity<MultiValueMap<String, String>> entity = new HttpEntity<>(map, headers);
        ResponseEntity<String> responseEntity = restTemplate.postForEntity(url, entity, String.class);
        return responseEntity.getBody();
    }

    private String doPostWithFormData(String url, MultiValueMap<String, String> map) {
        HttpHeaders headers = new HttpHeaders();
        headers.setContentType(MediaType.APPLICATION_FORM_URLENCODED);
        HttpEntity<MultiValueMap<String, String>> entity = new HttpEntity<>(map, headers);
        ResponseEntity<String> responseEntity = restTemplate.postForEntity(url, entity, String.class);
        return responseEntity.getBody();
    }

}
1.4、编写XxlService.java(注意新建service和impl目录)
package com.abliner.myproject.service.impl;

import com.abliner.myproject.model.XxlJobInfo;
import com.abliner.myproject.tool.XxlUtil;
import lombok.RequiredArgsConstructor;
import lombok.extern.slf4j.Slf4j;
import org.springframework.beans.factory.annotation.Value;
import org.springframework.stereotype.Service;

/**
 * @author
 * @date 2023/12/11 15:43
 * @describe
 */
@Service
@Slf4j
@RequiredArgsConstructor
public class XxlService {

    private final XxlUtil xxlUtil;

    @Value("${xxl.job.executor.appname}")
    private String appName;

    public void addJob(XxlJobInfo xxlJobInfo) {
        xxlUtil.addJob(xxlJobInfo, appName);
        log.info("任务已添加");
    }

}
1.5、新建时间转换工具类DateUtils.java
package com.abliner.myproject.tool;

import java.time.LocalDateTime;
import java.time.format.DateTimeFormatter;

/**
 * @author
 * @date 2023/12/11 15:56
 * @describe
 */
public class DateUtils {

    // 使用 DateTimeFormatter 格式化时间
    public static final DateTimeFormatter formatter = DateTimeFormatter.ofPattern("yyyy MM dd HH mm ss");

    /**
     * 时间转换Cron表达式
     *
     * @param dateTime
     * @return Cron表达式
     * @author
     */
    public static String getCron(LocalDateTime dateTime) {

        String formattedDateTime = dateTime.format(formatter);

        String[] dateTimeParts = formattedDateTime.split(" ");
        String cron = String.format("%s %s %s %s %s ? %s-%s", dateTimeParts[5], dateTimeParts[4], dateTimeParts[3], dateTimeParts[2], dateTimeParts[1], dateTimeParts[0], dateTimeParts[0]);

        return cron;
    }

}
1.6、模拟登录请求
1.6.0、controlelr层->LoginController.java
package com.abliner.myproject.controller;

import com.abliner.myproject.service.LoginService;
import org.springframework.web.bind.annotation.GetMapping;
import org.springframework.web.bind.annotation.RequestMapping;
import org.springframework.web.bind.annotation.RequestParam;
import org.springframework.web.bind.annotation.RestController;

import javax.annotation.Resource;

/**
 * @author
 * @date 2023/12/11 15:40
 * @describe
 */
@RestController
@RequestMapping("server")
public class LoginController {

    @Resource
    private LoginService loginService;

    @GetMapping("/login")
    public String login(@RequestParam("name") String name,
                        @RequestParam("password") String password) {
        loginService.login(name, password);
        return "登录成功";
    }

}
1.6.2、service层->LoginService.java
package com.abliner.myproject.service;

/**
 * @author
 * @date 2023/12/11 15:48
 * @describe
 */
public interface LoginService {

    /**
     * 登录
     *
     * @param name
     * @param password
     * */
    void login(String name,String password);

}
1.6.3、service实现层->LoginServiceImpl.java
完整代码如下:
package com.abliner.myproject.service.impl;

import com.abliner.myproject.model.XxlJobInfo;
import com.abliner.myproject.service.LoginService;
import com.abliner.myproject.tool.DateUtils;
import org.springframework.stereotype.Service;
import org.springframework.util.StringUtils;

import javax.annotation.Resource;
import java.time.LocalDateTime;

/**
 * @author
 * @date 2023/12/11 15:51
 * @describe
 */
@Service
public class LoginServiceImpl implements LoginService {

    @Resource
    private XxlService xxlService;

    /**
     * 登录
     *
     * @param name
     * @param password
     */
    @Override
    public void login(String name, String password) {
        if (!StringUtils.isEmpty(password)) {
            if ("123456".equals(password)) {
                // 登录成功
                // 创建一个1分钟后向用户问好的任务
                LocalDateTime scheduleTime = LocalDateTime.now().plusMinutes(1L);

                XxlJobInfo xxlJobInfo = new XxlJobInfo();
                xxlJobInfo.setJobDesc("定时给用户发送通知");
                xxlJobInfo.setAuthor("imHJ");
                xxlJobInfo.setScheduleType("CRON");
                xxlJobInfo.setScheduleConf(DateUtils.getCron(scheduleTime));
                xxlJobInfo.setGlueType("BEAN");
                xxlJobInfo.setExecutorHandler("sayHelloHandler");
                xxlJobInfo.setExecutorParam(name);
                xxlJobInfo.setMisfireStrategy("DO_NOTHING");
                xxlJobInfo.setExecutorRouteStrategy("FIRST");
                xxlJobInfo.setExecutorBlockStrategy("SERIAL_EXECUTION");
                xxlJobInfo.setTriggerStatus(1);
                //将任务提交到xxl-job-admin
                xxlService.addJob(xxlJobInfo);
            }
        }
    }
}
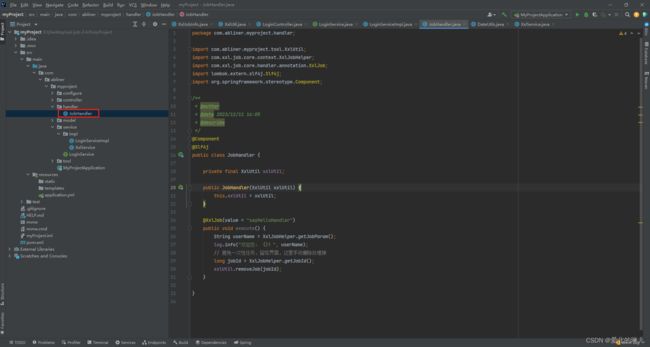
1.6.4、新建JobHandler.java执行器,用于处理任务(定时任务执行的具体业务)
package com.abliner.myproject.handler;

import com.abliner.myproject.tool.XxlUtil;
import com.xxl.job.core.context.XxlJobHelper;
import com.xxl.job.core.handler.annotation.XxlJob;
import lombok.extern.slf4j.Slf4j;
import org.springframework.stereotype.Component;

/**
 * @author
 * @date 2023/12/11 16:05
 * @describe
 */
@Component
@Slf4j
public class JobHandler {

    private final XxlUtil xxlUtil;

    public JobHandler(XxlUtil xxlUtil) {
        this.xxlUtil = xxlUtil;
    }

    @XxlJob(value = "sayHelloHandler")
    public void execute() {
        String userName = XxlJobHelper.getJobParam();
        log.info("欢迎您: {}!", userName);
        // 避免一次性任务,留在界面,这里手动删除处理掉
        long jobId = XxlJobHelper.getJobId();
        xxlUtil.removeJob(jobId);
    }

}


