IBM DMC运行在RedHat 9的FIPS模式
文章目录
- 环境
- 步骤
-
- 打开RedHat的FIPS模式
- 安装DMC
- nssdb
- pk12util和certutil
- 导入certificate
-
- 导入Liberty的SSL key
- 导入Java的certificate
- 查看nssdb(可选)
- 配置jvm.options
- 配置server.xml
- 配置java.security
- 配置dswebserver_override.properties
- 重启DMC
- 验证
- 常见问题
-
- RedHat 7没有fips-mode-setup
- secmod.db
- 参考
环境
- Red Hat Enterprise Linux release 9.2 (Plow)
- IBM Data Management Console 3.1.12 for Linux (x86)
- WebSphere Application Server Version 23.0.0.9 Liberty - (23.0.0.9-cl230920230904-1158)
- JRE:
[root@kai12071 bin]# $CONSOLE_DIR/java/jre/bin/java -version
java version "17.0.8" 2023-07-18
IBM Semeru Runtime Certified Edition 17.0.8.0 (build 17.0.8+7)
Eclipse OpenJ9 VM 17.0.8.0 (build openj9-0.40.0, JRE 17 Linux amd64-64-Bit Compressed References 20230718_477 (JIT enabled, AOT enabled)
OpenJ9   - d12d10c9e
OMR      - e80bff83b
JCL      - 30f808c1763 based on jdk-17.0.8+7)
步骤
打开RedHat的FIPS模式
查看当前FIPS模式:
[root@kai12071 ~]# cat /proc/sys/crypto/fips_enabled
0
或者:
[root@kai12071 ~]# fips-mode-setup --check
FIPS mode is disabled.
打开FIPS模式:
[root@kai12071 ~]# fips-mode-setup --enable
Kernel initramdisks are being regenerated. This might take some time.
Setting system policy to FIPS
Note: System-wide crypto policies are applied on application start-up.
It is recommended to restart the system for the change of policies
to fully take place.
FIPS mode will be enabled.
Please reboot the system for the setting to take effect.
按照提示,重启一下电脑。
然后再次查看FIPS模式:
[root@kai12071 ~]# cat /proc/sys/crypto/fips_enabled
1
或者:
[root@kai12071 ~]# fips-mode-setup --check
FIPS mode is enabled.
可见,FIPS模式已打开。
安装DMC
DMC下载地址为: https://epwt-www.mybluemix.net/software/support/trial/cst/programwebsite.wss?siteId=1120&tabId=2917 ,如下图所示:
我下载的是DMC 3.1.12 for Linux (x64)的命令行安装包,文件名为: ibm-datamgmtconsole-3.1.12-linux.tgz 。
将其下载到 /root/Downloads/dmc3112 目录下。
解压: tar -zxvf ibm-datamgmtconsole-3.1.12-linux.tgz
运行 setup.sh ,安装DMC,具体安装过程略。
安装好DMC以后,用以下两个链接登录:
http://kai12071.fyre.ibm.com:11080/consolehttps://kai12071.fyre.ibm.com:11081/console
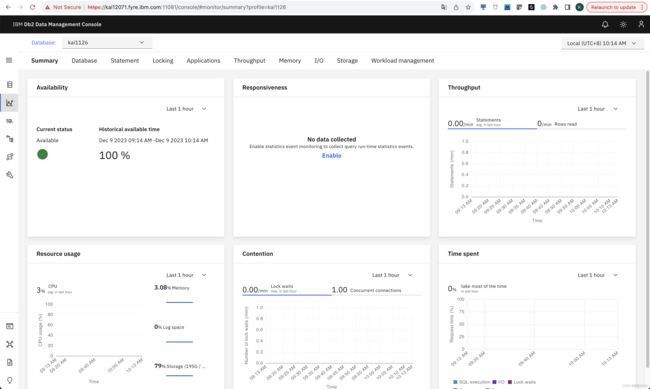
添加repo DB和monitored DB,确保DMC工作正常:
nssdb
确保系统已安装 nssdb :
[root@kai12071 ~]# ll /etc/pki/nssdb
total 28
-rw-r--r-- 1 root root  9216 Dec  8 18:19 cert9.db
-rw-r--r-- 1 root root 11264 Dec  8 18:19 key4.db
-rw-r--r-- 1 root root   451 Mar 22  2023 pkcs11.txt
注:此处没有 secmod.db 文件,我们也不需要该文件,但是在我的测试中,若缺少该文件则会有问题(详见文末的常见问题)。解决办法就是创建一个空的 secmod.db 文件:
[root@kai12071 bin]# touch /etc/pki/nssdb/secmod.db
pk12util和certutil
确保系统已安装 pk12util 和 certutil :
[root@kai12071 ~]# which pk12util
/usr/bin/pk12util
[root@kai12071 ~]# which certutil
/usr/bin/certutil
注:可用 man pk12util 和 man certutil 查看用法。
列出nssdb里的certificate:
[root@kai12071 ibm-datamgmtconsole]# certutil -L -d /etc/pki/nssdb

Certificate Nickname                                         Trust Attributes
                                                             SSL,S/MIME,JAR/XPI
可见,目前nssdb是空的。
导入certificate
为了方便,先export一些变量。
创建文件 export.sh 如下:
#!/bin/bash
export CONSOLE_DIR=/root/Downloads/dmc3112/ibm-datamgmtconsole
export NSSDB_PATH=/etc/pki/nssdb
export liberty_dsweb=${CONSOLE_DIR}/wlp/usr/servers/dsweb
export KEYSTORE_PASSWORD=password
export CONSOLE_CONF_DIR=${CONSOLE_DIR}/Config
export console_conf_file=${CONSOLE_CONF_DIR}/dswebserver_override.properties
添加 x 属性( chmod +x export.sh ),并运行脚本( . ./export.sh )。
导入Liberty的SSL key
[root@kai12071 ~]# pk12util -i ${CONSOLE_DIR}/wlp/usr/servers/dsweb/resources/security/key.p12 -W "$KEYSTORE_PASSWORD" -d $NSSDB_PATH -K "$KEYSTORE_PASSWORD"
pk12util: PKCS12 IMPORT SUCCESSFUL
查看nssdb:
[root@kai12071 ~]# certutil -L -d /etc/pki/nssdb

Certificate Nickname                                         Trust Attributes
                                                             SSL,S/MIME,JAR/XPI

default                                                      u,u,u
注:本例中Certificate Nickname是 default ,在别的系统上有可能不同,一定要先看一下。
修改certificate属性:
[root@kai12071 ~]# certutil -M -n "default" -t "CT,CT,CT" -d ${NSSDB_PATH}
再次查看nssdb:
[root@kai12071 ~]# certutil -L -d /etc/pki/nssdb

Certificate Nickname                                         Trust Attributes
                                                             SSL,S/MIME,JAR/XPI

default                                                      CTu,Cu,Cu
可见,属性并没有变成 CT,CT,CT ,不过貌似也没有关系。
注:对属性值 C 、 T 、 u 的解释,可参见 man certutil 。摘录如下:
- C: Trusted CA (implies c)
- T: trusted CA for client authentication (ssl server only)
- u: means that there is a private key associated with the certificate. It is a dynamic flag and you cannot set it with certutil.
导入Java的certificate
通过Java自带的 keytool 工具,把cacerts由 JKS 类型转换为 PKCS12 类型,再导入nssdb。
首先确认 cacerts 文件已存在:
[root@kai12071 ~]# ls -al $CONSOLE_DIR/java/jre/lib/security/cacerts
-rw-r--r-- 1 root root 167595 Dec  8 18:08 /root/Downloads/dmc3112/ibm-datamgmtconsole/java/jre/lib/security/cacerts
转换类型:
[root@kai12071 ~]# $CONSOLE_DIR/java/jre/bin/keytool -noprompt -importkeystore -srckeystore $CONSOLE_DIR/java/jre/lib/security/cacerts -destkeystore /tmp/cacerts.p12 -srcstoretype JKS -deststoretype PKCS12 -deststorepass changeit -srcstorepass changeit
Importing keystore /root/Downloads/dmc3112/ibm-datamgmtconsole/java/jre/lib/security/cacerts to /tmp/cacerts.p12...
Entry for alias _,cro,ocertsign_sa,oucertsign_root_ca_g2 [jdk] successfully imported.
Entry for alias _,ccn,obeijing_certificate_authority,cnbjca_global_root_ca2 [jdk] successfully imported.
......
......
确保已生成目标文件:
[root@kai12071 ~]# ls -al /tmp/cacerts.p12
-rw-r--r-- 1 root root 187680 Dec  8 18:43 /tmp/cacerts.p12
导入nssdb:
[root@kai12071 ~]# pk12util -i /tmp/cacerts.p12 -W changeit -d $NSSDB_PATH
pk12util: PKCS12 IMPORT SUCCESSFUL
删除无用文件:
[root@kai12071 ~]# rm -f /tmp/cacerts.p12
查看nssdb:
[root@kai12071 ~]# certutil -L -d $NSSDB_PATH

Certificate Nickname                                         Trust Attributes
                                                             SSL,S/MIME,JAR/XPI

default                                                      CTu,Cu,Cu
_,cro,ocertsign_sa,oucertsign_root_ca_g2 [jdk]               ,,
_,ccn,obeijing_certificate_authority,cnbjca_global_root_ca2 [jdk] ,,
_,cus,stillinois,lchicago,otrustwave_holdings,_inc,cntrustwave_global_certification_authority [jdk] ,,
......
......
修改certificate属性:
[root@kai12071 ~]# certutil -L -d $NSSDB_PATH | grep ",," | sed 's/ ,,.*//' | sed 's/ *$//' | while IFS= read -r line; do echo "Trust ${line} ..."; certutil -M -n "$line" -t "CT,CT,CT" -d $NSSDB_PATH; done
Trust _,cro,ocertsign_sa,oucertsign_root_ca_g2 [jdk] ...
Trust _,ccn,obeijing_certificate_authority,cnbjca_global_root_ca2 [jdk] ...
Trust _,cus,stillinois,lchicago,otrustwave_holdings,_inc,cntrustwave_global_certification_authority [jdk] ...
......
......
再次查看nssdb:
[root@kai12071 ~]# certutil -L -d $NSSDB_PATH

Certificate Nickname                                         Trust Attributes
                                                             SSL,S/MIME,JAR/XPI

default                                                      CTu,Cu,Cu
_,cro,ocertsign_sa,oucertsign_root_ca_g2 [jdk]               CT,C,C
_,ccn,obeijing_certificate_authority,cnbjca_global_root_ca2 [jdk] CT,C,C
_,cus,stillinois,lchicago,otrustwave_holdings,_inc,cntrustwave_global_certification_authority [jdk] CT,C,C
......
......
查看nssdb(可选)
前面的工作都完成后,查看一下nssdb:
[root@kai12071 ~]# certutil -K -d ${NSSDB_PATH}
certutil: Checking token "NSS FIPS 140-2 Certificate DB" in slot "NSS FIPS 140-2 User Private Key Services"
< 0> rsa      642041b44793a07b6d67a9ef6f24ebac63caeb71   default
注: -K 表示列出key ID。
[root@kai12071 ~]# certutil -L -d ${NSSDB_PATH}

Certificate Nickname                                         Trust Attributes
                                                             SSL,S/MIME,JAR/XPI

default                                                      CTu,Cu,Cu
_,cro,ocertsign_sa,oucertsign_root_ca_g2 [jdk]               CT,C,C
_,ccn,obeijing_certificate_authority,cnbjca_global_root_ca2 [jdk] CT,C,C
_,cus,stillinois,lchicago,otrustwave_holdings,_inc,cntrustwave_global_certification_authority [jdk] CT,C,C
......
......
配置jvm.options
把 ${liberty_dsweb}/jvm.options 文件备份一下,然后修改文件,添加如下内容:
-Dsemeru.fips=true
-Djava.security.debug=semerufips
-Djavax.net.ssl.trustStoreType=PKCS11
-Djavax.net.ssl.trustStore=NONE
-Djavax.net.ssl.trustStoreProvider=SunPKCS11-NSS-FIPS
配置server.xml
把 ${liberty_dsweb}/server.xml 文件备份一下,然后修改文件,找到如下内容:
<include location="${dshome}/Config/SSLConfig.xml" optional="true"/>
将其修改为:
<include location="${dshome}/Config/FIPSSSLConfig.xml" optional="true"/>
注: SSLConfig.xml 文件内容如下:
<server>
	<keyStore id="defaultKeyStore" password="${wlp.keystore.password}" location="${wlp.keystore.location}" type="${wlp.keystore.type}"/>
	<keyStore id="defaultTrustStore" password="${wlp.truststore.password}" location="${wlp.truststore.location}" type="${wlp.truststore.type}"/>
server>
FIPSSSLConfig.xml 文件内容如下:
<server description="FIPS liberty SSL configuration">


	<ssl id="defaultSSLConfig" keyStoreRef="defaultKeyStore" sslProtocol="TLSv1.2"/>
	<keyStore id="defaultKeyStore" location="${dshome}/Config/pkcs11cfg.cfg" type="PKCS11-NSS-FIPS" fileBased="false" password="changeit" provider="SunPKCS11-NSS-FIPS"/>
server>
查看 ${dshome}/Config/pkcs11cfg.cfg 文件,确保其内容如下:
name = NSS-FIPS
library = /usr/lib64/libsoftokn3.so
slot = 3
showInfo=true
注: ${dshome} 就是DMC的路径,本例中为 /root/Downloads/dmc3112/ibm-datamgmtconsole 。
配置java.security
把 ${CONSOLE_DIR}/java/jre/conf/security/java.security 文件备份一下,然后修改文件,找到 # Java Restricted Security Mode 部分,添加如下内容:
RestrictedSecurity1.jce.provider.5 = SunJCE [{SecretKeyFactory, PBKDF2WithHmacSHA1, *}, \
    {SecretKeyFactory, PBKDF2WithHmacSHA224, *}, \
    {SecretKeyFactory, PBKDF2WithHmacSHA256, *}, \
    {SecretKeyFactory, PBKDF2WithHmacSHA384, *}, \
    {SecretKeyFactory, PBKDF2WithHmacSHA512, *}]
配置dswebserver_override.properties
备份 ${CONSOLE_CONF_DIR}/dswebserver_override.properties 文件,然后修改文件,添加如下内容:
FIPS_MODE=true
重启DMC
在 /root/Downloads/dmc3112/ibm-datamgmtconsole/bin 目录下,重启DMC:
[root@kai12071 bin]# ./restart.sh
Fri Dec  8 07:18:05 PM PST 2023 Stopping IBM Db2 Data Management Console

Stopping server dsweb.
Server dsweb stopped.
Fri Dec  8 07:18:07 PM PST 2023 Successfully stopped IBM Db2 Data Management Console.
Updating the application server bootstrap and environment properties ...
Updating the applications ...
Fri Dec 8 07:18:18 PM PST 2023 Starting IBM Db2 Data Management Console.

Starting server dsweb.
Server dsweb started with process ID 5287.
Fri Dec 8 07:18:20 PM PST 2023 Successfully started IBM Db2 Data Management Console.
******************************************************************************

Summary
	* Web console HTTP URL
 		http://kai12071.fyre.ibm.com:11080/console

	* Web console HTTPS URL
 		https://kai12071.fyre.ibm.com:11081/console
注:也可以先 ./stop.sh ,再 ./startup.sh 。
验证
登录DMC:
http://kai12071.fyre.ibm.com:11080/consolehttps://kai12071.fyre.ibm.com:11081/console
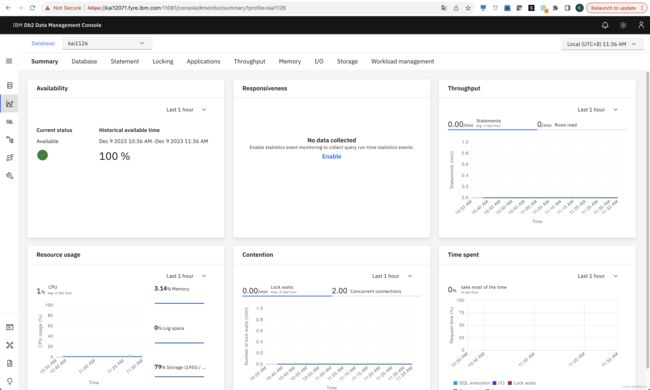
确保DMC工作正常。
至此,工作全部完成。
常见问题
RedHat 7没有fips-mode-setup
RedHat 8和9自带 fips-mode-setup ,可以直接用,但ReHat 7并没有该工具。
官网提供了在RedHat 7上如何手工打开FIPS模式的文档: https://access.redhat.com/documentation/en-us/red_hat_enterprise_linux/7/html/security_guide/chap-federal_standards_and_regulations#sect-Federal_Information_Processing_Standard
注:我没有实际测试过。
secmod.db
在RedHat 8上, /etc/pki/nssdb 目录下的文件为:
[root@kai12101 ~]# ls /etc/pki/nssdb/
cert8.db  cert9.db  key3.db  key4.db  pkcs11.txt  secmod.db
在RedHat 8上, /etc/pki/nssdb 目录下的文件为:
[root@kai12071 ~]# ls /etc/pki/nssdb
cert9.db  key4.db  pkcs11.txt
我们实际使用时,并不需要 secmod.db 文件,但是在我的测试中,最后启动DMC的时候,虽然貌似能启动,但是实际并没有启起来。在Liberty的log文件 $CONSOLE_DIR/logs/messages.log 里,报错如下:
[12/8/23, 19:18:19:882 PST] 00000021 LogService-9-com.ibm.ws.config                               E CWWKE0701E: FrameworkEvent ERROR org.osgi.framework.BundleException: Exception in com.ibm.ws.config.internal.WSConfigActivator.start() of bundle com.ibm.ws.config.
        at org.eclipse.osgi.internal.framework.BundleContextImpl.startActivator(BundleContextImpl.java:839)
        at org.eclipse.osgi.internal.framework.BundleContextImpl.start(BundleContextImpl.java:767)
......
......
Caused by: java.lang.ExceptionInInitializerError
        at java.base/java.lang.J9VMInternals.ensureError(Unknown Source)
        at java.base/java.lang.J9VMInternals.recordInitializationFailure(Unknown Source)
......
......
Caused by: java.security.ProviderException: Could not initialize NSS
        at sun.security.pkcs11.SunPKCS11.(Unknown Source)
        at jdk.crypto.cryptoki/sun.security.pkcs11.SunPKCS11$1.run(Unknown Source)
......
......
Caused by: java.io.FileNotFoundException: /etc/pki/nssdb/secmod.db
        at jdk.crypto.cryptoki/sun.security.pkcs11.Secmod.initialize(Unknown Source)
        ... 42 more
注意其中的 java.io.FileNotFoundException: /etc/pki/nssdb/secmod.db ,可能Liberty启动时还是会检查该文件是否存在。
解决办法就是创建一个空的 secmod.db 文件:
[root@kai12071 bin]# touch /etc/pki/nssdb/secmod.db
参考
https://access.redhat.com/documentation/en-us/red_hat_enterprise_linux/9/html/security_hardening/using-the-system-wide-cryptographic-policies_security-hardening#switching-the-system-to-fips-mode_using-the-system-wide-cryptographic-policieshttps://epwt-www.mybluemix.net/software/support/trial/cst/programwebsite.wss?siteId=1120&tabId=2917https://openliberty.io/docs/latest/enable-fips.htmlhttps://stackoverflow.com/questions/11538988/nss-shared-db-not-working-with-sunpkcs11https://www.ibm.com/docs/en/was-liberty/nd?topic=liberty-setting-up-fips-compliancehttps://wiki.archlinux.org/title/Network_Security_Serviceshttps://www.ibm.com/support/pages/fips-certified-cryptography-ibm-semeru-runtimes