MongoDB单机部署方式
MongoDB单机部署方式
- 1 部署环境
- 2 部署步骤
-
- 2.1 基础配置
-
- 2.1.1 关闭SELinux
- 2.1.2 关闭防火墙或开放需要的业务端口
- 2.1.3 调整max_open_files
- 2.1.4 重启检查SELinux、firewalld和open files
- 2.2 上传软件包
- 2.3 创建数据与日志目录
-
- 2.3.1 创建配置文件
- 2.3.2 修改配置文件
- 2.4 启动
- 3 开启密码
-
- 3.1 连接mongo服务
- 3.2 创建用户
- 3.3 验证生效
-
- 3.3.1 方法一
- 3.3.2 方法二
- 4 基本操作
-
- 4.1 操作系统
- 4.2 内存
- 4.3 CPU
- 4.4 存储空间
1 部署环境
| 环境 | 版本 |
|---|---|
| 操作系统 | CentOS7.4 64位系统 |
| MongoDB版本 | mongodb-linux-x86_64-rhel70-4.2.2 |
| 内存 | 2GB+ |
| CPU | 2c+ |
| 存储空间 | 100GB |
mongodb-linux-x86_64-rhel70-4.2.2.tgz下载地址:
https://download.csdn.net/download/Zhuge_Dan/12557607
2 部署步骤
2.1 基础配置
2.1.1 关闭SELinux
[root@MONGO ~]# setenforce 0
[root@MONGO ~]# vi /etc/selinux/config
SELINUX=disabled								#将SELINUX设置为disabled
2.1.2 关闭防火墙或开放需要的业务端口
[root@MONGO ~]# systemctl stop firewalld								#关闭防火墙
[root@MONGO ~]# systemctl disable firewalld								#禁止防火墙开机自启
2.1.3 调整max_open_files
[root@MONGO ~]# echo '* soft nofile 65535' >> /etc/security/limits.conf

[root@MONGO ~]# echo '* hard nofile 65535' >> /etc/security/limits.conf

[root@MONGO ~]# cat /etc/security/limits.conf | tail -2
* soft nofile 65535
* hard nofile 65535

[root@MONGO ~]# echo 'ulimit -SHn 65535' >> /etc/rc.d/rc.local

[root@MONGO ~]# cat /etc/rc.d/rc.local | tail -1
ulimit -SHn 65535

[root@MONGO ~]# chmod +x /etc/rc.d/rc.local								#为rc.local增加可执行权限
2.1.4 重启检查SELinux、firewalld和open files
[root@MONGO ~]# reboot

[root@MONGO ~]# getenforce								#查看SELinux是否关闭成功
Disabled								#关闭成功

[root@MONGO ~]# systemctl status firewalld								#查看防火墙状态
● firewalld.service - firewalld - dynamic firewall daemon
    Loaded: loaded (/usr/lib/systemd/system/firewalld.service; disabled; vendor preset: enabled)
    Active: inactive (dead)								#防火墙已关闭
      Docs: man:firewalld(1)

[root@MONGO ~]# systemctl is-enabled firewalld								#查看防火墙是否开机自启
disabled								#防火墙已禁止开机自启

[root@MONGO ~]# ulimit -a | grep open
open files                      (-n) 65535								#open files已调整为65535
2.2 上传软件包
上传mongodb-linux-x86_64-rhel70-4.2.2.tgz到服务器,然后解压缩、重命名。以上传到/usr/local/目录下为例:
[root@MONGO ~]# cd /usr/local/
[root@MONGO local]# tar -zxvf mongodb-linux-x86_64-rhel70-4.2.2.tgz
[root@MONGO local]# mv mongodb-linux-x86_64-rhel70-4.2.2 mongo
[root@MONGO local]# rm -f mongodb-linux-x86_64-rhel70-4.2.2.tgz
2.3 创建数据与日志目录
[root@MONGO local]# mkdir -p /data/mongo/
[root@MONGO local]# mkdir -p /var/log/mongo/config/
2.3.1 创建配置文件
[root@MONGO local]# cd mongo
[root@MONGO mongo]# vi mongo.conf
2.3.2 修改配置文件
配置文件内容如下,根据需要调整
# 数据目录,需手动创建
dbpath=/data/mongo/
# 日志输出路径
logpath=/var/log/mongo/config/mongo.log
# 追加日志
logappend=true
# 后台运行
fork=true
# 监听在所有网口,根据需要调整,也可以使用--bind_ip参数指定监听的网口
bind_ip_all=true
# 使用端口
port=20000
# 缓存最大使用内存,单位GB
wiredTigerCacheSizeGB=2

# 开启密码
auth=true
2.4 启动
[root@MONGO mongo]# /usr/local/mongo/bin/mongod -f /usr/local/mongo/mongo.conf
正常提示:
about to fork child process, waiting until server is ready for connections.								#启动成功
forked process: 1204
child process started successfully, parent exiting
3 开启密码
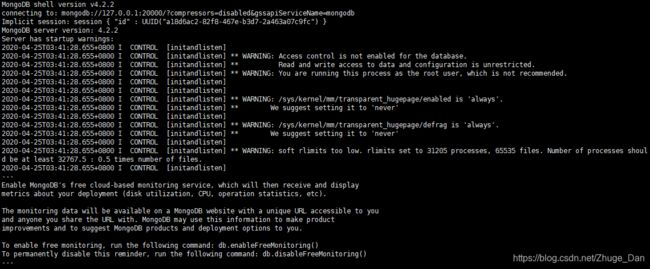
3.1 连接mongo服务
如果需要开启密码,使用mongo命令连接mongo服务,添加用户
[root@MONGO ~]# /usr/local/mongo/bin/mongo 127.0.0.1:20000
3.2 创建用户
在新打开的命令行中,创建用户
> use admin
switched to db admin
#root是要添加的用户,atenorth是要设置的用户密码,根据需要修改
> db.createUser(
...   {
...     user:"root",
...     pwd:"atenorth",
...     roles:[{role:"root",db:"admin"}]
...   }
... )
正常提示:
Successfully added user: {
	"user" : "root",
	"roles" : [
		{
			"role" : "root",
			"db" : "admin"
		}
	]
}
退出MongoDB。
> exit
bye
3.3 验证生效
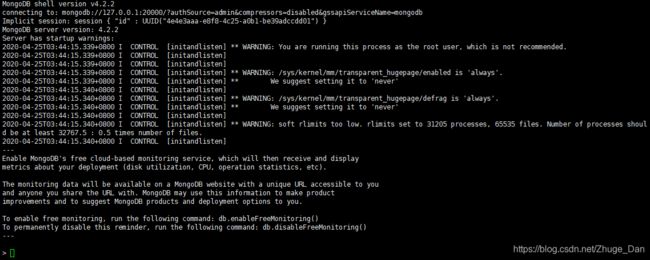
3.3.1 方法一
[root@MONGO ~]# /usr/local/mongo/bin/mongo --host 127.0.0.1 --port 20000 -u root -p atenorth
> use admin
switched to db admin
> show dbs
admin   0.000GB
config  0.000GB
local   0.000GB
> exit
bye
3.3.2 方法二
[root@MONGO ~]# /usr/local/mongo/bin/mongo --host 127.0.0.1 --port 20000 -u root -p atenorth --authenticationDatabase admin
> show dbs
admin   0.000GB
config  0.000GB
local   0.000GB
> exit
bye
4 基本操作
4.1 操作系统
[root@MONGO ~]# cat /etc/redhat-release
CentOS Linux release 7.4.1708 (Core)
4.2 内存
[root@MONGO ~]# cat /proc/meminfo | head -2
MemTotal:        8010844 kB
MemFree:         7170008 kB
4.3 CPU
[root@MONGO ~]# lscpu
Architecture:          x86_64
CPU op-mode(s):        32-bit, 64-bit
Byte Order:            Little Endian
CPU(s):                2
On-line CPU(s) list:   0,1
Thread(s) per core:    1
Core(s) per socket:    2
Socket(s):             1
NUMA node(s):          1
Vendor ID:             GenuineIntel
CPU family:            6
Model:                 63
Model name:            Intel(R) Xeon(R) CPU E5-2620 v3 @ 2.40GHz
Stepping:              2
CPU MHz:               2393.668
BogoMIPS:              4788.91
Hypervisor vendor:     VMware
Virtualization type:   full
L1d cache:             32K
L1i cache:             32K
L2 cache:              256K
L3 cache:              15360K
NUMA node0 CPU(s):     0,1
Flags:                 fpu vme de pse tsc msr pae mce cx8 apic sep mtrr pge mca cmov pat pse36 clflush dts mmx fxsr sse sse2 ss ht syscall nx pdpe1gb rdtscp lm constant_tsc arch_perfmon pebs bts nopl xtopology tsc_reliable nonstop_tsc aperfmperf eagerfpu pni pclmulqdq ssse3 fma cx16 pcid sse4_1 sse4_2 x2apic movbe popcnt tsc_deadline_timer aes xsave avx f16c rdrand hypervisor lahf_lm abm epb fsgsbase tsc_adjust bmi1 avx2 smep bmi2 invpcid xsaveopt dtherm ida arat pln pts
4.4 存储空间
[root@MONGO ~]# df -h
Filesystem               Size  Used Avail Use% Mounted on
/dev/mapper/centos-root   28G  7.2G   21G  26% /
devtmpfs                 3.9G     0  3.9G   0% /dev
tmpfs                    3.9G     0  3.9G   0% /dev/shm
tmpfs                    3.9G  8.5M  3.9G   1% /run
tmpfs                    3.9G     0  3.9G   0% /sys/fs/cgroup
/dev/sda1                197M  121M   77M  62% /boot
tmpfs                    783M     0  783M   0% /run/user/0