界面编程与视图(view)组件——三种UI界面开发方式
Android中三种UI界面的开发方式
一、使用编程方式开发UI界面的例子:
import android.app.Activity;
import android.os.Bundle;
import android.view.View;
import android.view.ViewGroup;
import android.widget.Button;
import android.widget.LinearLayout;
import android.widget.TextView;

public class ViewActivity extends Activity {
    @Override
    protected void onCreate(Bundle savedInstanceState) {
        super.onCreate(savedInstanceState);
        LinearLayout layout = new LinearLayout(this);
        super.setContentView(layout);
       layout.setOrientation(LinearLayout.VERTICAL);
        final TextView tv  = new TextView(this);
        Button btn = new Button(this);
        btn.setText(R.string.app_name);
        btn.setLayoutParams(new ViewGroup.LayoutParams(
                ViewGroup.LayoutParams.WRAP_CONTENT,
                ViewGroup.LayoutParams.WRAP_CONTENT));
        layout.addView(btn);
        layout.addView(tv);
        btn.setOnClickListener(new View.OnClickListener(){
            @Override
            public void onClick(View v){
                tv.setText("hello"+new java.util.Date());
            }
        });
    }
}
运行截图:
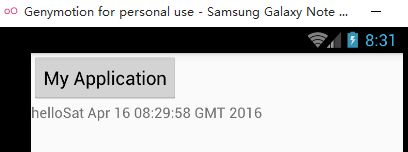
使用代码创建UI界面,代码十分臃肿,不如xml布局文件来控制UI界面,不过在实际项目中更多采用代码和xml结合的方式控制UI界面,是界面更加美观、功能完善。
二、xml布局文件和Java代码混合控制UI界面例子——简单的图片浏览器
xml布局文件代码:
<LinearLayout xmlns:android="http://schemas.android.com/apk/res/android"
    xmlns:tools="http://schemas.android.com/tools"
    android:layout_width="match_parent"
    android:layout_height="match_parent"
    android:id="@+id/root"
    android:orientation="vertical"
    tools:context="com.example.john.myapplication.MainActivity">
LinearLayout>
Java代码:
import android.app.Activity;
import android.os.Bundle;
import android.view.View;
import android.widget.ImageView;
import android.widget.LinearLayout;

public class MainActivity extends Activity {
    int[] images = new int[]{
            R.drawable.ajax,
            R.drawable.html,
            R.drawable.java,
            R.drawable.javaee,
    };
    int imaNum=0;
    @Override
    protected void onCreate(Bundle savedInstanceState) {
        super.onCreate(savedInstanceState);
        setContentView(R.layout.activity_main);
        LinearLayout main= (LinearLayout) findViewById(R.id.root);
        //创建ImageView组件
        final ImageView image = new ImageView(this);
        //将ImageView组件添加到LinearLayout布局中
        main.addView(image);
        //初始化显示的第一张图片
        image.setImageResource(images[0]);
        image.setOnClickListener(new View.OnClickListener(){
            @Override
            public void onClick(View v){
             //改变显示的图片        image.setImageResource(images[++imaNum%images.length]);
            }
        });
    }

}
运行截图


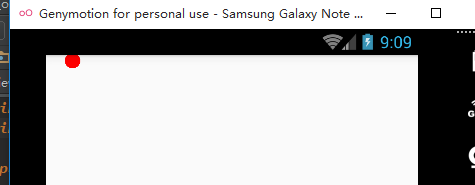
三、开发自定义View
想要把UI界面设置的更加美观,开发自定义的View非常非常的重要,还是新手小白的我在这方面还在学习中,不能提出什么好的建议,这里给一个我在学习中用到的例子——跟随手指动的小球
Java代码:
import android.content.Context;
import android.graphics.Canvas;
import android.graphics.Color;
import android.graphics.Paint;
import android.util.AttributeSet;
import android.view.MotionEvent;
import android.view.View;

public class DrawView extends View {
    public float currentX=40;
    public float currentY=50;
    //定义并创建画笔
    Paint p = new Paint();
    public  DrawView(Context context){
        super(context);
    }
    public DrawView(Context context, AttributeSet set){
        super(context,set);
    }
    @Override
    public void onDraw(Canvas canvas){
        super.onDraw(canvas);
        //设置画笔颜色
        p.setColor(Color.RED);
        canvas.drawCircle(currentX,currentY,15,p);
    }
    //为该组件的触碰事件重写事件的处理办法
    @Override
    public boolean onTouchEvent(MotionEvent event){
        currentX=event.getX();
        currentY=event.getY();
        //通知当前的组件重画自己
        invalidate();
        //返回true表明该处理方法已经处理该事件
        return true;
    }
}
有两种方式可以使用这个我们自定义的组件
(1)直接通过代码使用自定义组件
Java代码:
public class MainActivity extends Activity {
    @Override
    protected void onCreate(Bundle savedInstanceState) {
        super.onCreate(savedInstanceState);
        setContentView(R.layout.activity_main);
        LinearLayout main= (LinearLayout) findViewById(R.id.root);
        //创建DrawView组件
        final DrawView draw = new DrawView(this);
        draw.setMinimumWidth(300);
        draw.setMinimumHeight(500);
        main.addView(draw);
      }
 }
(2)直接在xml使用自定义组件
xml代码:
<LinearLayout xmlns:android="http://schemas.android.com/apk/res/android"
    xmlns:tools="http://schemas.android.com/tools"
    android:layout_width="match_parent"
    android:layout_height="match_parent"
    android:id="@+id/root"
    android:orientation="vertical"   tools:context="com.example.john.myapplication.MainActivity">
 <com.example.john.myapplication.DrawView
    android:layout_width="match_parent"
    android:layout_height="match_parent"/>
LinearLayout>
在布局文件中已经添加自定义组件了,因此,在Java代码中只需要写
public class MainActivity extends Activity {
    @Override
    protected void onCreate(Bundle savedInstanceState) {
        super.onCreate(savedInstanceState);
        setContentView(R.layout.activity_main);
    }
 }
运行截图